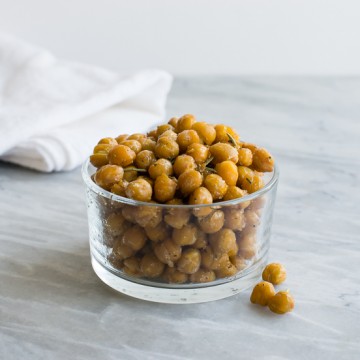
Are you ready for one of the easiest, tastiest, most addictive-est snacks ever? Roasted chickpeas, friends, are where it’s at. They are loaded with protein and vitamins, so there’s no room for guilt with these babies.
We roast these chickpeas by the bucketful…well, not really, but I should. They get snatched up by big and tiny hands just as soon as I pull then out of the oven. Why are they so addictive, you ask? It’s hard to say. It could be the plethora of seasoning options like rosemary and sea salt, curry, or cinnamon and sugar. Or it might be the delectable way they are slightly crunchy on the outside and creamy in the middle.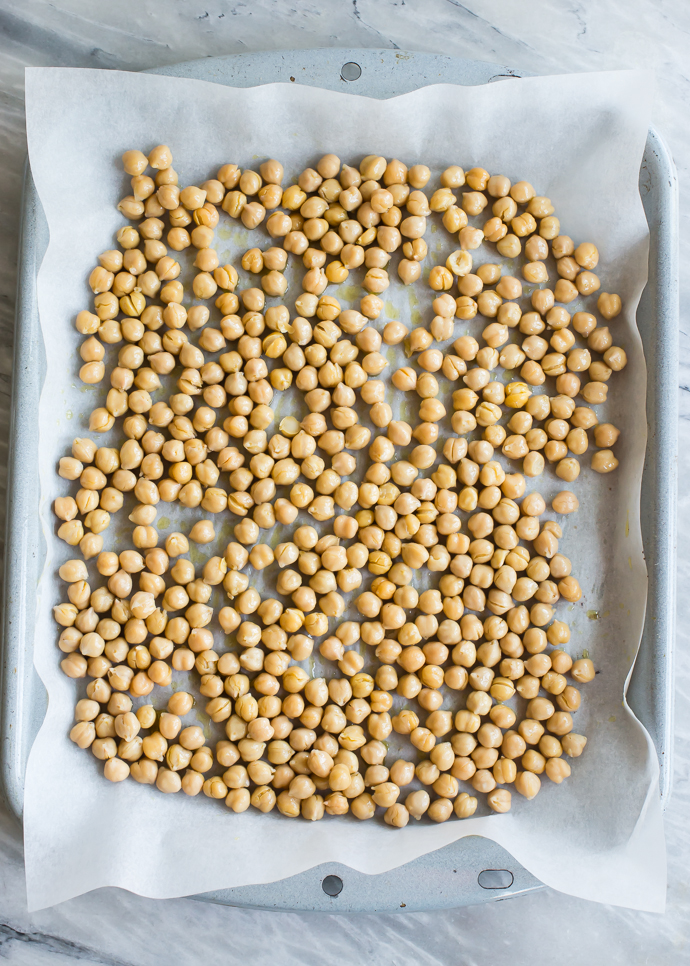
Roasted Chickpeas for a Healthy Snack
For a long time we were told to stop snacking and eat three square meals a day. And then came the ubiquitous 100 calorie packs of…empty calories. No, no, no. I don’t get sucked in by that stuff. I am all for real, whole food snacks that help satiate me. That’s why I love roasted chickpeas. A handful is just enough to stave off hunger while satisfying that craving for something a little salty and crunchy. But if I’m craving something sweet? Then I season them with cinnamon and a wee bit of sugar, or honey. 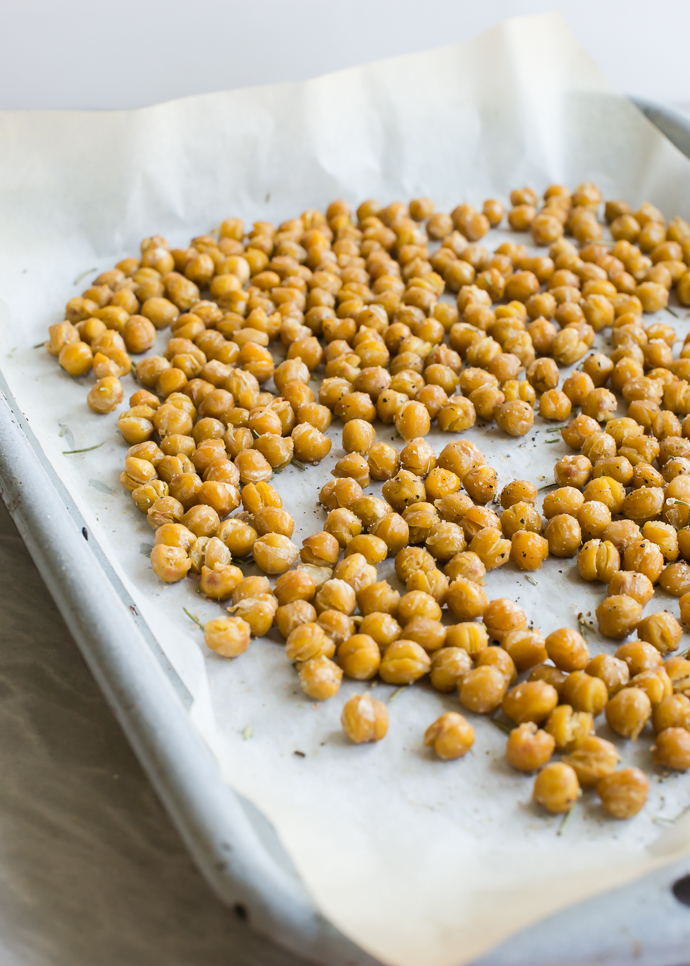
Tips for Roasting Chickpeas
One thing, be sure to give the chickpeas a good toss with a little olive oil to keep them from drying out as they roast. The temperature is pretty hot and the goal is for a toasty exterior and creamy center.
If the papery skins are coming loose, you can remove them. Or not. That can be kind of time consuming. And we don’t want to become too impatient for our afternoon snack.
Another tip – use a rimmed baking sheet. The chickpeas roll all around and may “pop” a little in oven, you’ll be glad you aren’t picking them up off the floor of your oven, and instead of popping them into your mouth by the fistful. 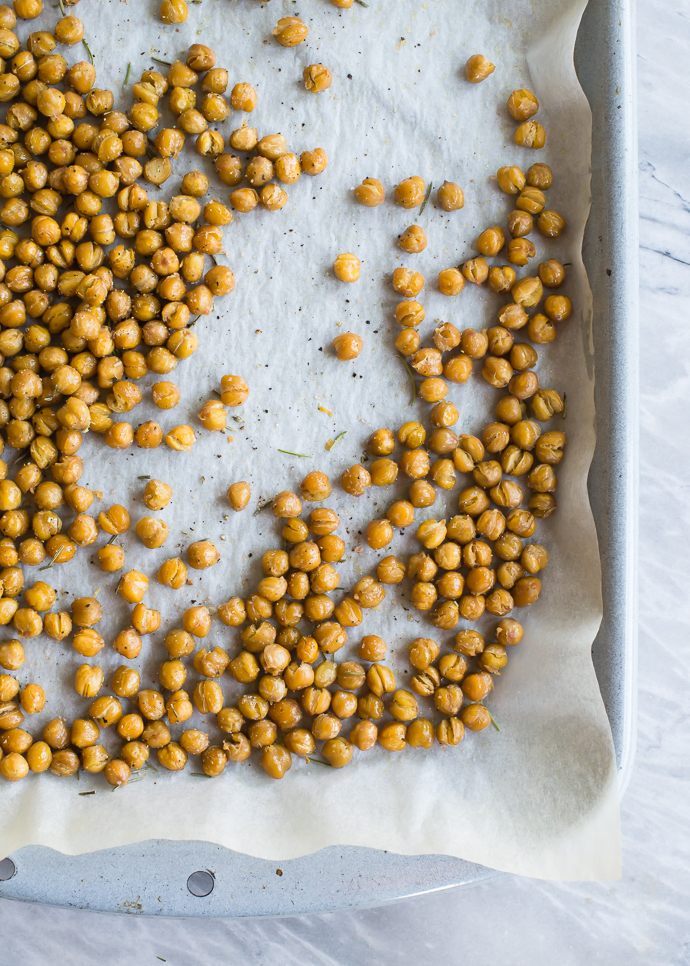
Seasoning Ideas for Roasted Chickpeas
Like I said before when I want a sweet snack I opt for cinnamon and sugar, if I’m looking for savory rosemary and sea salt does the trick. Here are a few other ideas for seasoning your roasted chickpeas:
- curry powder
- lemon zest
- lime zest and chili powder
- ras el hanout spice blend
- five spice
- Italian herb blend
- rosemary and sea salt
- salt & pepper
- taco seasoning
- bbq seasoning
Storing Roasted Chickpeas
We find that we enjoy these within an hour or two of roasting or they can go kind of stale. Not inedible stale, just not as good as fresh, stale.
If you did not eat all the chickpea snack within an hour or two you can store them in a glass container (or mason jar), or a glass bowl tightly covered with a paper towel for 2-3 days (at room temp). Note that they will not be as crisp as they are right out of the oven.
It is not recommended to keep them in a sealable plastic bag, they lose their crisp even faster with this storage method.

Roasted Chickpeas 3 Ways
Ingredients
- 2 15 ounce cans or 3 cups chickpeas, drained and rinsed
- 1 Tablespoon olive oil
- Desired seasonings
Instructions
- Preheat oven to 425 degree F. Line a rimmed baking sheet with parchment paper.
- Blot chickpeas dry. Toss with olive oil. Bake for 30 minutes.
- Season with desired seasoning and eat.
- Suggested seasonings:
- salt and coarse ground black pepper
- dried herbs
- finely grated lemon zest
- cinnamon and sugar
- curry powder
- herb blends - ras el hanout, five spice, BBQ blend, taco blend, etc.
Notes
I’m dying to know what your favorite roasted chickpea flavor is/would be. I can’t decide between rosemary and sea salt, or curry. Or smoked paprika with the tiniest pinch of cayenne. Or tamari with a little lime. Or…


 The Santas are from Target, and I buy one each year I find one I like. The red one in front is from 1999, which was our first year as a married couple. The big hurricanes are a regular part of our decor and are from the Magnolia home line at Target.
 The
The 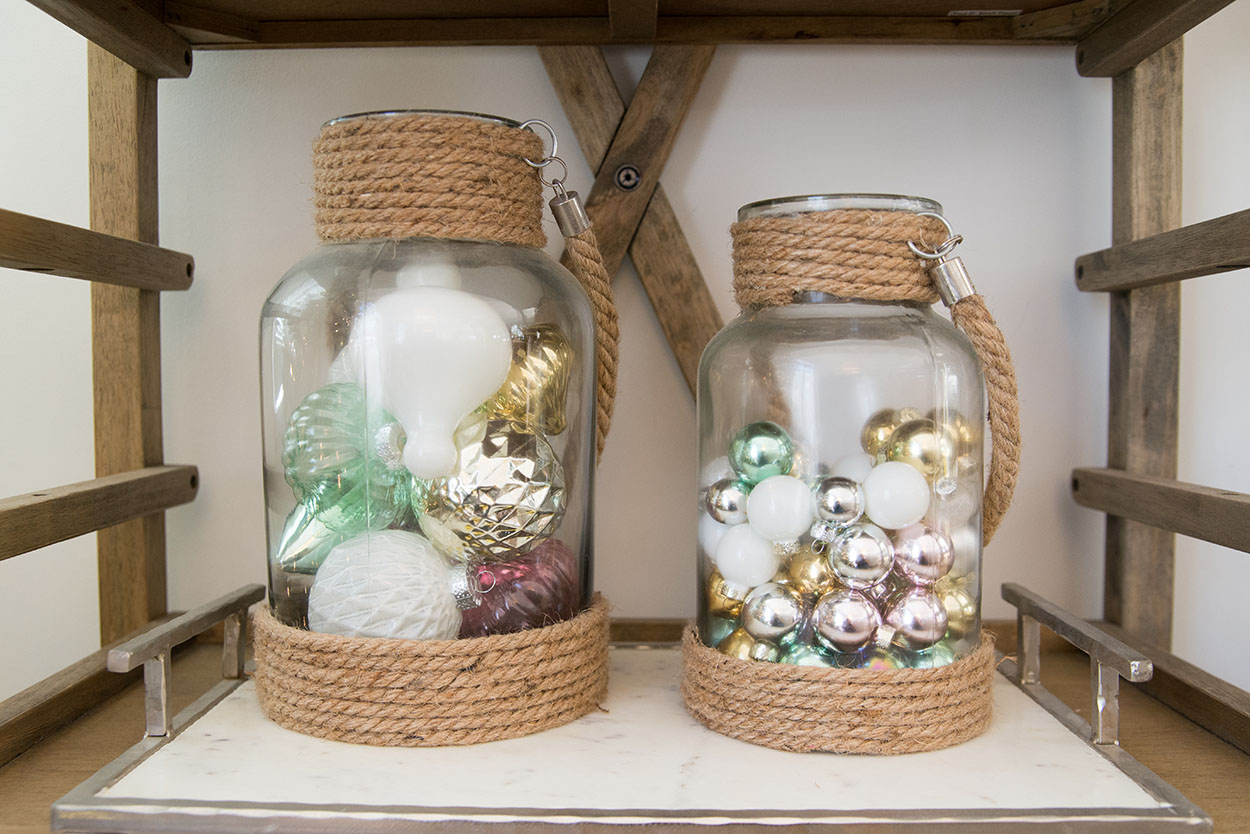


 The
The 


 I have several wooden signs from my friend Amy’s shop Project Find Joy.
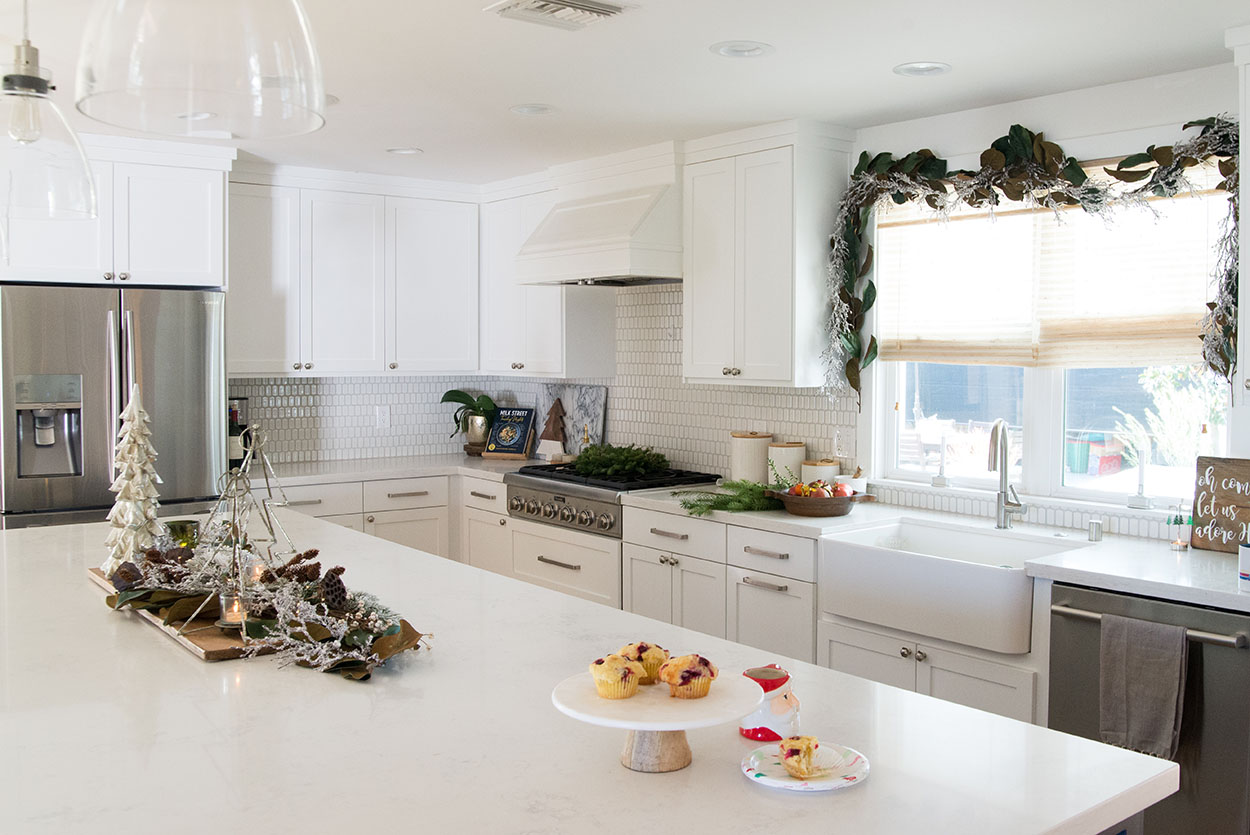
 All of the garlands and trees on both the kitchen island and here on the dining room table are from


 The quilts are from Chartreuse, and the pillows and garlands and
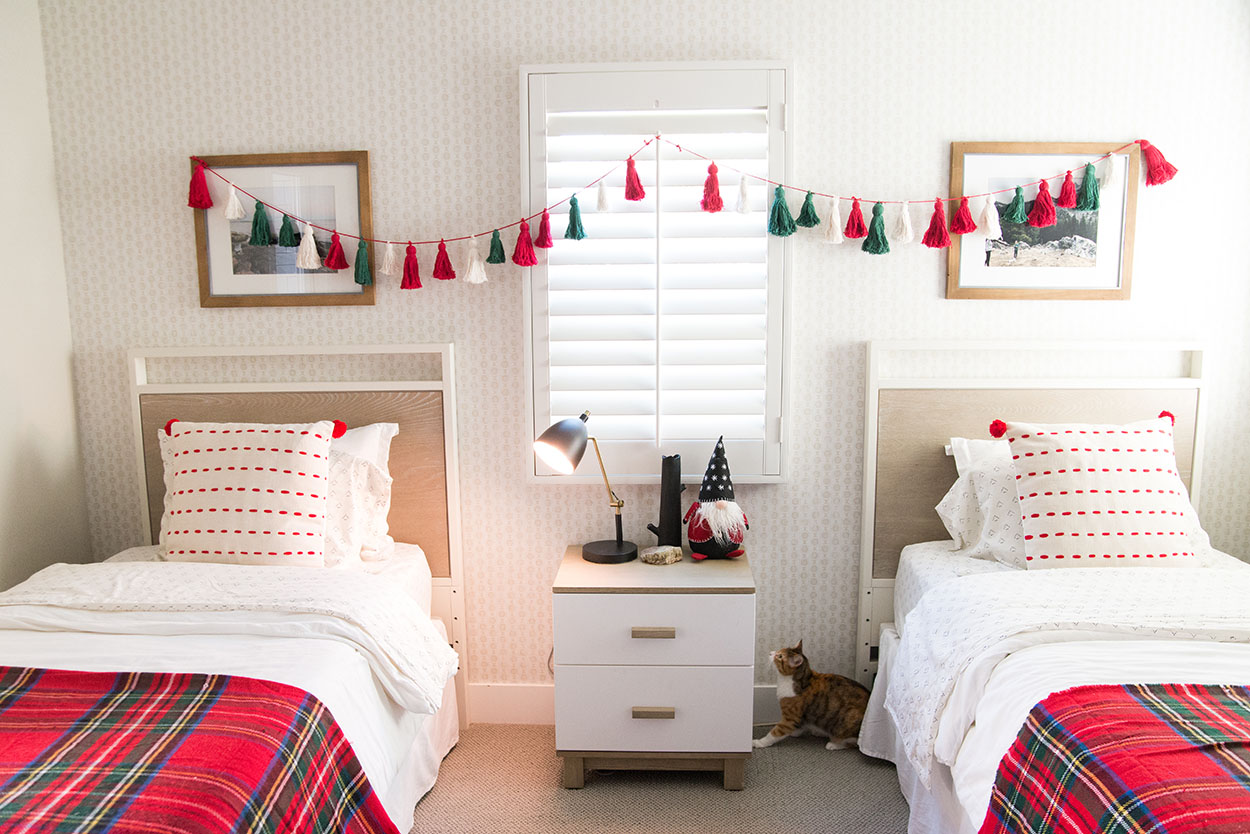

 And that’s it for our little Christmas home decor tour. I hope you enjoyed it 🙂


 I was sort of channeling
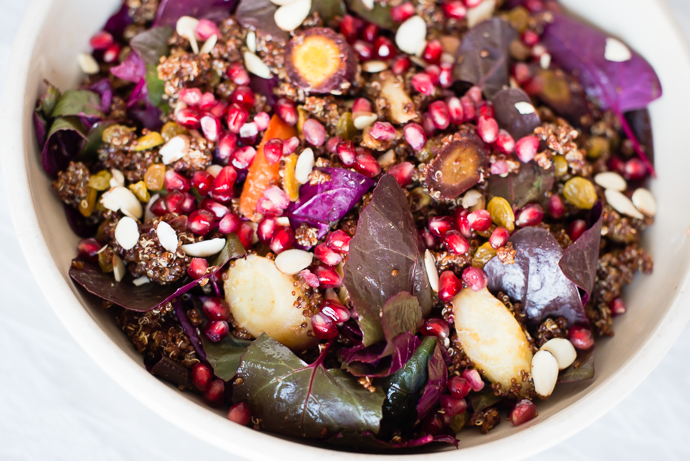


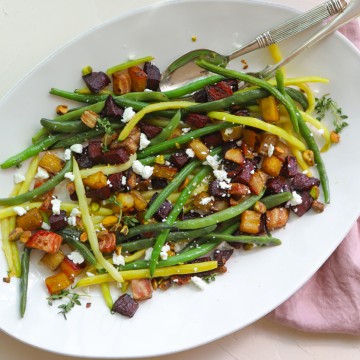
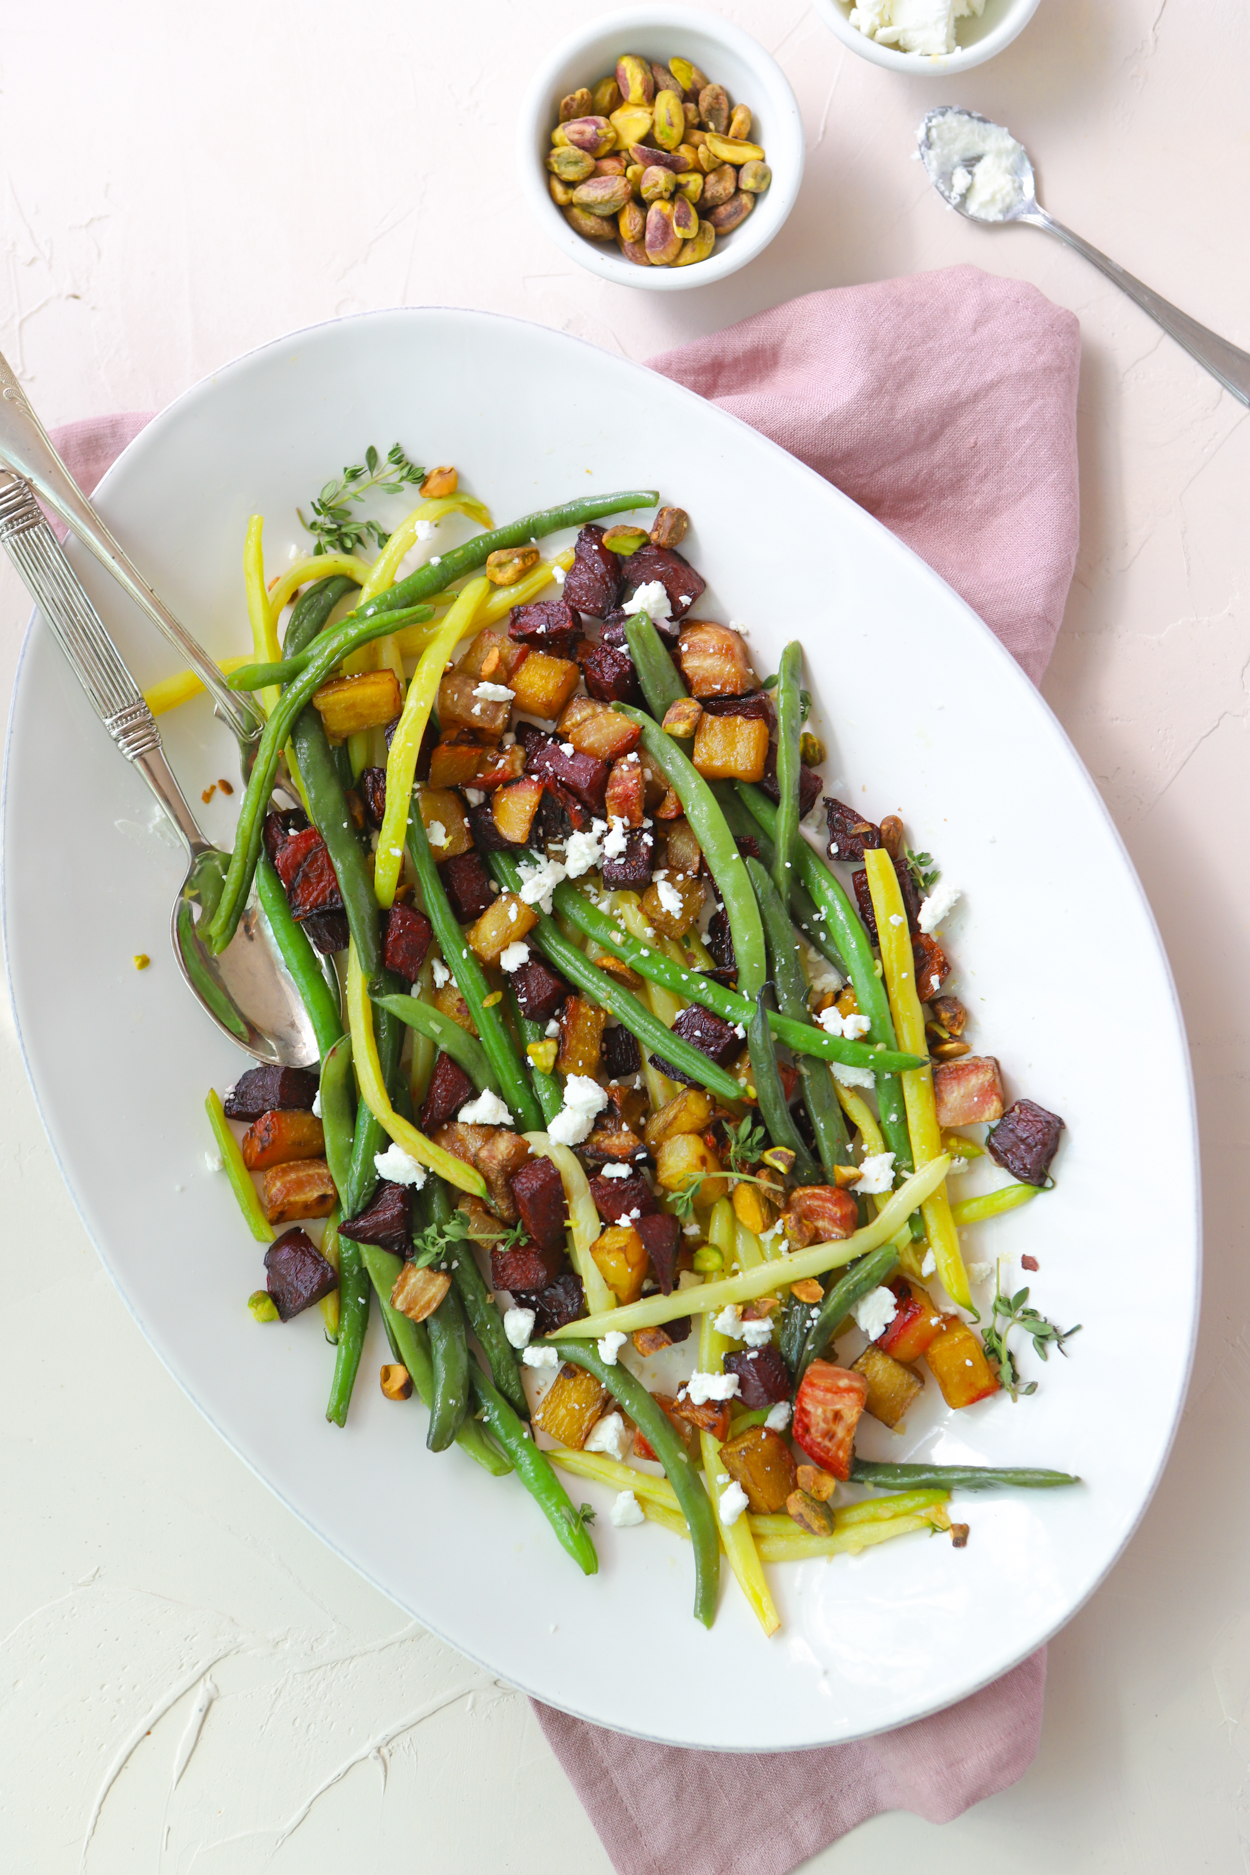 Now, you have two options in making this dish; you can either roast both the beets and green beans, or you can do what I did and mix up your cooking techniques by roasting the beets and blanching the green beans. I personally really liked this method because it allowed me to easily control the doneness of the beans and made it much easier to protect the crispness of them. Roasting is always a great alternative, but I sometimes find that roasted beans can quickly turn mushy if you don’t keep an eye on them. The only inconvenience is dirtying one extra pan, but really beyond that, this ensures a crisp bean contrasted with a soft beet.

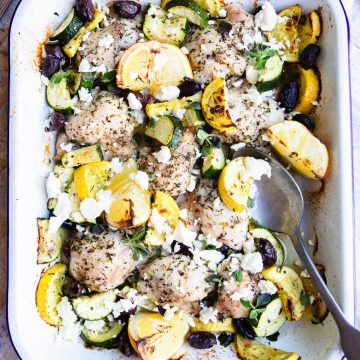
 The thing I love about this coconut curry chicken and vegetables one pan tray bakes is the ease with which you can adjust ingredients to just about any vegetable and seasonings you have on hand, and the formula is just about the same. Chicken (either breasts or thighs & drumsticks) + vegetables of choice + seasonings of choice + fat in form of oil so things don’t dry out = totally versatile one pan dish.


 So as we were in the plane getting ready to head out to Vermont, I posted on Facebook that we were traveling back East and although we had a pretty good idea of what we wanted to do, I asked for recommendations of anything else that may be missing from the “must do” list. A reader keyed me into King Arthur Flour and indicated that it was a highlight not to be missed. So our first night in town as we were sitting at dinner and figuring out our itinerary for the next day, I looked up KAF and saw they were less than an hour away from where we were staying. On a whim I decided to look up their class schedule, and was surprised to see they offered baking classes 7 days a week, and they just happened to have 2 spots left for their New England Desserts class happening the next day, which was a Sunday. So Taylor and I signed up and oh my gosh we had such a great time baking together for 3 hours and I learned so much because I bugged the instructor with all the baking questions I could think of. I learned so much in fact that I think my enhanced knowledge should go in a completely separate blog post titled “Everything I Learned at the King Arthur Flour Baking School.” For now though let’s get straight into the recipe.
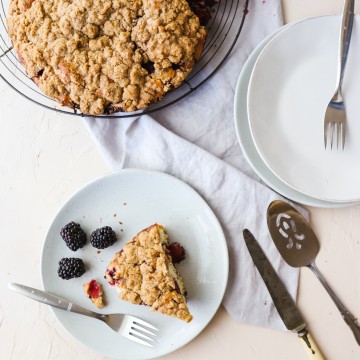
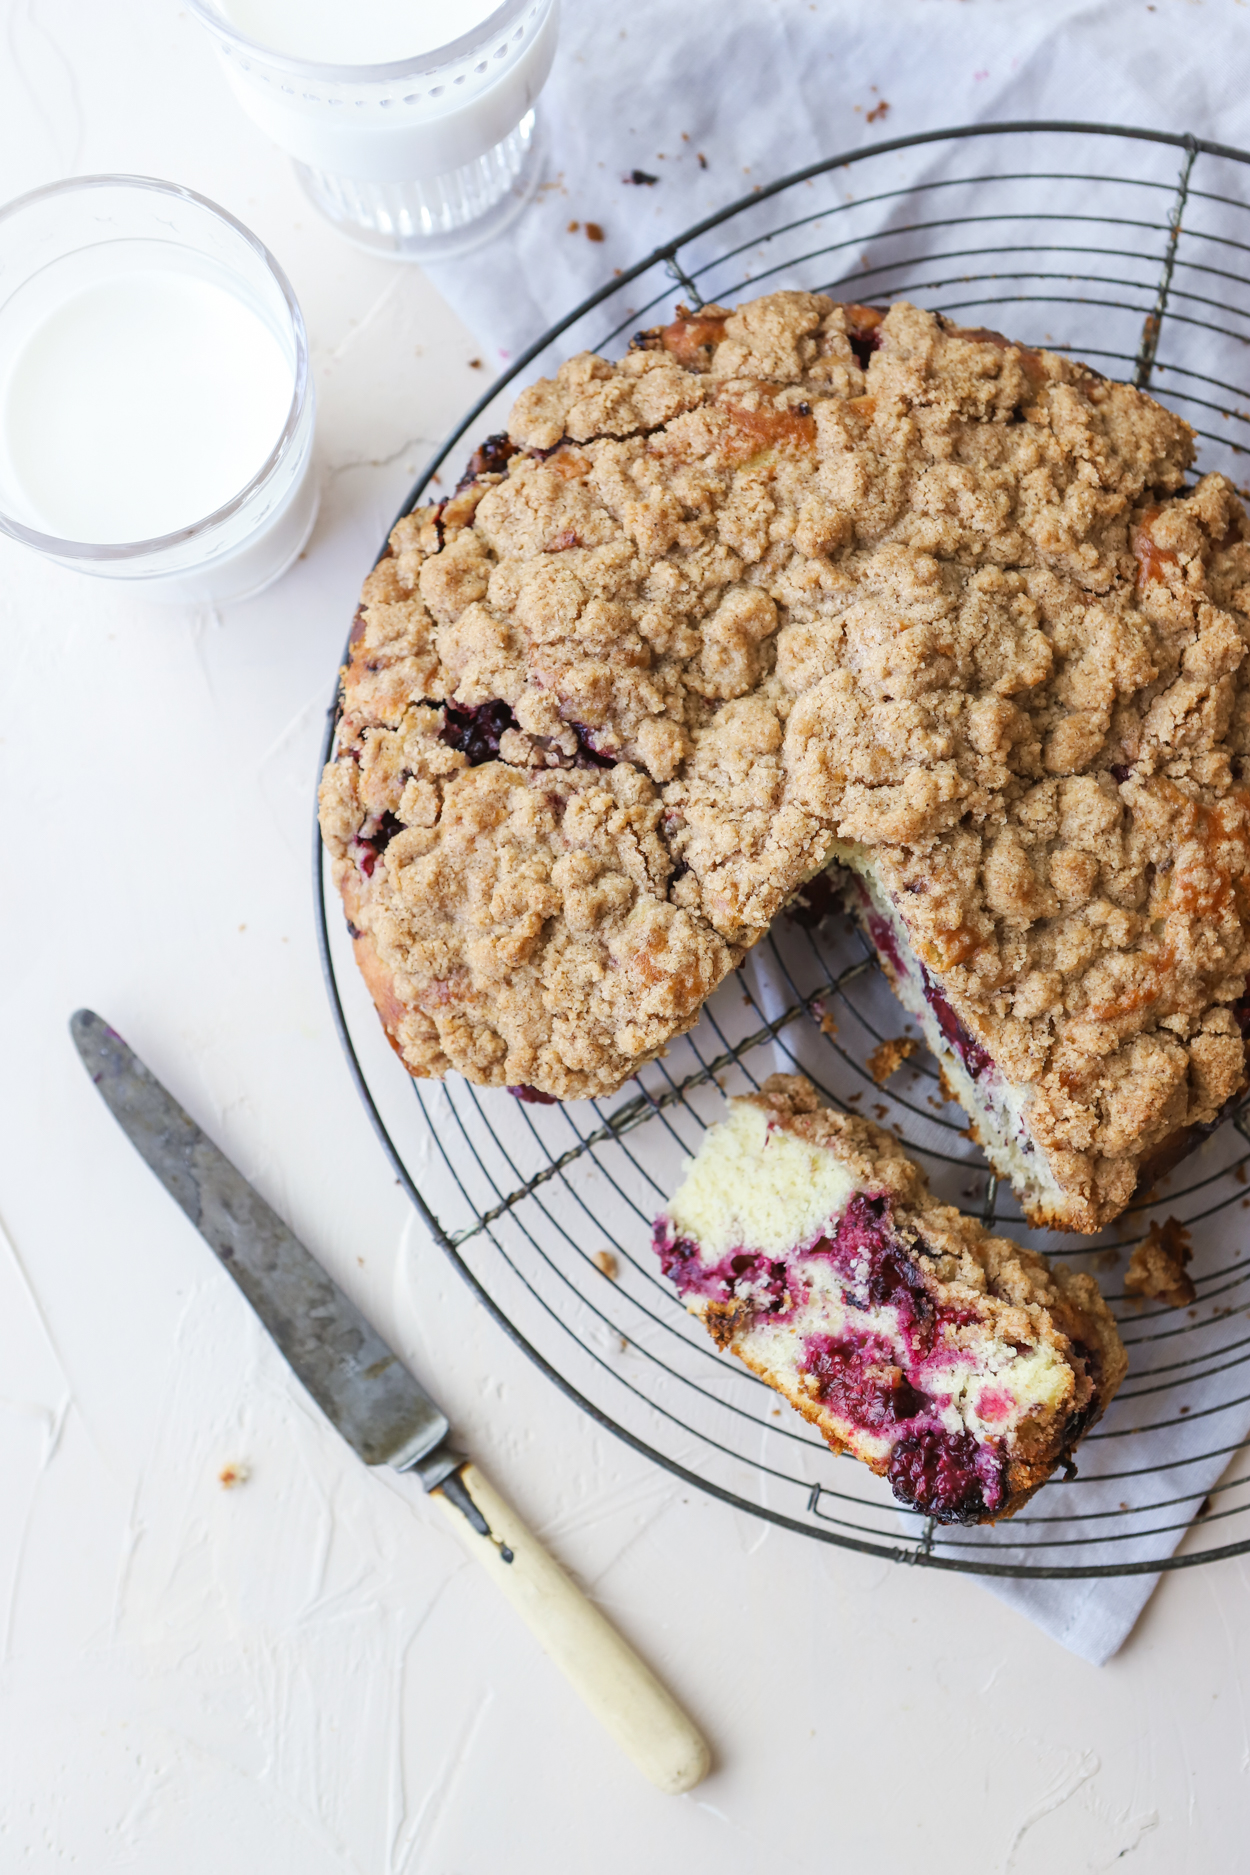
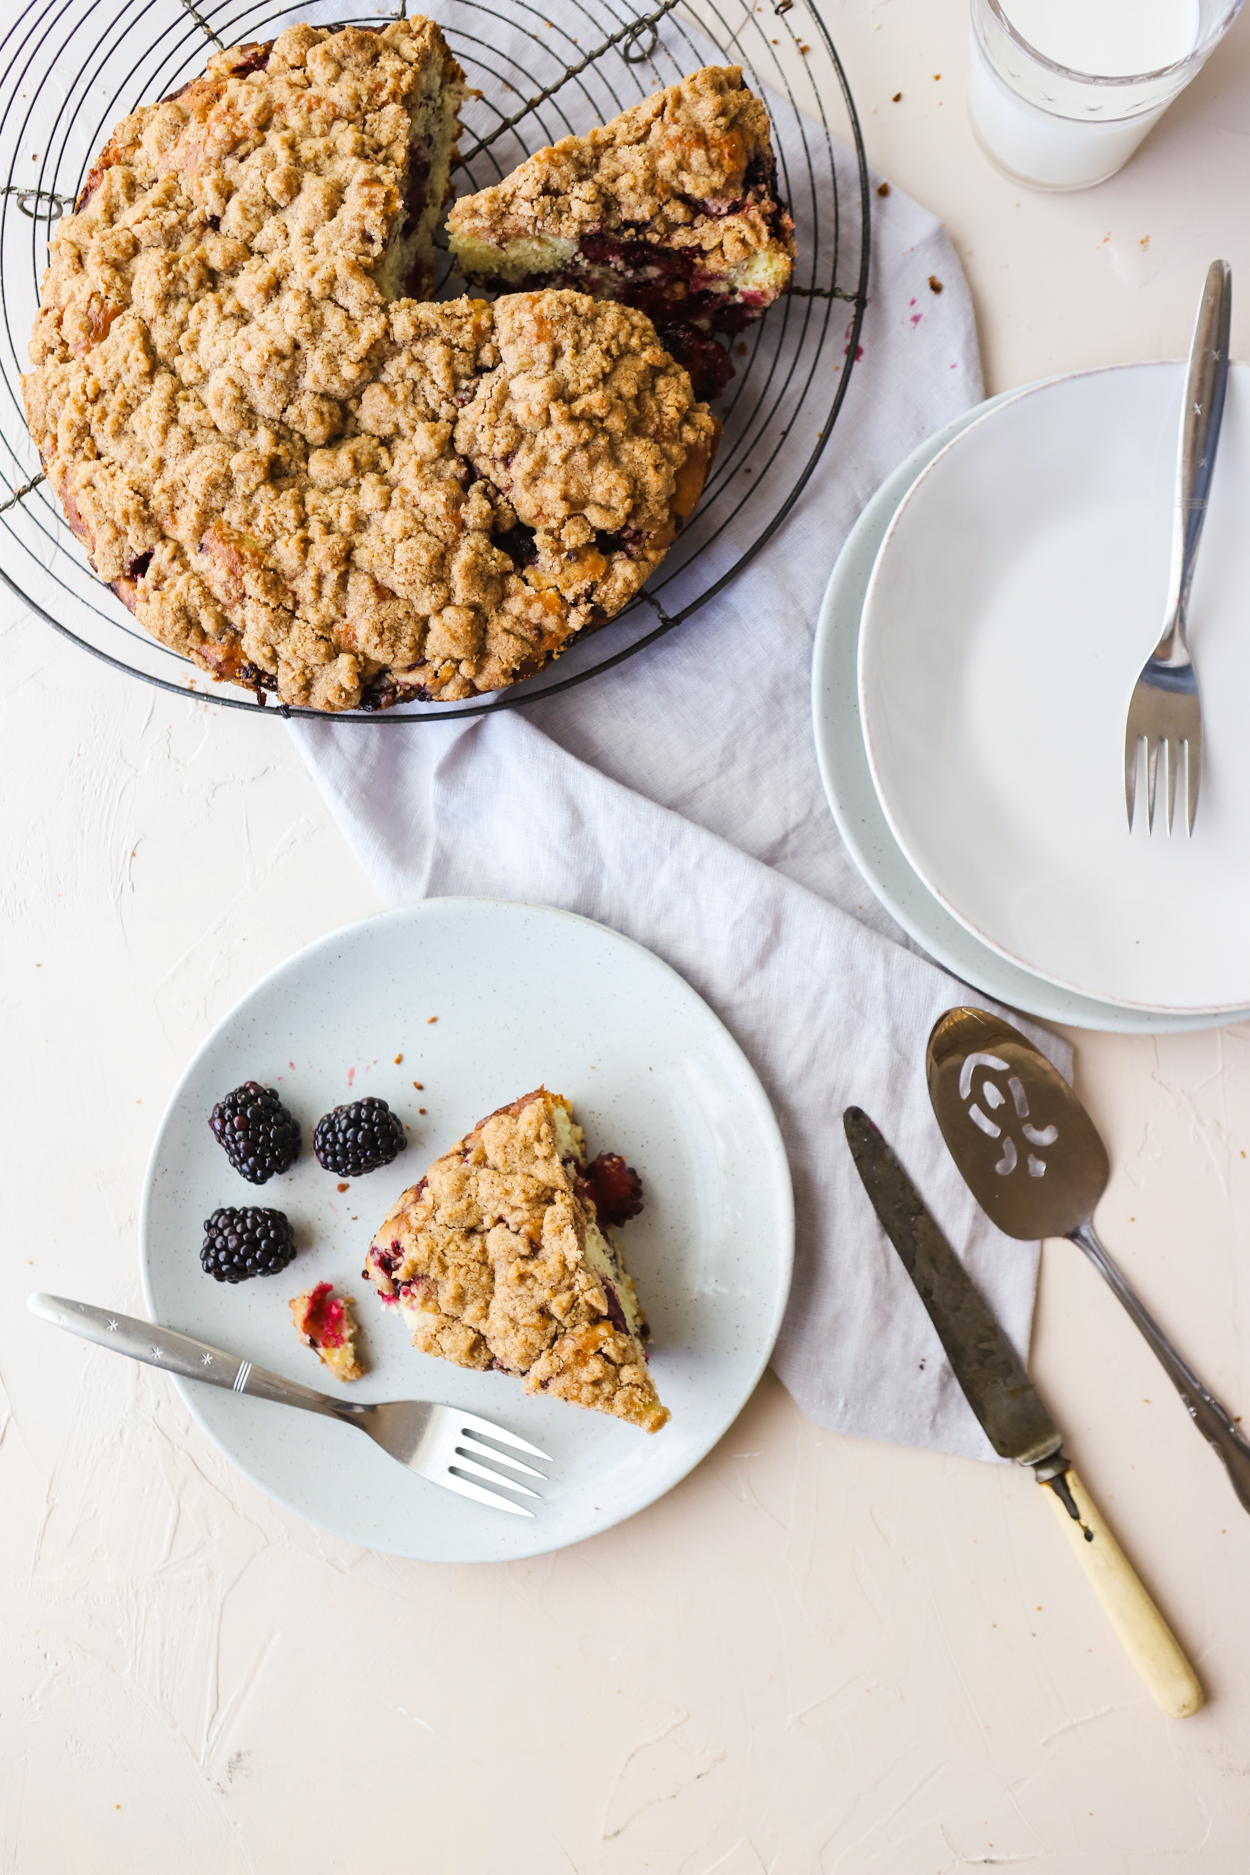 So a buckle is basically a crumble, but the moist cake is so loaded down with fruit that the crumbly top “buckles” under the weight. You can also see big nice pockets of fruit when you slice into the cake, and because of the coffee-cake like crumble top, it works just as well for breakfast alongside some scrambled eggs and a cup of coffee (or milk), as it does for dessert. For a full run down on the differences between all the typical New England style desserts, visit
 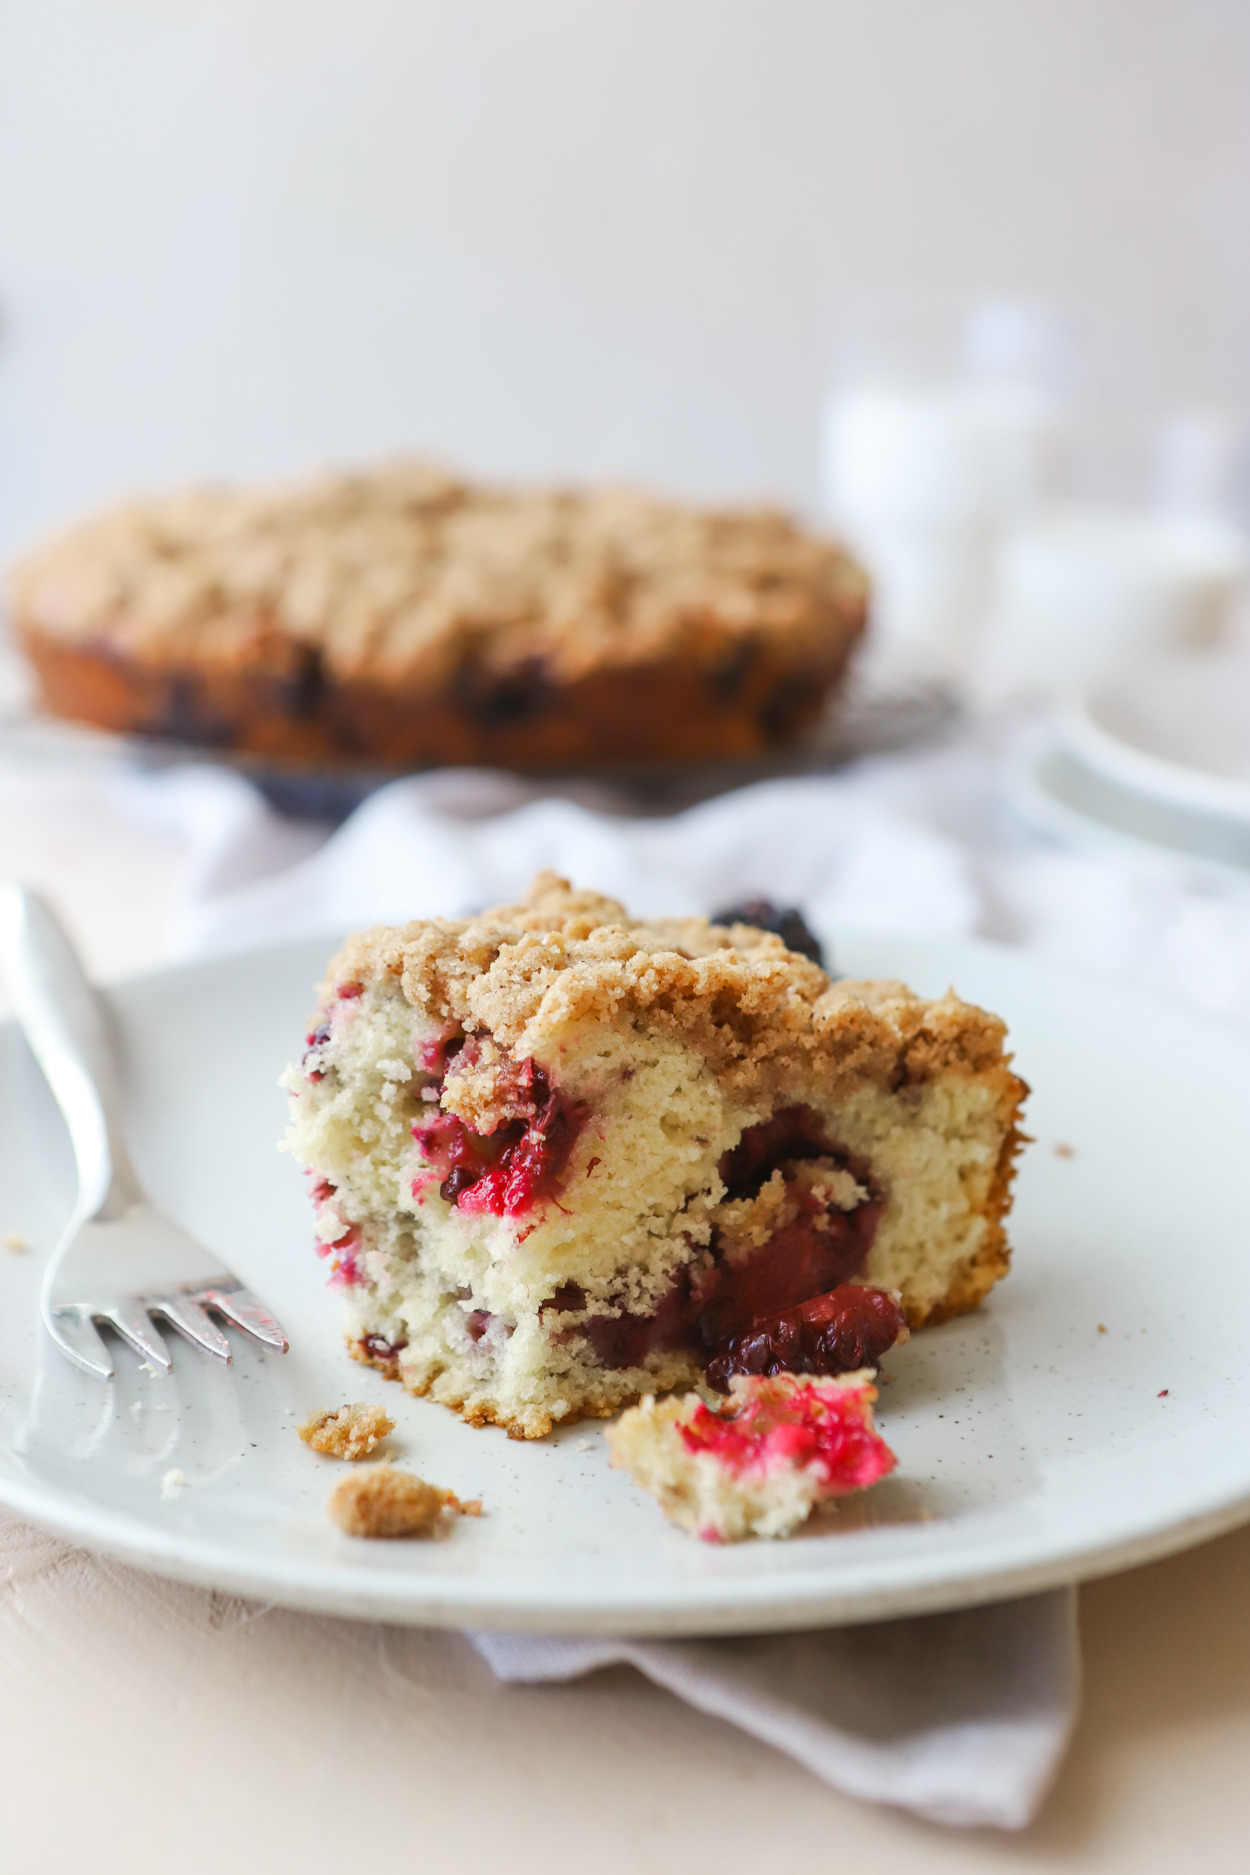 A buckle is often made with blueberries, and that’s exactly how we made it in baking school, but the instructor assured us that this cake works well with just about any dessert, especially berries and stone fruits. I would assume that apples may be the only fruit it may not pair as well with, since the apples may be a bit too dry thanks to their enhanced pectin content over most other fruits (thanks KAF baking school for teaching me that little nugget ;). I decided to make mine back home with blackberries because our farmer’s market was overflowing with containers of gorgeous, juicy blackberries last week. They worked beautifully with this cake and it was gone in under 48 hours.
 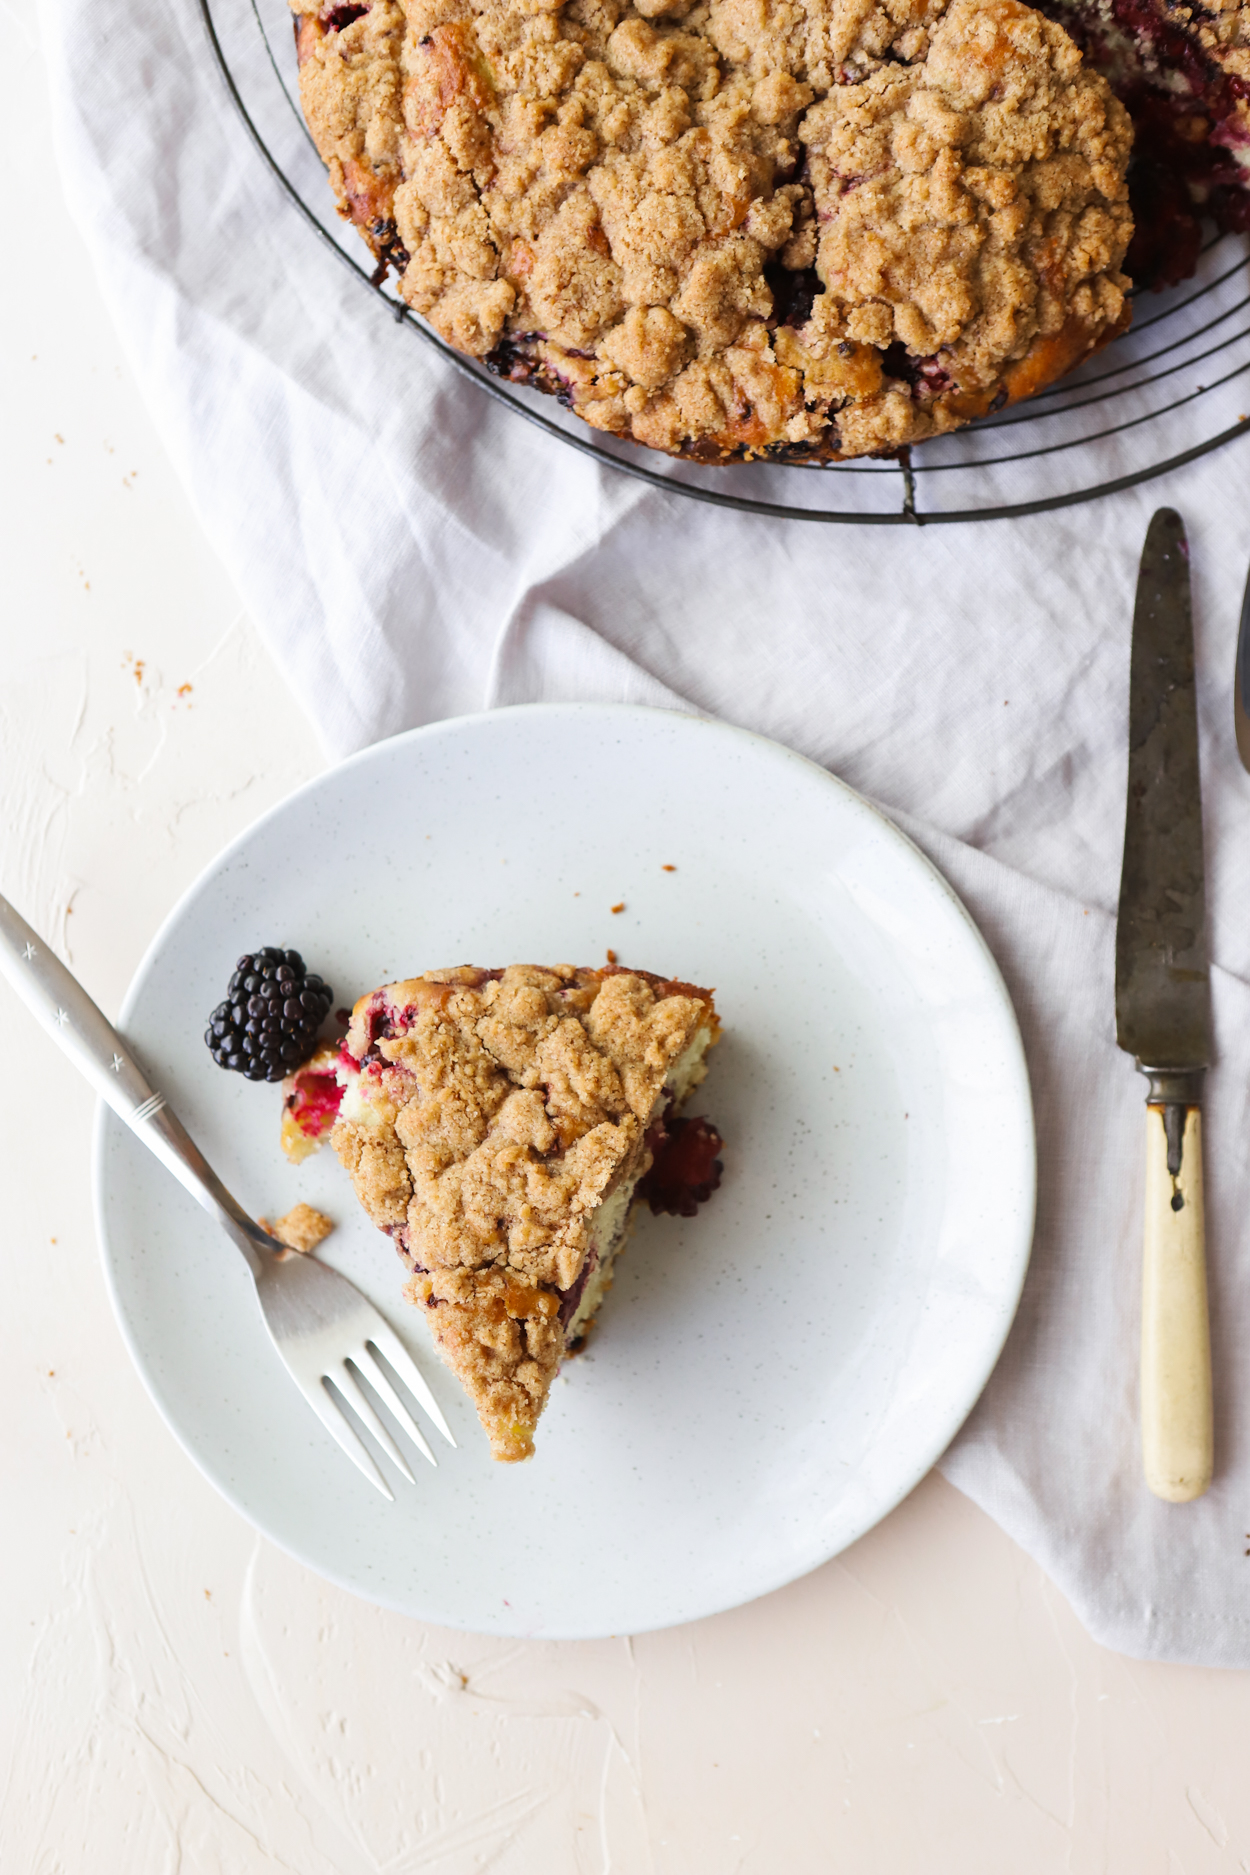 The main enhancement I made to the recipe besides switching out the fruits, was increasing the amount of crumble topping so there was more of it to enjoy. Not at all a bad move on my part. Other than that I followed the recipe as we learned it in class and it was full proof. I hope you enjoy it and you most likely have all the ingredients on hand to make it to enjoy over the weekend. Keep in mind that you can also use frozen fruit, just make sure the fruit is defrosted (and drained a bit if need be) before adding to the cake batter. Enjoy, and please let me know if you make it! If you share it on social, use the tag #howewedobaking so I can see your creation!

 Don’t kid yourself, these aren’t “healthy” by today’s standards, but they are baked not fried, and they’re homemade with no weird ingredients, and for being so rich, overall they don’t have a ton of sugar. So let’s call them healthy-ish. When we ate these for breakfast, we made sure to also eat some eggs for protein so that we didn’t go about our morning and experience a sugar crash. But when eaten for dessert, they are perfectly acceptable all on their own.
  The hardest part about donut making is forming them in the molds. My first couple of batches came out sloppy as heck, but after I got the hang of it, I learned to pipe them out in one thick, long, even swipe and if I had to go back and add in more filling, smooth it out on top a bit with the back of a spoon.
  The sage brown butter is undetectable in the donuts themselves, but the flavor is definitely noticeable in the glaze. I love the combo of the herb & sugar, but just be sure not to use too much sage because it will start to get very earthy tasting and the sage will overpower. So start with just a couple of leaves, then taste and add more if needed. The flavor imparts rather quickly so don’t worry if you need to add more.
  Overall, my first venture back into the world of donut making went okay, and I’m ready to try more flavor combinations as baking season goes on. If you make them, please make sure to let me know what you thought and use the tag #howeweeat if sharing on social media. Happy donut making!
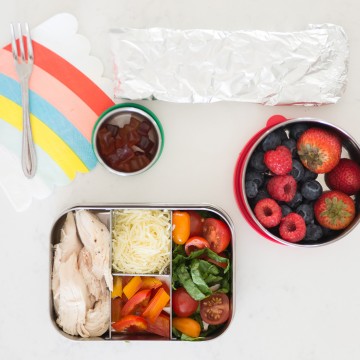
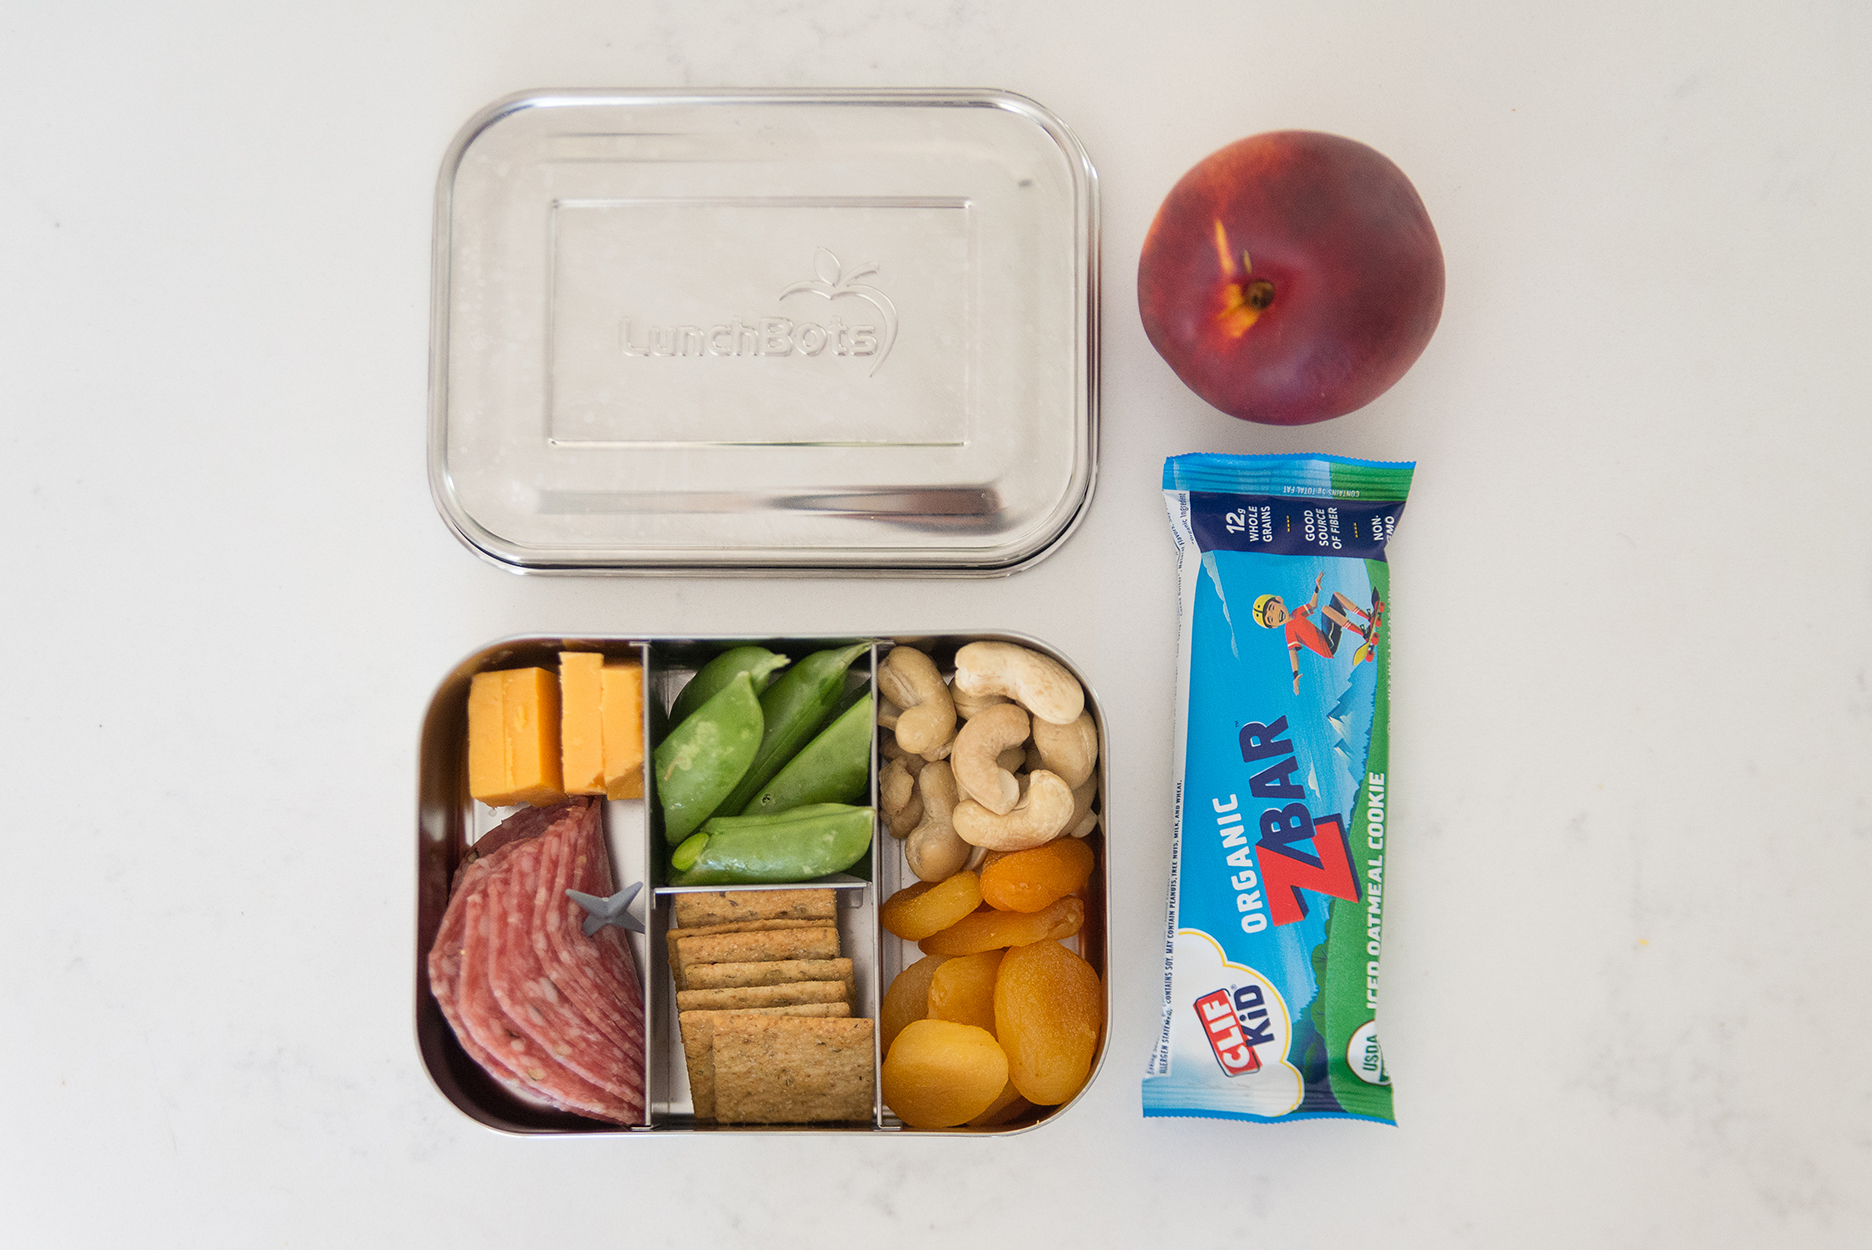
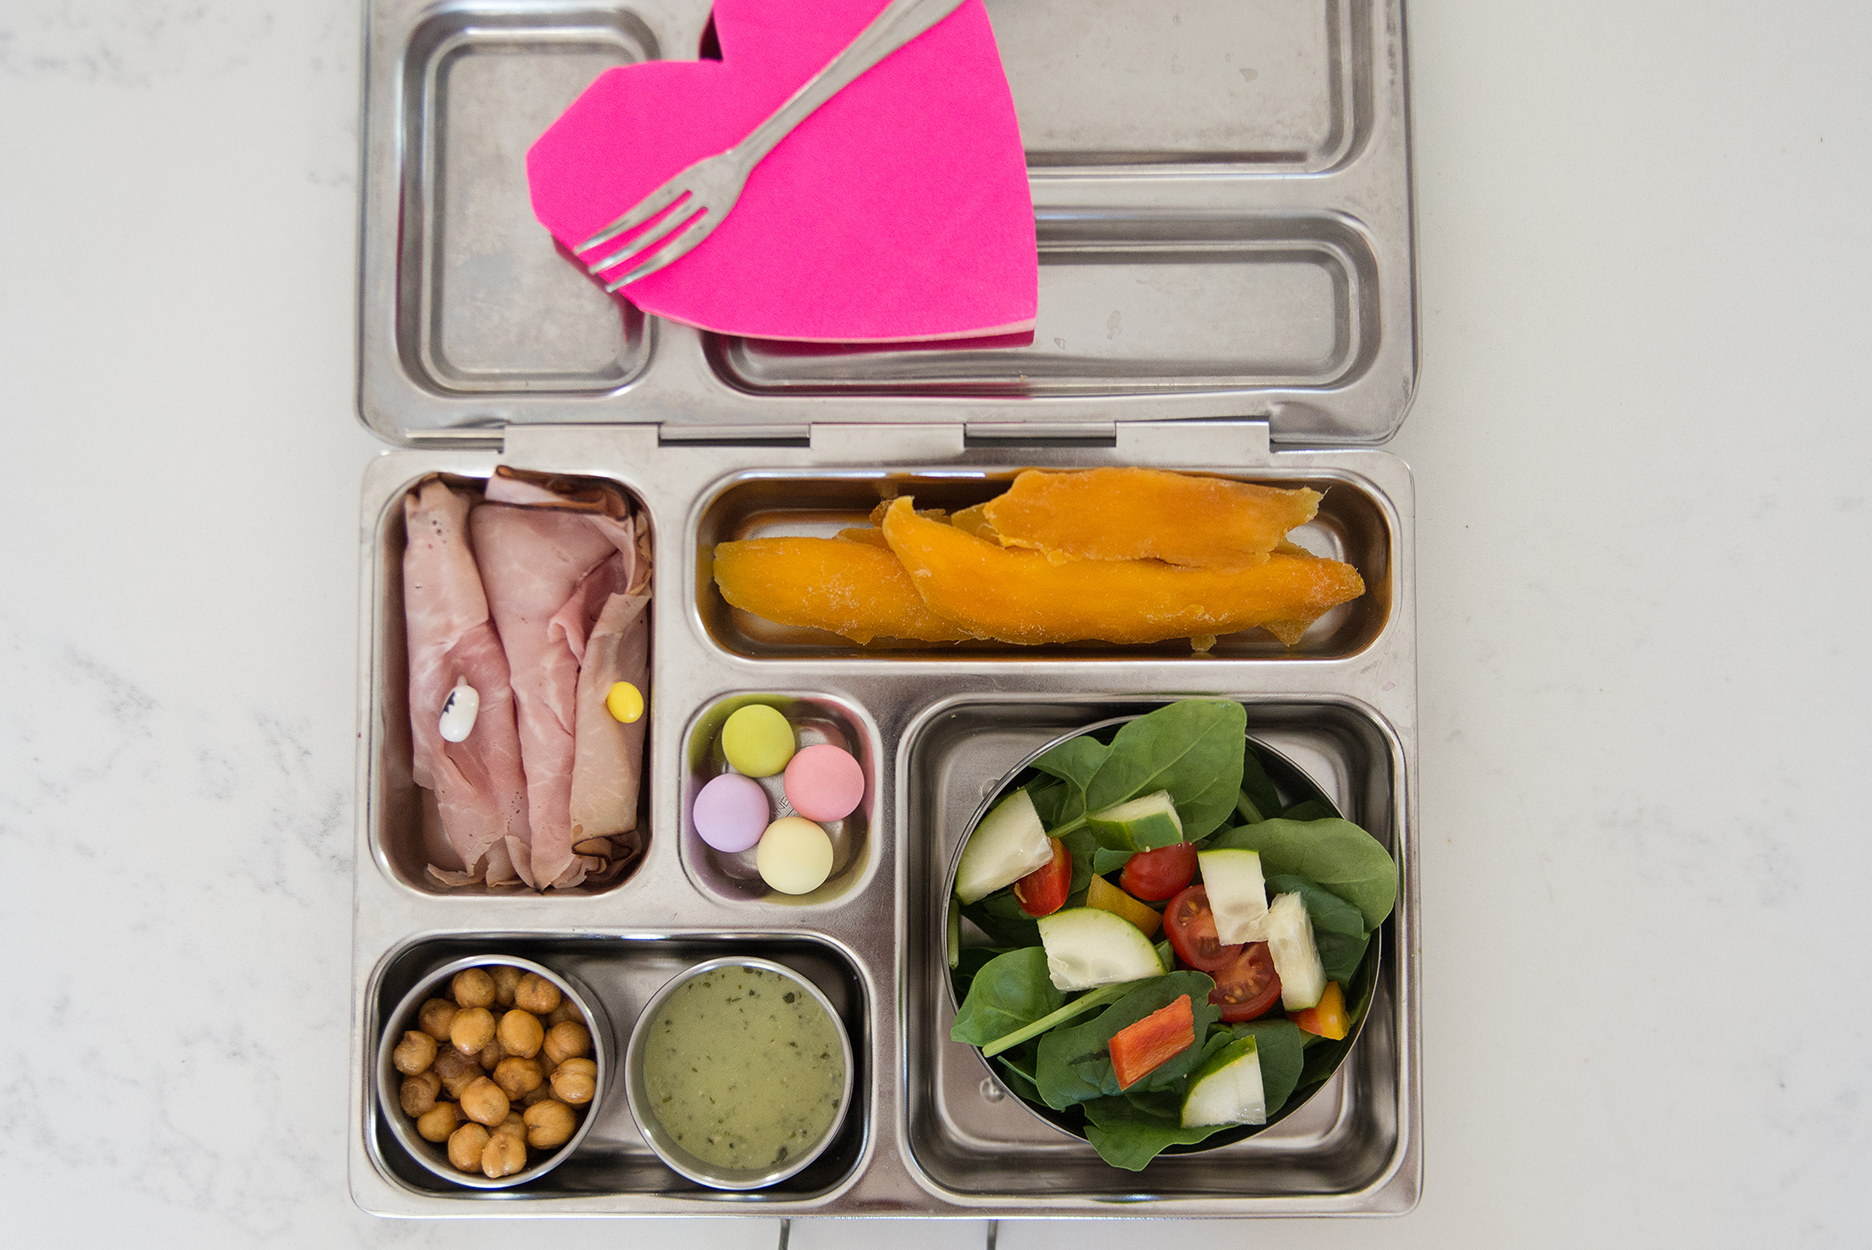
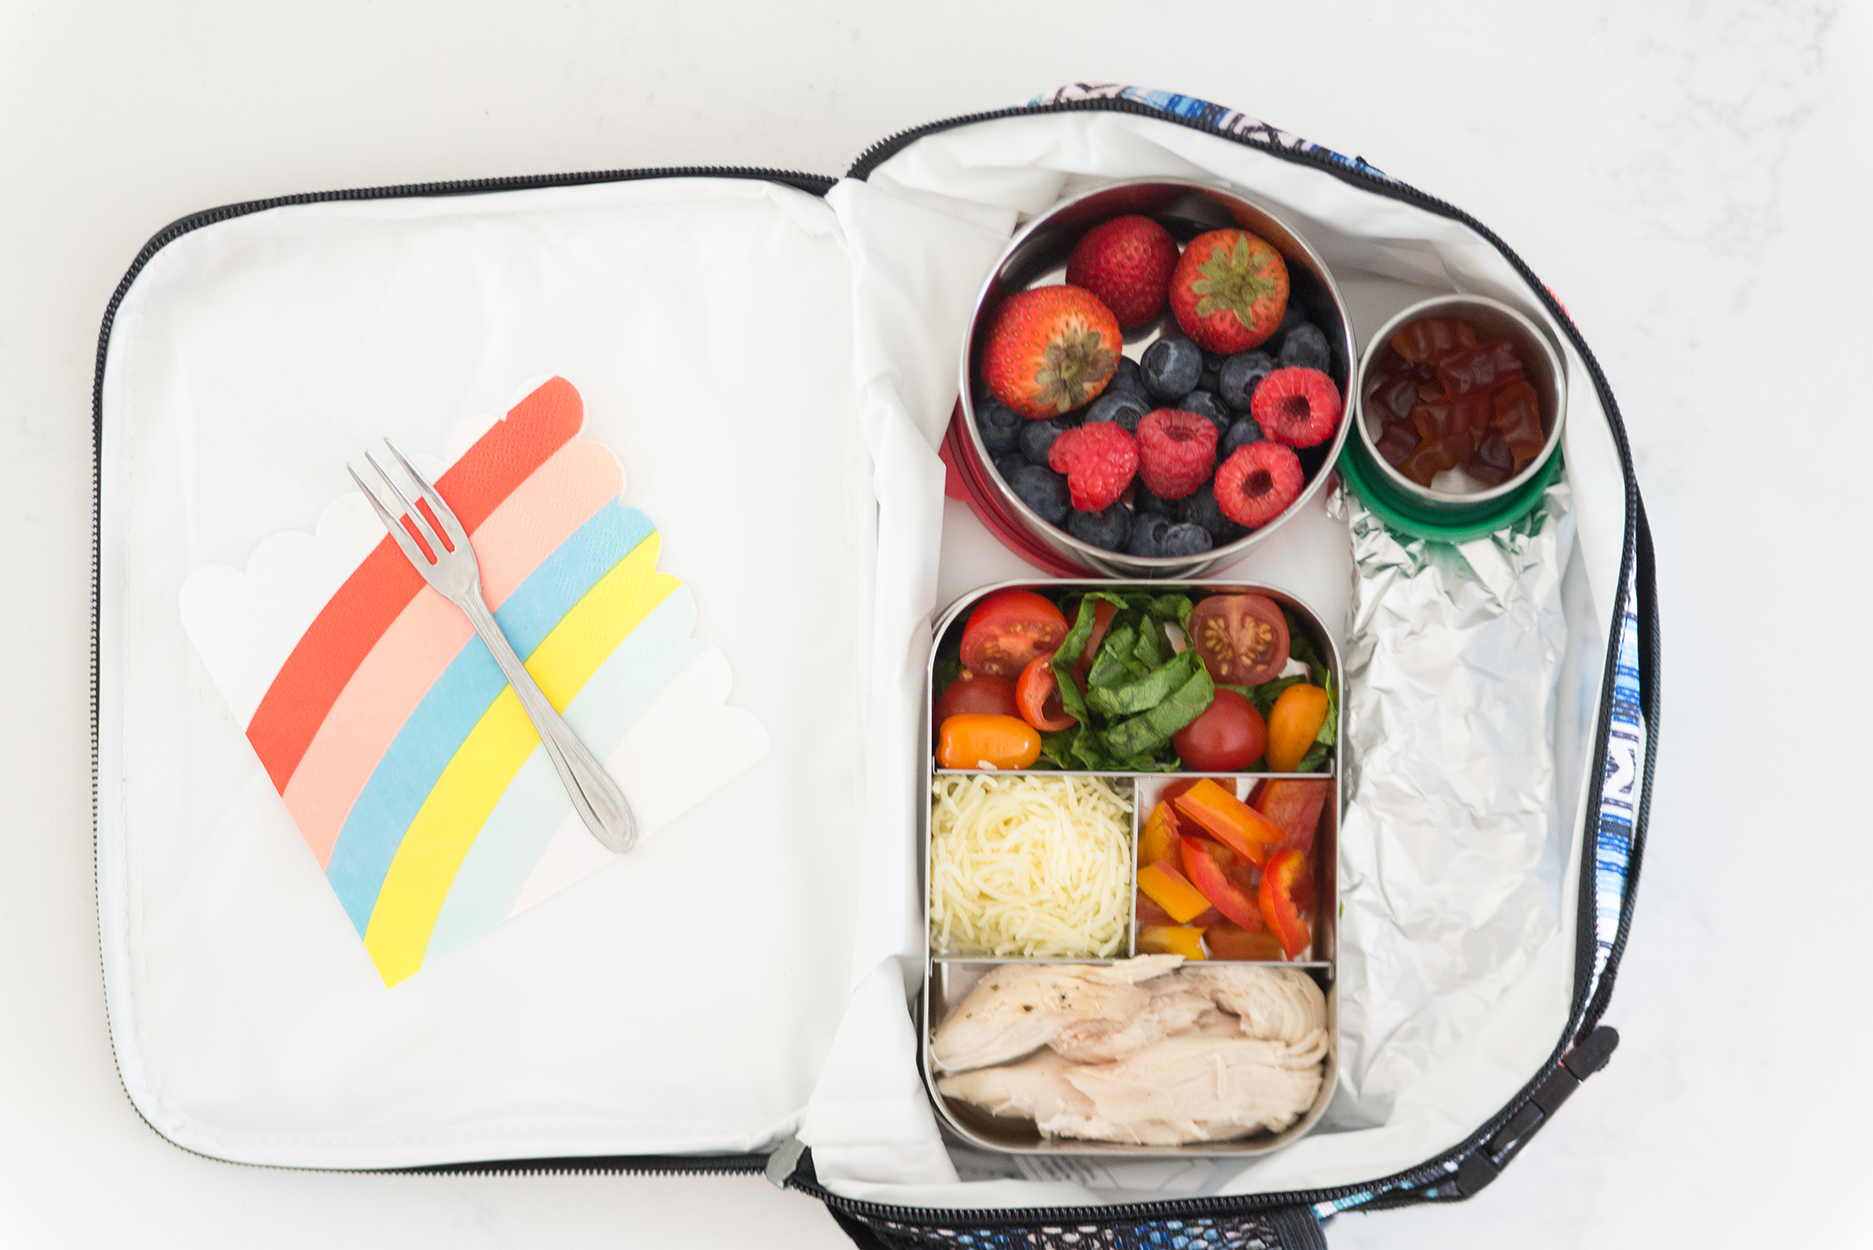
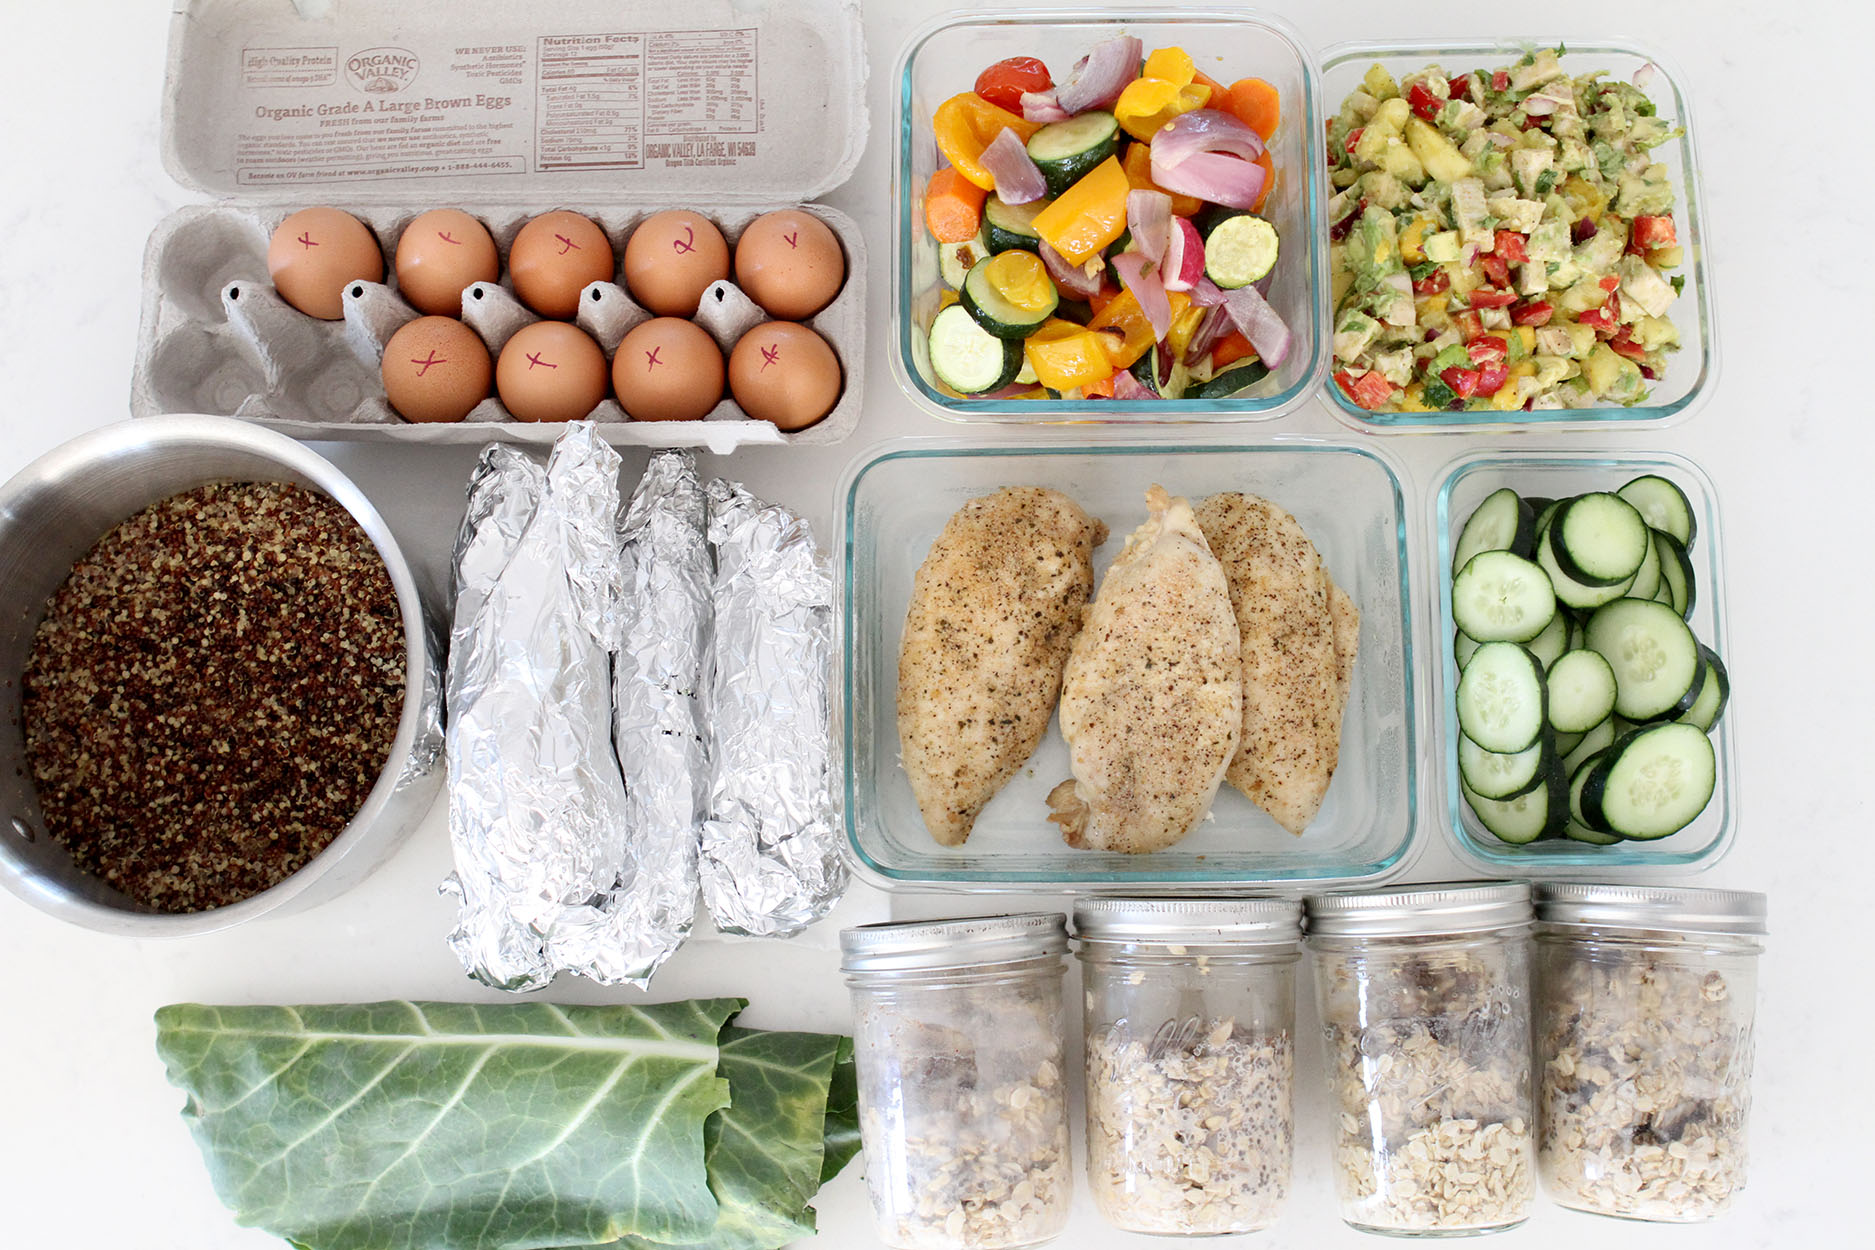
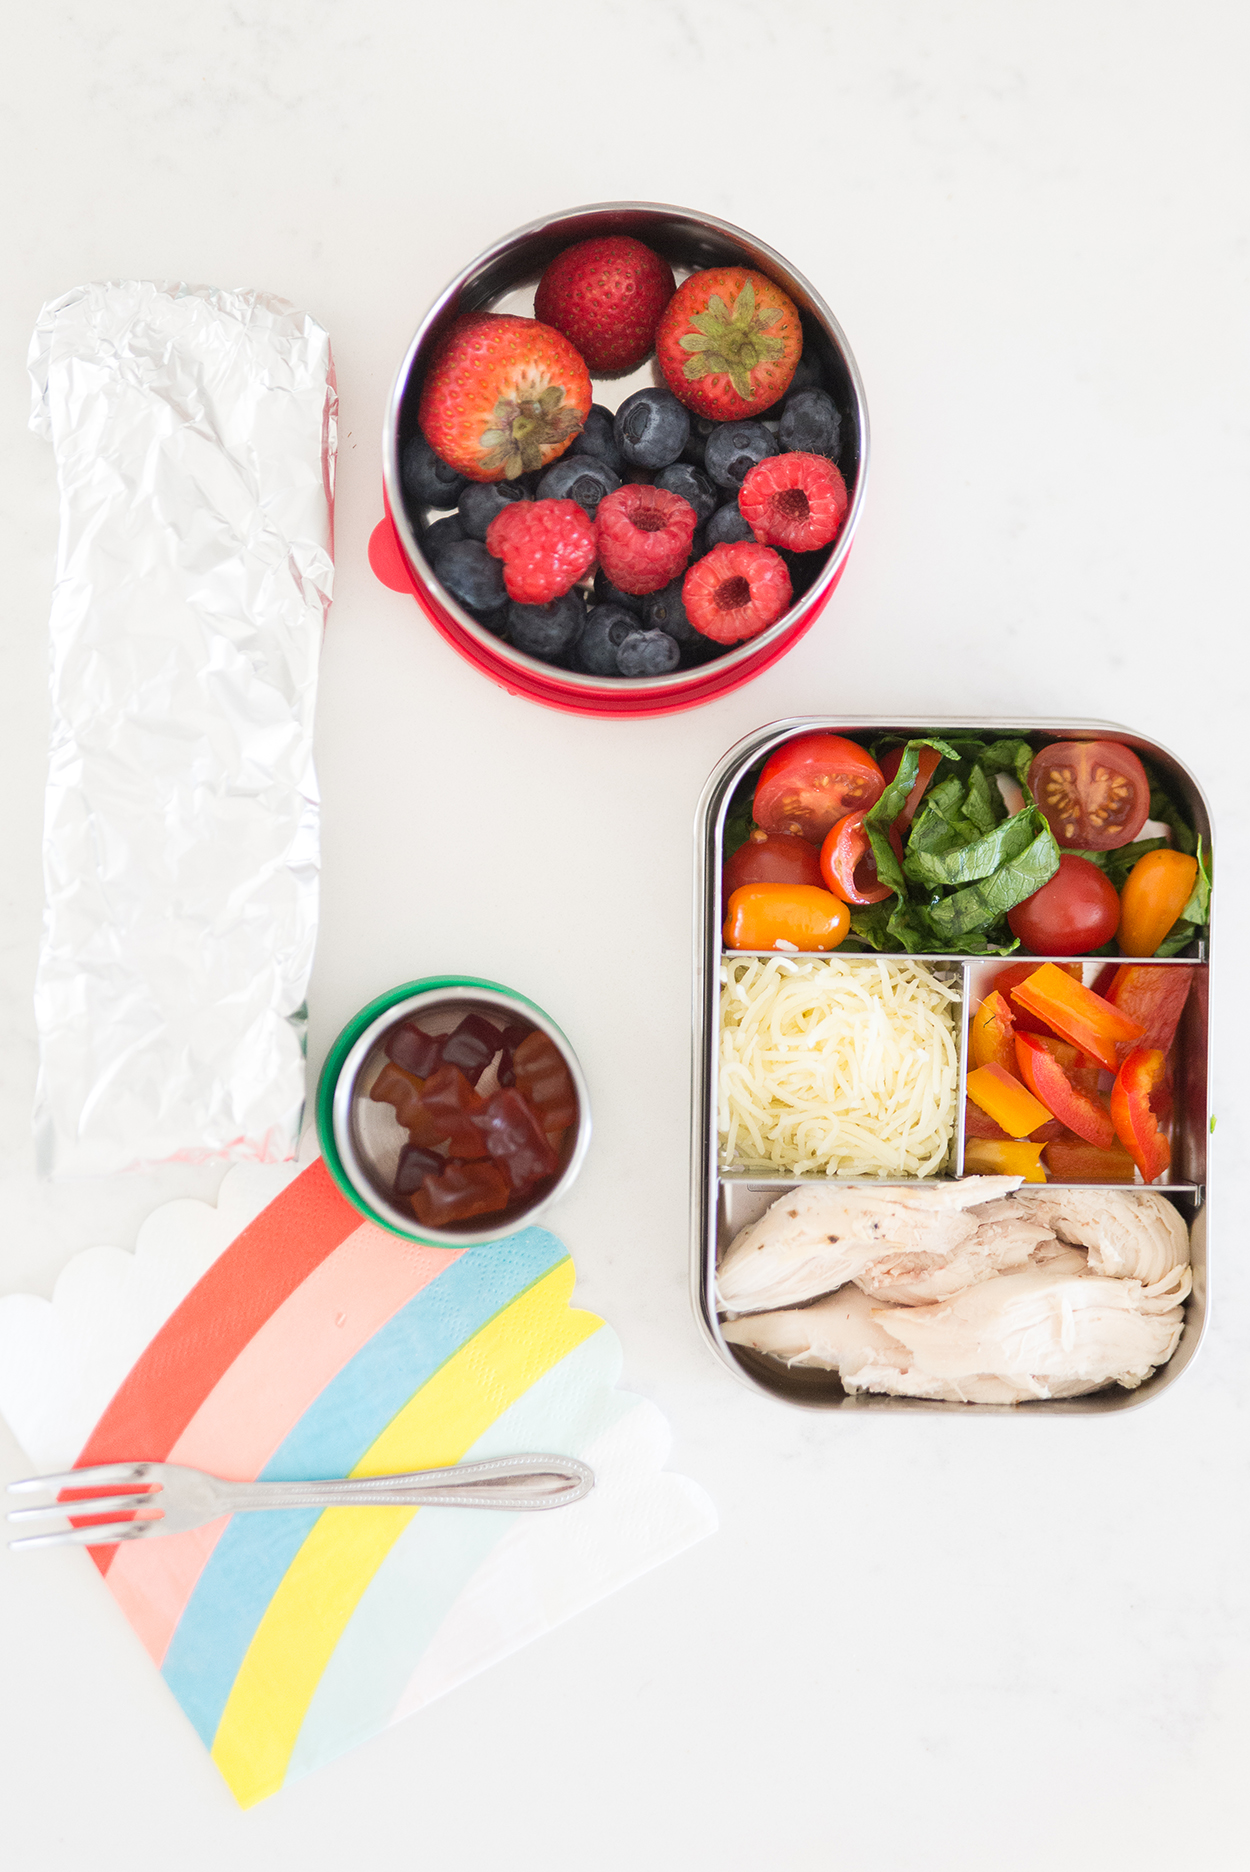 Well what the heck does that mean, cause that seems pretty broad doesn’t it? Not really. I just mean each lunch has to contain a protein of some sort, a carb, a fruit and a veggie as well as a little treat, and when the kids do pack their own lunch, the treat is always the first thing they pack! 🙂
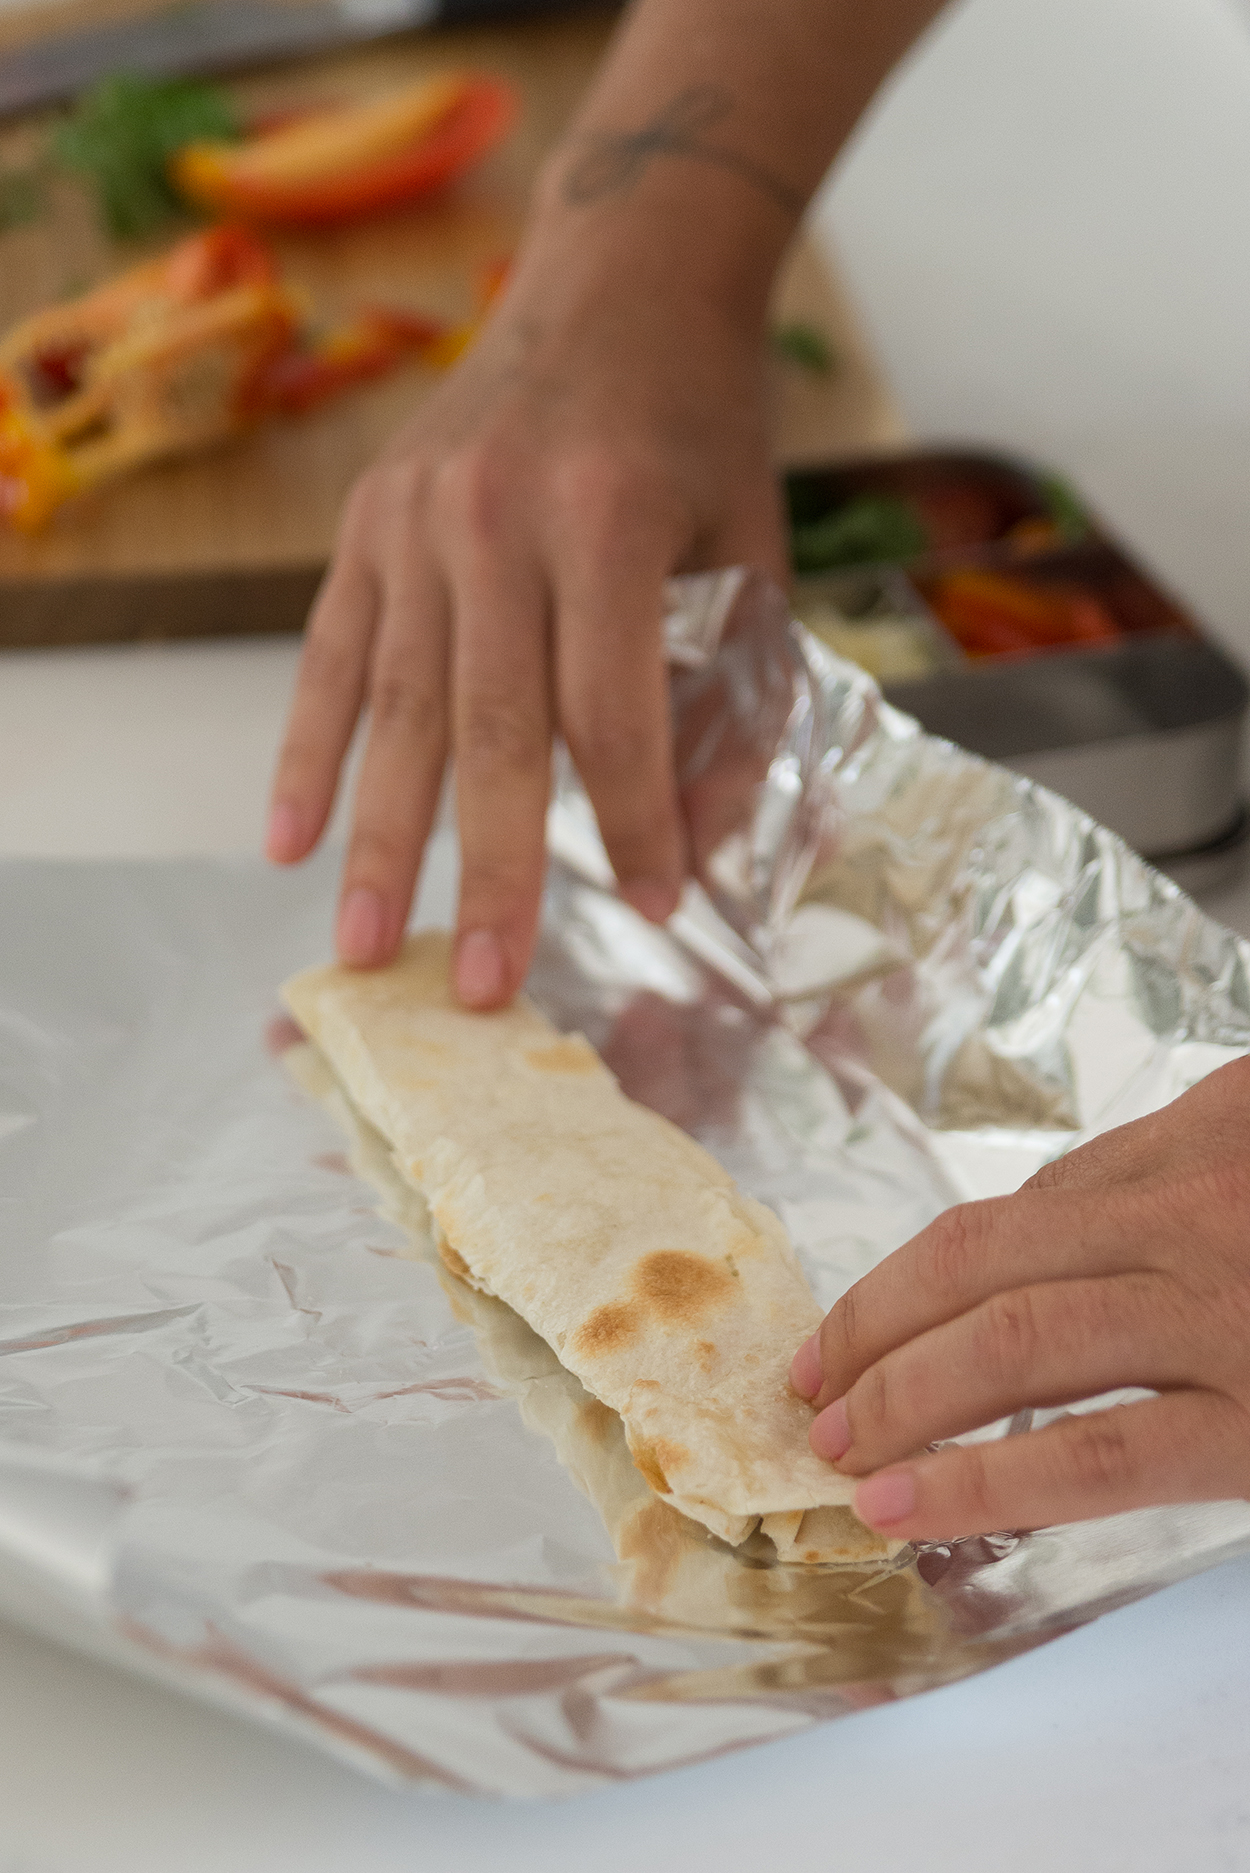

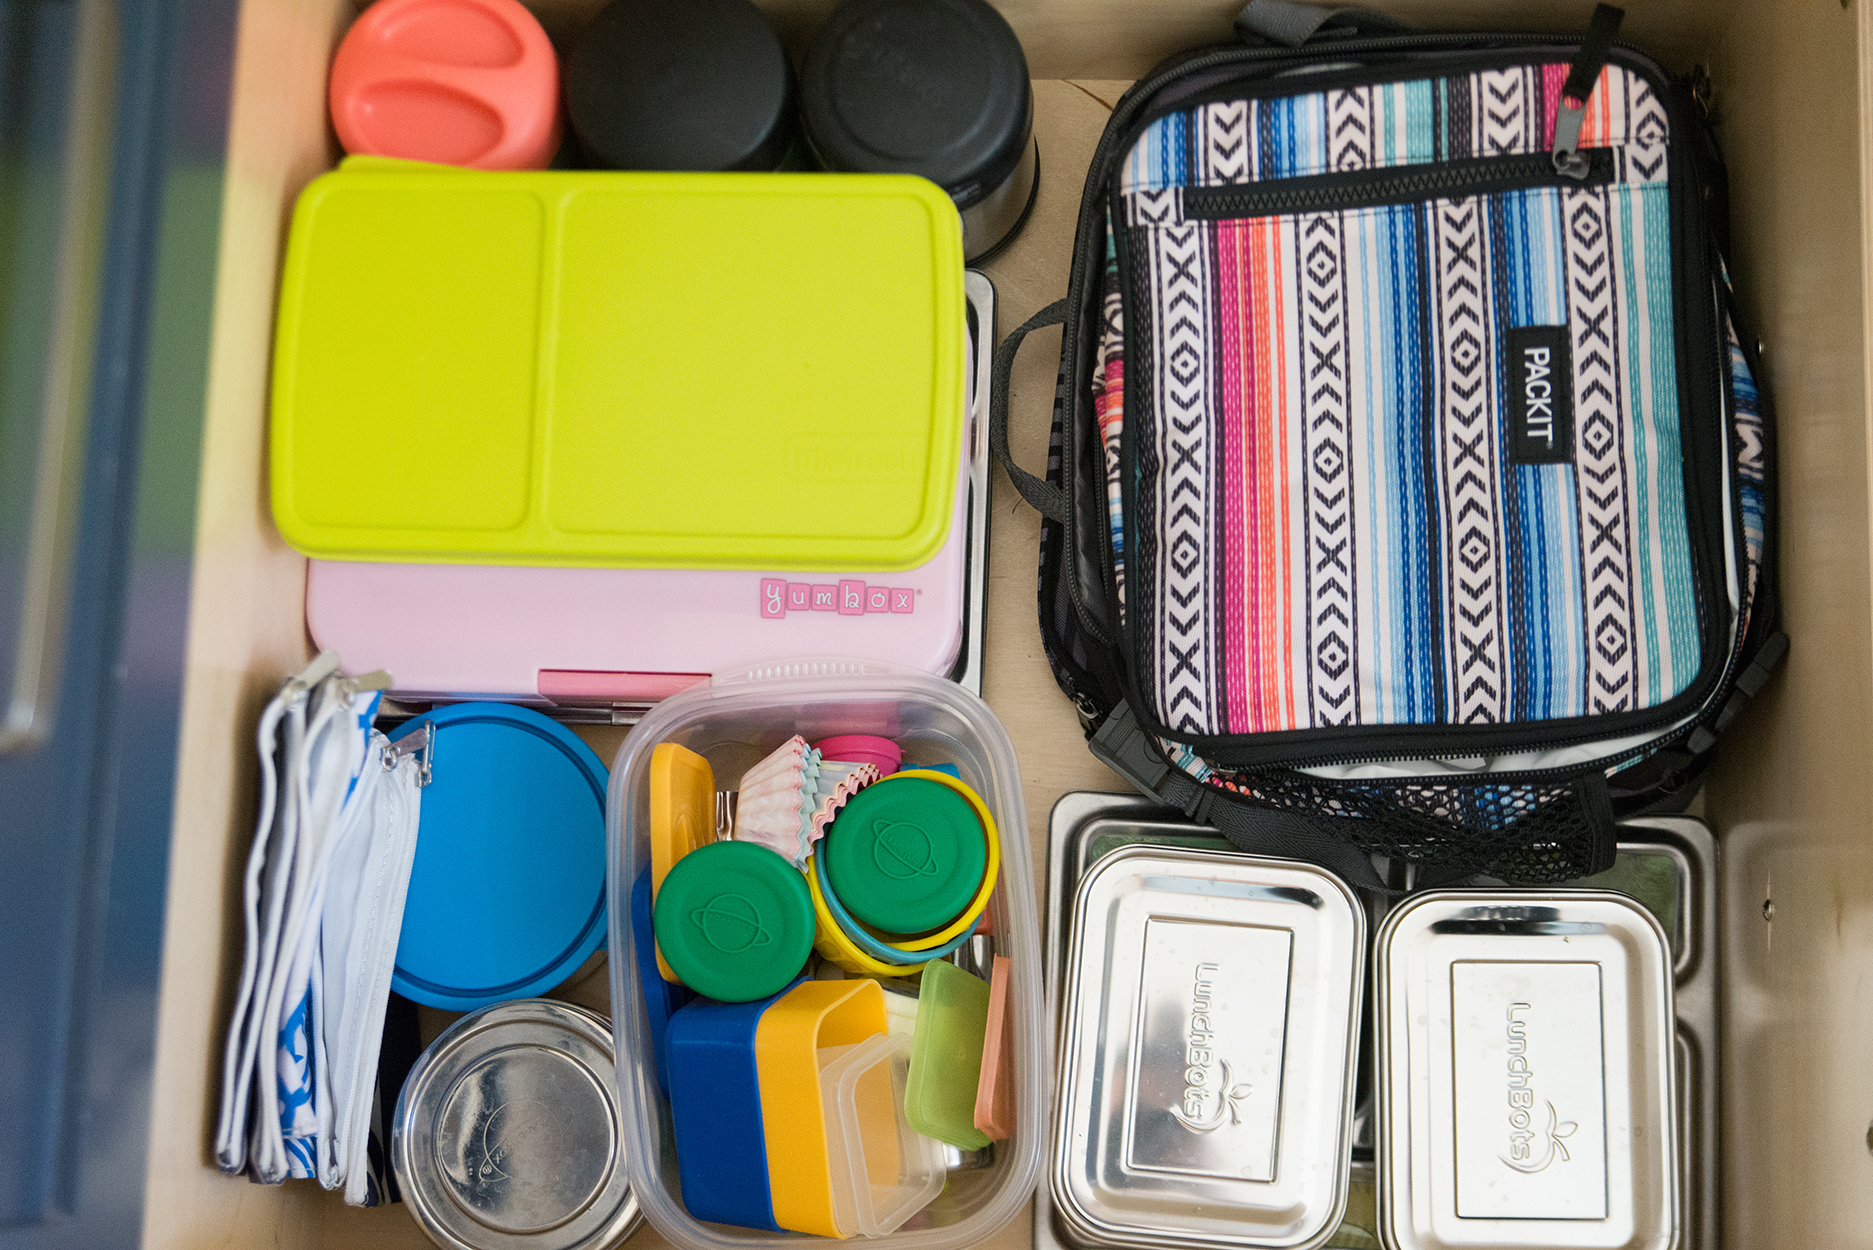
 You may have noticed we have a few new lunch packing accessories around these parts. If you’ve been following my lunch posts for awhile, you know that I’ve been a long time fan of the
  I’ve been using the
  When the company saw that I was already a fan of their reusable pouches, they sent me a box of their new biodegradable
 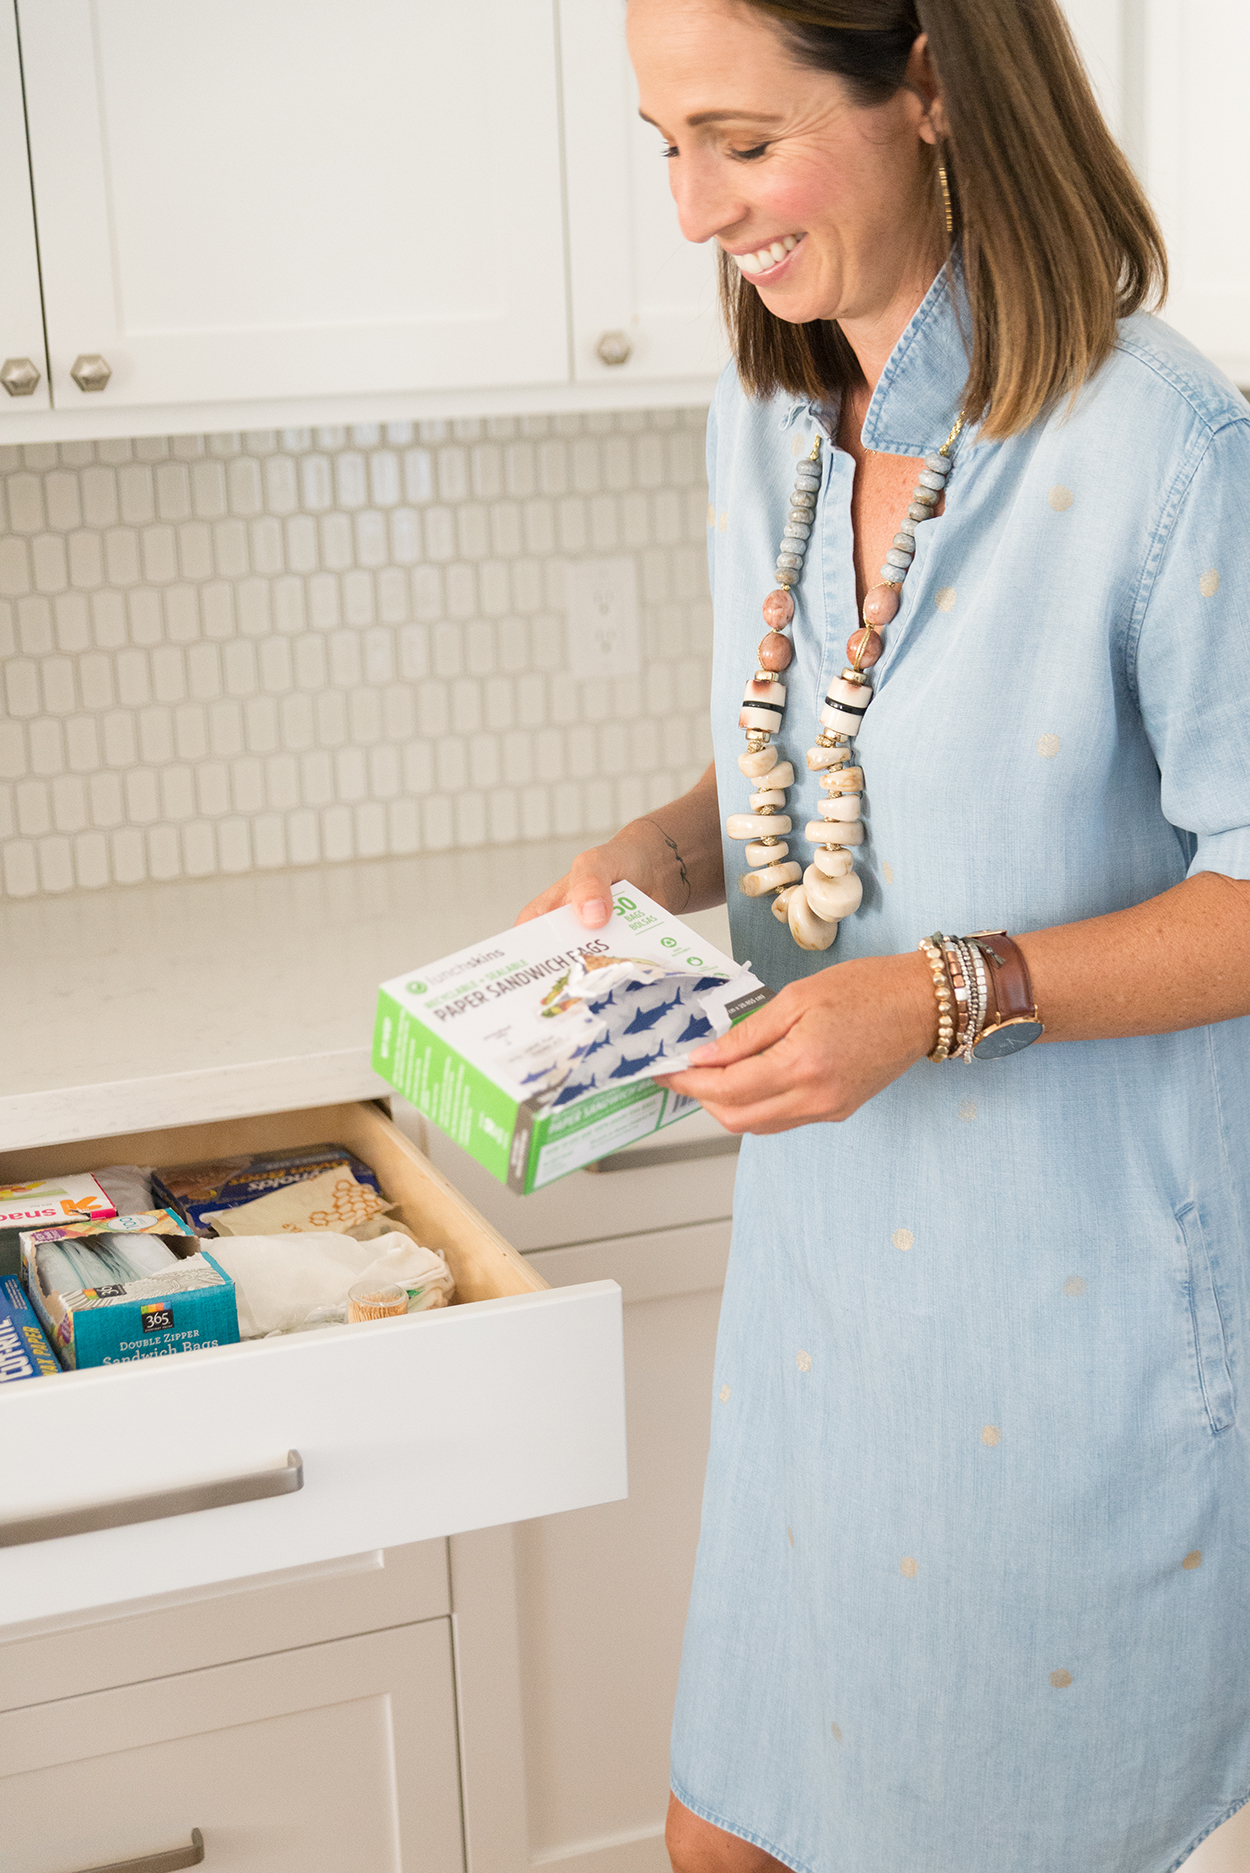 Taylor was in need of a new thermos, having outgrown her Hello Kitty one from Kindergarten (those things do last forever), so I found this well-reviewed
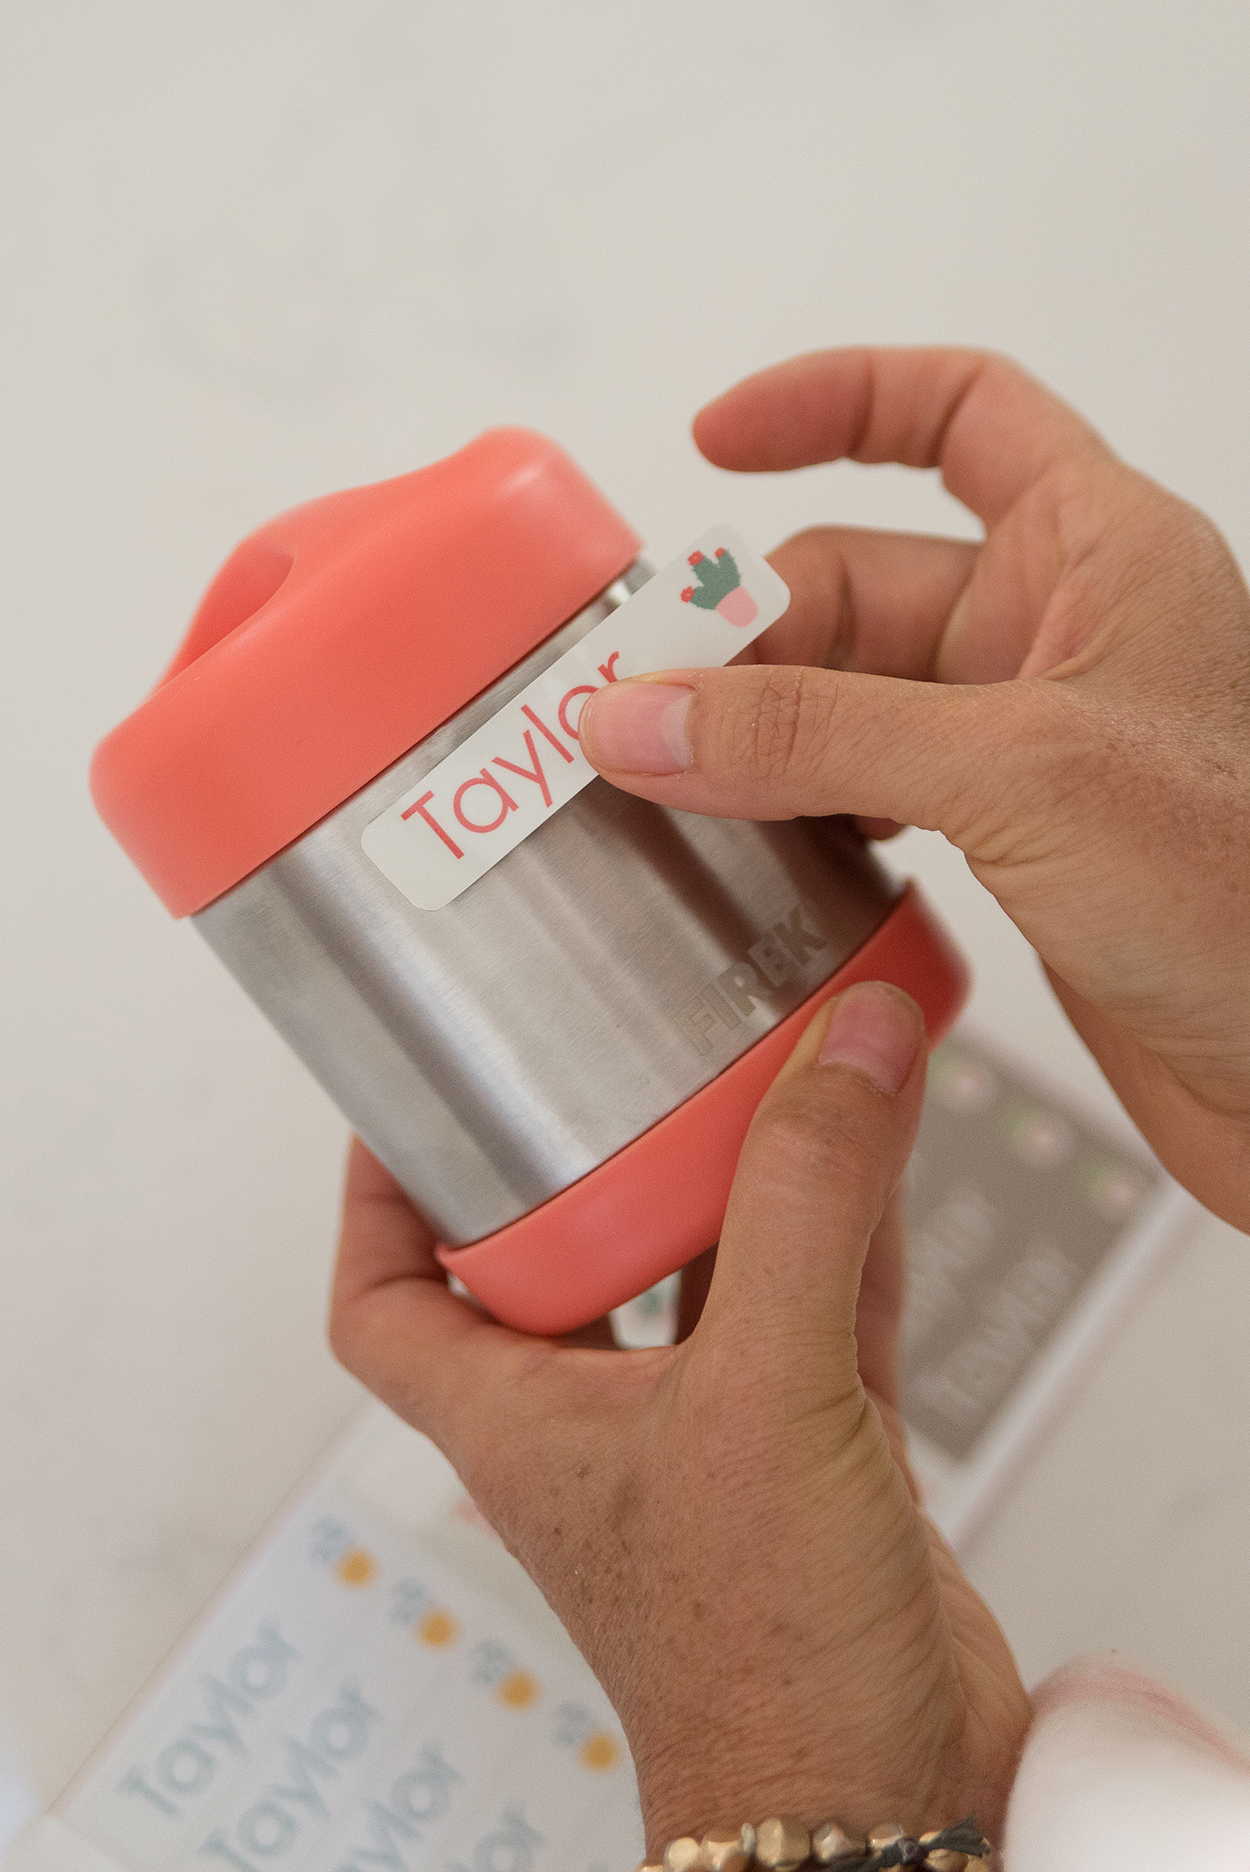 And so that’s over 2000 words on packing school lunches, who knew I had so much to say?!? I sure hope this hasn’t been overwhelming at all haha!
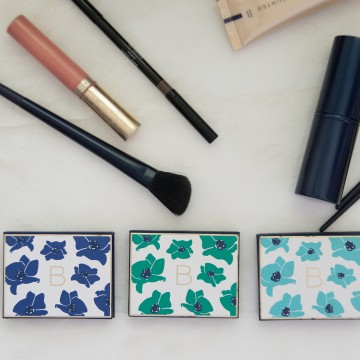


 Then with a crease brush, I apply Sable, which is a rich shade of brown and is dark enough to add some dimension and depth in the crease of my eyelid, but not so dark that it looks like an evening smoky eye.
  I begin at the outer bottom edge of my lid and swipe inwards to about half the length of my lid. I don’t want to cover my entire lower lid, just the outer bottom edge up towards the middle inner crease.
 Then, to add a bit more color and dimension, I add a secondary rich color, Sienna, to the inner lower half of my lid. This will make the look a bit more interesting and lighter, than sticking with just a single dark crease. If done correctly, and you may need some practice, the dark color will sweep along the outer edge inwards and remain on the top half of that crease, and this brighter color will then be on the bottom lid and meet the darker shade at the outer edge.

 To top off the look, I add Ivory, the lightest shade, to my upper lid underneath and along the arch of my brow to highlight the eye overall. Worth noting right now that the sparkly middle color, Penny, can be applied to the whole lower lid to add glimmer and shine for an evening look. That’s what I love about all these new palettes, each come with a playful sparkly color you can add to enhance the look and take it from day to night with one single application.
 Now I could add some mascara and gloss and call this look done, but I wanted to play around with the new Precision Liquid Eyeliner, so added a simple small swipe of black liner as well. The new brush makes applying the liner a lot easier (the old brush was really small and made application a bit tricky), and the long lasting formula is amazing.
  If you’re intimidated by liquid liner, don’t be! Again, if my shaky clumsy hands could learn, with some practice, yours can too. I suggest practicing on a blank eye without shadow, so if you mess up, you don’t ruin your pretty shaded lids. I always start at the middle of the lid, and work my way out, getting that outer edge looking good first, then I finish off the rest of the inner line.
 I’ve worked with many women over the last 3.5 years since I’ve been with Beautycounter who feel so intimidated by makeup application, and once I sit down with them and just show them the basics of a simple eye routine, they suddenly feel much more empowered. Even though they may only utilize these tips once every couple of weeks, they at least feel so much better knowing *how* to apply their makeup, that how often really doesn’t even matter. And usually, once they see how easy it can be, they end up wearing makeup a bit more often, not necessarily to try and make themselves feel or look prettier, but just because they enjoy spending a bit more time on themselves. When you slow down even for 5-10 minutes, to spend time on yourself, you suddenly feel like you have a lot more time for yourself than darting out the door with wet hair. Plus, doing your makeup is one of the easiest, most accessible forms of self-care and expression. When I used to work retail, my fellow co-workers and I would often joke that makeup was just about the cheapest, most guilt-free and therefore fun forms of retail therapy.


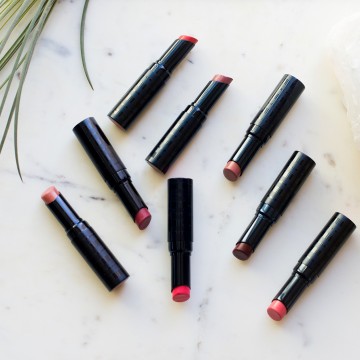
 The first color above is called
  This next color is called


 And lastly, this color


 We’ve had the Ikea desk and chairs for over a year now, but it sat against a dull blank wall that lacked any form of organization and inspiration. Bills and paperwork were just piled high on top of the desk, and I squeezed my laptop somewhere alongside the stacks. The first order of business then was to go back to Ikea and pick up the filing cabinet that would also serve as a dividing line between the two chairs.
  Next, we needed a couch that would be small enough for the space, but also utilize the longish stretch of wall, so we opted for this extended love-seat style couch with a single bench cushion, which comfortably seats 3, or a single adult laying down. I also needed a large mirror so that clients who come over for 1 on 1 appointments can look at themselves to check colors and shades of makeup.
  The media center is from CB2 and has a sleek single drawer to hold the Wii and all the games and controllers that go along with it, as well as DVD’s and remotes. I searched for a smaller media console for months, and this was the nicest looking one I found at the most affordable cost.
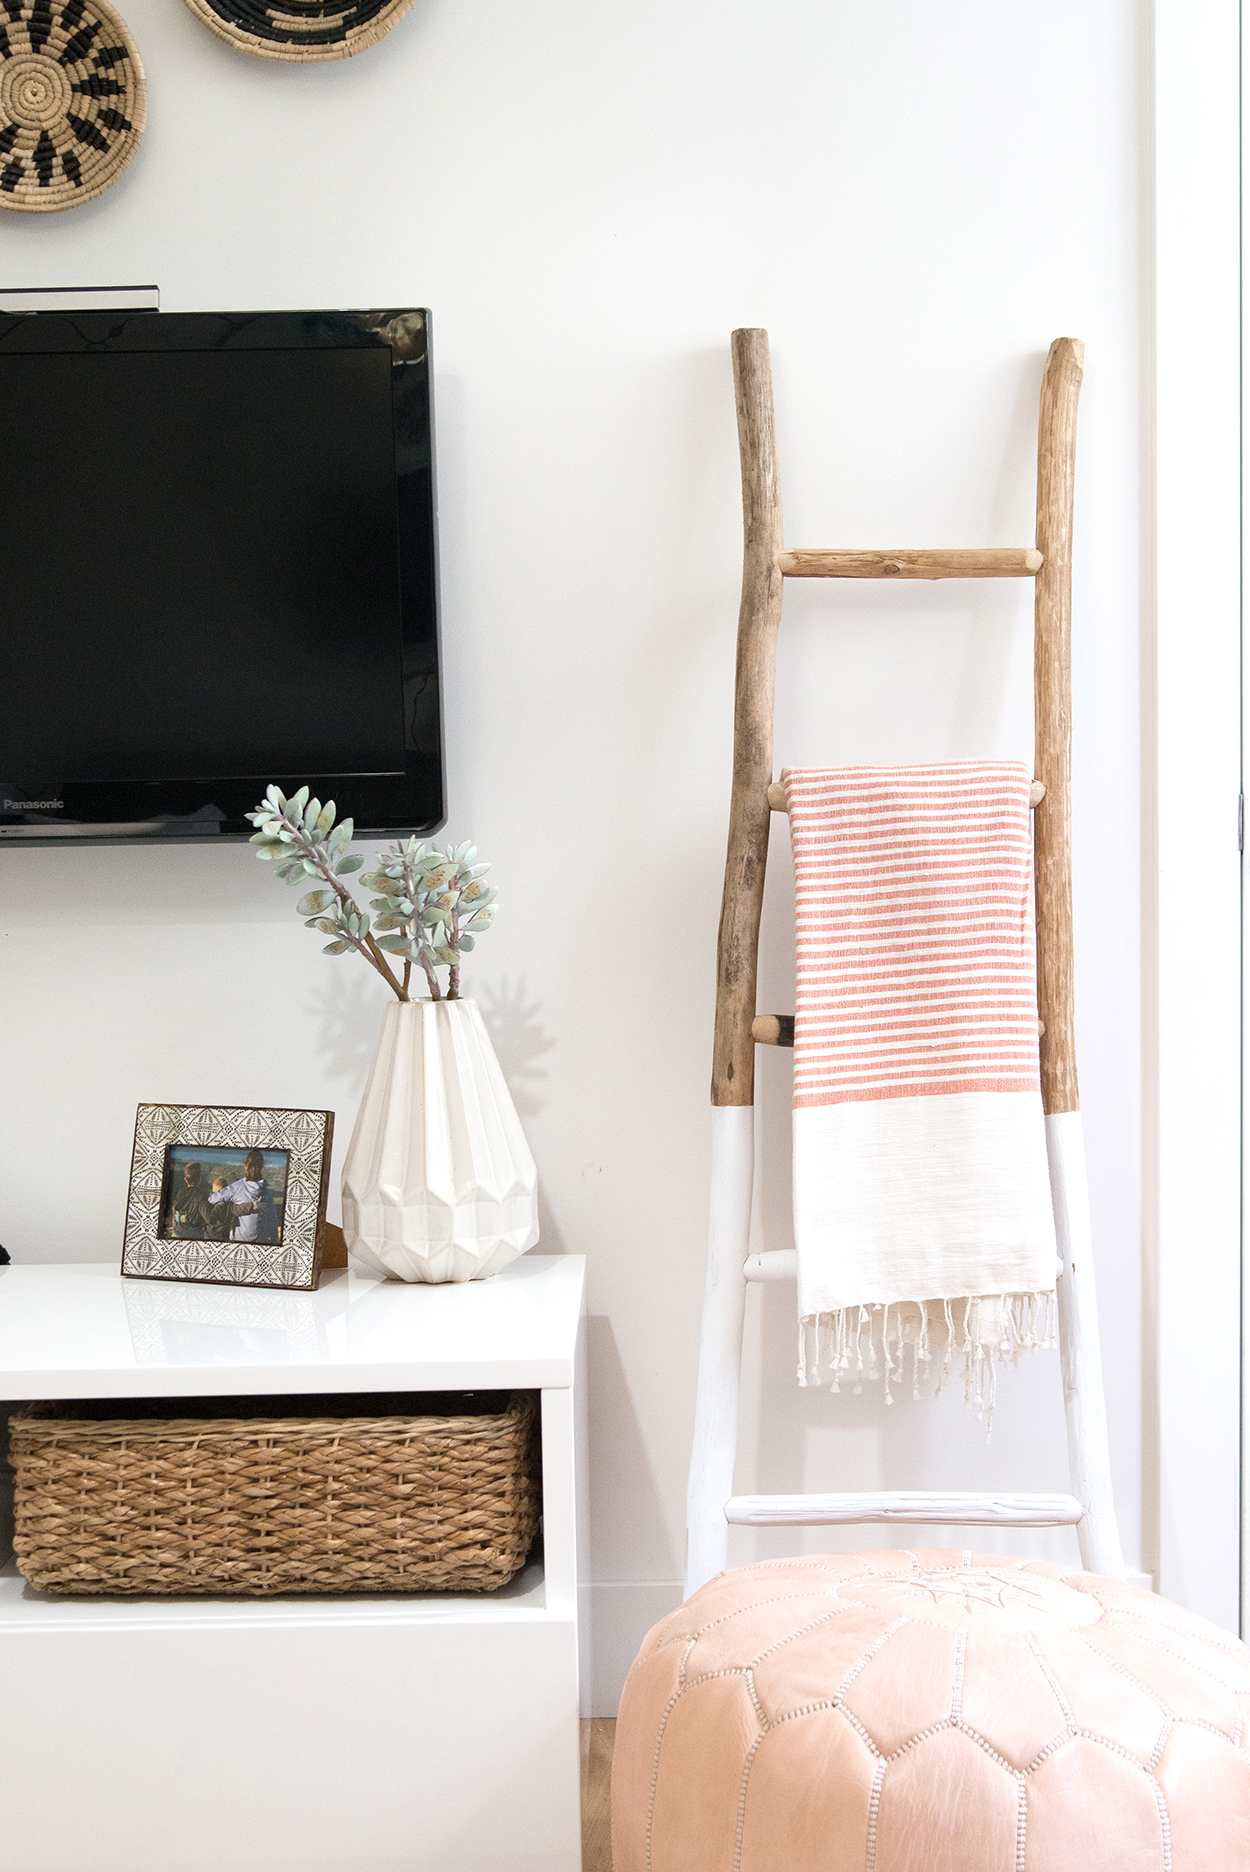 The room is about 8’x10′, so it’s not super large and we wanted to do a lot with the space, so instead of a coffee table, we opted for poufs that could be moved around, serve as step stools, extra seating and another decor element. I love that the tan leather resembles a shade of blush pink.
 I wanted as many things off my desk as possible, with the exception of basic and often used office supplies, a file sorter to hold bills and important paperwork, and some sort of cork/magnetic board that I could affix other important notes & pieces of paperwork I wanted to keep front and center. I originally thought I would hold a lot of books on the shelving units, but I’m glad we opted for artwork, plants and decor instead.
  I wasn’t so sure about the chandelier when I first got it, thinking it was a bit too boho for my taste, but it has definitely grown on me and I now love it. It really adds a very feminine element to the room. The acrylic bookcase is from Wisteria and makes for the perfect display case for all my Beautycounter product. It helps that the packaging is also so pretty.
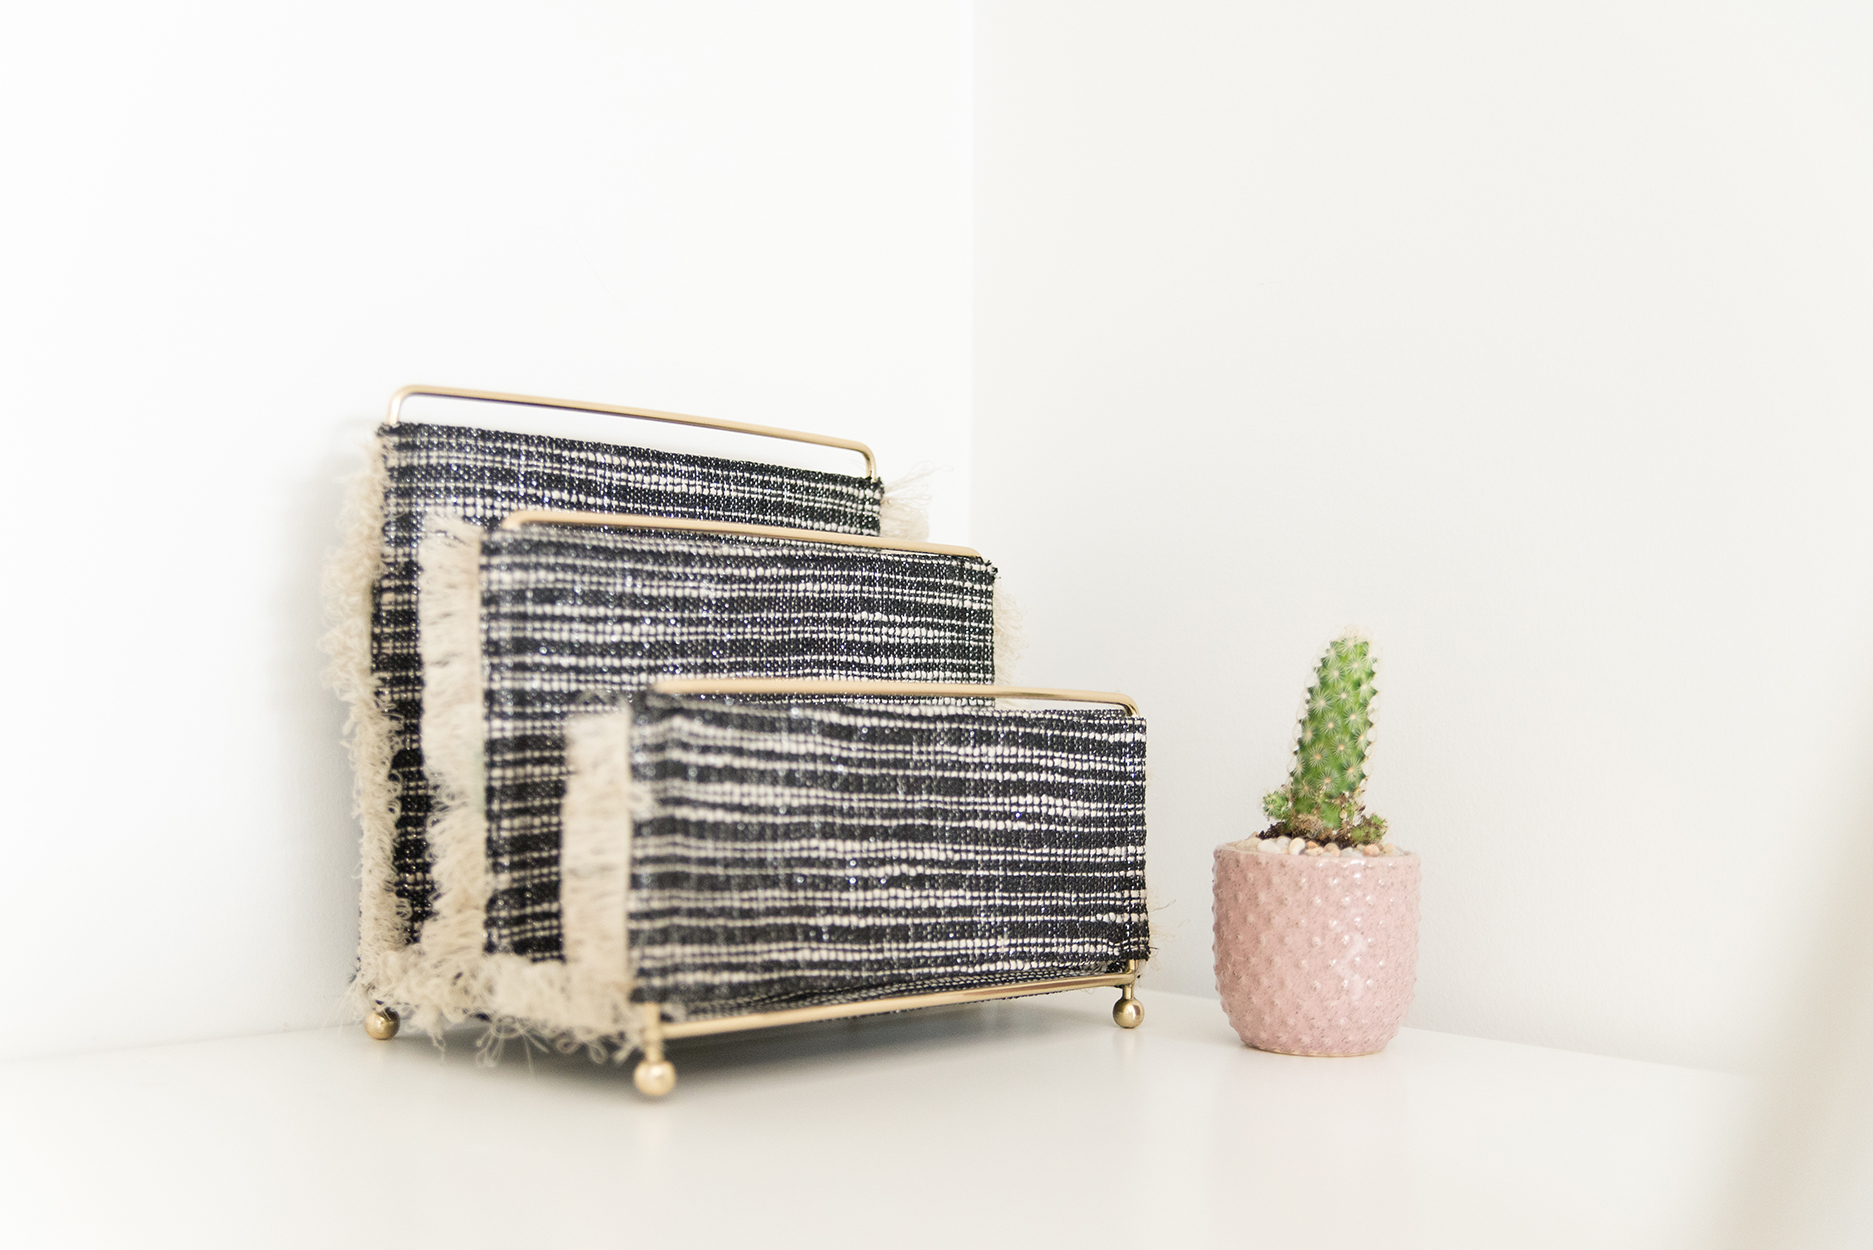 The biggest splurge in the office is this silly paper sorter, but it’s so cute and keeps the bills right in front of me so I don’t forget to pay them. I am admittedly bad at remembering to pay bills on time. It’s the one area of my life that often leaves me feeling like a flighty college kid instead of a competent adult.
 The office doesn’t get a ton of light, so most of the plants are faux, like this one. The 2 plants that were alive at the time of shoot are now both dead.
 Besides the color scheme of blush pink & green, I knew I wanted the office to reflect the desert and sea of my home state of California, hence the succulents and ocean print.
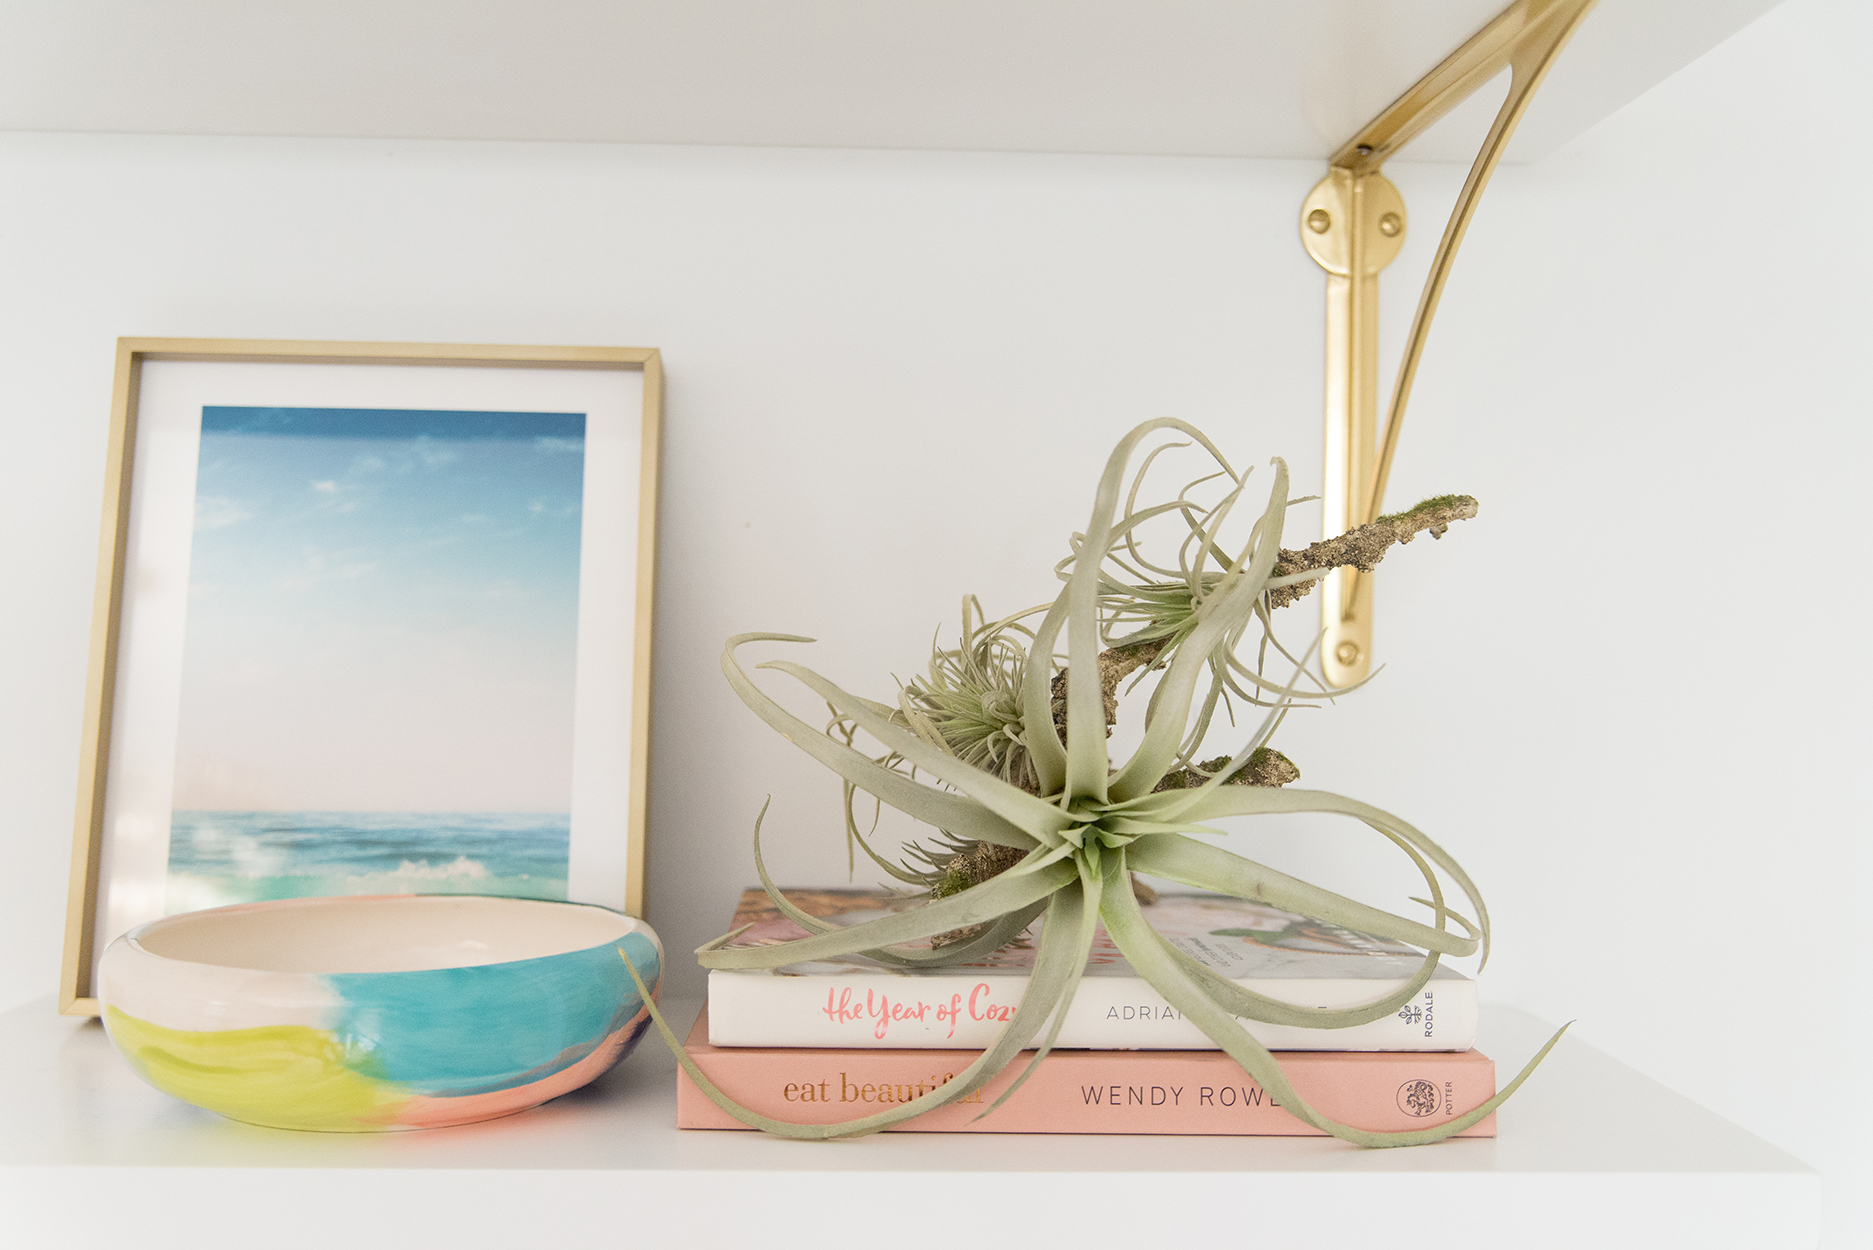

 When Kendall originally found the wallpaper, we thought we wanted to do the whole room with it. Then we cost it out and it was going to be well into the thousands to wallpaper all the walls, even it being a small room it was just way too cost prohibitive. She searched for something similar, but never found an alternative we loved as much, so in the end we decided to just do the one main wall and I’m glad we did. It makes such a statement and I was able to get the paper I really wanted, without going way over budget.
 I am so thankful to have such a functional space to host clients in, write, work with my team, sneak away from my noisy house and read, and it’s especially great that the kids also feel comfortable calling this room theirs too.
 Sources:
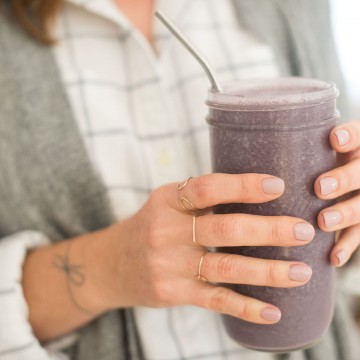


 Where to Stay:
 What to See:


 What to Eat:
 Where to Shop:
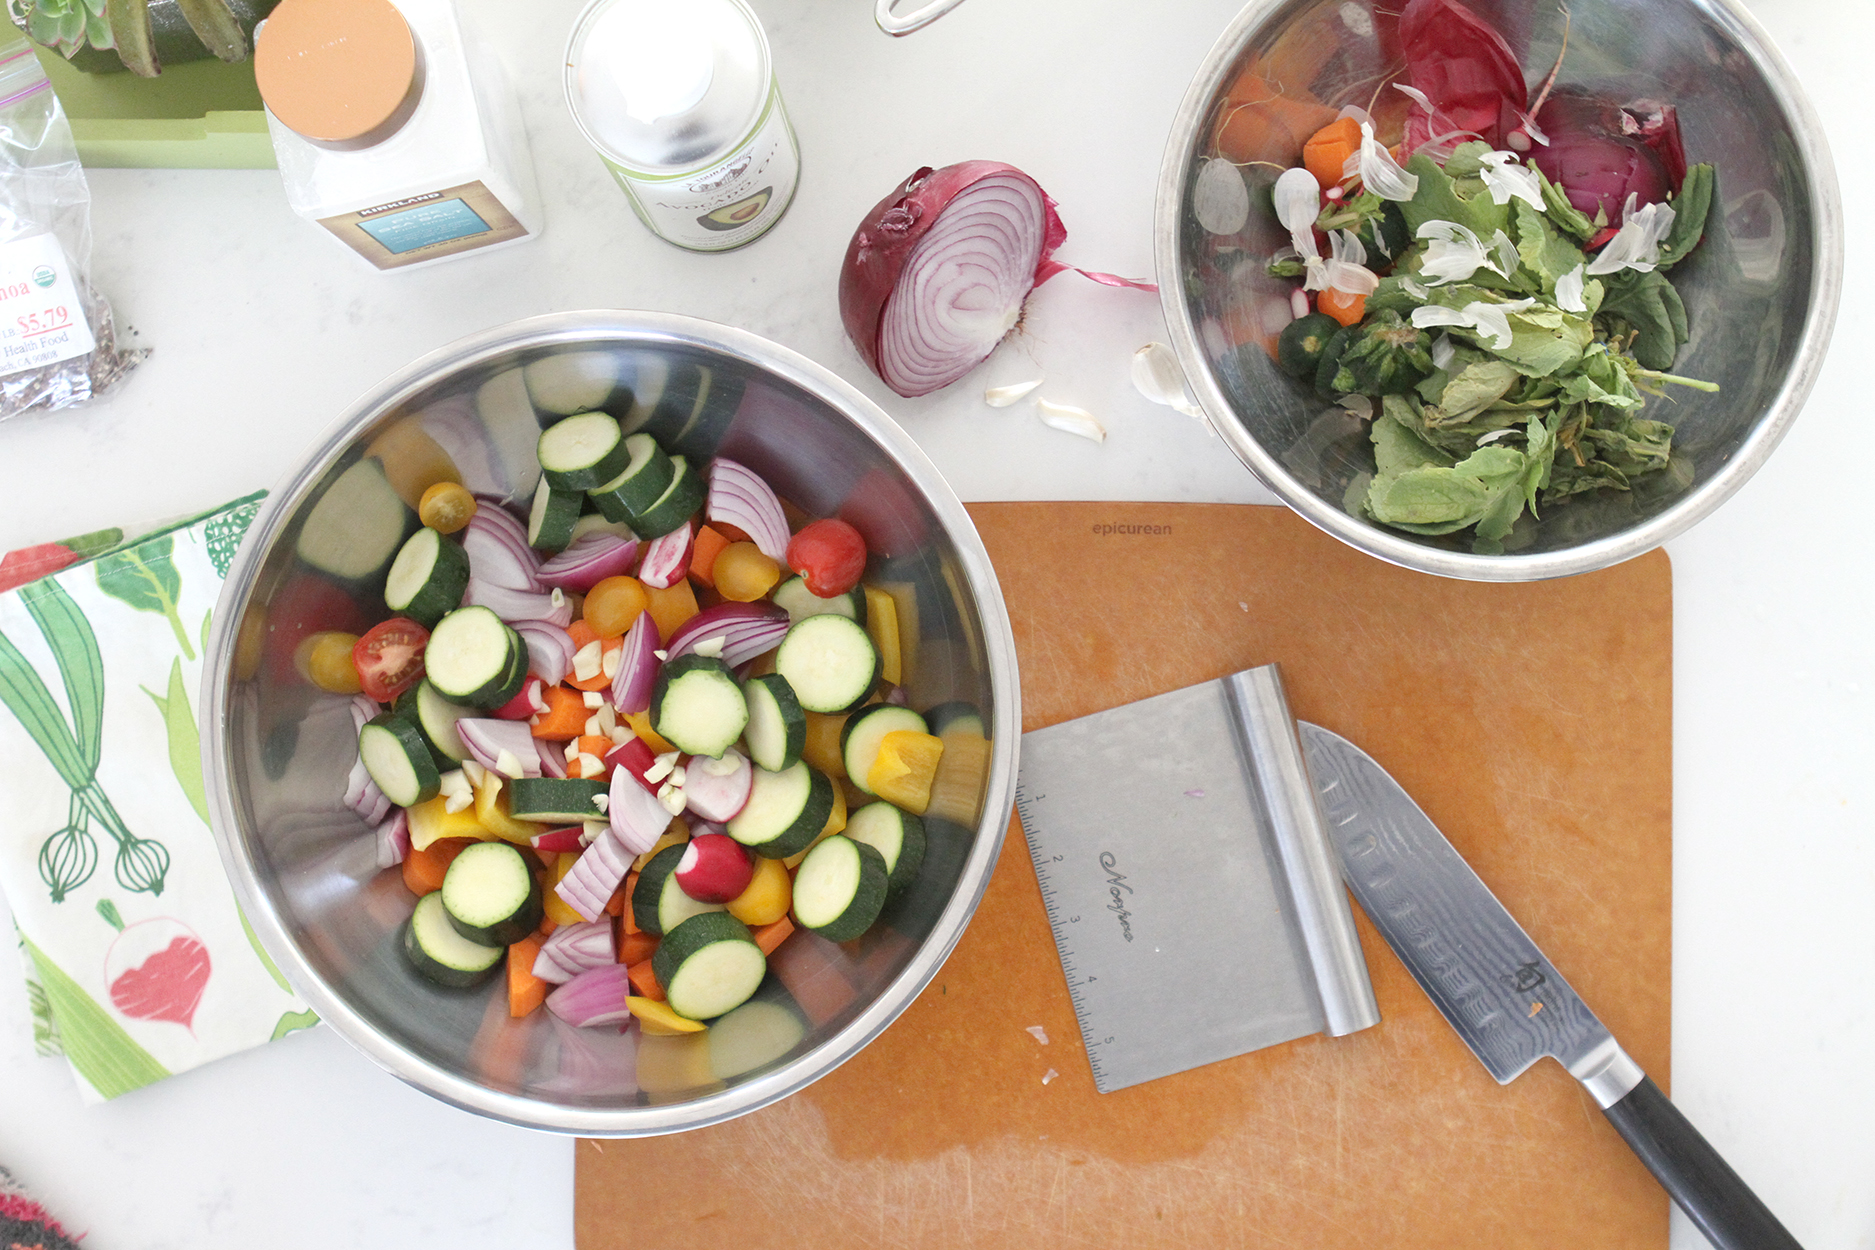
 I’ve gotten back into the habit of visiting the farmer’s market, and on a recent trip picked up young garlic, also known as green garlic, and some gorgeous heads of broccoli, bundles of heirloom carrots and the freshest, sweetest sugar snap peas I’ve tasted in awhile. So into the pot these all went, along with the usual sliced onion and a few sprigs of thyme, the herb I happened to have on hand this week, but make sure to use whichever poultry herb you happen to have, including rosemary or sage.
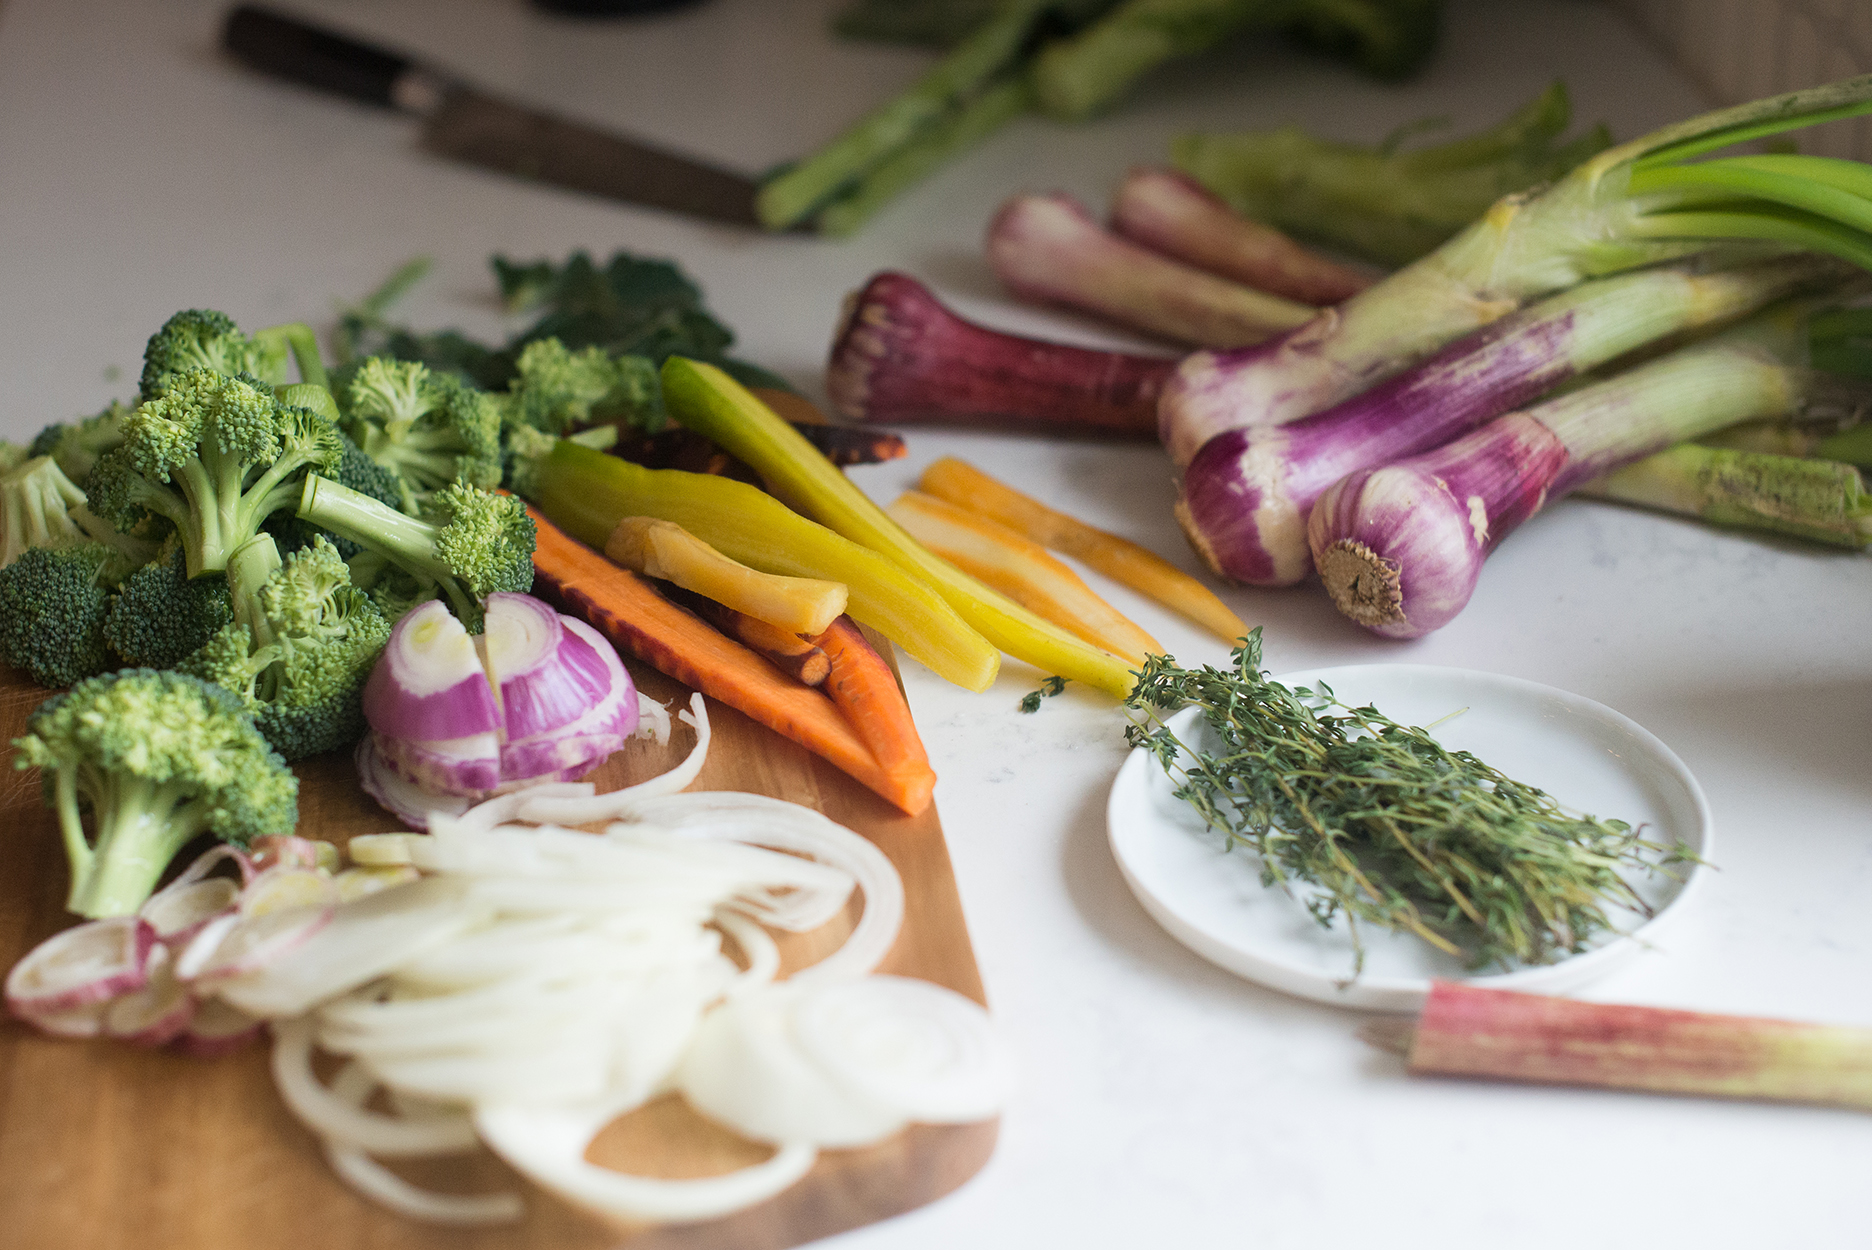 Sauteing everything up in the pan before baking gives the chicken that gorgeous brown coloring, and also helps to soften up the veggies a bit and get all the flavors melding together nicely. Plus, it makes the house smell like home and puts one in the perfect mood to eat. If using precooked rice, make sure to pull back on the chicken stock, only adding about a cup to help keep the veggies and chicken moist while cooking. Too much more that that and the rice will get way too soggy. I’ve used leftover white rice as well as rice pilaf, and while the white rice was fine, the rice pilaf did hold up better and was a lot more flavorful.
  I originally adapted this from a Tyler Florence book of baby recipes, and he recommends chopping up into fine pieces or pureeing a portion of the ingredients together and serving as baby food, while leaving the rest in tact to serve to mom and dad. Pretty ingenious way to get your kids used to the varying flavors of home cooked grown up food from a very young age. Obviously though there’s no need to do all that if everyone eating at home has a full set of teeth and a digestive track that’s moved beyond the complexities of pureed pears and green peas. Just serve up as is and enjoy only having one pot to clean.
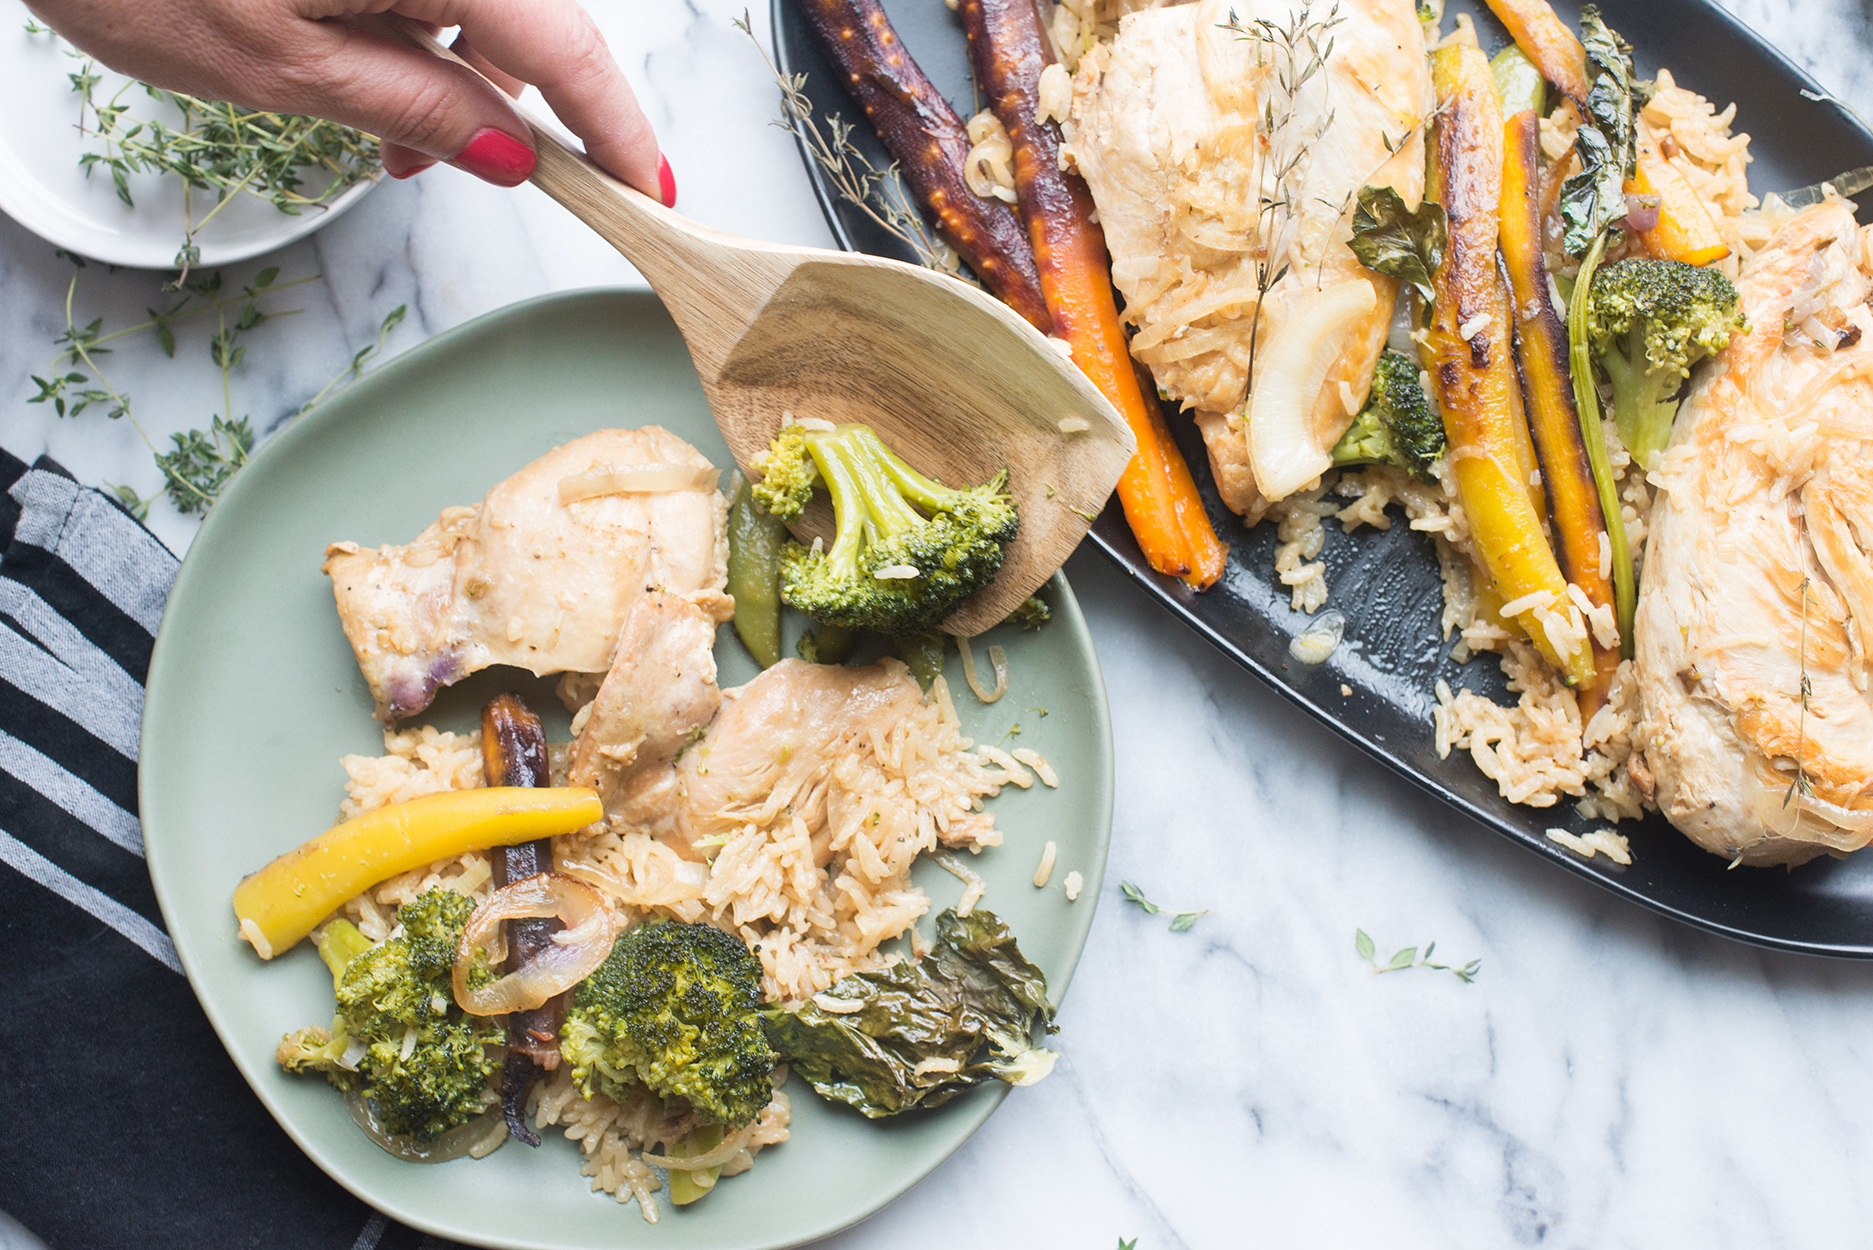


 We’ll start in the master. I wanted some color, but also wanted it to feel masculine, hence the black grasscloth wallpaper. This was previously Hayden’s nursery, and before we knew we were going to have a 3rd child, it was the guest room/office. This space has gone through quite the transformation over the years, and is now finally our “master quarters” haha! We popped the room out about 4 more feet, then added the bathroom.
 Our designer/stylist for the project brought in this cute Serena & Lily knockoff bench and I love it, although truth be told it doesn’t feel super sturdy. Art and I can’t sit on it at the same time because it creaks and moans when we do haha! The rug was pulled in from the living room and is Serena & Lily. Our old dog Maddie loved sleeping on one corner of it, and she left a dark stain on it from the oils of her fur, which is now conveniently hidden under the bed. Whenever we want a reminder of our faithful old girl, we just lift up the bed skirt and take a peek at her sleeping circle.
 The headboard is and task lights are from Pottery Barn, and the nightstands and bedding are from our local furniture store Chartreuse. The knick-knacks are from various places and Art’s nightstand definitely doesn’t look like this every day.
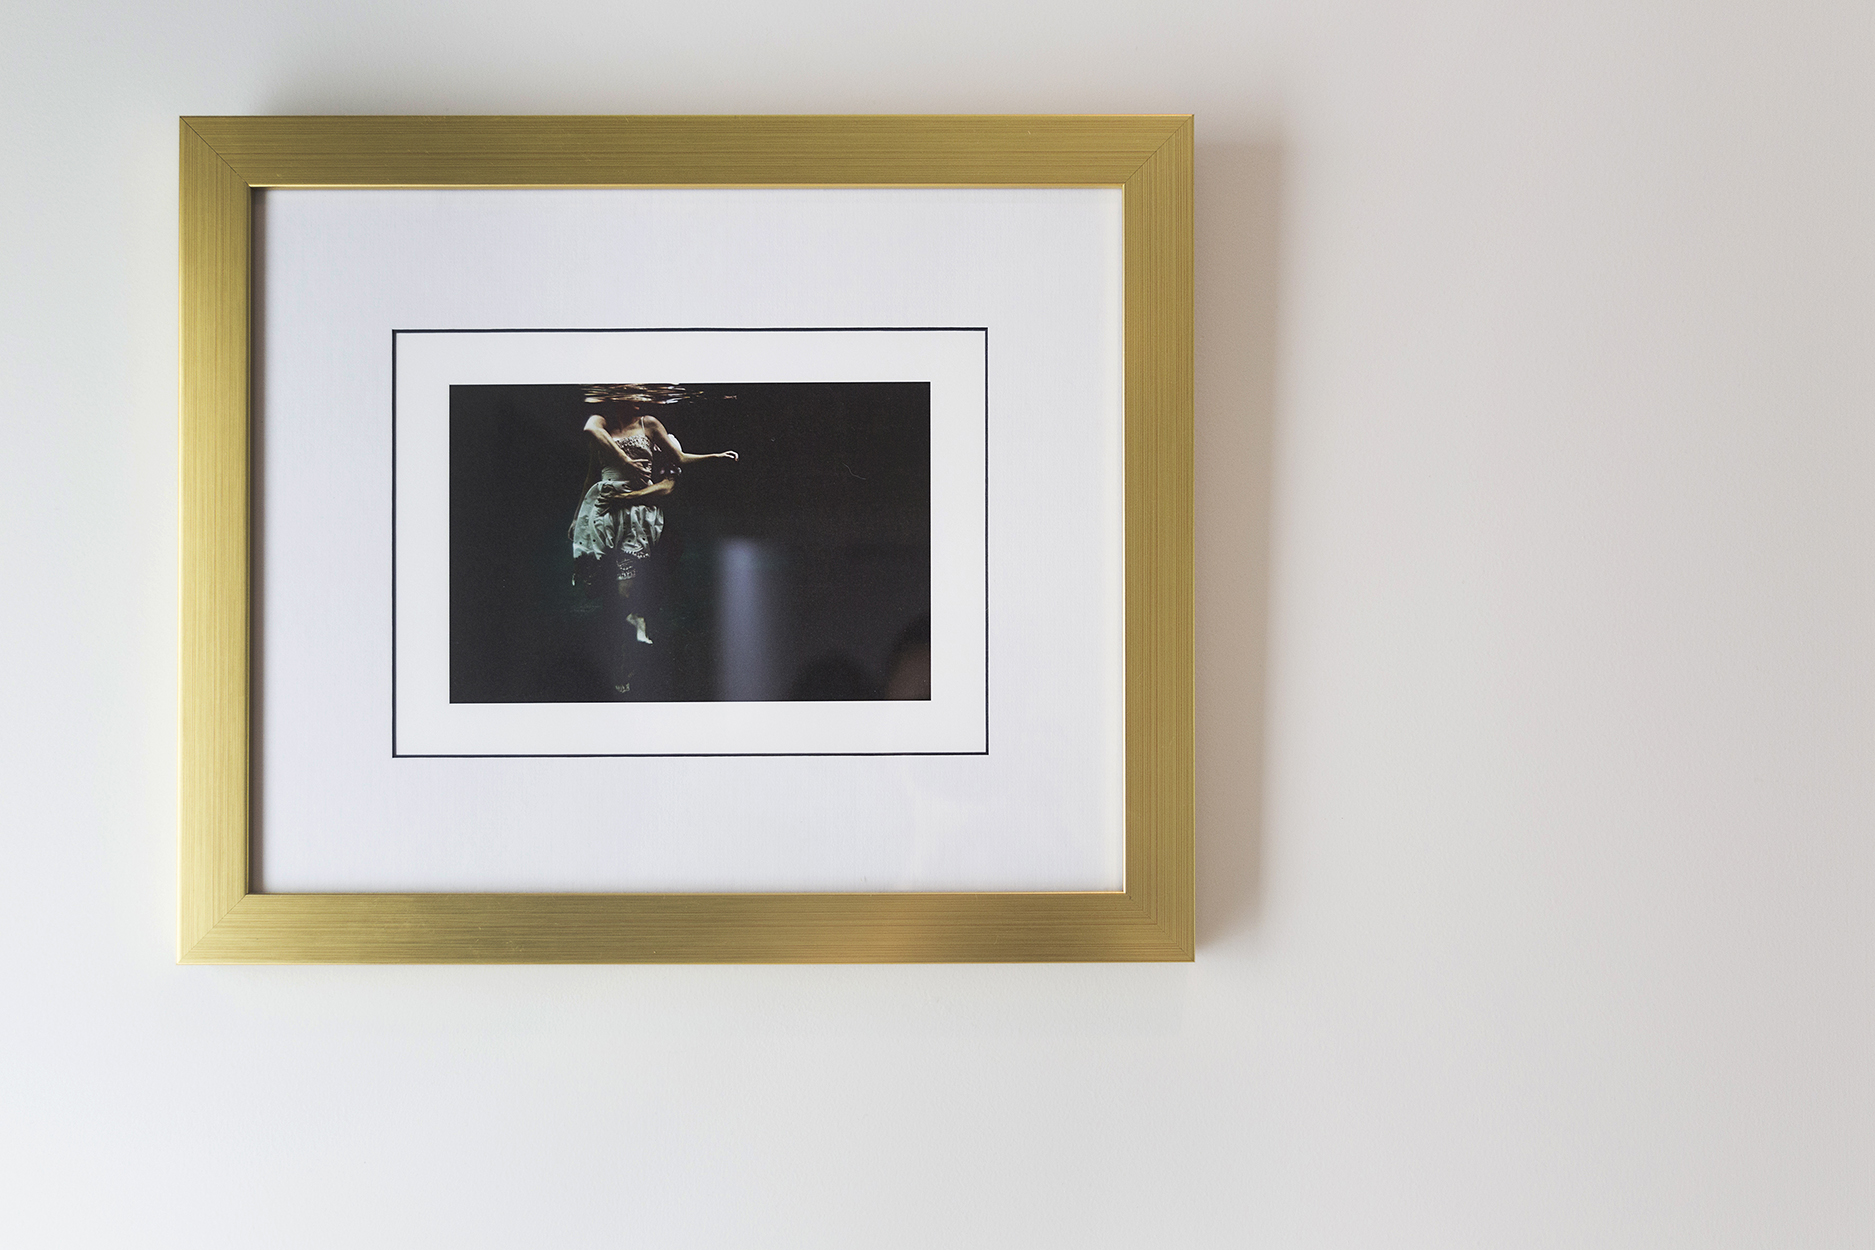 I bought this off Society 6 years ago and I can’t for the life of me remember the artists name and I wish I did because they had a whole series of these underwater photos, and I’d like to purchase more. It’s not signed or marked or anything, and it’s been so long Society 6 no longer has my order history. If you happen to know how this is, please let me know!
 My friend Shelly of VanRozeboom Interiors helped design the bathroom and I love it. The large window inspiration originally came from a home I had seen in Sunset magazine, and I loved the idea of all that natural light pouring in everyday. We didn’t plan thoroughly enough before hand and should have had a pull down shade installed first, before the beams were installed, but so far 2+ years later, we haven’t had any peeping tom mishaps. Because the window overlooks the backyard, we just can’t take a shower when having a backyard BBQ, but that would be weird to be showering when you have guests anyhow.
 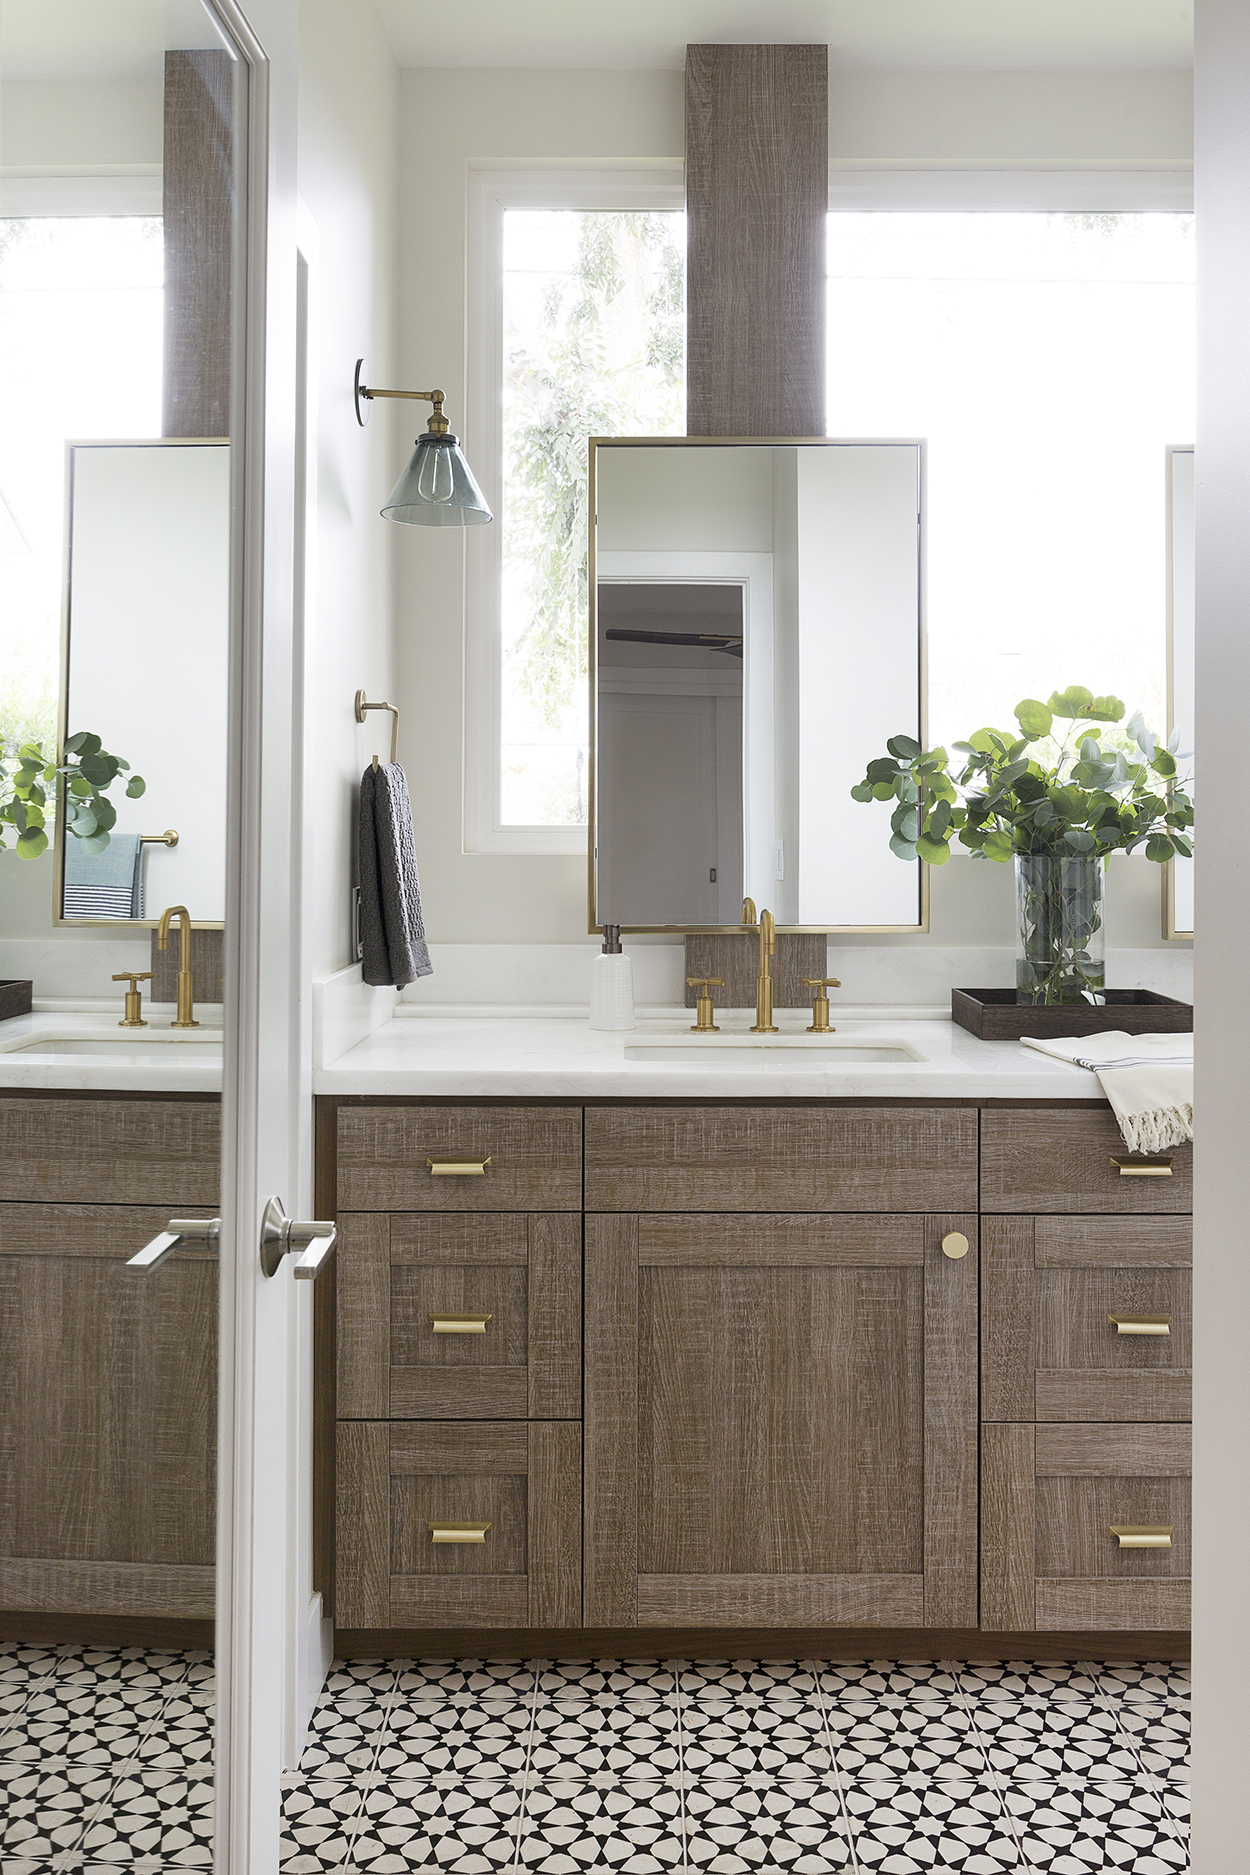 The tile is rad, but a word of warning, it does get very weathered over time. You need to be fastidious about sealing it, but even then, I’ve read it’s pretty much impossible to keep stains off it. If you are really OCD about markings on your floor, this is not the tile for you. But if you don’t mind a little weathering and think it gives it character, go for it. The tile definitely cleans up nicely and easily, it just gets stained very easily. In fact by the door there’s a couple of teeny tiny pencil markings the tile guys left behind that won’t come off, and I stare at them every time I go to the bathroom. It doesn’t bother me all that much but it would a neat freak, which certainly isn’t me 😉
  The small toilet area, not pictured, has a pocket door on the opposite wall of the shower, which allows for privacy. It also has a door that opens up to the outside, and a cabinet to hold towels, so it functions as a pool bath. Our architect questioned our decision to have our master bath also be the pool bath, but again, 2 years and multiple pool parties later, it hasn’t at all been an issue and I’d much rather kids use this bath than traipse through the house in wet feet, to get to the other bathroom.
 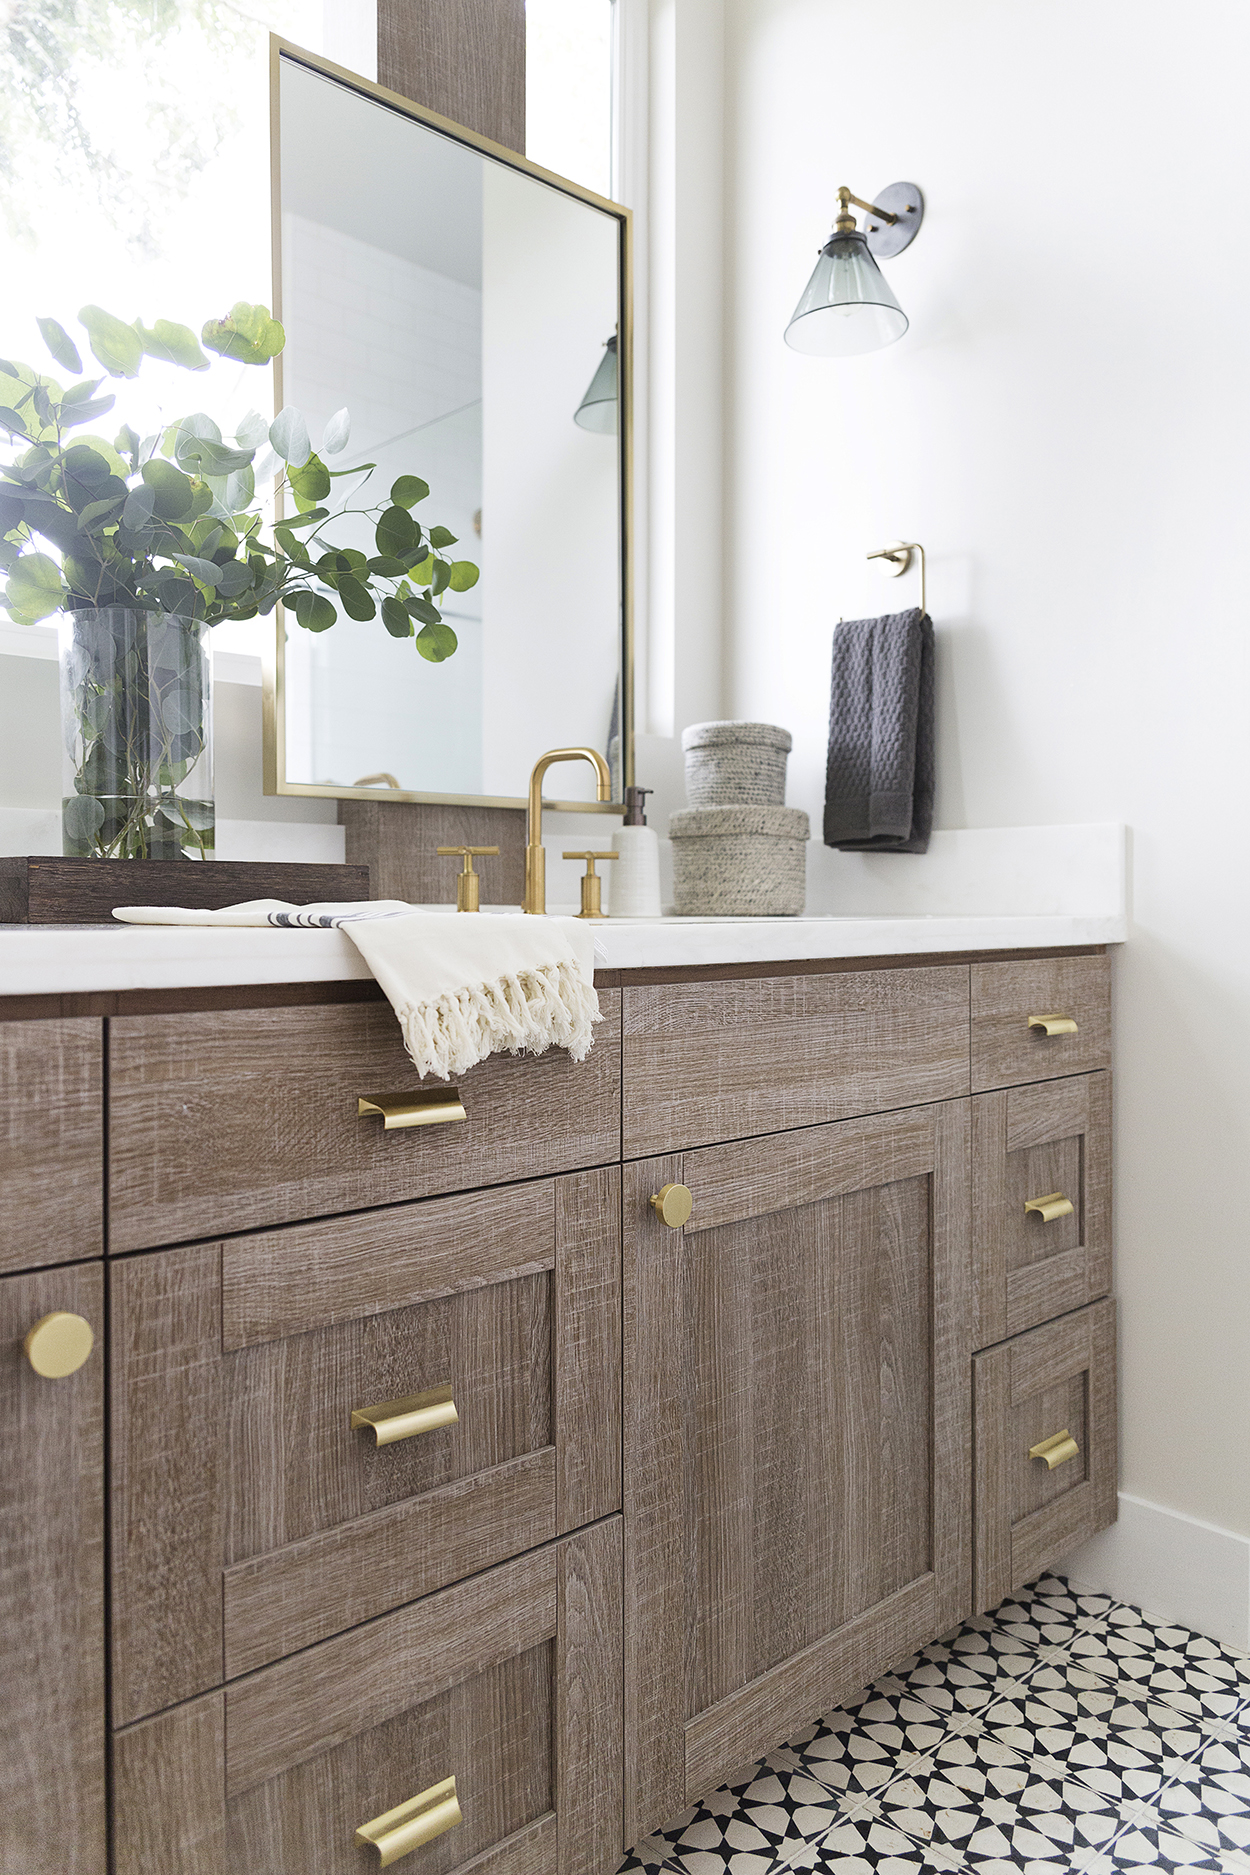 The cabinets are actually a veneer and I get asked all the time what stain it is we used to get such a weathered look that looks somewhat clean as well and I think people are disappointed to learn that this is all veneer! We love them though and it saved ourselves a lot of money, otherwise we would have had to pay a pretty penny for stain-grade custom cabinetry like this.
  The faucets are Kohler Purist line, and all the towel bars and other accessories are from Delta. The Purist accessories that went along with the line were outrageously expensive and I actually quite like that the Delta accessories are more of a bronze finish than gold, and don’t match exactly. The mirrors are from West Elm and knobs are from Schoolhouse Electric.
  So you’re just gonna see this side of Taylor’s room, because the other side of the room looks like a typical tween’s room; cluttered and messy and just full of stuff. She has a desk, a bookcase and bean bag chair, and just tons of tchotchkes and *stuff*. It is what it is. 🙂
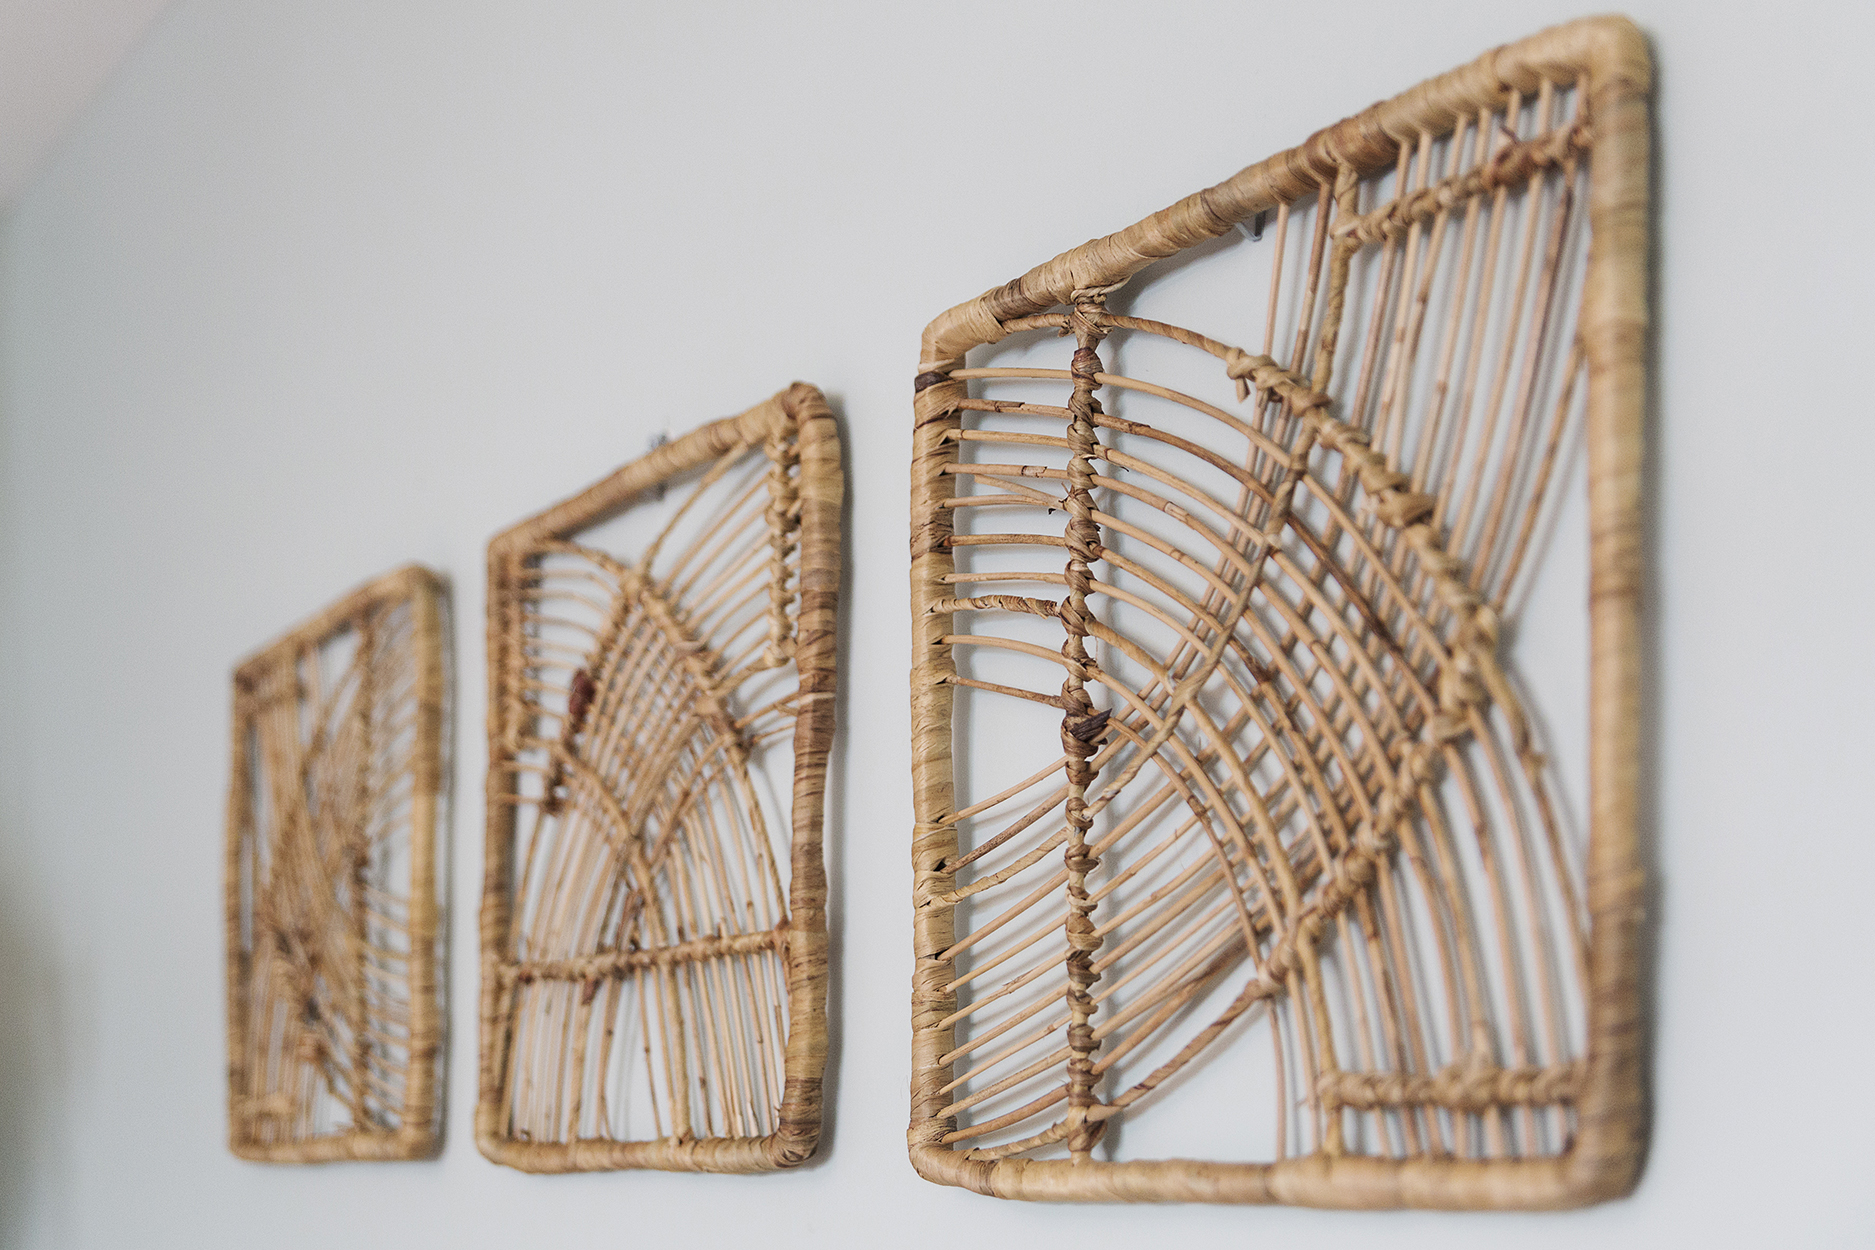 This cute plant hanger is from PB Teen and I don’t think they carry it anymore, but we love it and wish I had one for my office too. I’m really digging hanging plants and love that they’ve made a resurgence in recent years. Bring back the macrame plant hangers! They will always remind me of my childhood and grandma.
 So Taylor’s bathroom, which also serves as the guest bath because it’s in the hallway, is the only room I have a couple of regrets on. We chose a off white/light gray 10″ hexagon tile with off white grout, but we made the grout lines too large, and so the floor always looks dirty. So dirty that the photographer didn’t even photograph it, which is a shame because the tile itself is really cool. Oh well. We are contemplating either digging out the grout and regrouting with darker grout, or seeing what it takes to paint it. It drives me crazy. But in a whole house, if that’s the only mistake we made, I count it as a pretty big victory. There could be worse things to fret about, that’s for sure.
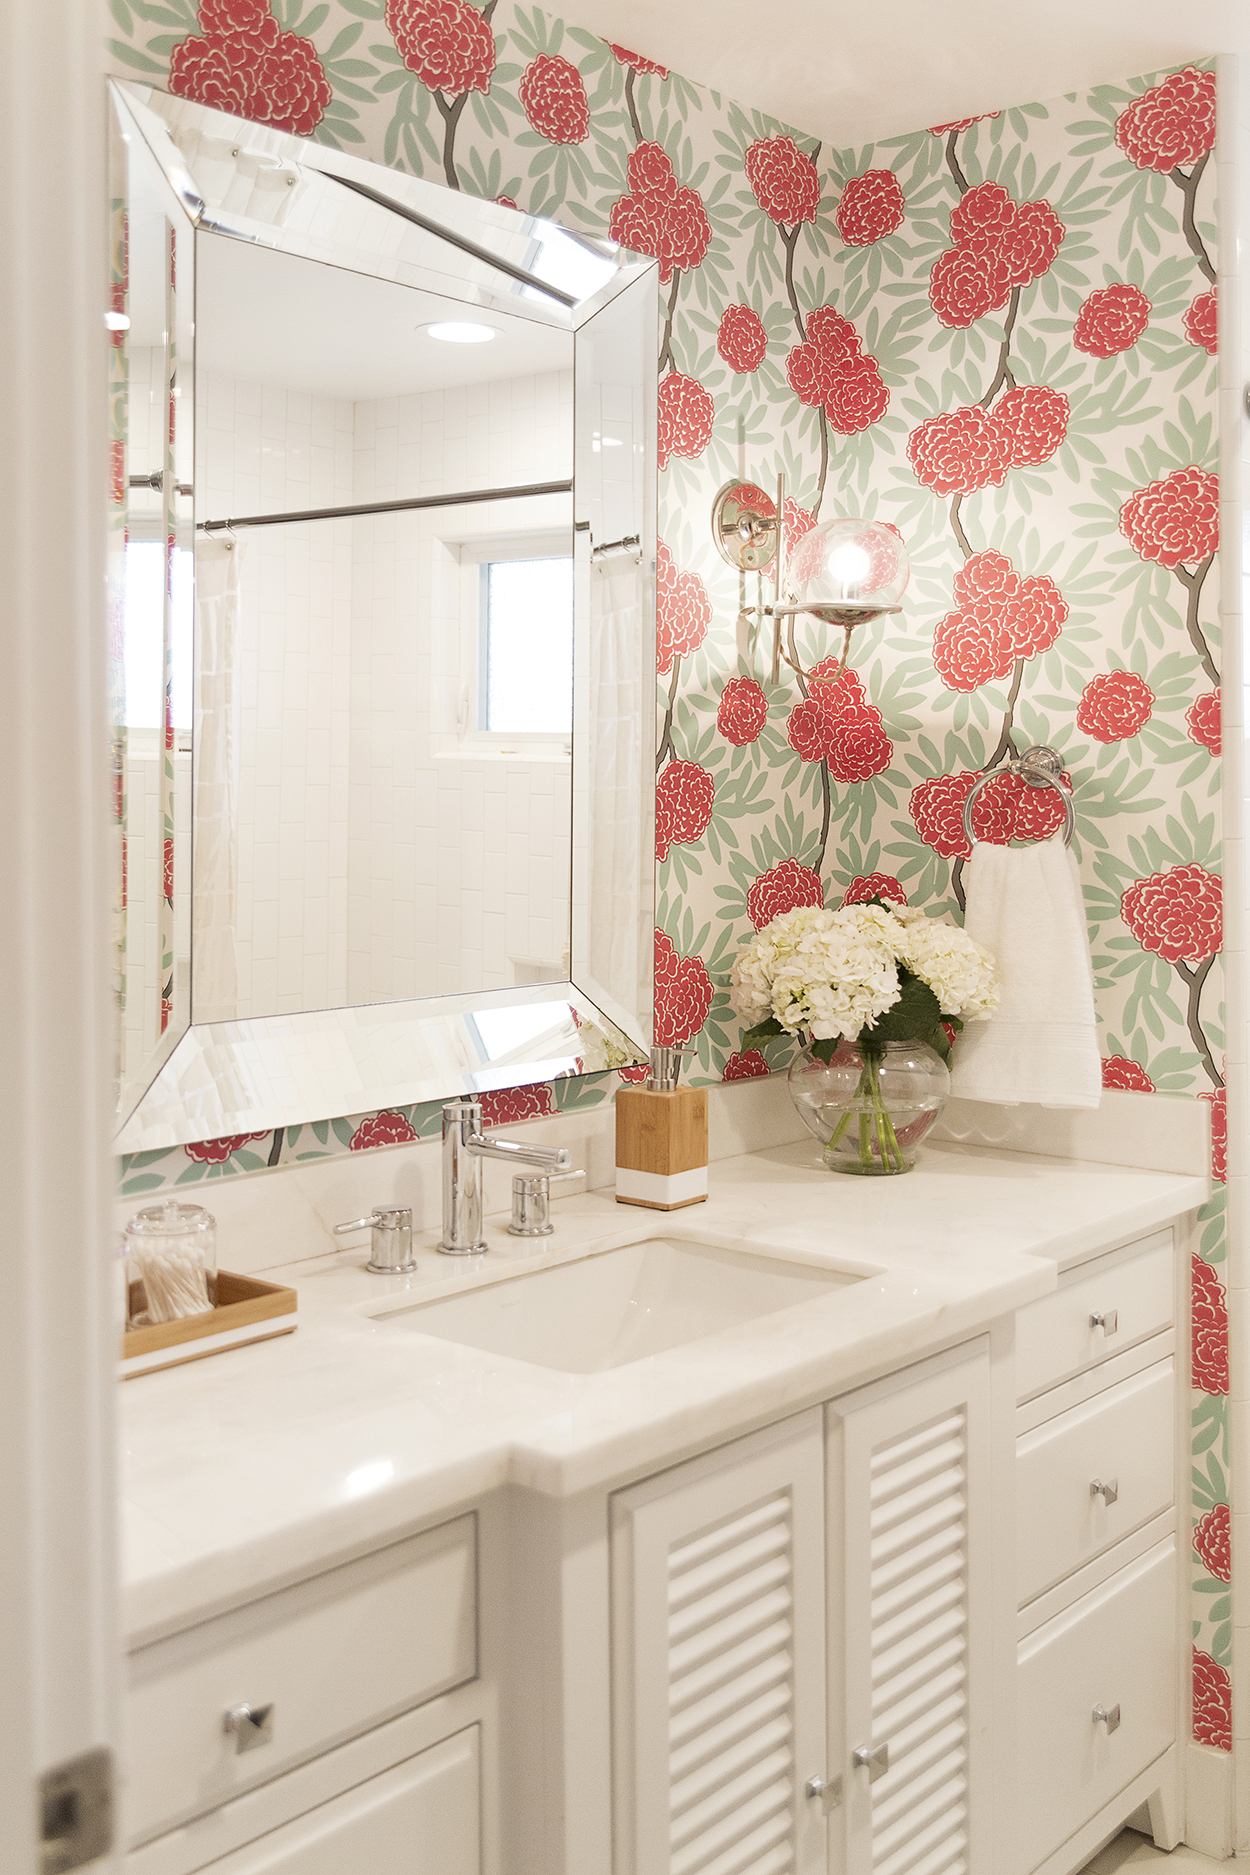 And so that’s our house! When the office and boys room is complete, I’ll share those pictures, and then maybe if I have the energy to look through all my old photos, I’ll share some before and afters, because the house did experience quite the transformation! And then I’ll be done talking about our house 😉 I don’t know how design bloggers do it, talking it about houses all day haha!
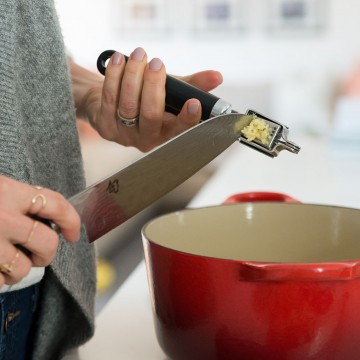
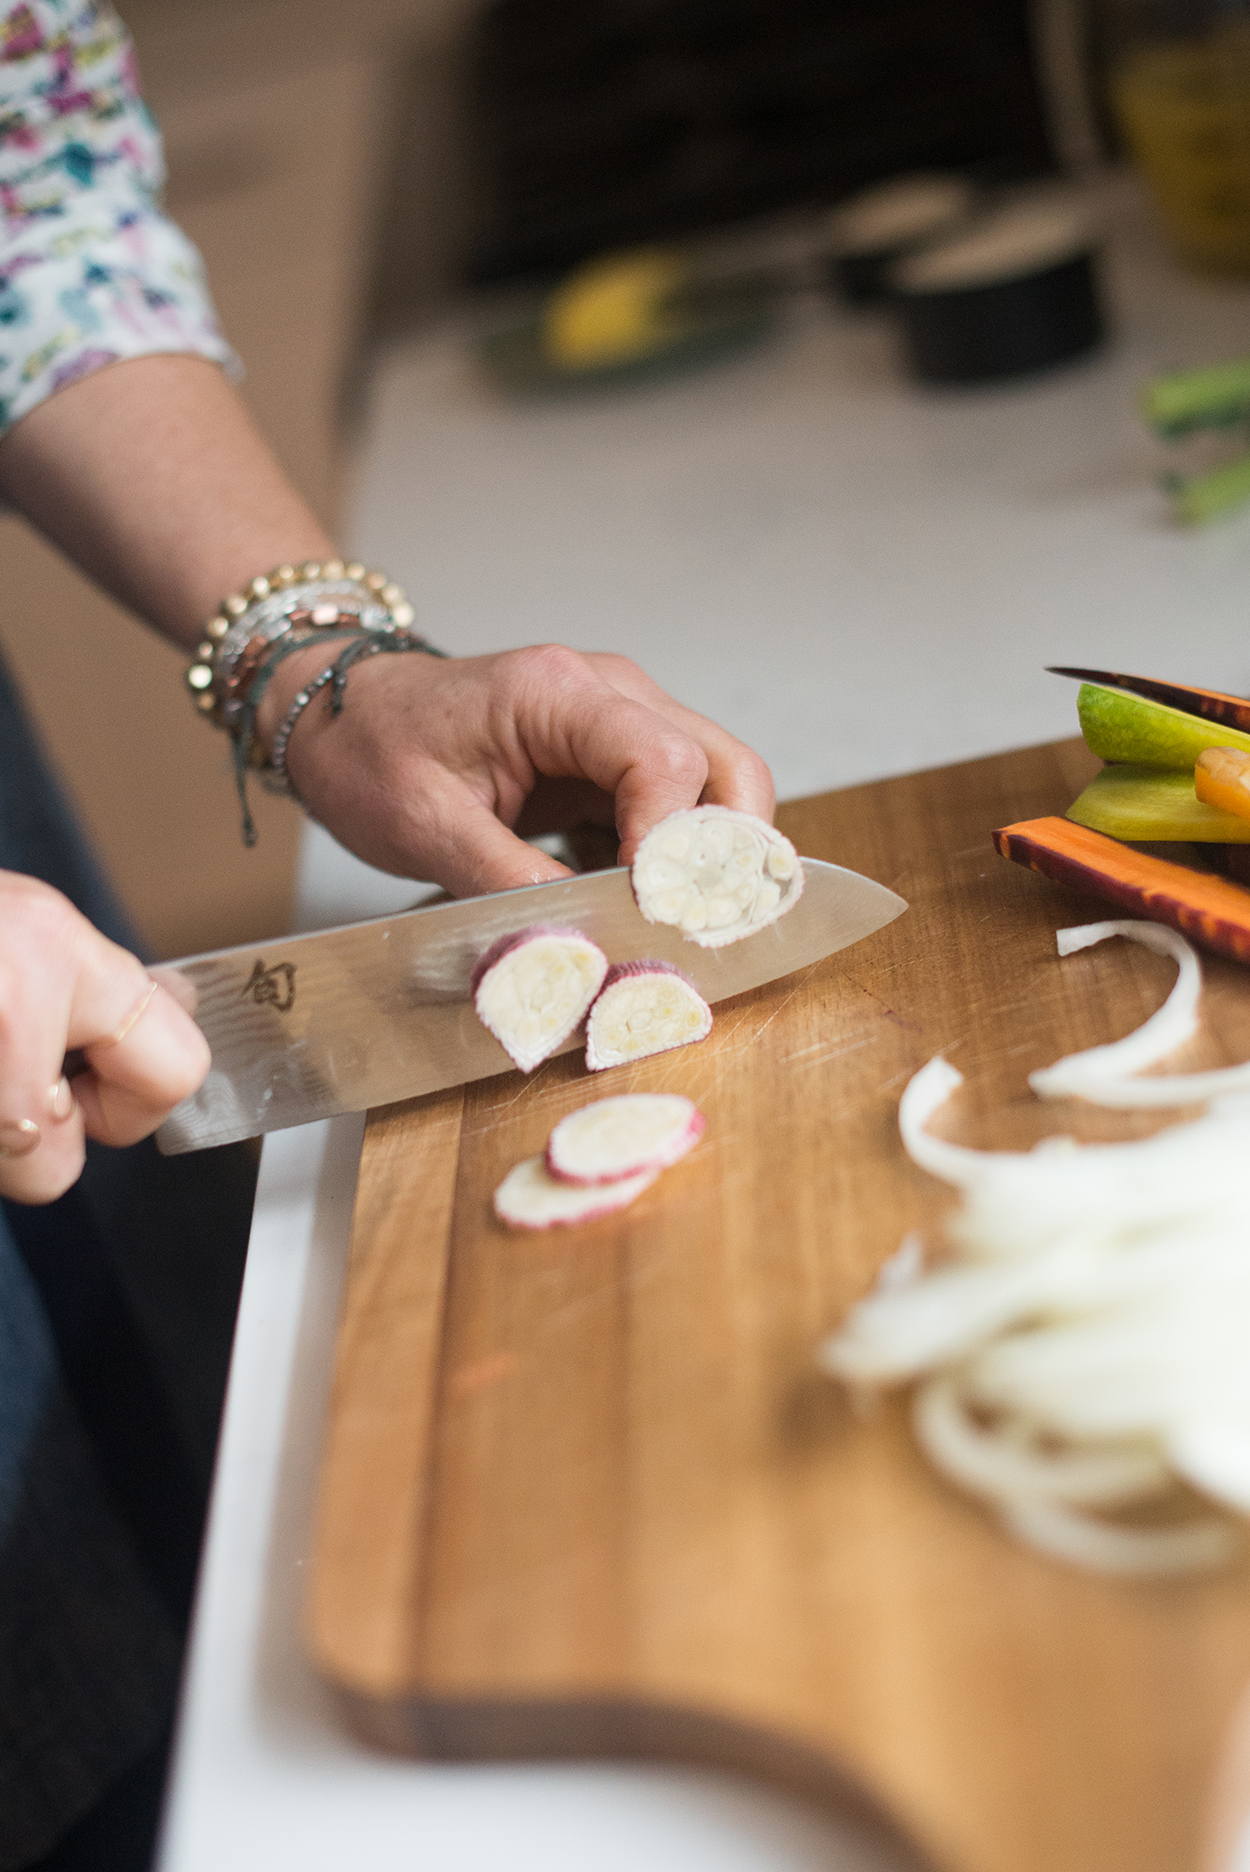
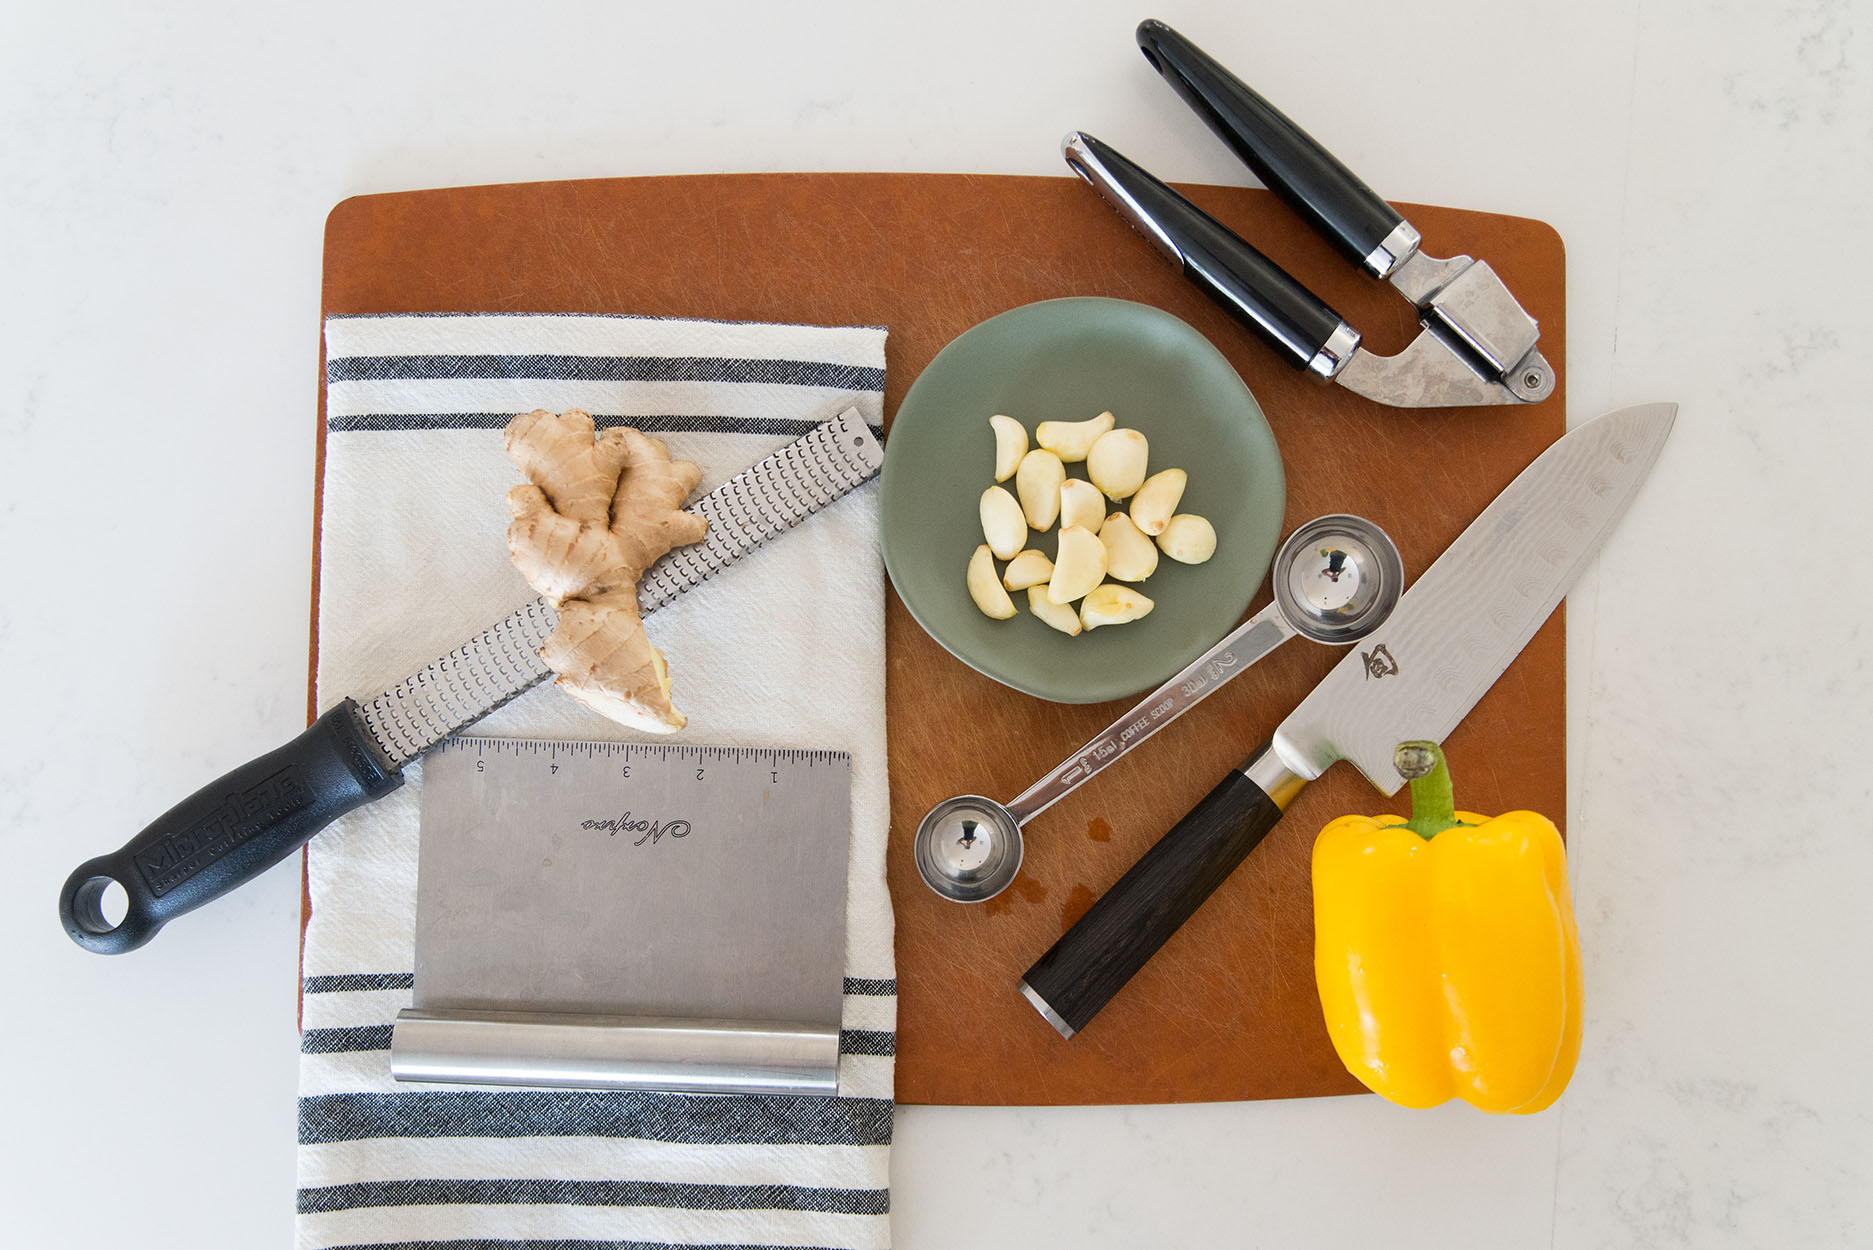 The first thing we need to talk about is how important it is to have a great knife. For all the butcher blocks full of knives my mother-in-law has, every single one of her knives was dull and lousy. Some held a lot of sentimental value (one carving knife belonged to her dad, an avid cook famous for her roast chicken), but most were just in need of a good sharpening and maybe a couple should have just been tossed. All this to say, I used the one knife I brought with me and never found a need to use anything else.
  I use a
 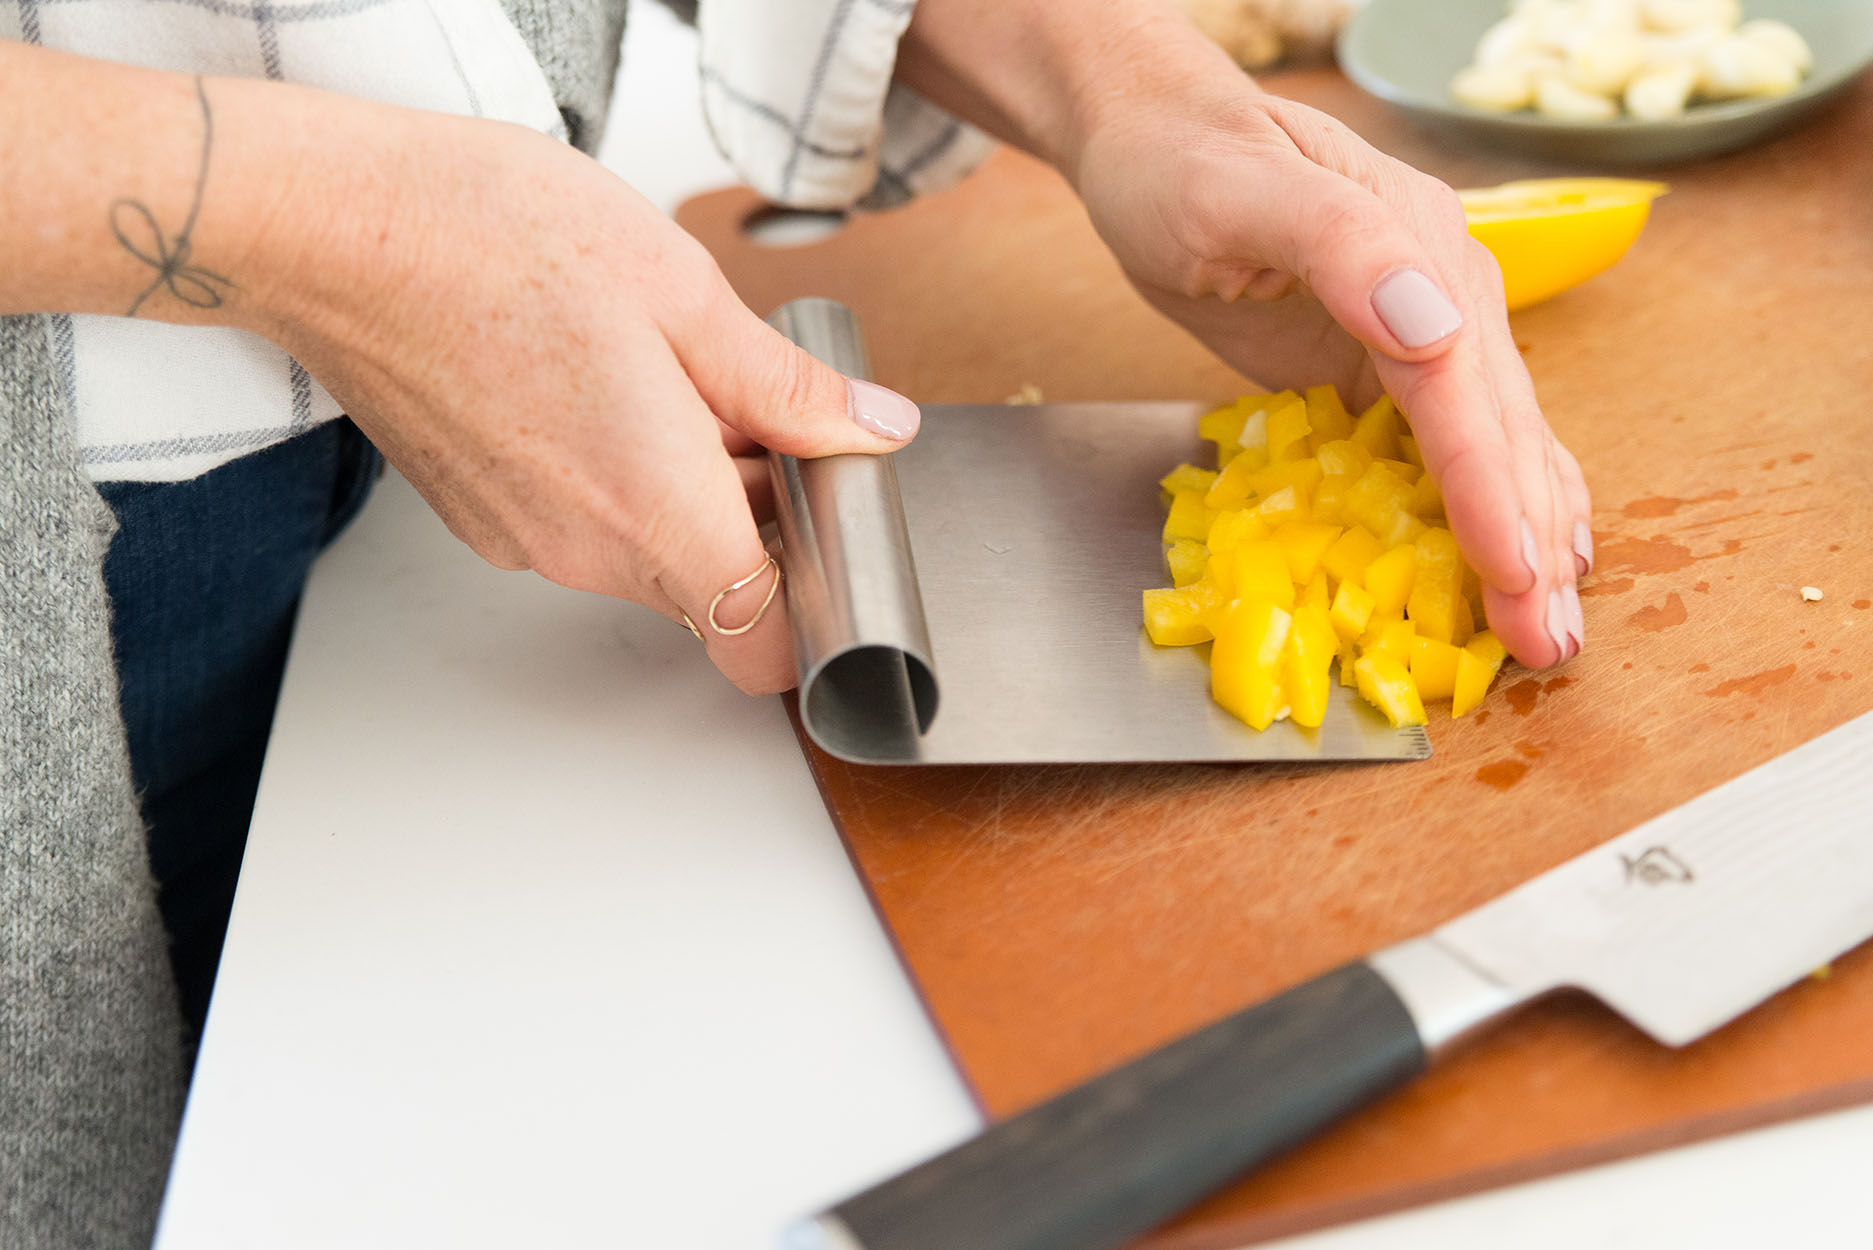 Next up is this little flat scraper thingy. I believe the technical term for this gadget is a
 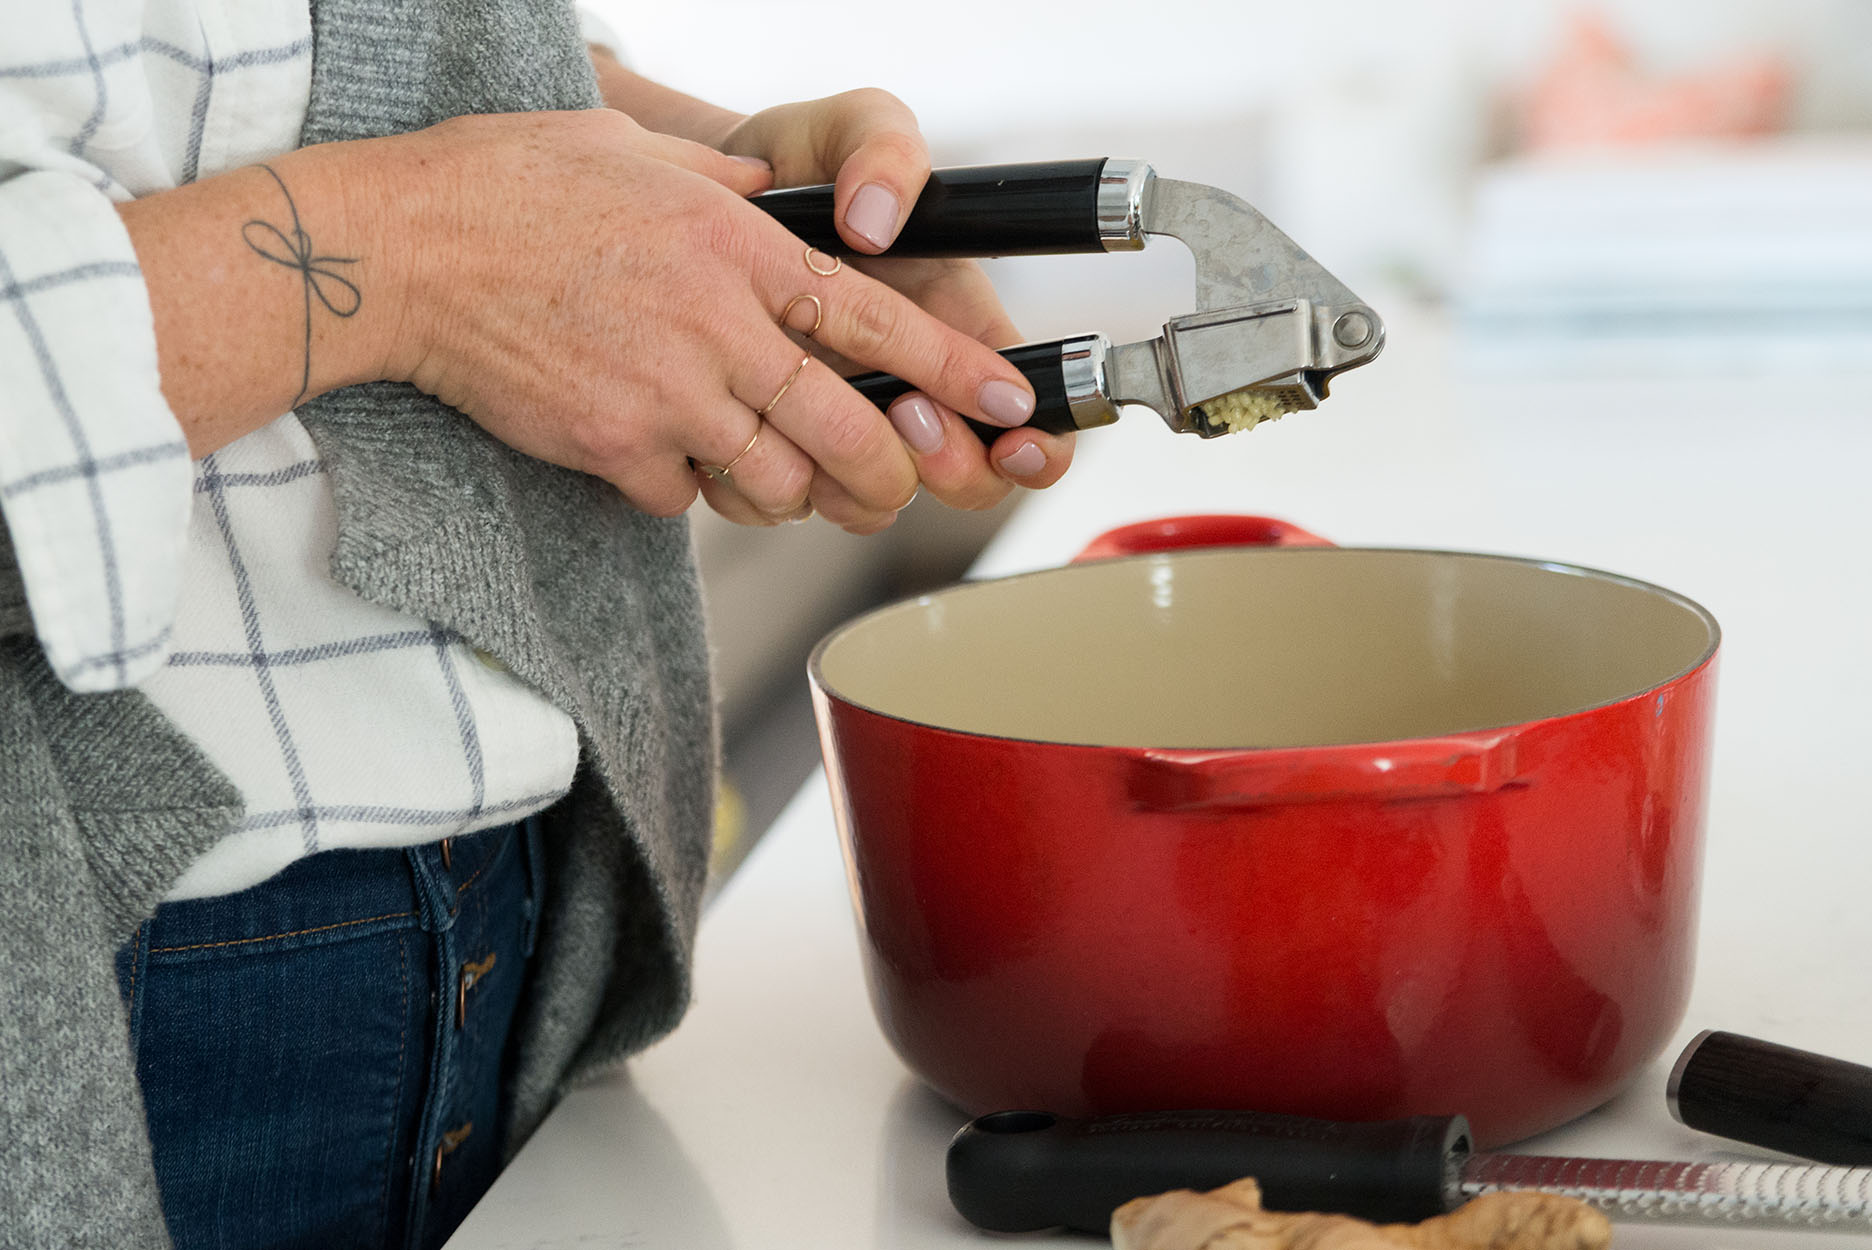 Nothing truly original with the next two gadgets on my list; a
 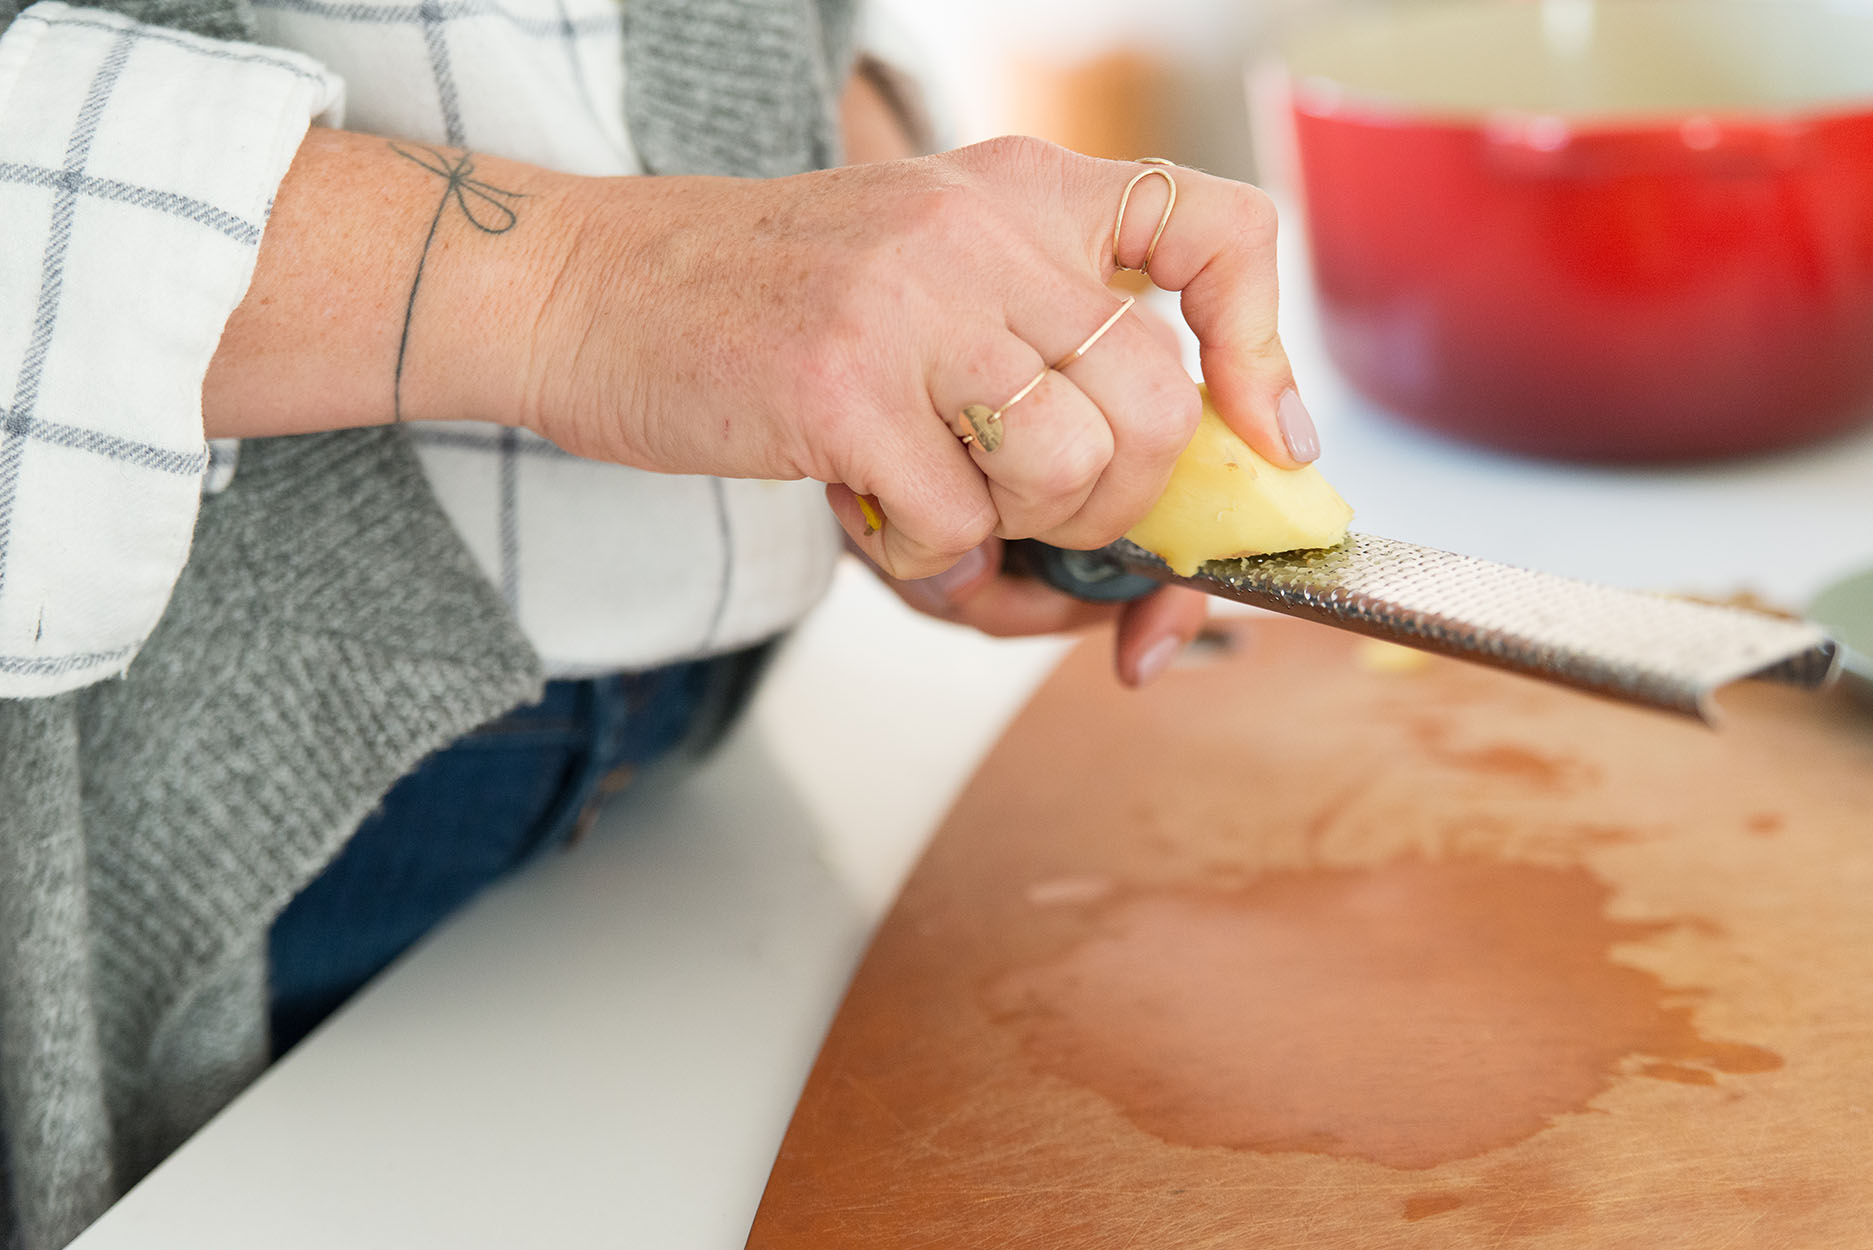 Yes, with a press I do notice that I lose a bit more of my garlic than if I mince it myself, but what it lacks in conservation, it certainly makes up for in efficiency and uniformity. And I can’t even imagine how zesting was even possible before the invention of a Microplane. What did people do in the old days, use a rough stone or God forbid, a cheese grater?!? I know I’m being silly, but if you can’t imagine the need for a Microplane in your kitchen, you’re the one being silly, not me 😉
  Last up on my list is this
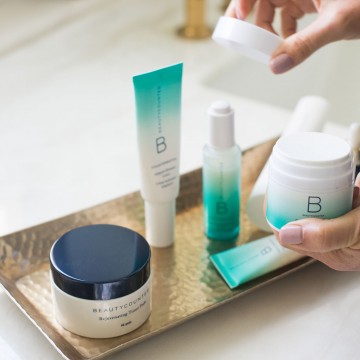
 In early Fall 2017, Beautycounter released a new skincare line called
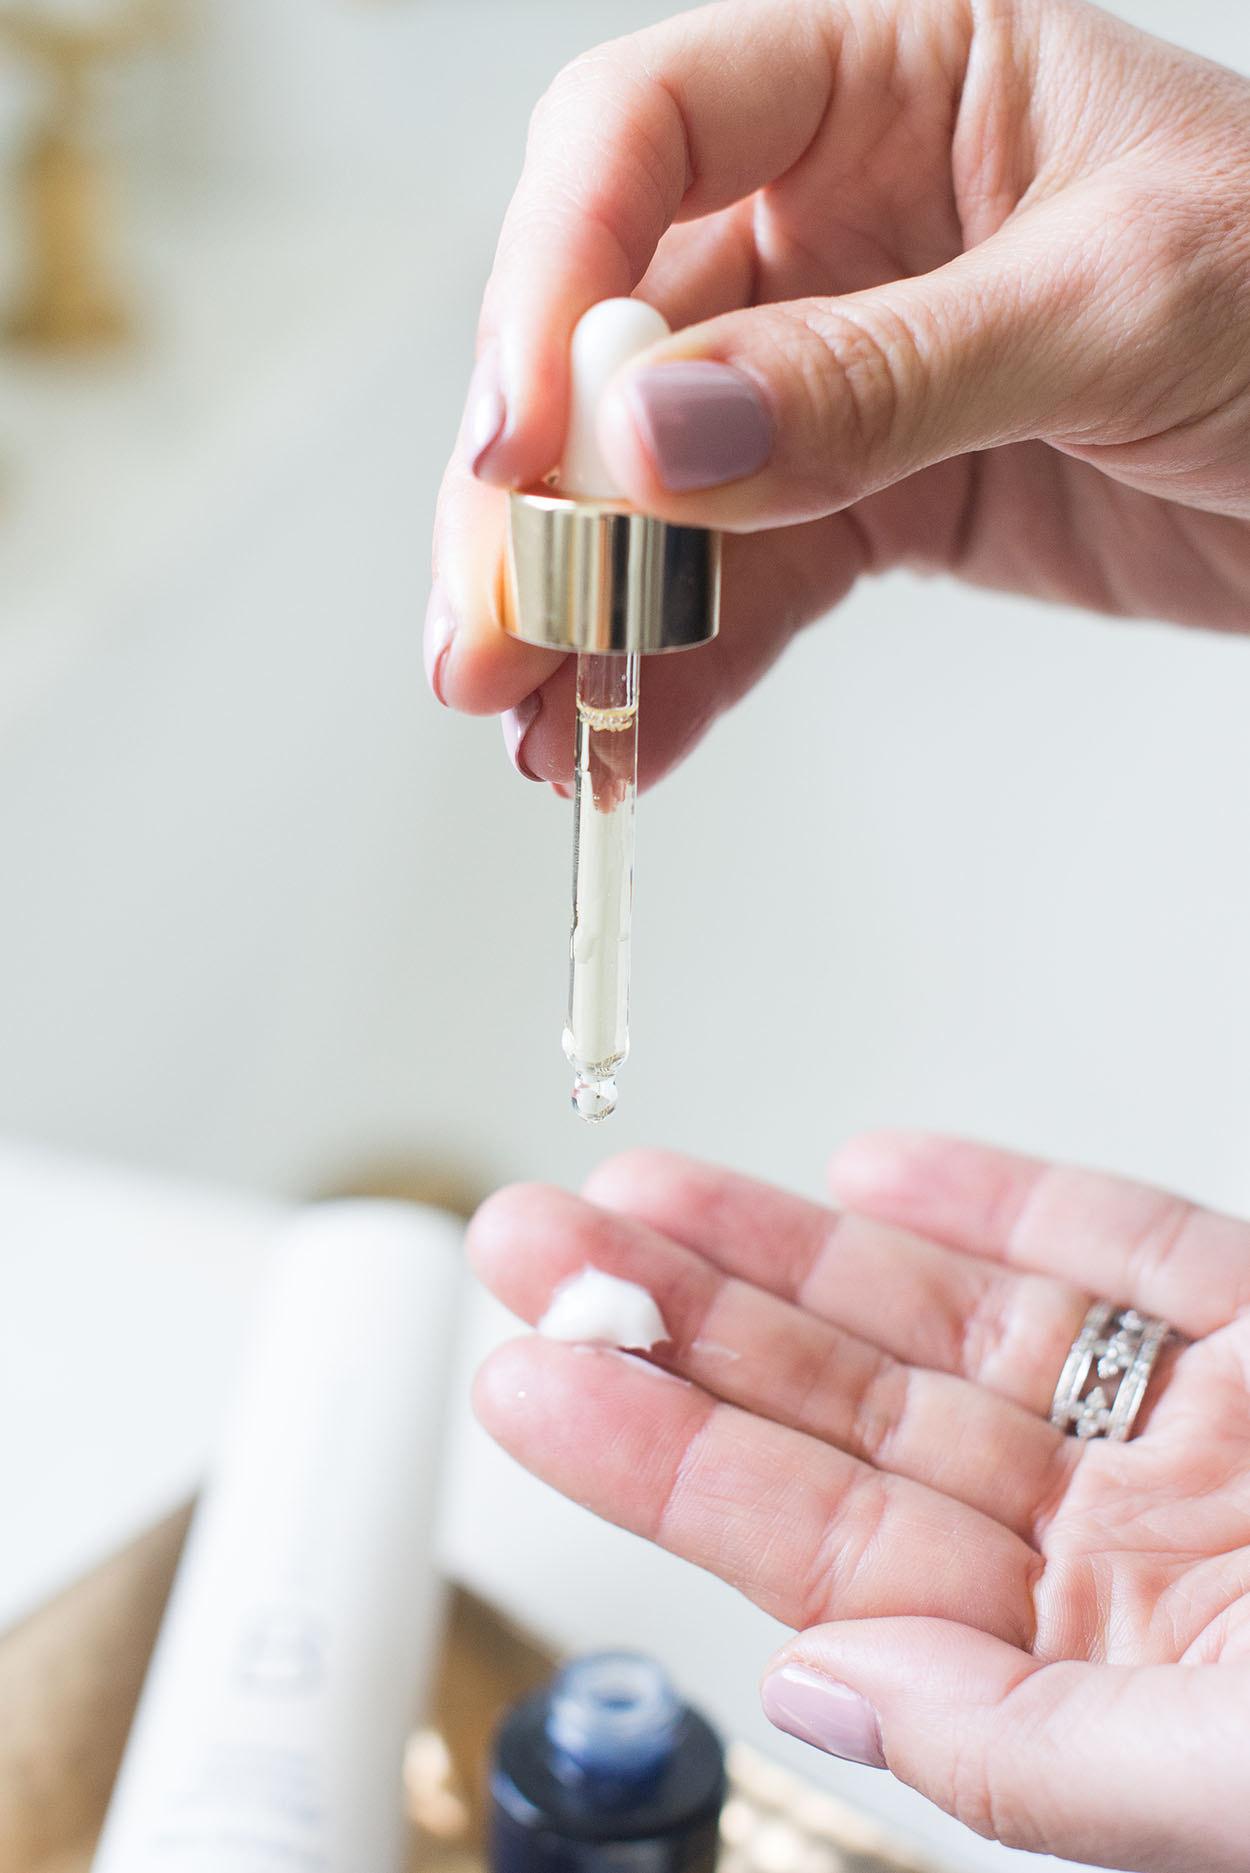
  And a note about the hydrating oil. The Countermatch lotion is plenty hydrating for my skin on its own, but during the winter months I do like my skin to feel extra moisturized. Once summer hits though, I won’t really have the need for the oil unless I’m using it after my skin has spent too much time in the sun. I used to use the
  At night, I wash my face with
 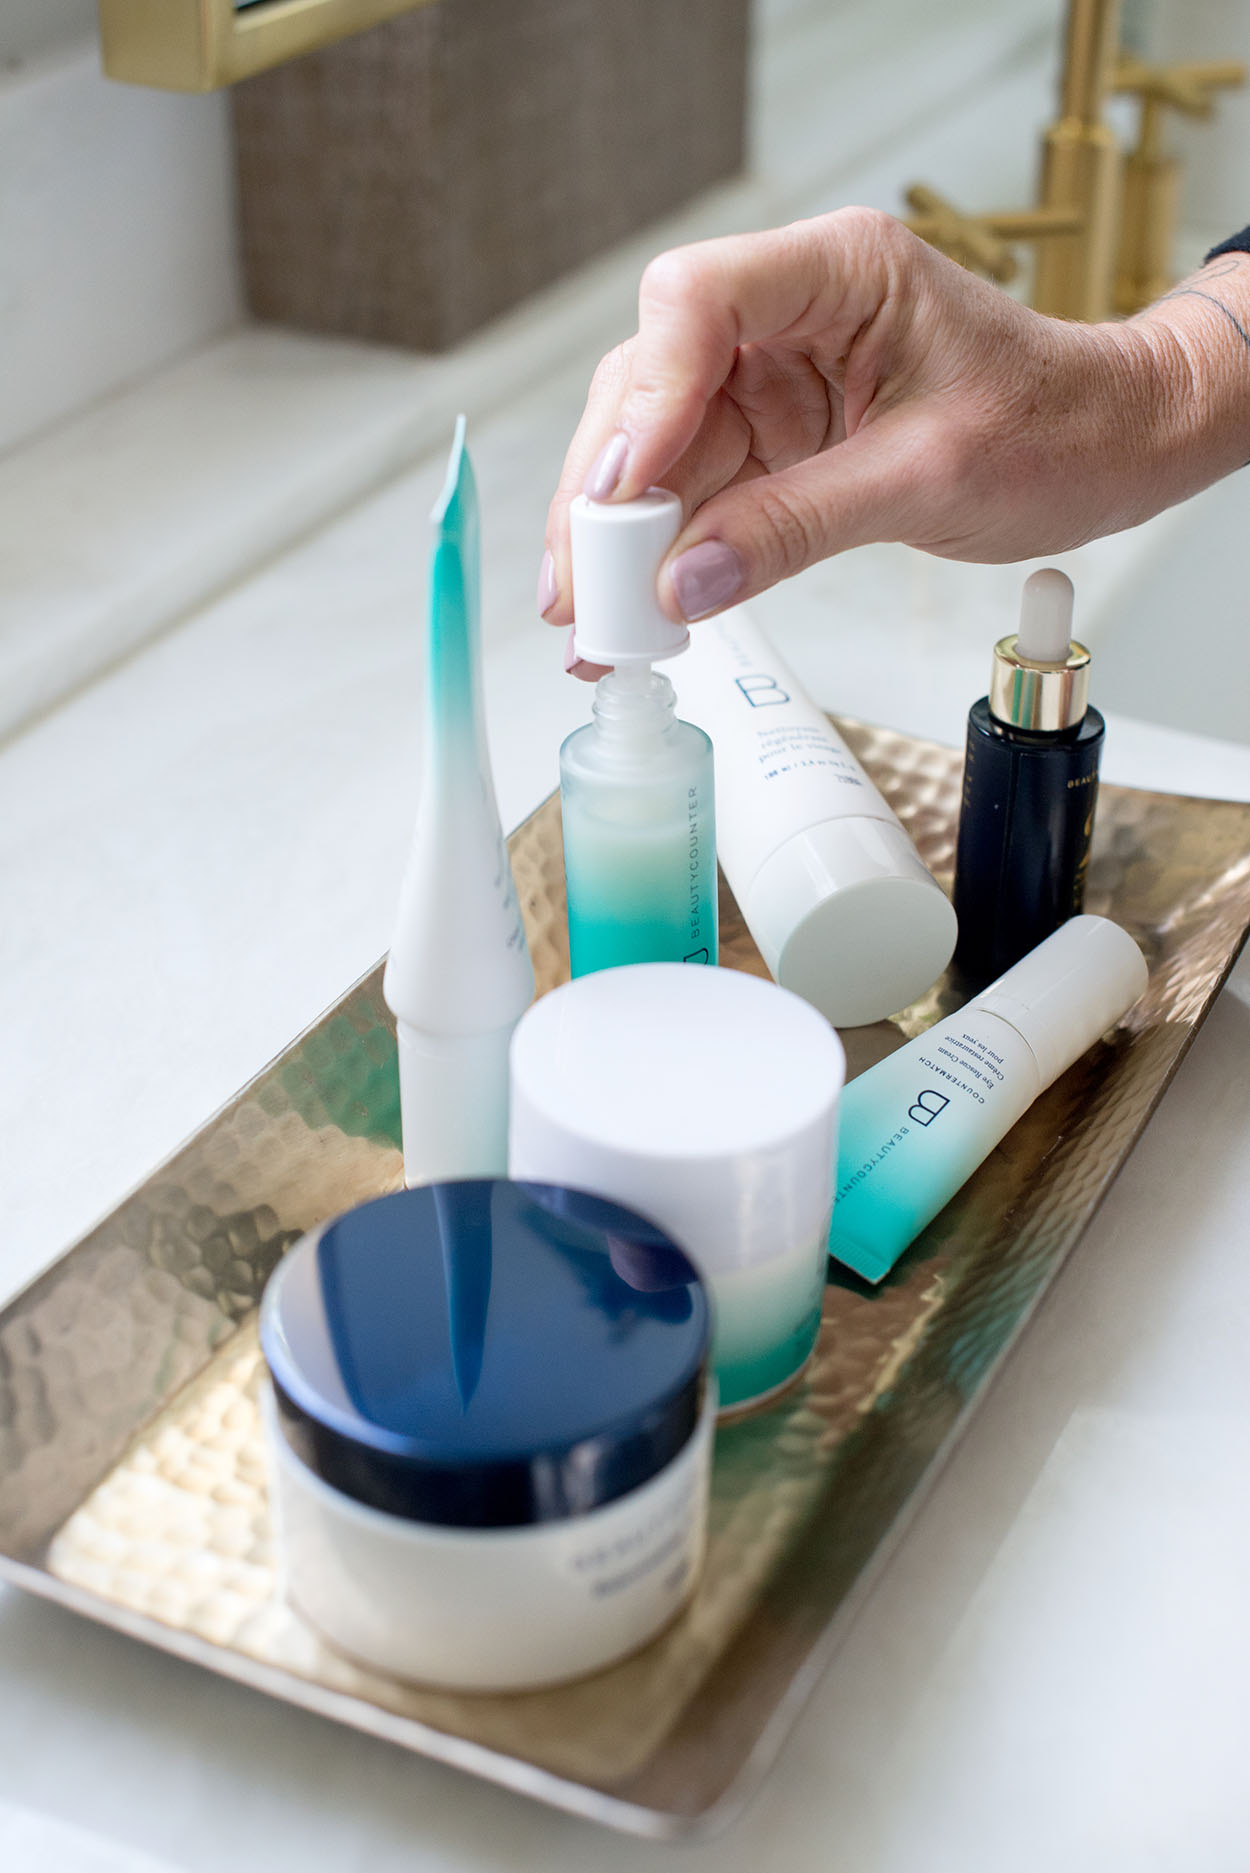 I then apply a small amount of the
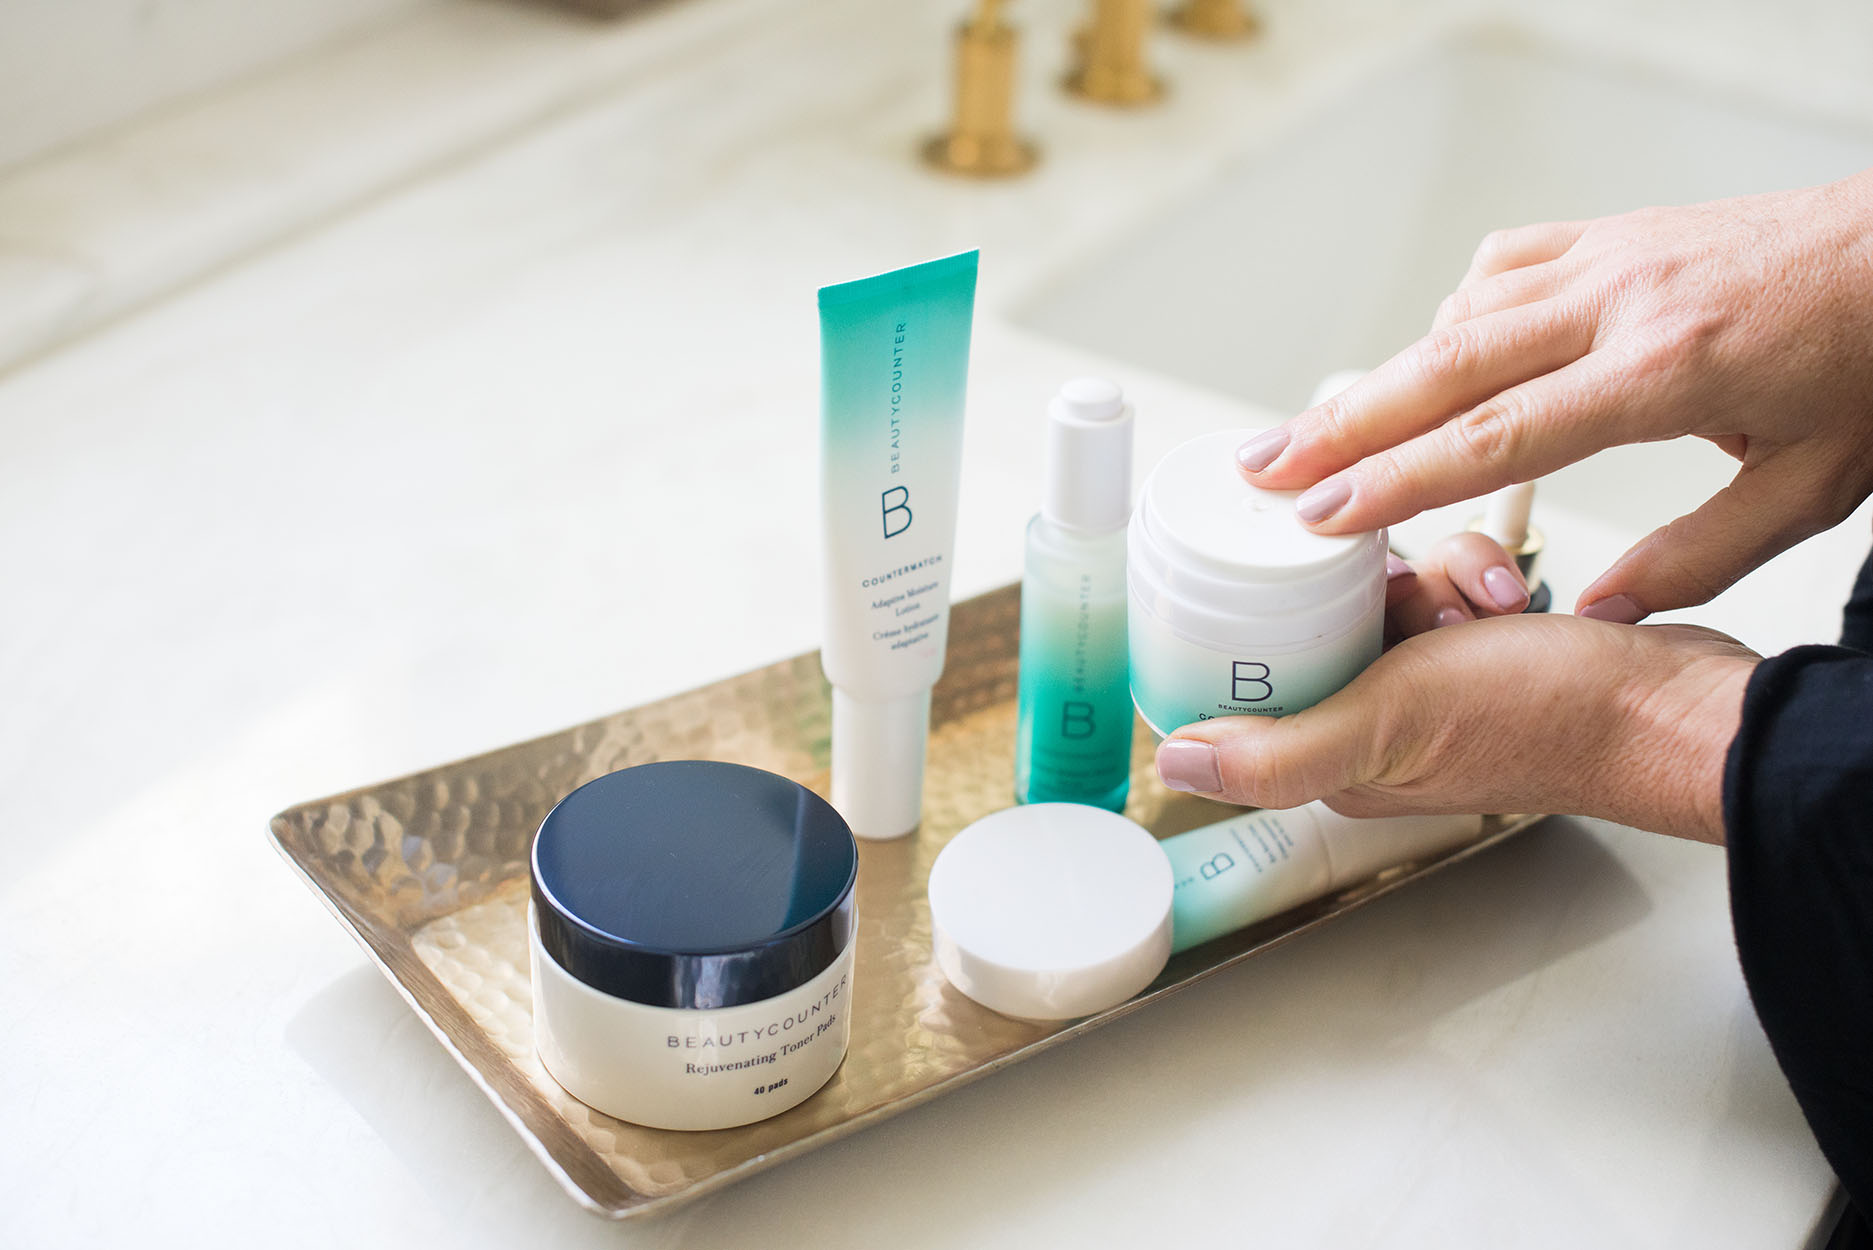
 I top it off with a small amount of
  I definitely keep my skincare routine a lot more simple in the morning when I’m rushed, and spend a bit more time at night. The secret to a successful nighttime routine I have found, is to wash and apply my potions and lotions while the kids are getting ready for bed, or do it immediately after. If I start getting too relaxed on the couch, I’ll get way too lazy and will most likely go to bed without having washed my face.
  As I said, I have very dry skin; always have, and so this routine works beautifully for me.

 When Taylor, my first born, was a baby, I fed her so many purees from the squash family that her nose turned orange. It was one of those things that you didn’t really notice much, until one day we were looking at digital photos we had taken of her and we were like “holy smokes, our baby’s nose is as orange as an orange!” Nervous first time parents that we were, we of course rushed her into the pediatrician’s office only to find out that she would be just fine, and to perhaps incorporate a few more greens into her regular diet of sweet potatoes, butternut squash, carrots and acorn squash.
 What’s especially funny about this is that after spending the first couple of years of her life as squashes biggest fan, she now despises all varieties & forms of it. She hates the texture, no matter how they’re cooked, and for having a rabid sweet tooth, finds them entirely too sweet. The boys aren’t huge fans either, which means that Art and I have the task each time I make roasted root veggies & squashes, of eating the whole batch by ourselves. Not that hard of a job actually.
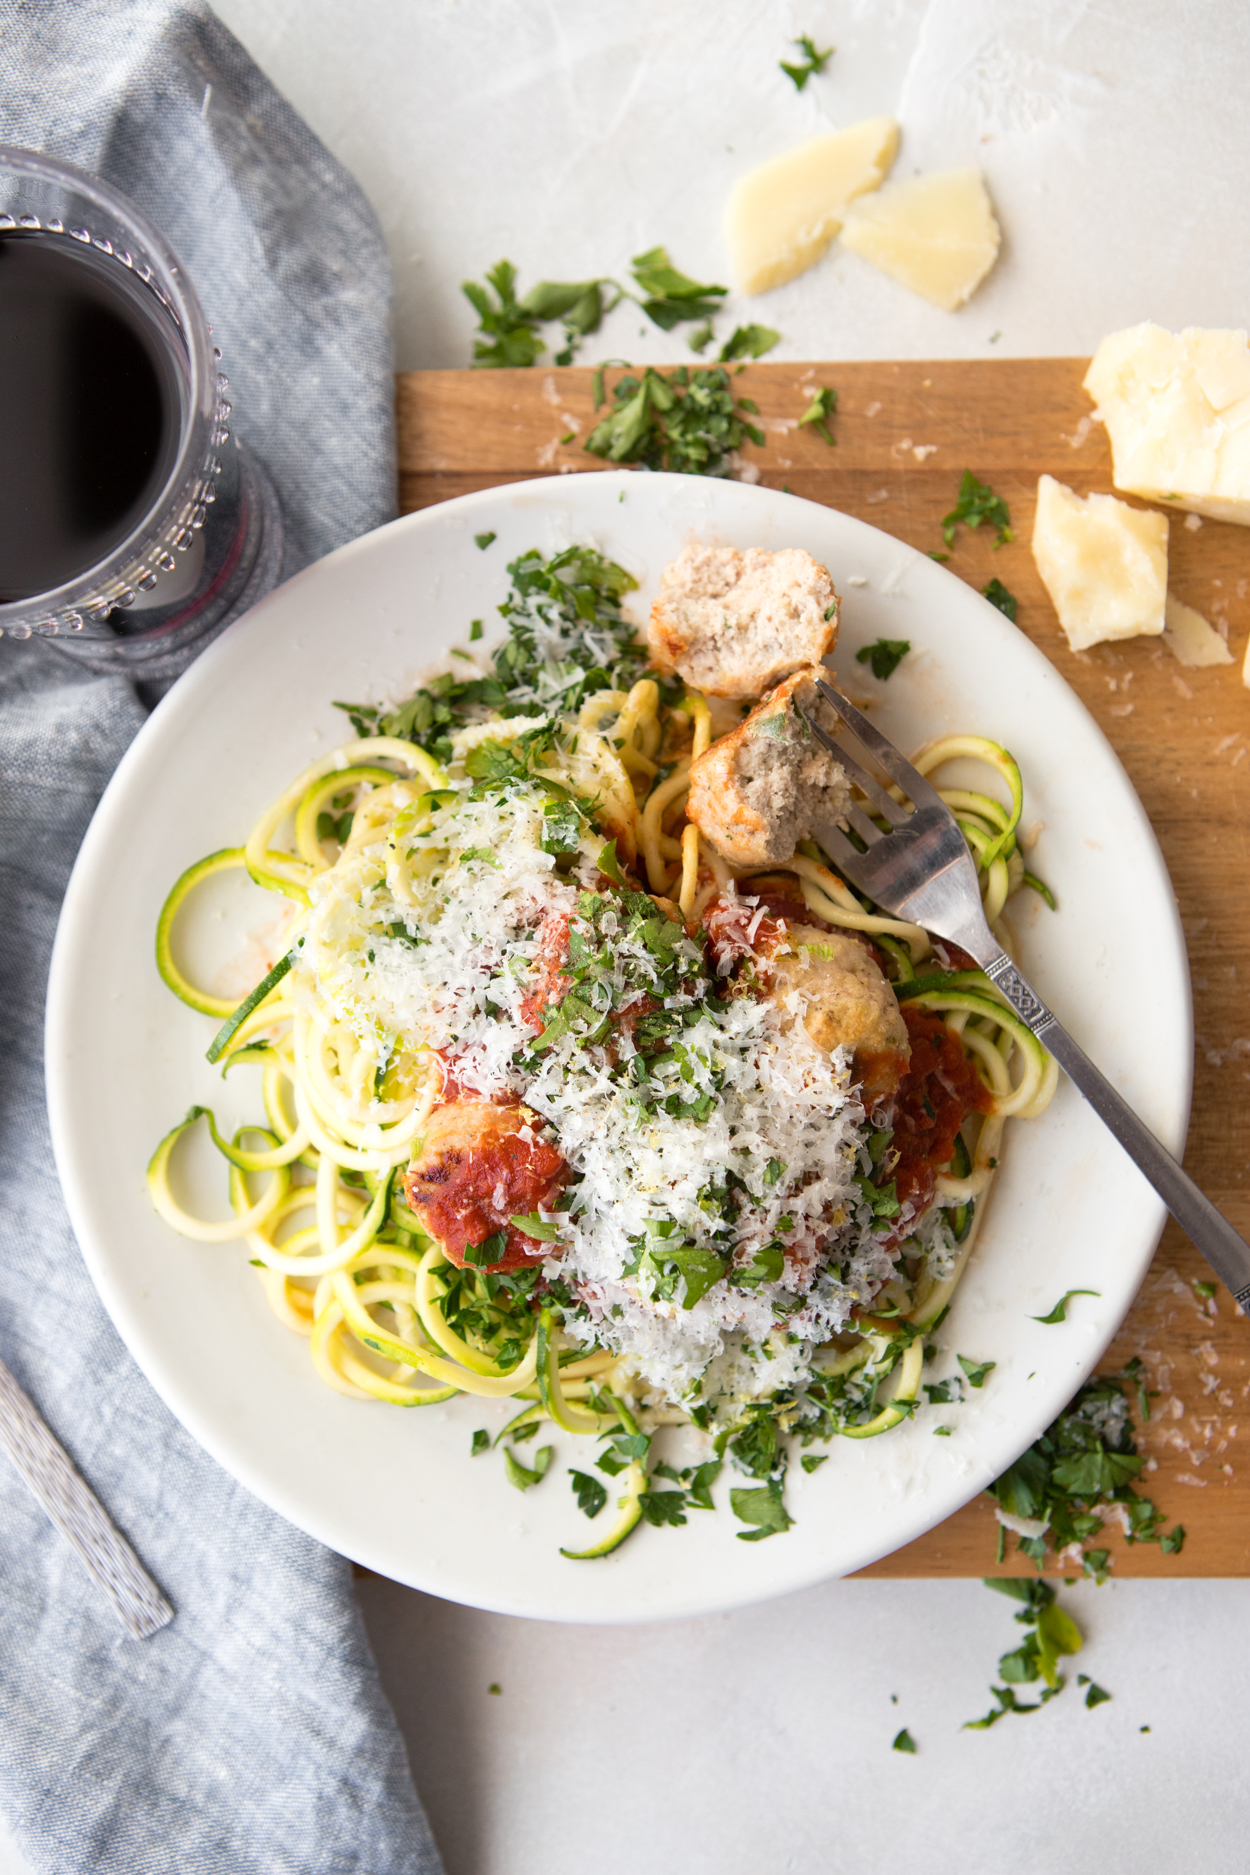
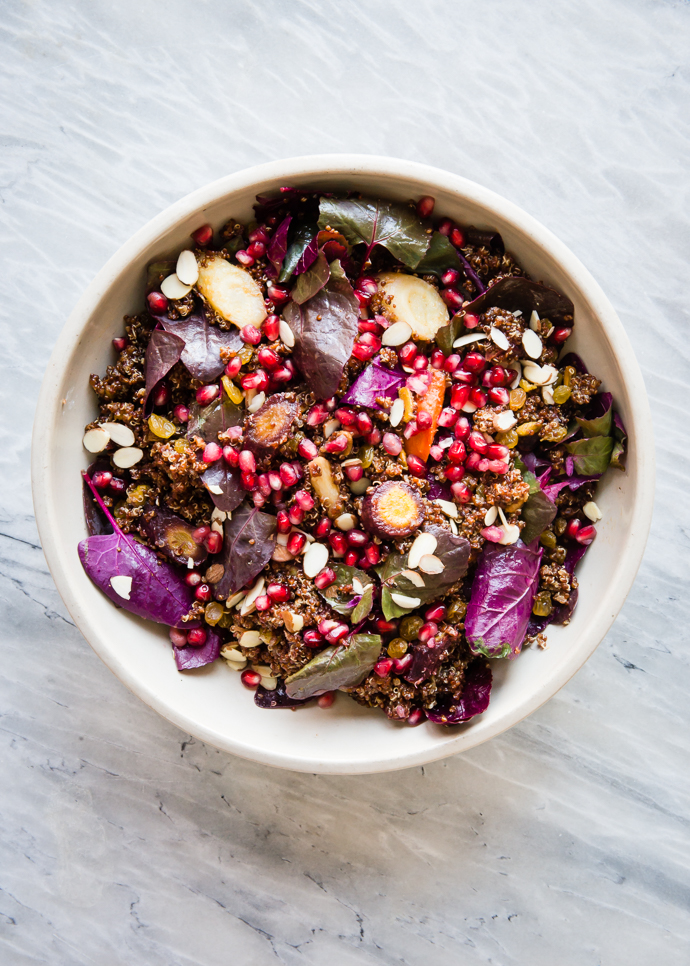
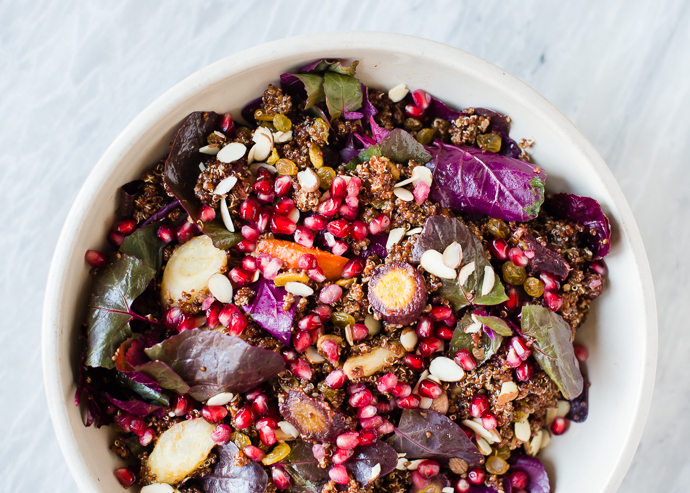
  Besides of course eating them as a warm side dish, I use them as a base for protein bowls, mash them up and roll them in meatballs for a perfect balanced snack containing protein, fat and carbs, and I definitely toss them cold into salads. They also make for a beautiful dish to set out at any holiday gatherings. Impressive as well as easy to make and hard to mess up, they serve as the perfect tasty dish to make when you can’t think of anything else to make.
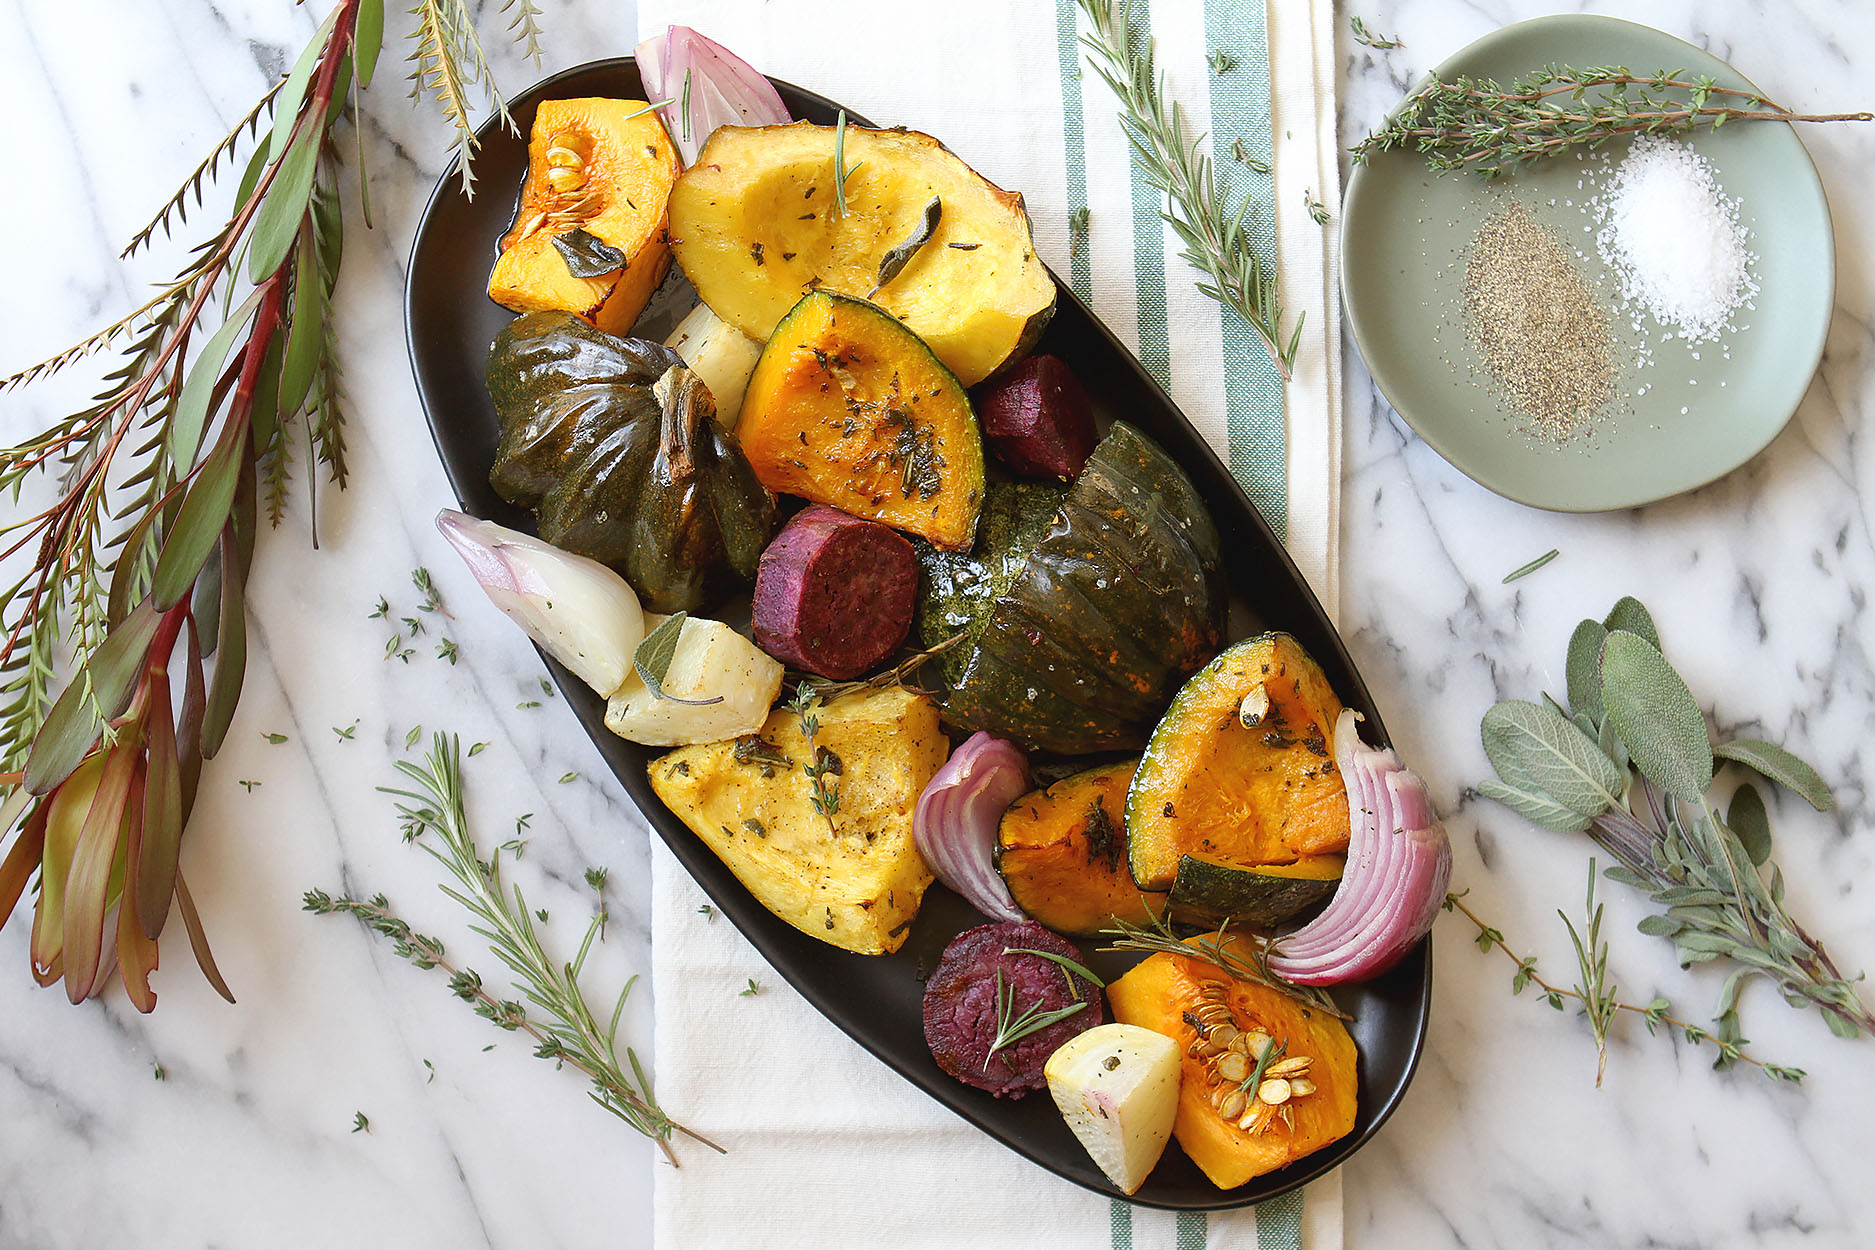 I don’t typically get too fussy about how I roast them, nor do I really measure out ingredients; generally choosing to just toss them in olive oil, an amount that I only ever eyeball, and throw in a few dashes of salt and pepper and maybe some herbs. Sometimes I roast them low and slow, other times high and fast.
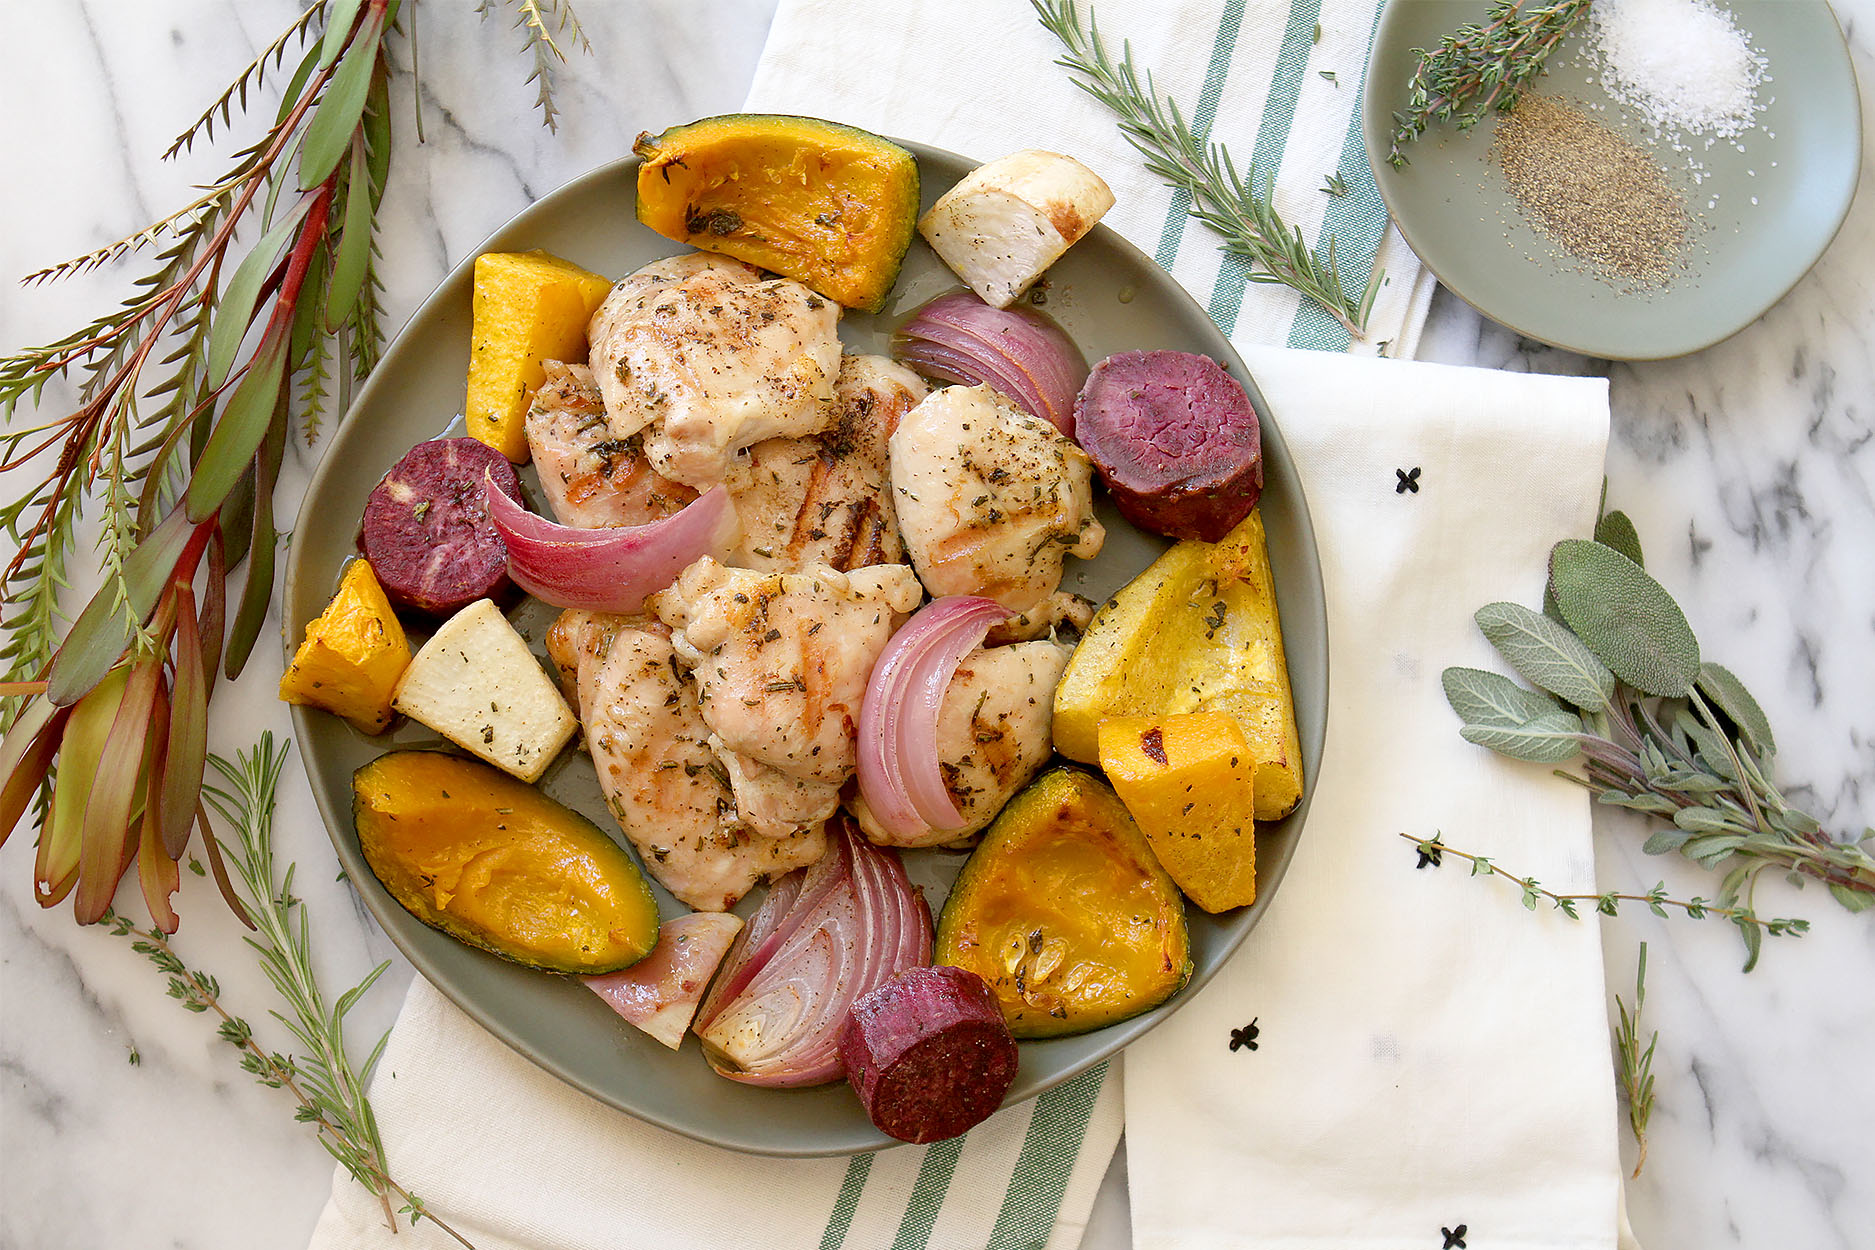 And while you are putting a big beautiful sheet of veggies to roast, make sure to grab some chicken thighs or breasts, and cook up a batch as well, using the same butter/oil/herb blend as you used for the veggies. It’s very easy to make the veggies and chicken on one sheet, just be aware that you’ll want to remove them sooner than your veggies, or, cook them at a lower temp by themselves. I like cooking my thighs at 400 degrees for about 20 minutes (depending on your oven), so if you do a 1 sheet meal, the veggies will definitely take longer cook at this temp, so simply remove them onto a separate plate, and continue cooking the veggies for another 15 minutes or so.
 I thought the seeds in the butternut squash looked especially pretty in the photo, but of course you can just scrape them all out before hand or afterwards too. You may also notice that the veggies are varying in size; some are big chunks of the squash, while other are more like 1 inch cubes. You may notice too that the bigger pieces aren’t as thick as the chunks, so even though they’re larger, volume wise they are about the same. Does that make sense? So in other words, you want all the pieces to be pretty similar not necessarily in size, but in thickness, so they cook evenly.

 We’re winding down the first monthly themed series on slow cooker meals, and I’m particularly excited to share this one with you, because it features seafood. One doesn’t always associate slow cookers with fish and other seafood, but I’ve had great success with cooking up crockpot meals on the fly, using fish, especially since it cooks so dang fast. Because after all, a great slow cooker recipe is only as good as your memory; if you forget to thaw your meat the night before, or can’t get it together in the morning to put everything in the slow cooker before you leave, most of the time you have to come up with Plan B for dinner. Not the case with seafood, as many dishes are ready in 2 hours or under.
  I especially like this dish because it uses cod, a flaky light fish which stand up firm to steaming, baking an stewing. I love cod because it’s consistently the most affordable wild-caught fish on the market, however truth be told, I don’t *love* it on its own. Breaded and baked or fried, or in a dish like this is fantastic! But just steamed or baked plain, it always has a somewhat metallic taste, to me anyhow. Anyone else? If you’ve never had cod, I’m probably not doing a great job selling it, but I promise it’s beautiful when you mix it in with other things haha! Anyhoo…


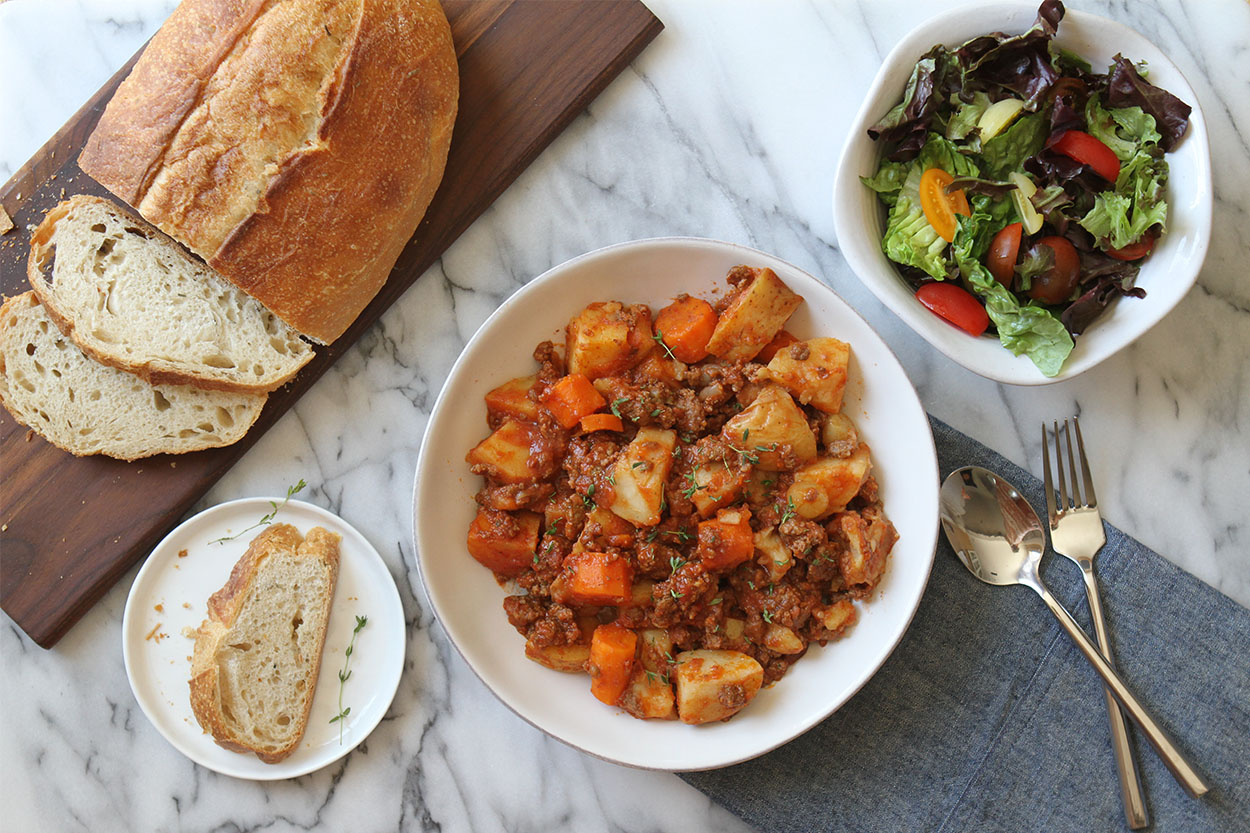 Isn’t that a nice way to put it? I thought so. At this point however, you may be asking yourself what a passage about love and marriage has to do with a budget stew you make in a crockpot, and I’m here to tell you, quite a lot. You see, it’s the fanciful and interesting meals that you enjoy while you’re out to eat on a date or splurging on vacation, or perhaps one you even make at home and spend hours preparing, that really peeks the senses and gets one excited about eating. Those meals are in a sense, the explosion which can make you fall in love with food and the process of eating and cooking, over and over again.
 Which brings me to something else I’d like to talk about; a new series I’ll be launching here. I haven’t yet come up with a name for this series, and don’t know if I ever will to be honest. But basically, I’ll be launching monthly recipe themes here on the blog, to get you interested in cooking and trying new recipes. Well, if I’m being honest, it’s actually to get me interested in cooking and trying new recipes seeing as I’ve been in a rut, and you my loyal readers, get to benefit from my monthly experiments 🙂
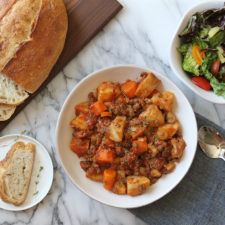

 After we moved back home, we began slowly updating some of the furniture in the living and family room areas. We worked with our friend Shelly of
 Lacking both time and design skills, walls, mantels and tables sat empty for the past year. Certainly not the end of the world, but I definitely wanted to finally have the rooms completed with more personal, warm touches to make it feel homier and reflective of our family. I originally had this vision of only adding in decorative items we nonchalantly picked up on our world travels, but after a year of sitting in empty rooms, I came to the realization that we aren’t world travelers, and probably won’t be for another 15-20 years, so stuff from Target and other retail stores will have to do haha!
 BTW, aside from these family photos on the wall, a lot of the really personal touches that do make a home feel like a home, like bottles of vitamins on the kitchen counter, and kids artwork and other odds and ends, were all taken out for the shoot. Hence, why these photos don’t really reflect the truly “personal” feel of our home on a day-to-day basis.
  This is where Sam comes in, of
  Sam came over one morning and walked the house, asked some questions and left in less than an hour. A week later, she showed up with a truckload of items, set everything up for the photo shoot, and took back the items I wasn’t in love with, of which there were very few. She was like our own designer fairy. Needless to say, I feel very lucky to be able to use her services, but I must also say that all things considered, her services and the items she purchased, were all very reasonable. Everything she used to accessorize with was from either Home Goods, Target, West Elm or World Market.
 The living room in particular, with its 9 foot high ceilings and white walls, was lacking some warmth, so she suggested adding bookshelves to either side of the fireplace, an idea I loved since we hadn’t originally designed in a single place to house books in the entire house. In hindsight we should have probably installed built-ins to either side of the fireplace during the remodel, but since that would have likely cost an additional $10k, probably just as well that we picked up a pair of bookshelves from World Market for under $500.
 Also, in case you are wondering why the fireplace mantel is so tall, new California code dictates the firebox (real fireplaces are now outlawed in California btw, so you can only install gas fireboxes), has to be something crazy like 2.5 feet away from the mantel. I’m sure you didn’t notice that though haha 🙂
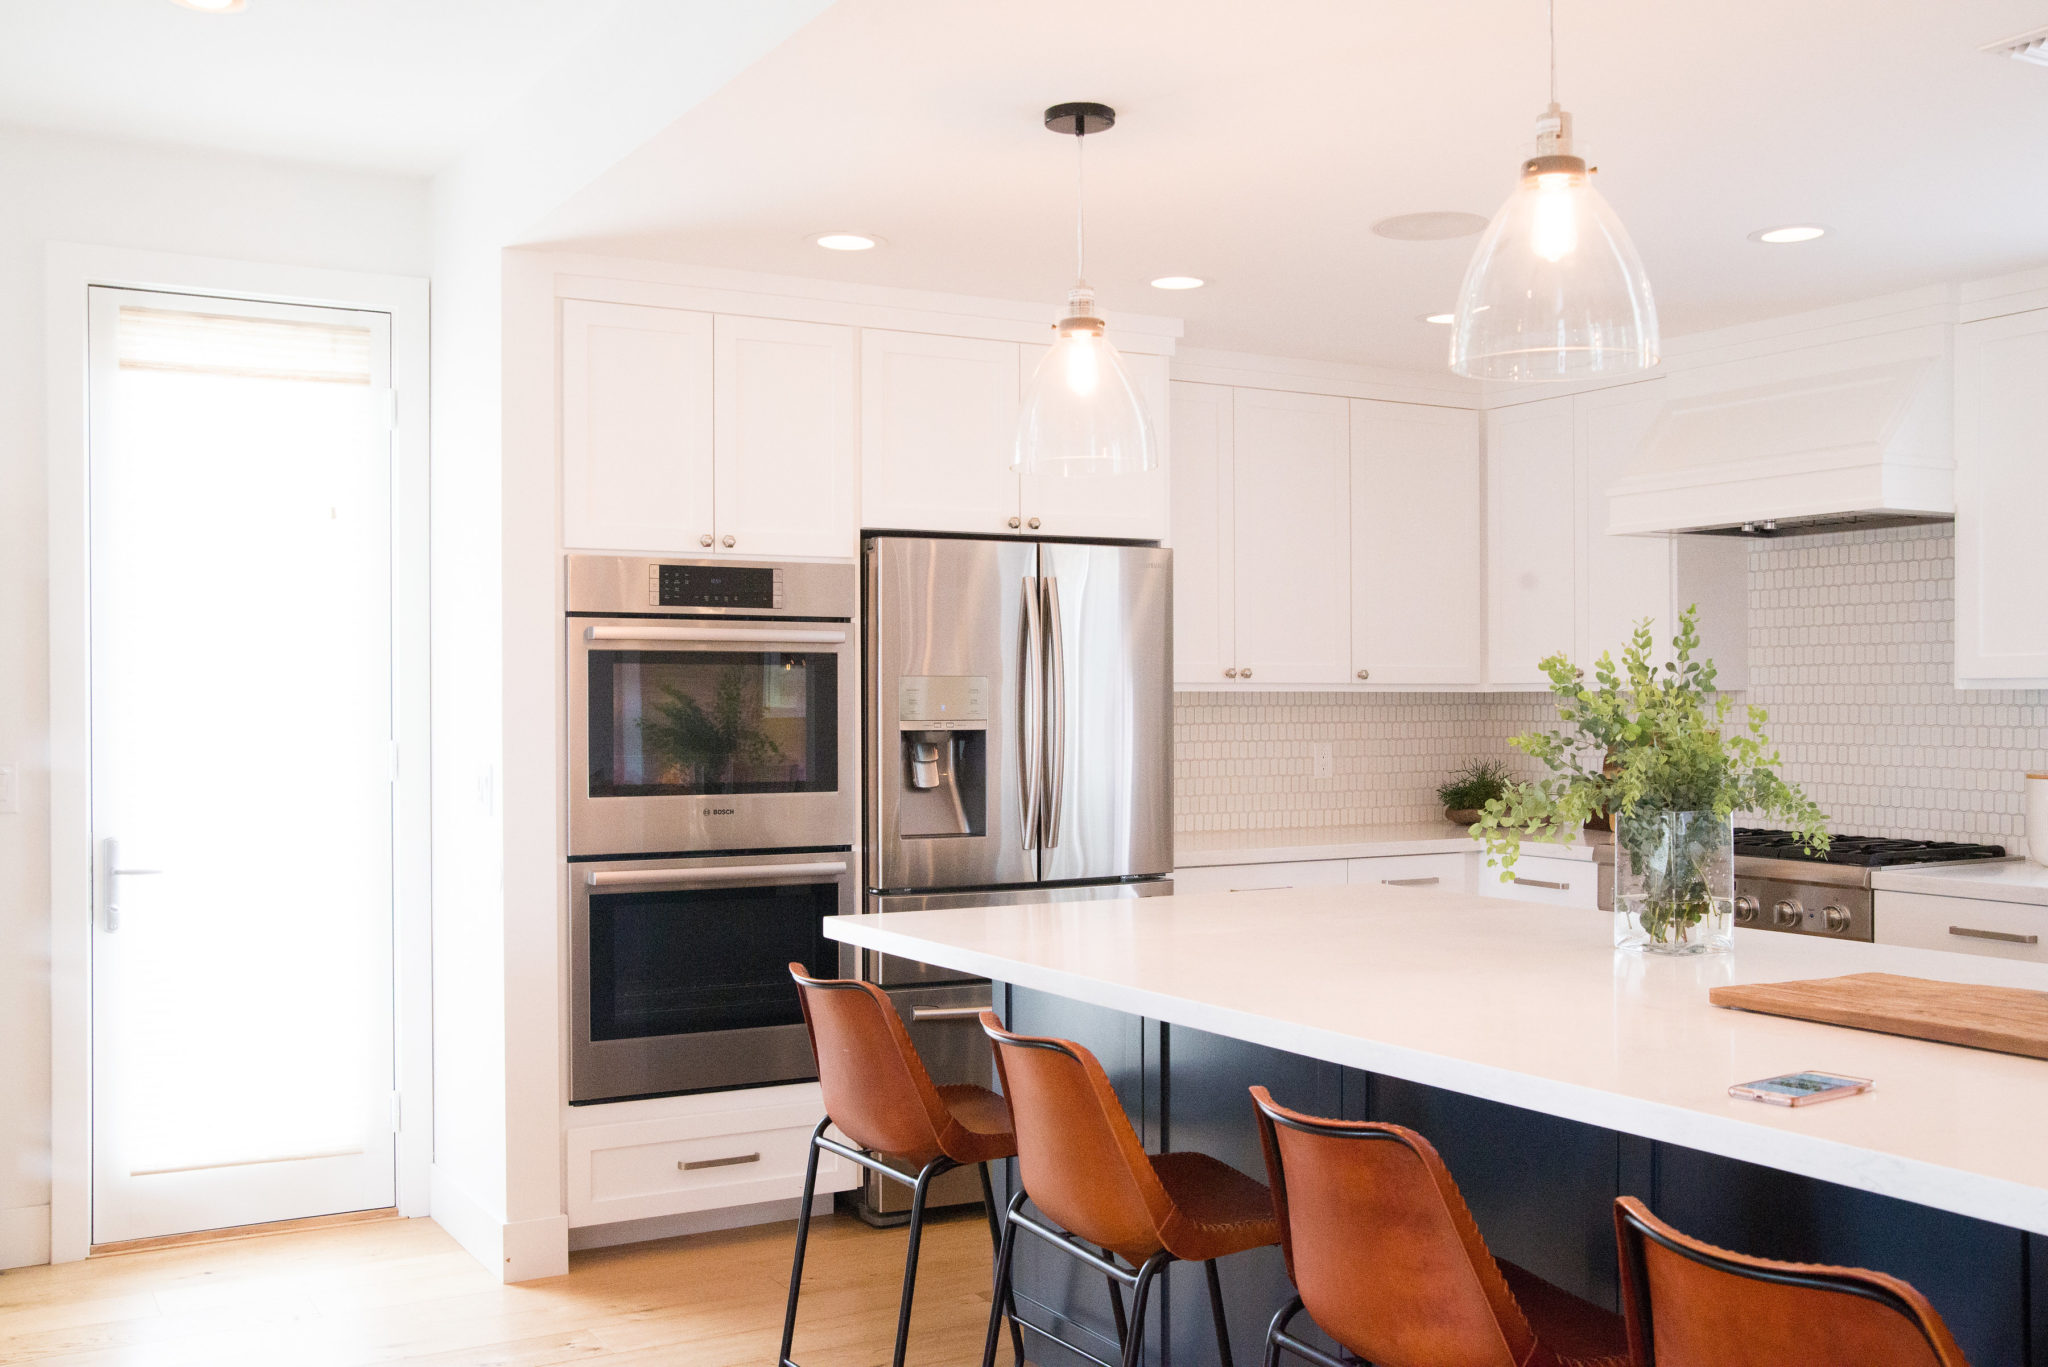 If you follow me on Instagram, you’ve already seen lots of pictures of the kitchen before, but here are a few more with all the kitchen appliances removed.
 Also, those artichokes were real and beautiful, but with the craziness of life, I forgot to cook them up before I noticed they had gone bad a few days later. 🙁
 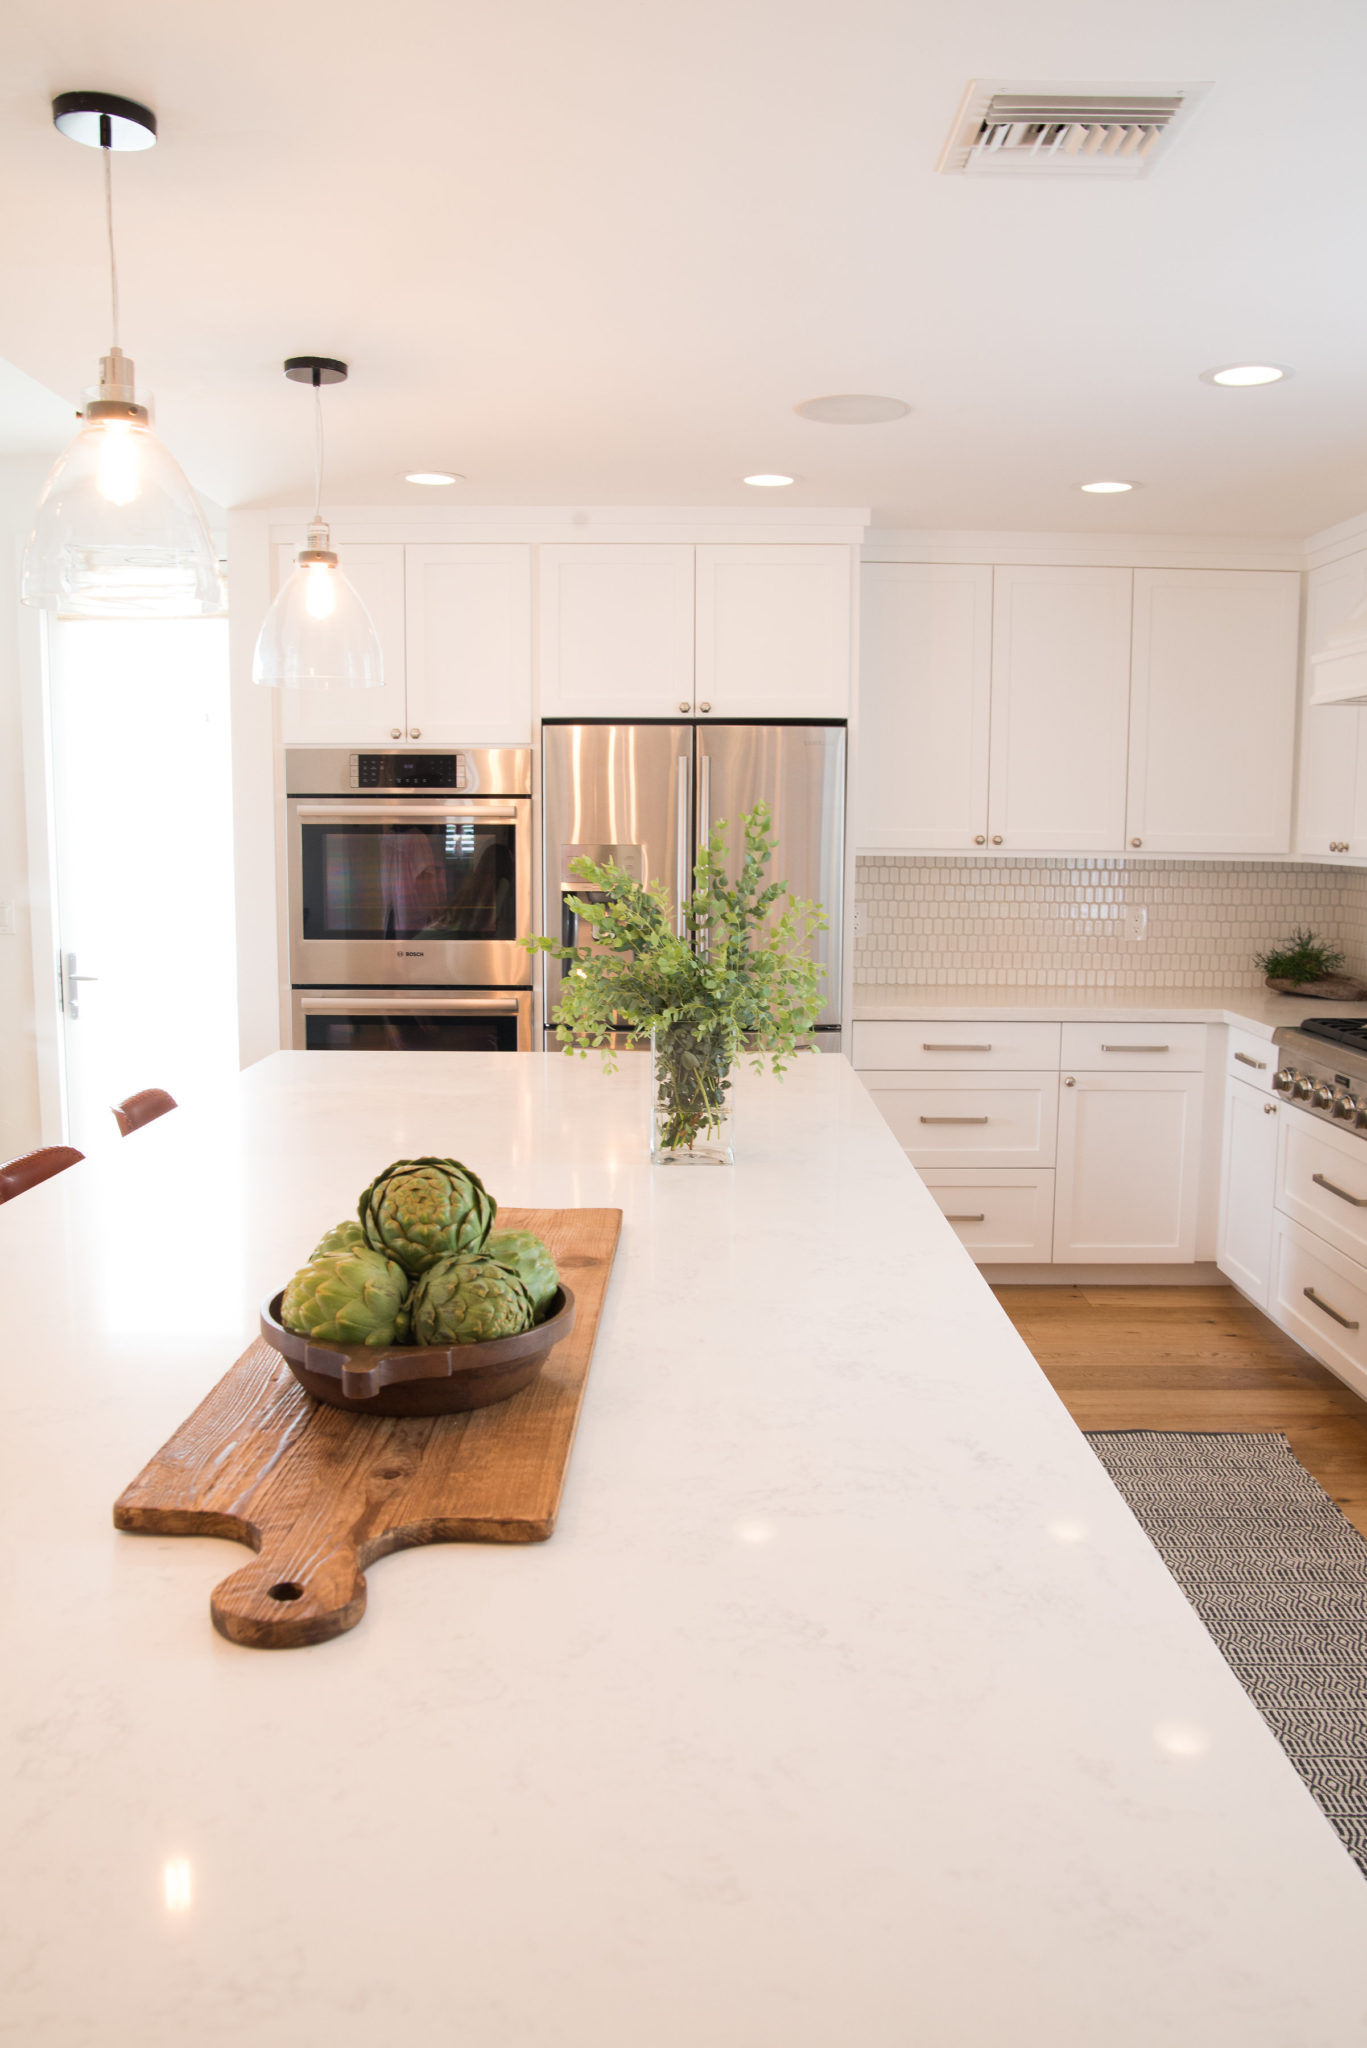 The entryway area here continues to be a work in progress, as I can’t decide if I want to do the practical thing and hang some hooks for us to place backpacks, purses and sweaters, or if I want to leave it clutter free. It definitely needs something though, so for the photo shoot she just tacked up a couple of hats, but eventually we need to find a permanent solution. I was at Container Store yesterday and they had some nice cloth covered peg board squares, as well as white boards and chalkboards, which are meant to be designed to fit the space you need in any configuration you want, so I may do something like that. Either way, I know that eventually I need to create a solution which will make better use of this space.
 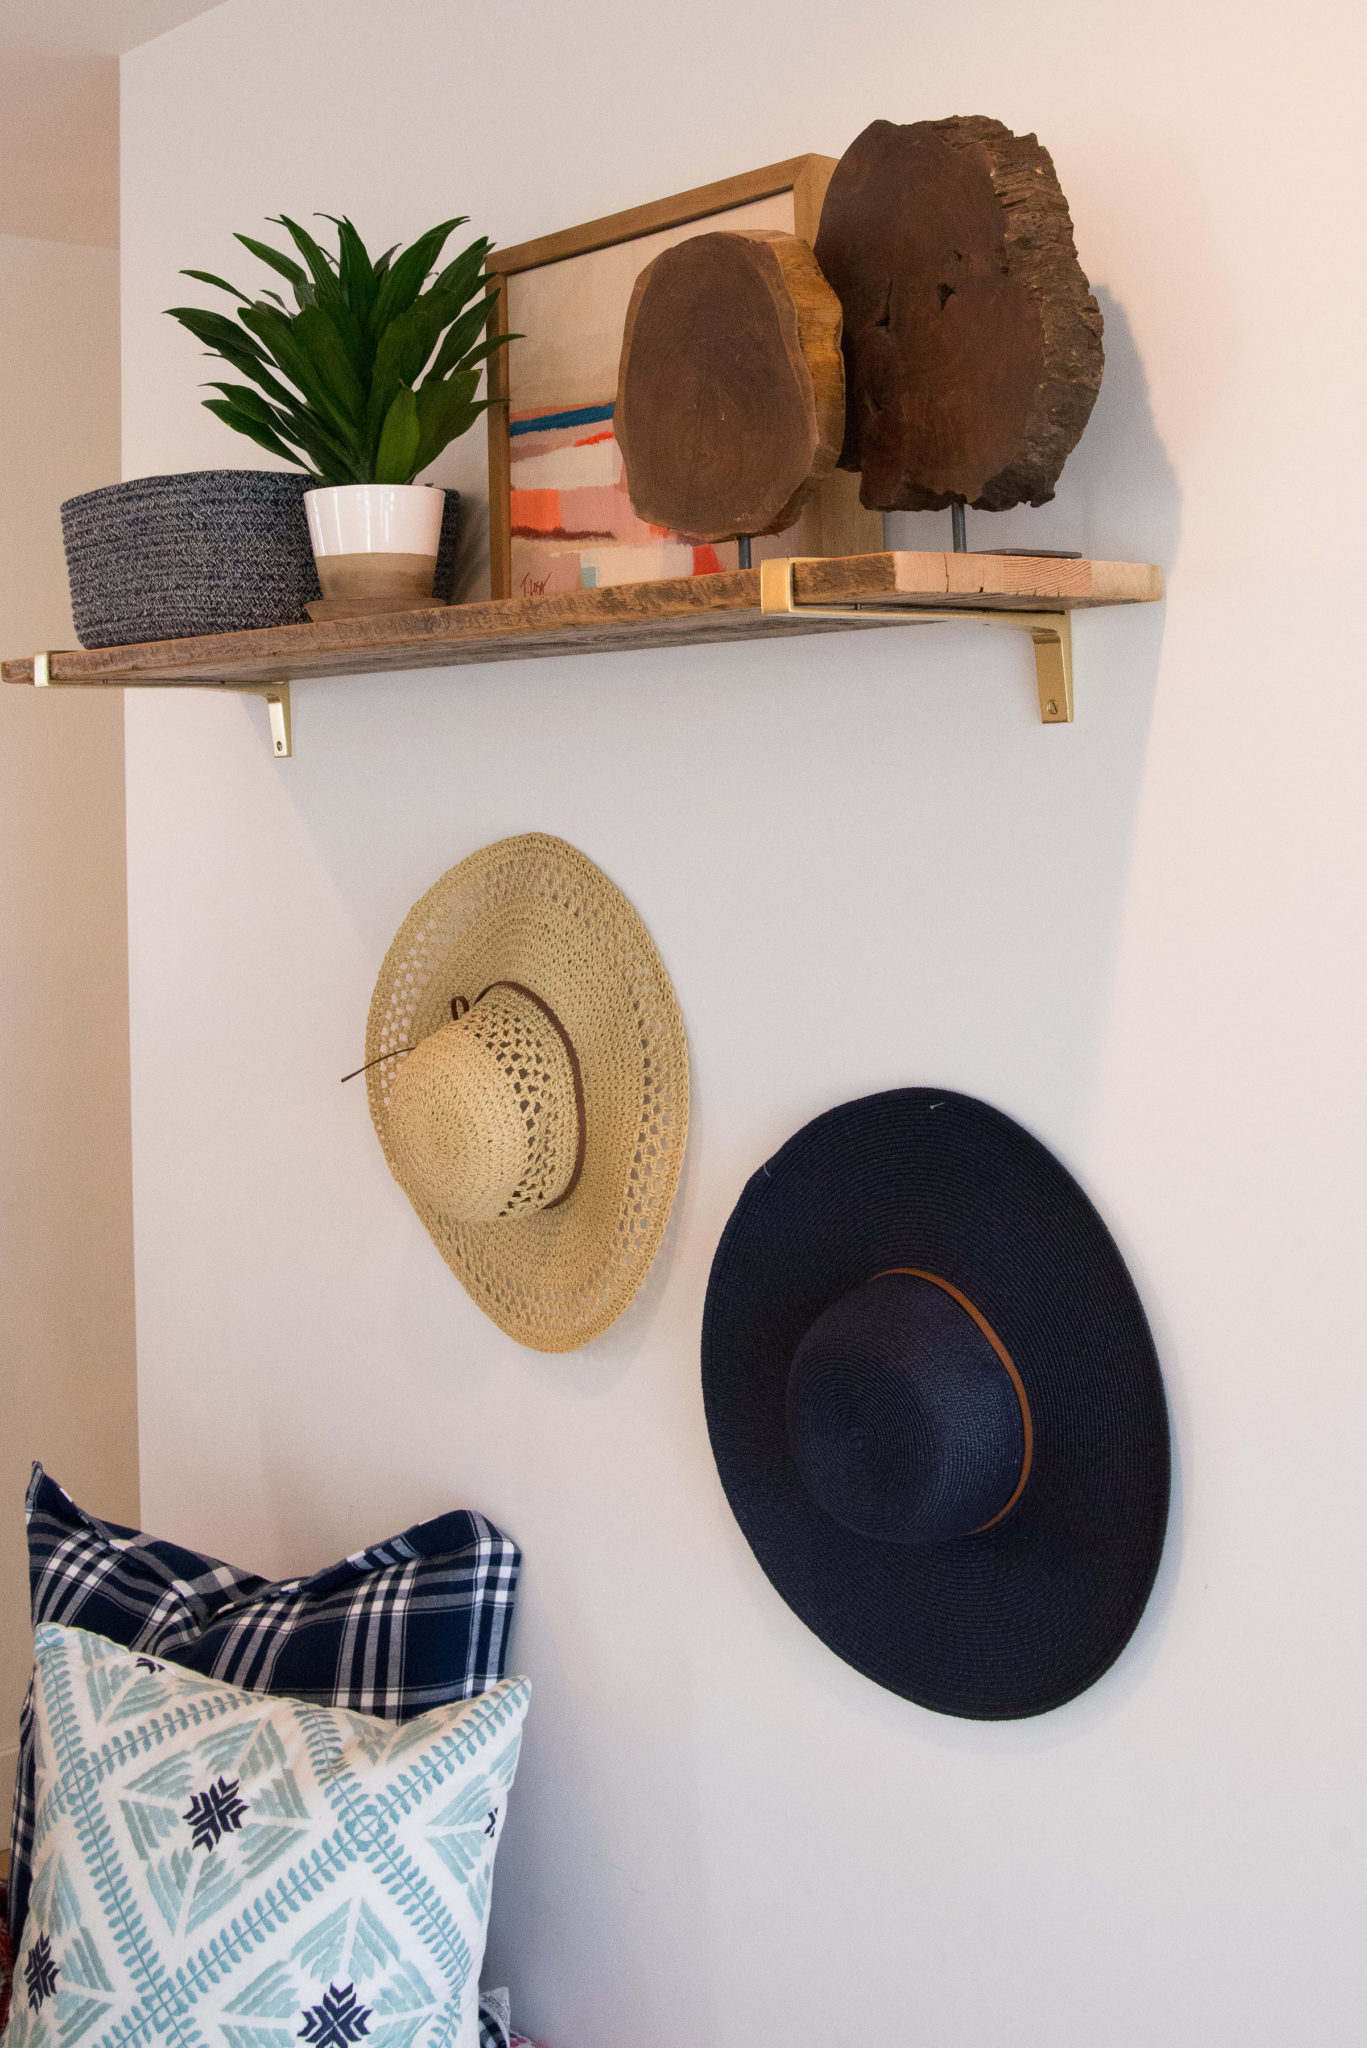 These photos were taken by my good friend Miranda of M.Shanti Photo. She came over while everything was all pretty and clean, and snapped a few pics while the photographer from Apartment Therapy was here. I’ll share the rest of the photos of the other rooms in a separate post next week. For now, here are the sources for a lot of the items you see.
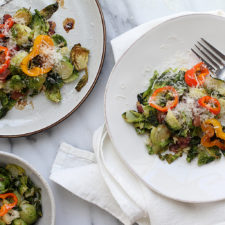
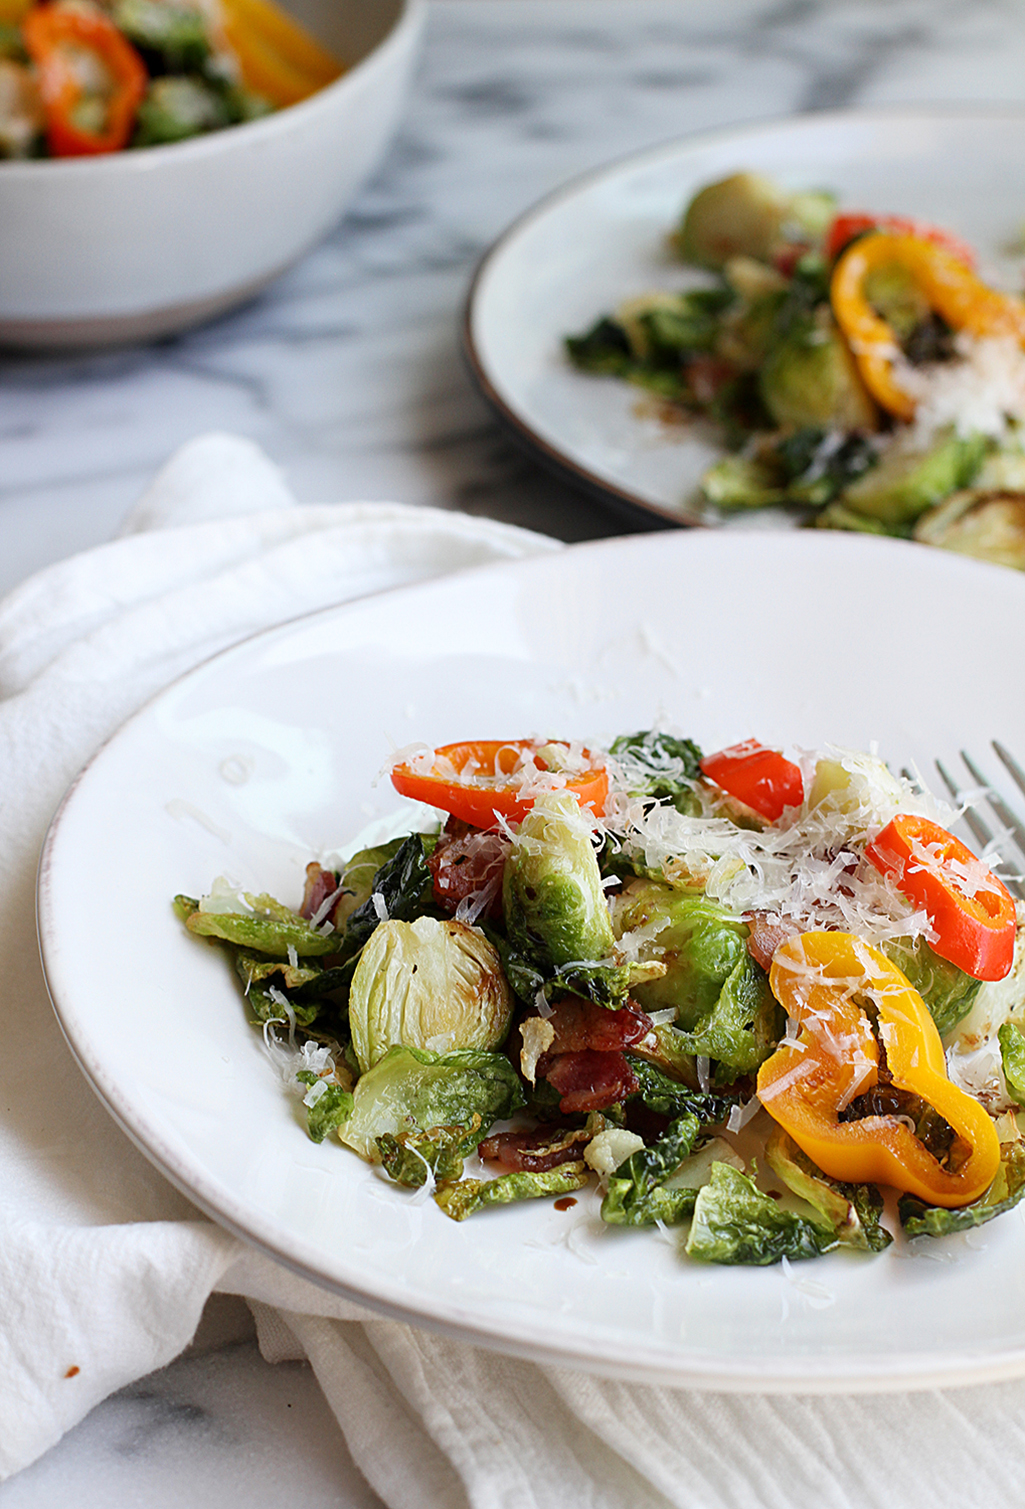 Perfectly tender yet still crisp, the saltiness offset of the sprouts and cauliflower, with just a bit of punch from the pickled sweet peppers, it’s the ideal blend of flavors to keep you wanting more, long after they’re gone. I think just about every one of us on that Ojai trip last year ordered a plate of these at lunch each day, and afterwards, the chef was generous enough to gift us with the recipe so that we may make them at home.
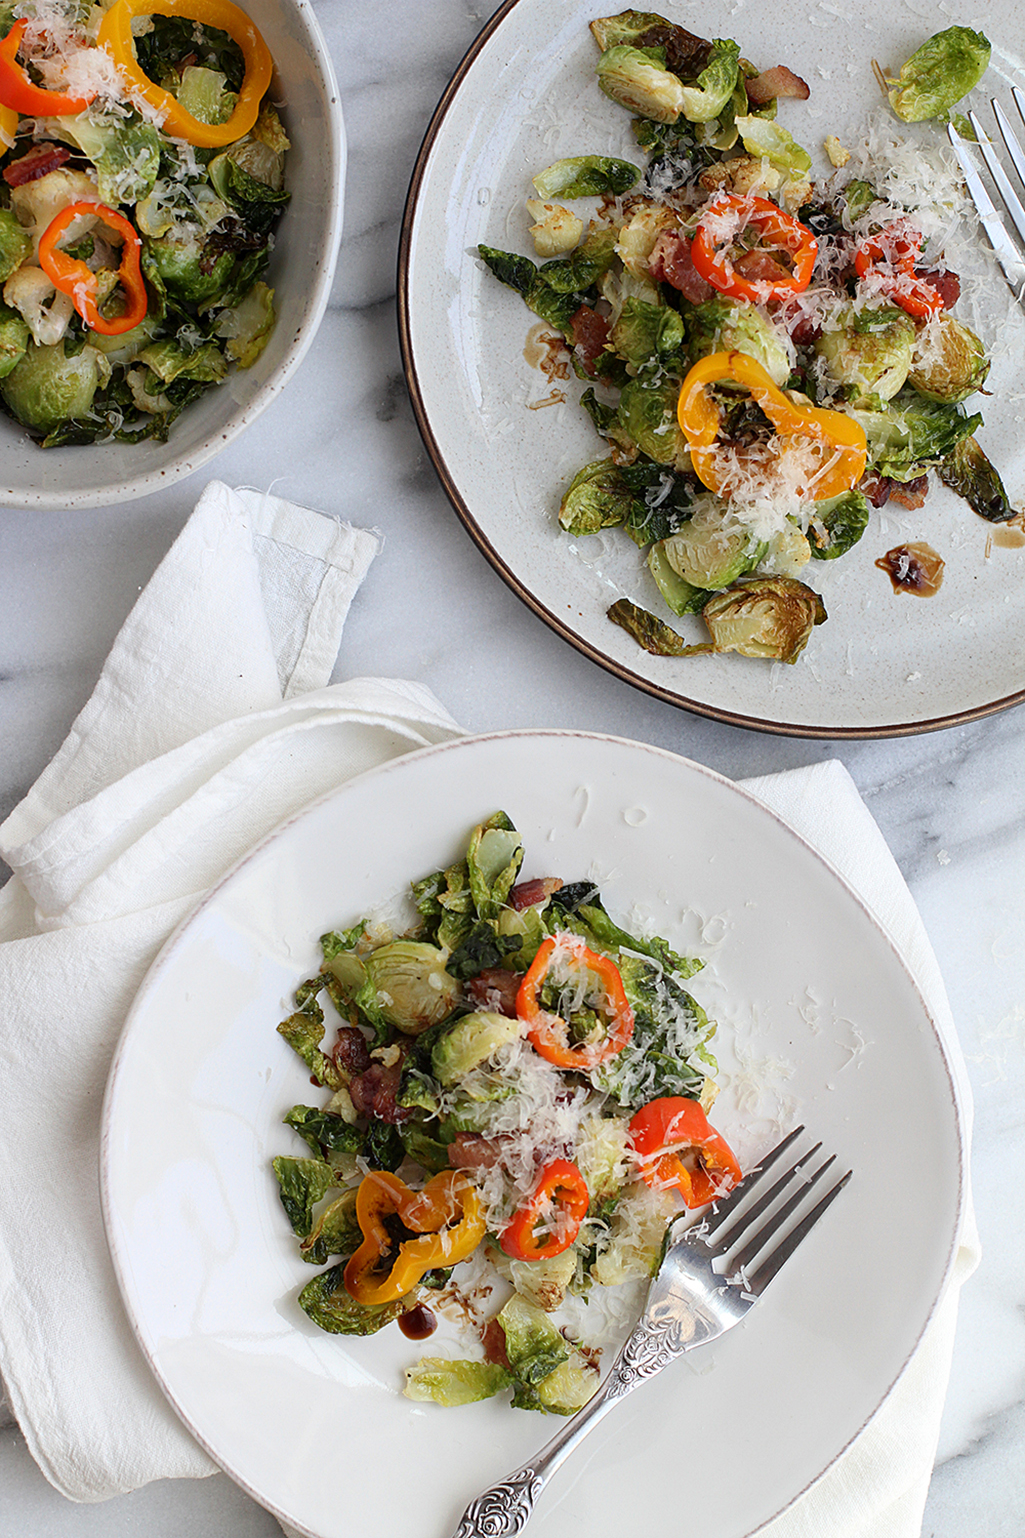 I’d rather dedicate my time to the centerpiece of the meal, the main dish, therefore I tend to favor really simple recipes for cooking up veggies, since I see them for what they are; just a side dish to the main. But these are meaty enough to stand up as a light meal on their own, especially when accompanied with a simple small salad or a baguette and some decent cheese. With that being said, don’t be intimidated by the few extra steps in this recipe, as they are relatively foolproof.
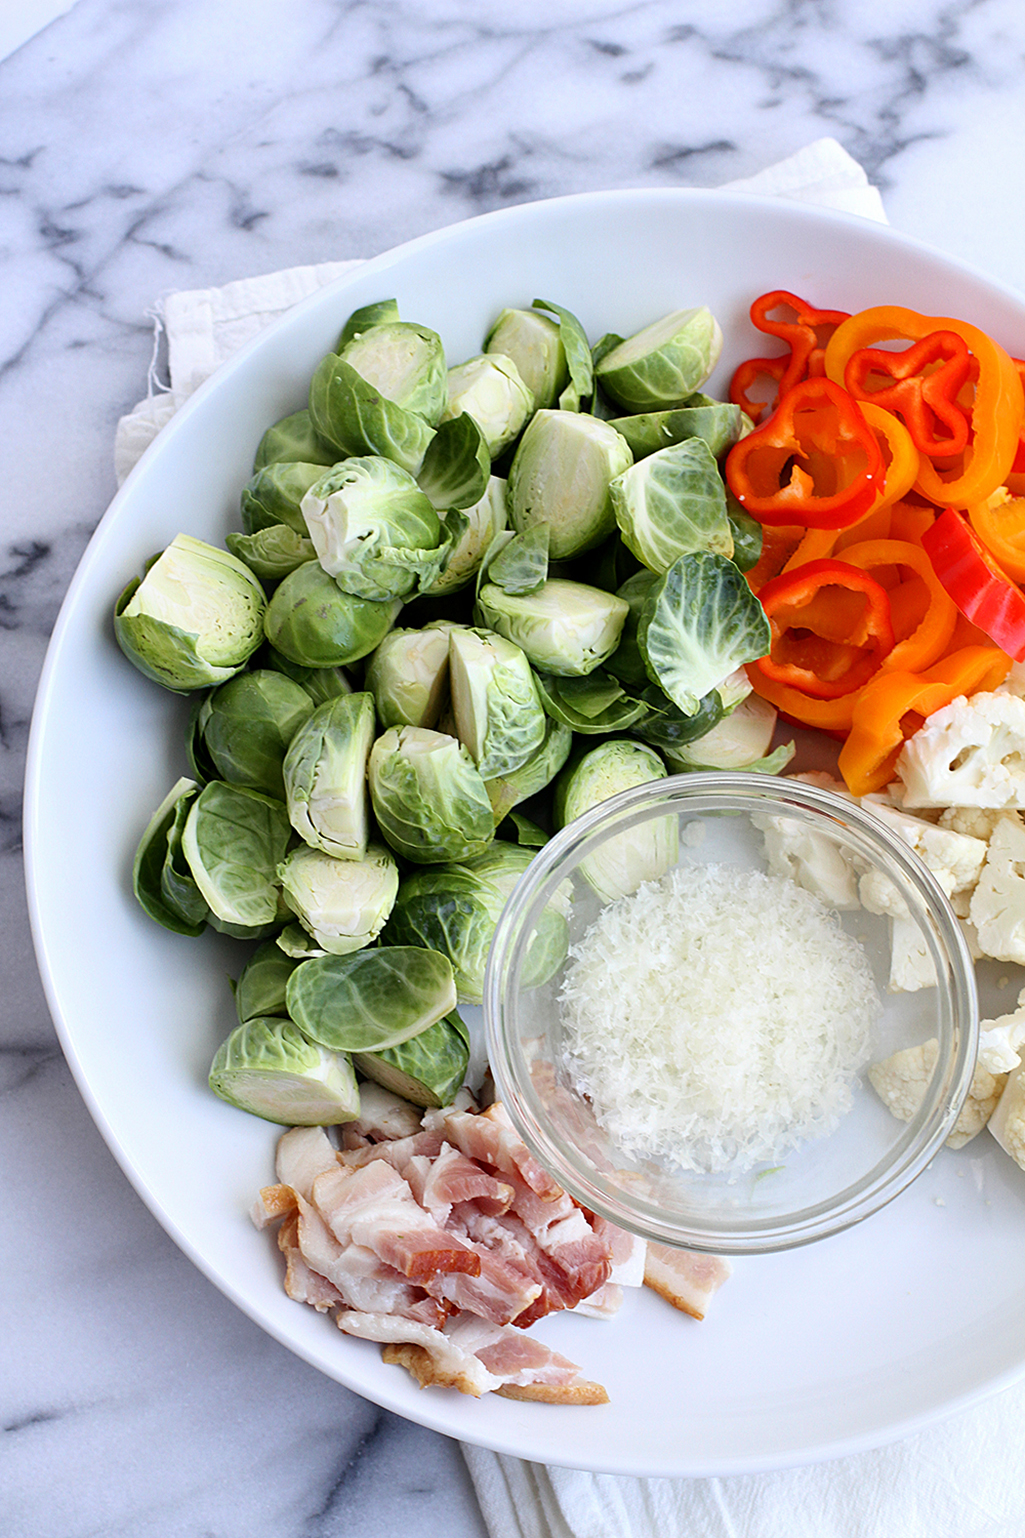 And if you’re adverse to deep frying these babies up, you can just as easily roast the sprouts and bacon together, and still have an excellent dish when topped with the pickled peppers and parm. You’ll just be missing some of the crispiness from the fried leaves, but can further compensate by putting them under a broiler for 2-3 minutes after they’re done roasting.
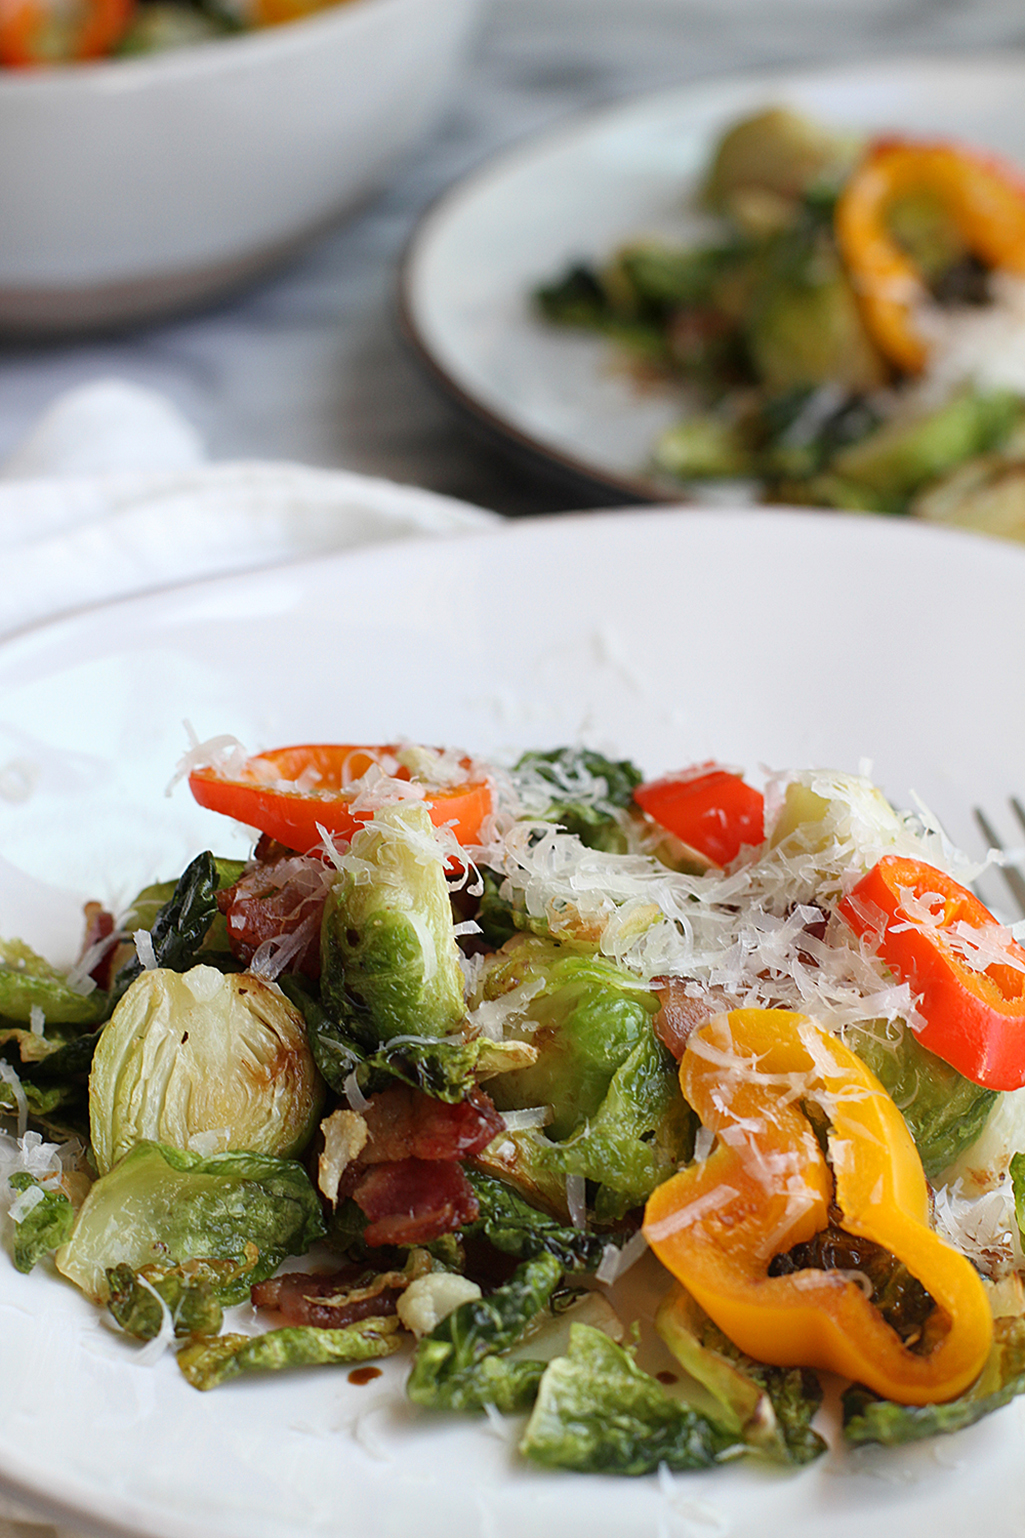

 Cara’s breakfast smoothies are a foundation of her quarterly weight loss challenges, and her creativity approach has led her to creating almost endless combinations, resulting in
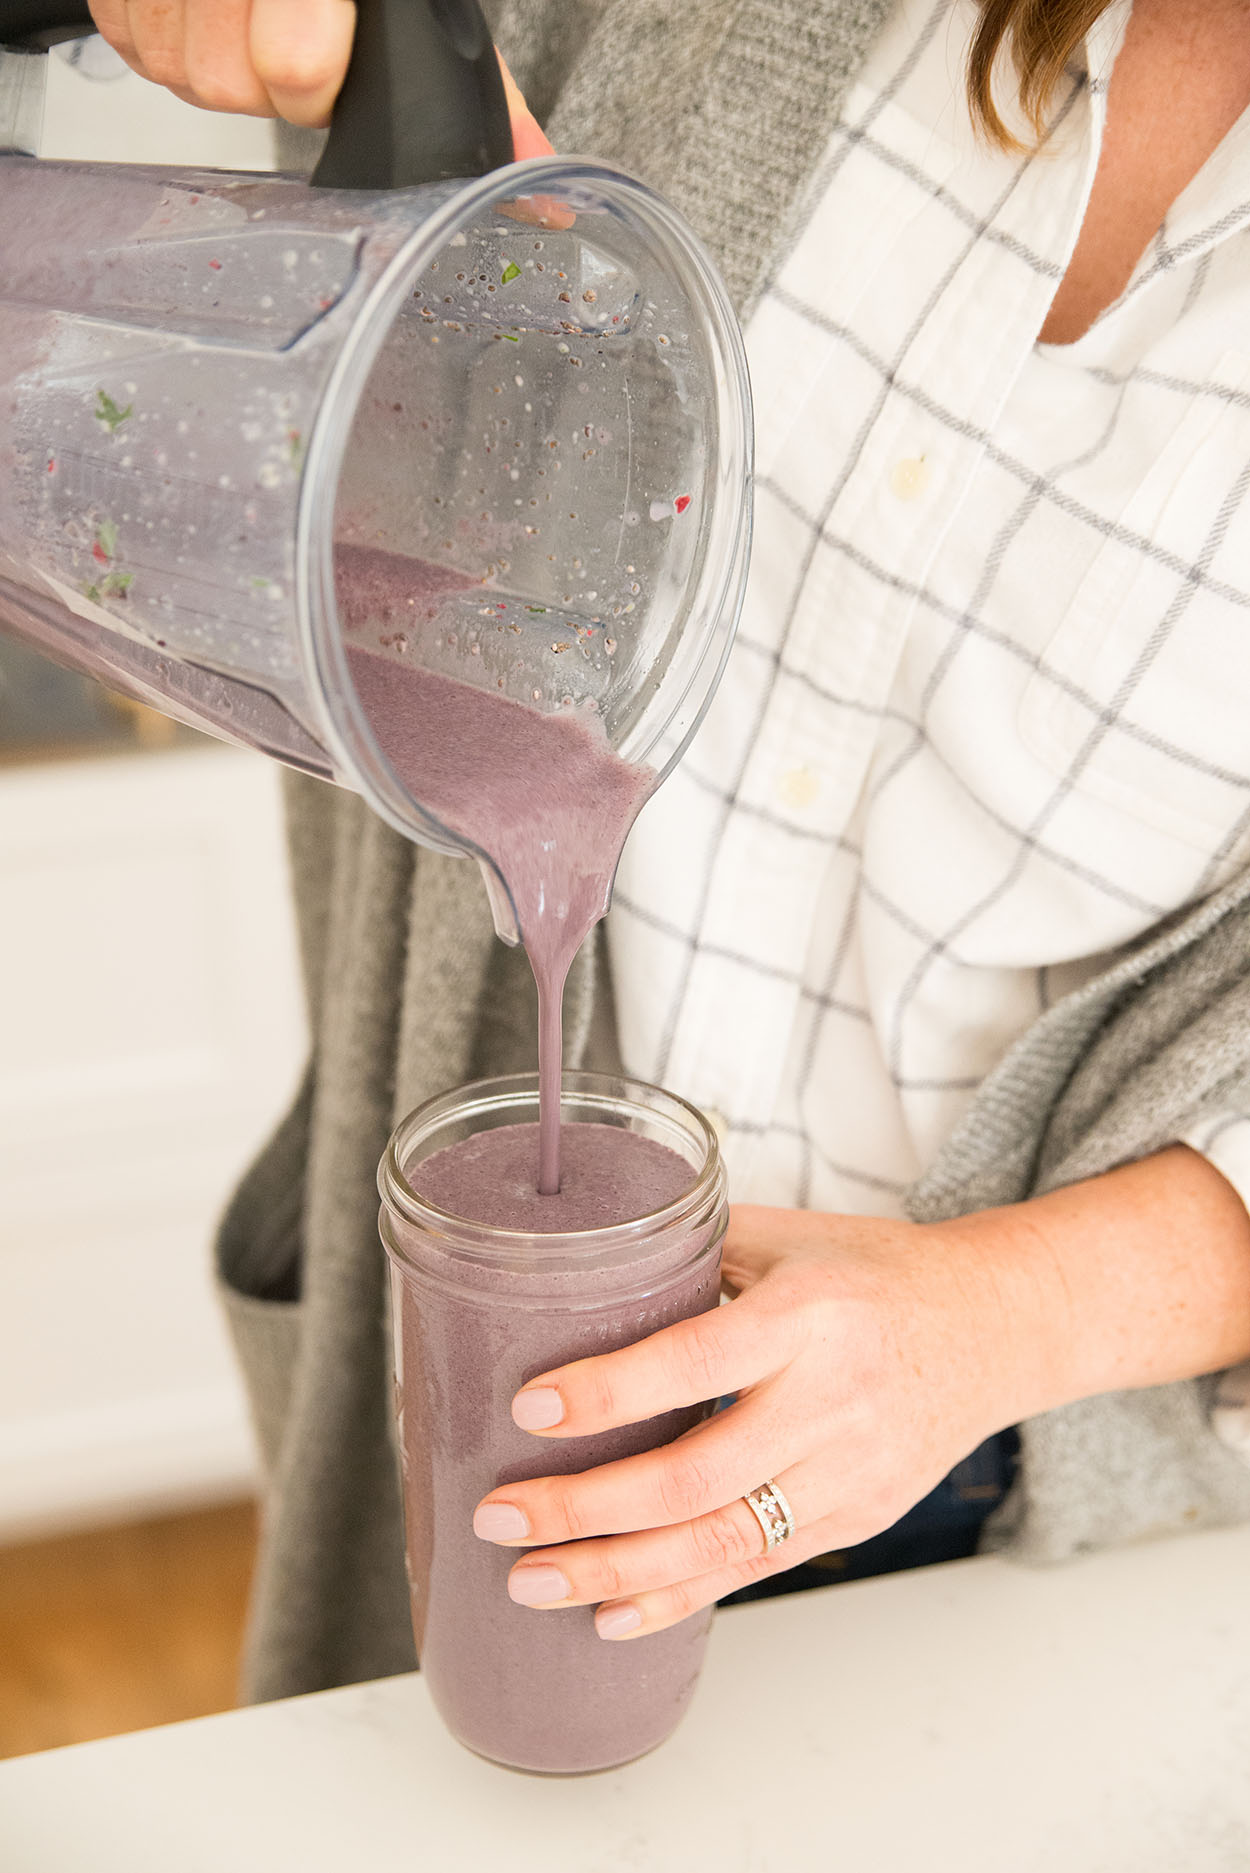
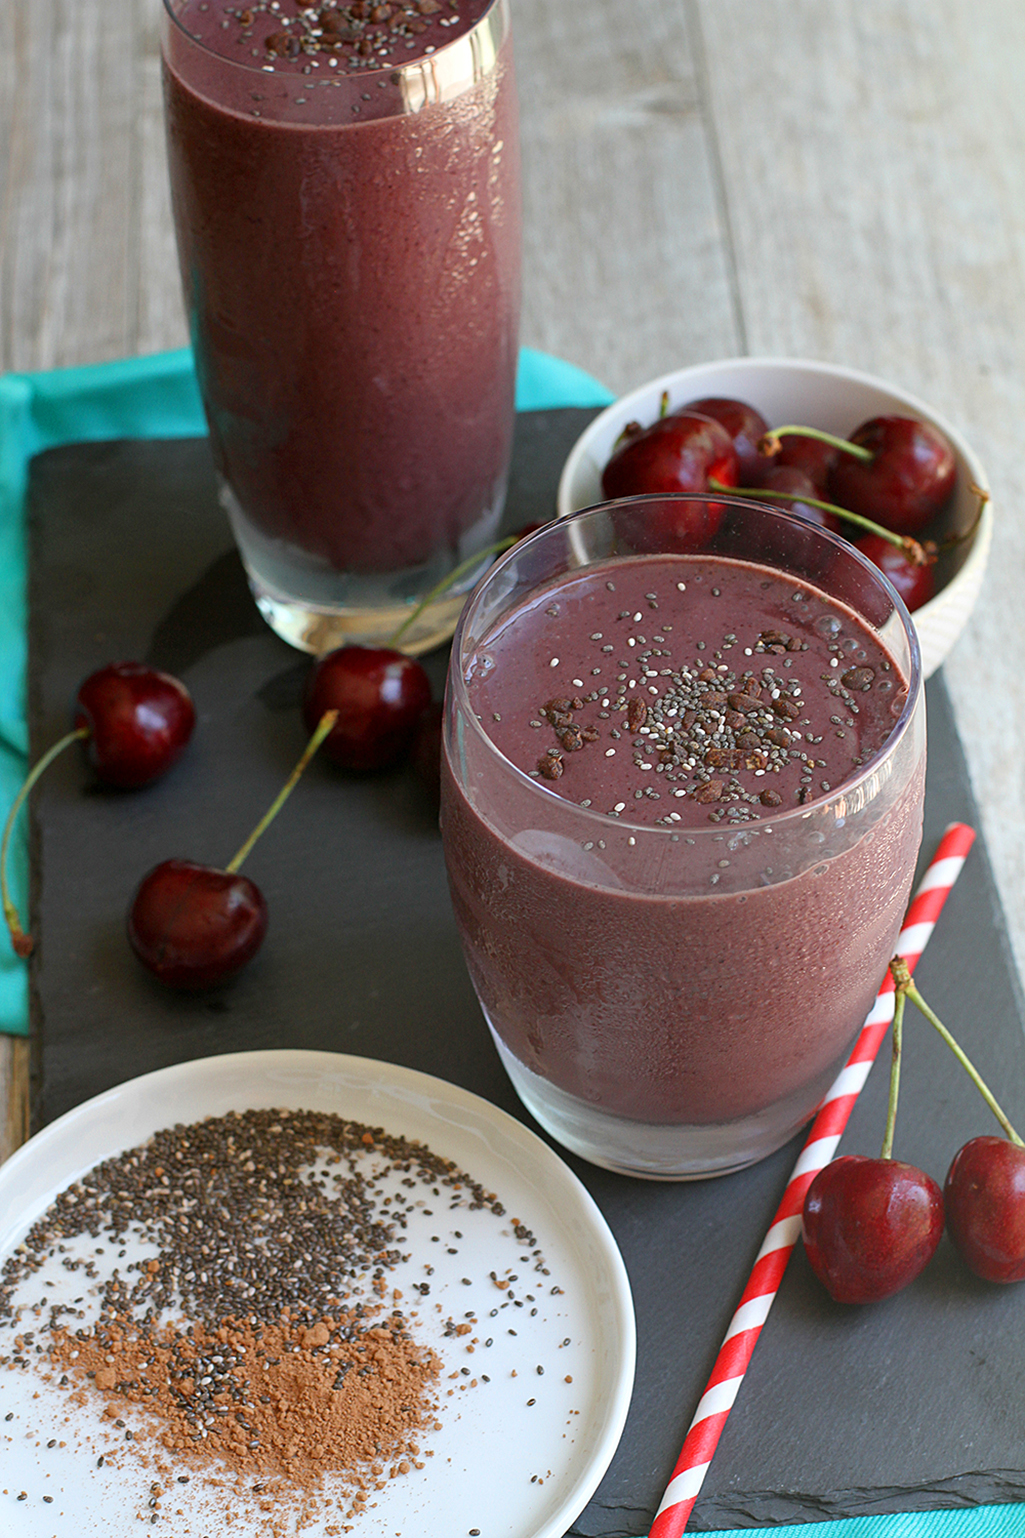
 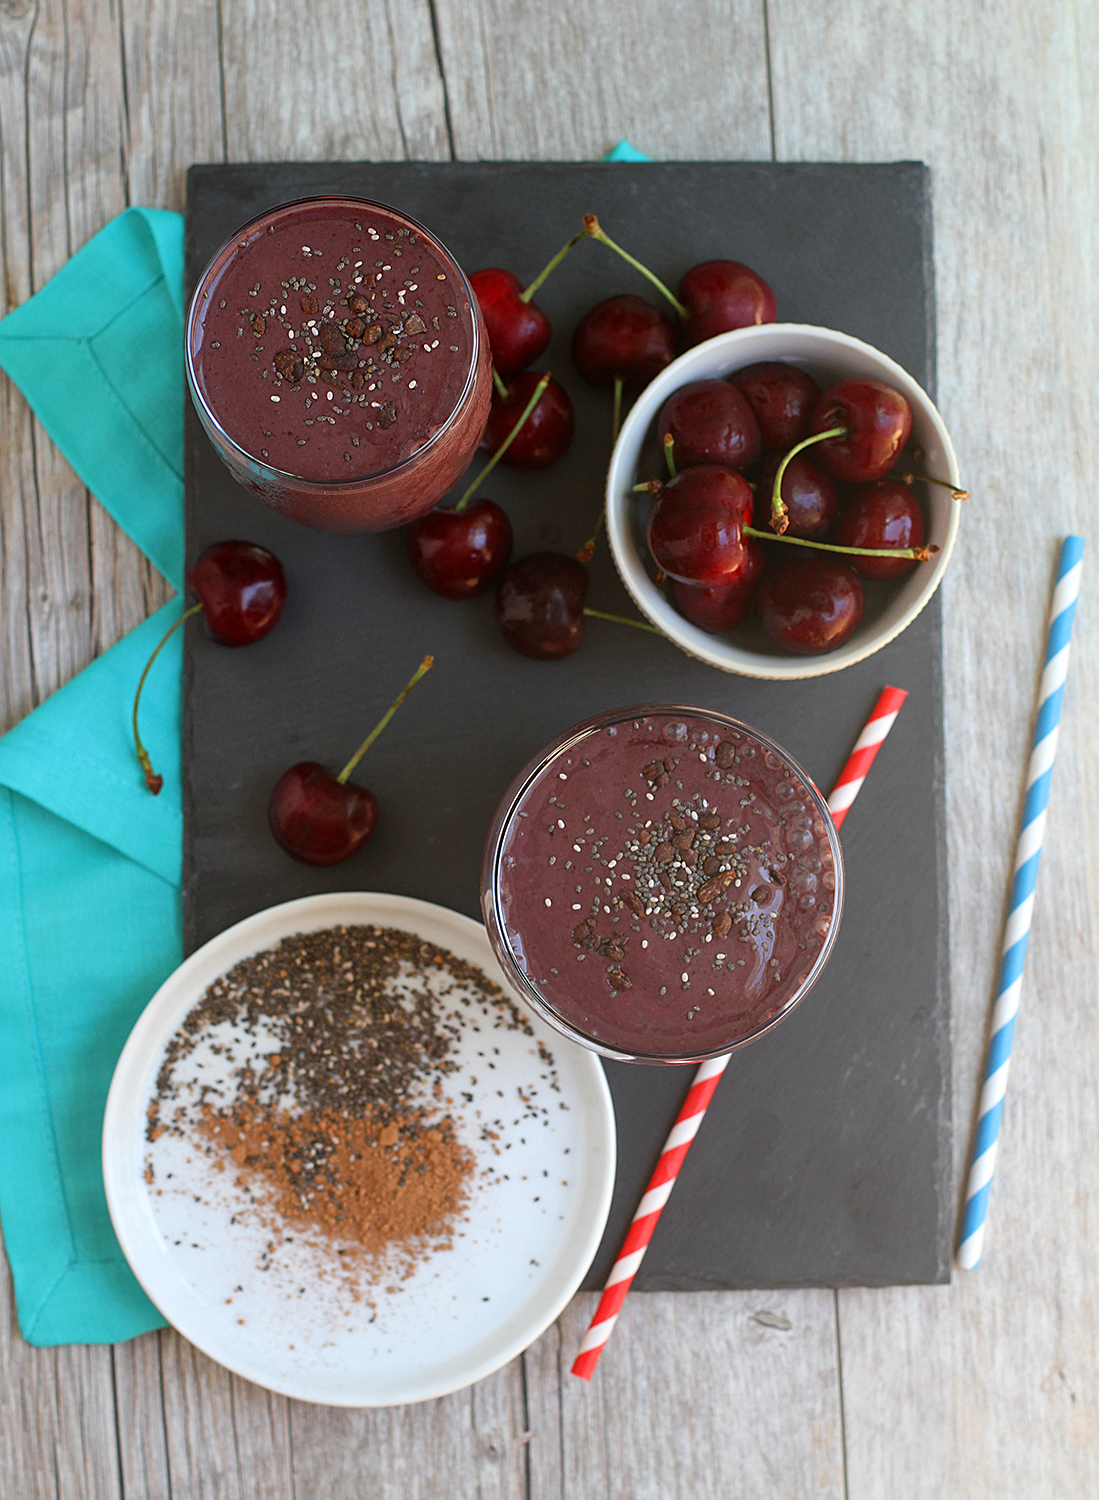 Today though I thought I’d share this great combo because it’s a nice alternative to the typical “green smoothie” that is usually a mango/pineapple or berry base, mixed with veggies. This one in fact doesn’t even have veggies, instead the cherries are balanced out with chia seeds and almond butter. And while I know cherries are very much a summer fruit, the addition of the cacao makes it feel a bit heavier, so it doesn’t feel out of place during the colder months.
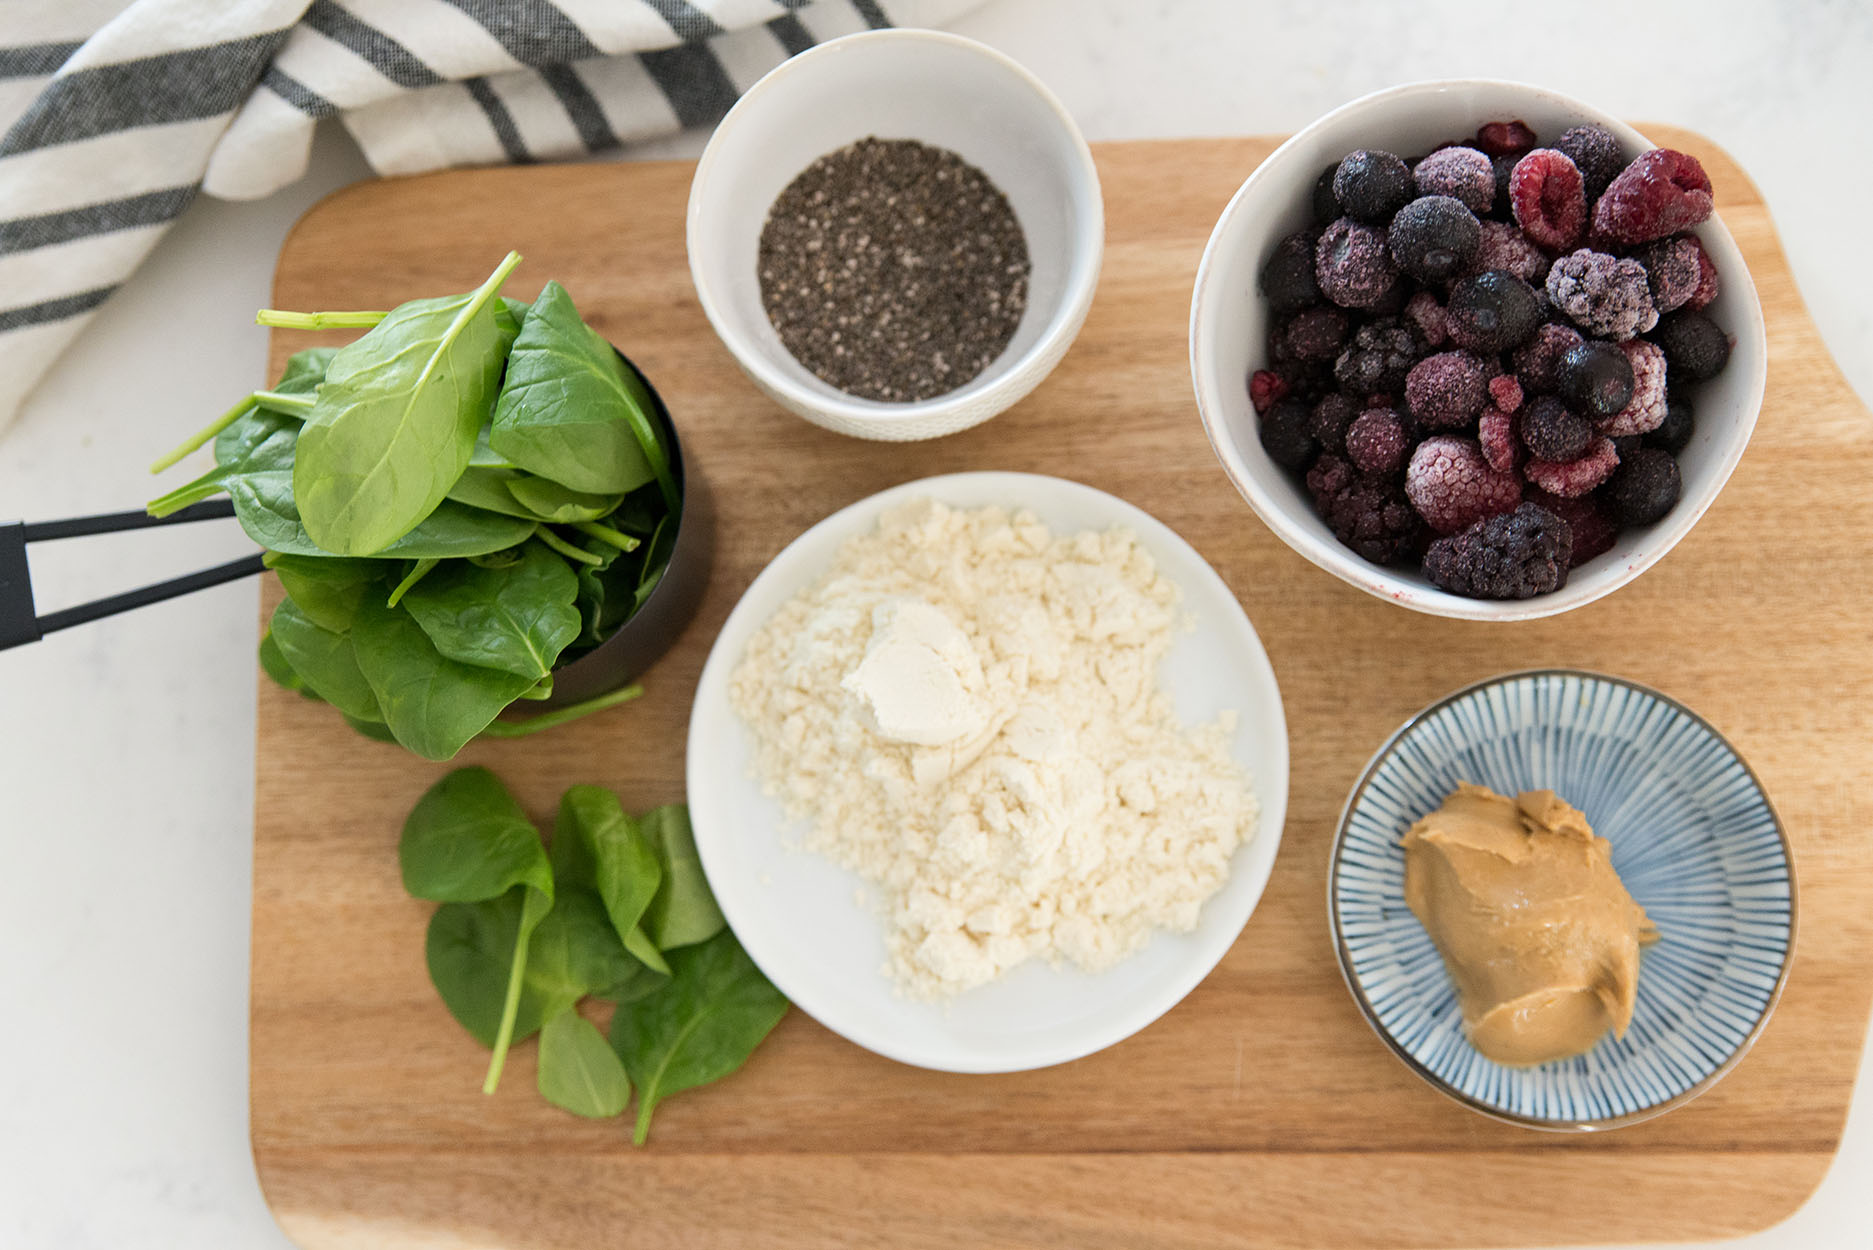
 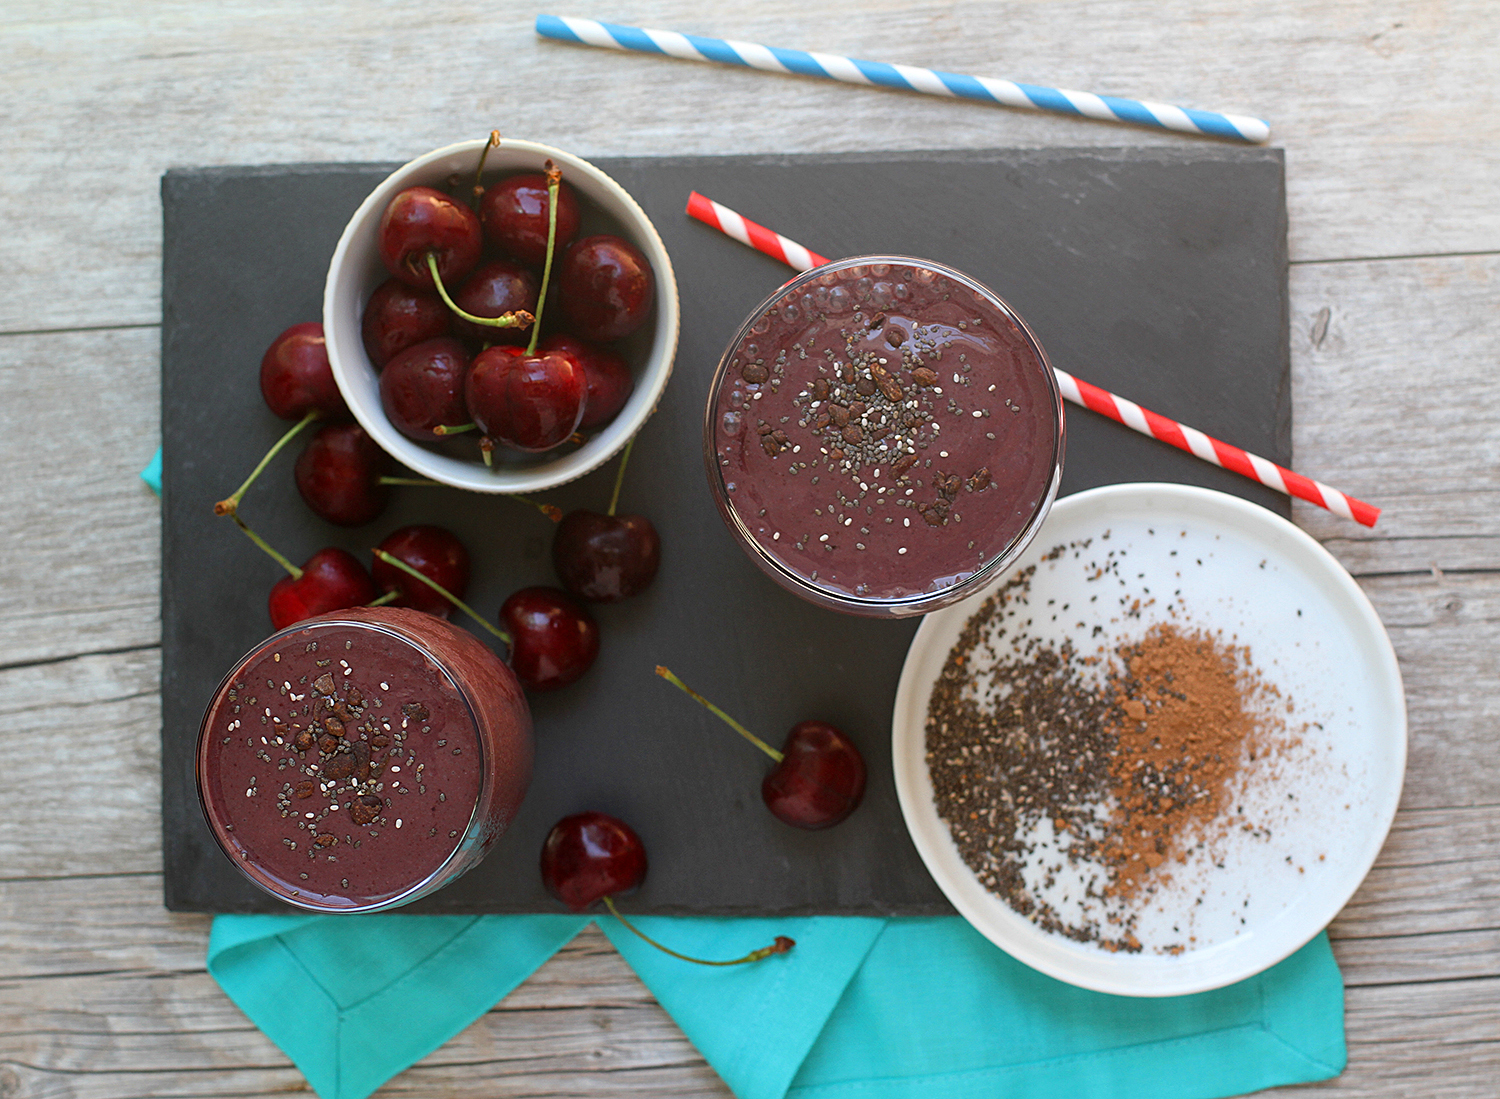 I use cacao here, but if you only have unsweetened cocoa, feel free to use that as well. The main difference between cacao and cocoa is
 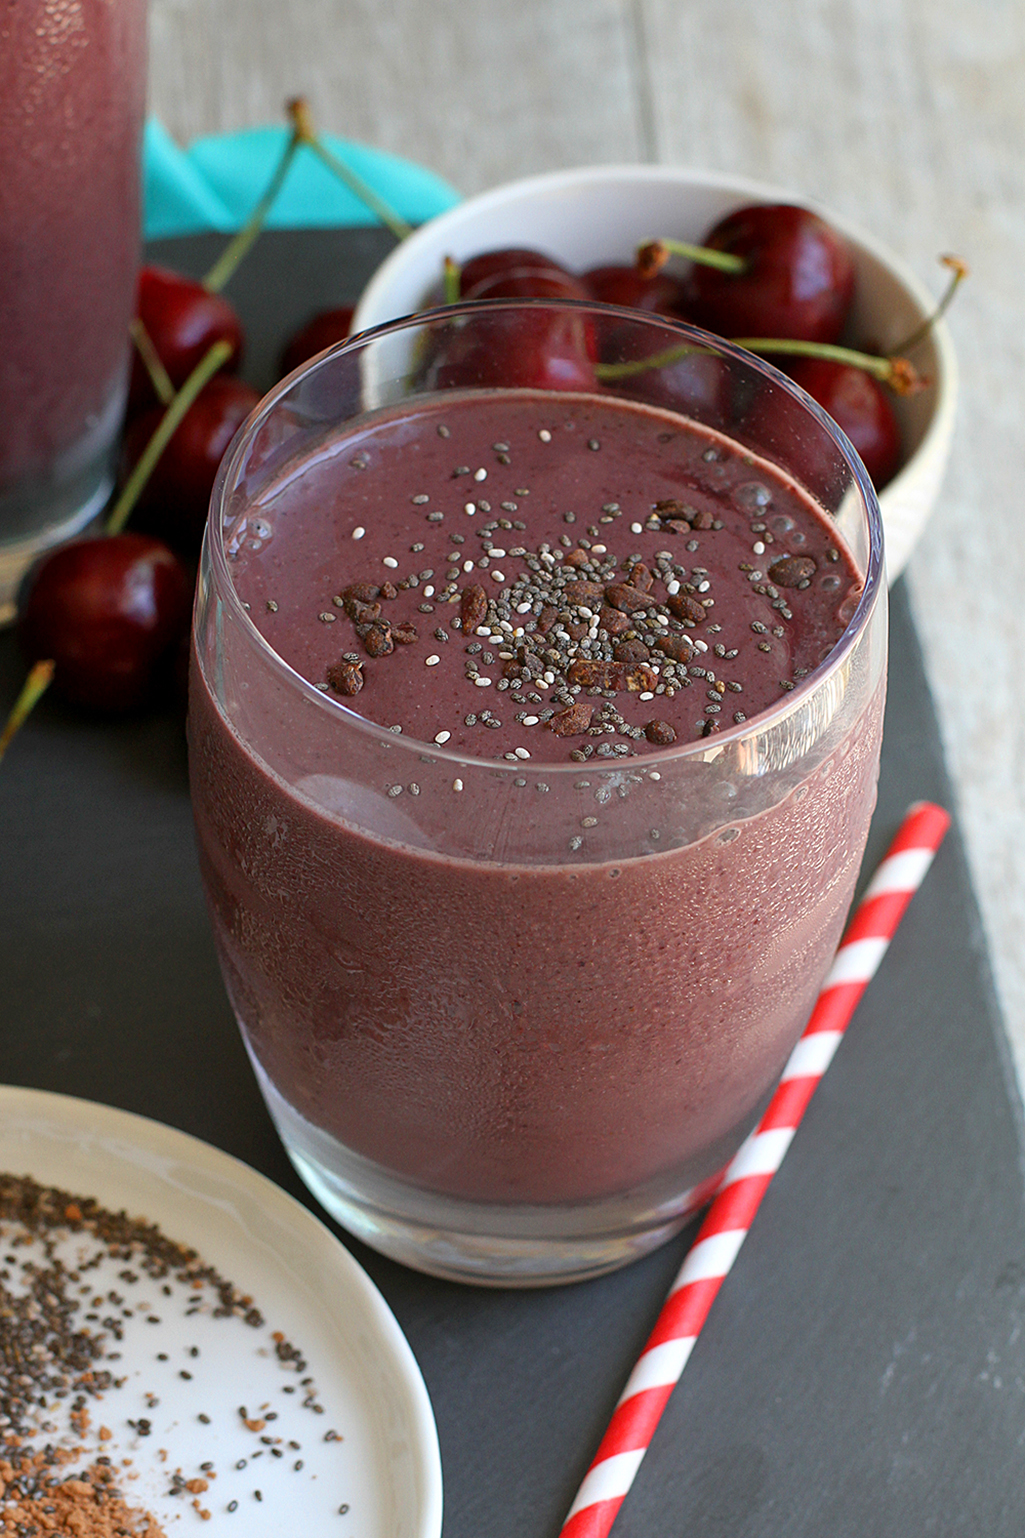 I typically drink one of these high calorie smoothies somewhere around 7 am, which easily keeps me full until my late morning snack around 11 am. If I’m busy and running around, it can usually get me through to an early lunch without any noticeable sugar shakes. And not to get too personal, but I definitely notice a big improvement in my digestion and BM’s when I’m consistently drinking one of these bad boys on a daily basis.
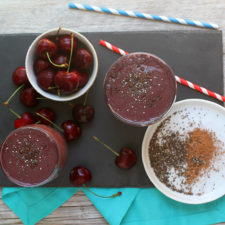
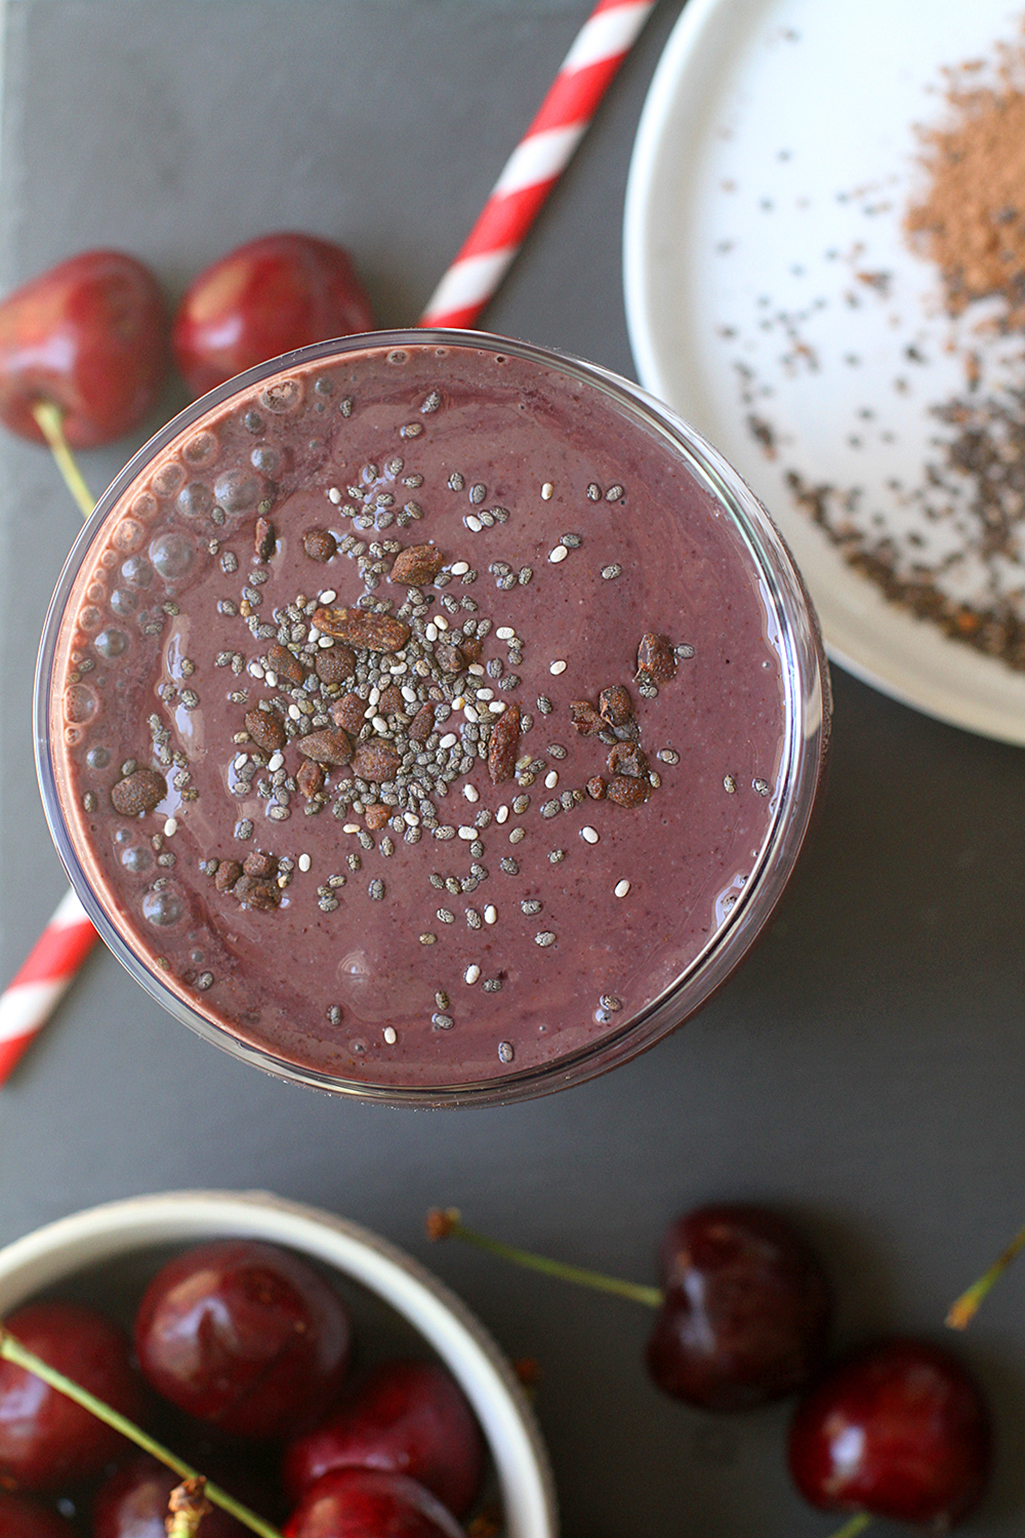
 I’ve been meaning to put this post together for some time now, and quite frankly my original goal was to get it up as a “back to school” post, but better late than never is my motto. We’ve now been living with my in-laws for close to 5 months, and packing these daily lunches for the kids has been a nice source of regularity in an otherwise irregular situation. I thought by now Taylor would be nagging to buy her own lunch, being the cool 5th grader that she is, but she still seems to enjoy the daily variety and sense of home I guess. They’re still eating most of the contents that I pack for them each day, of course some days are better than others, and they have now started playing a more active role in packing the lunches for themselves. All in all, I’m still plenty happy with our
 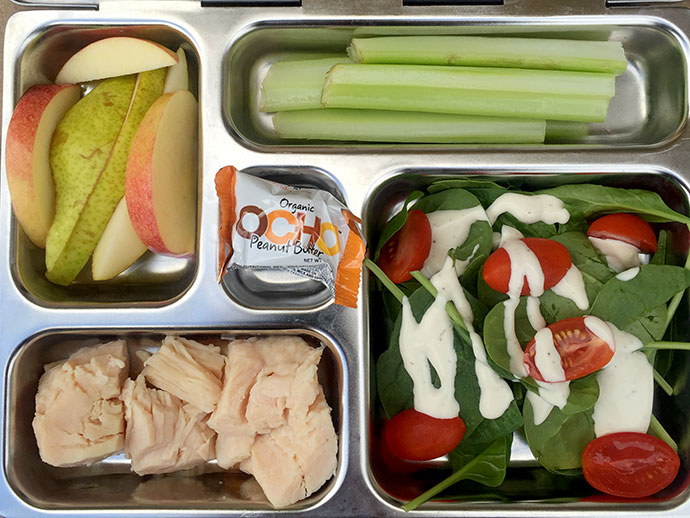 Above – canned chicken, spinach salad, celery, apples & pears, Ocho peanut butter bar//Below – grilled chicken, pretzel sticks, veggies, watermelon, cinnamon twist, dark chocolate covered almonds
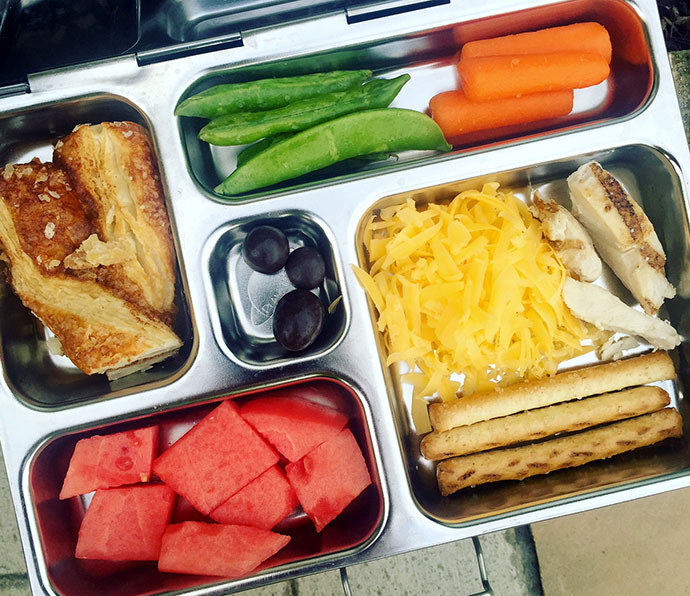
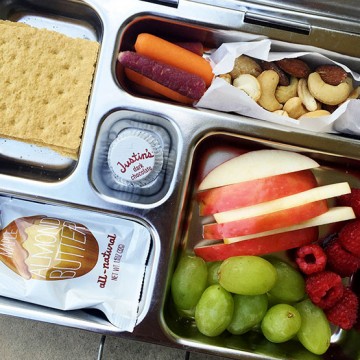
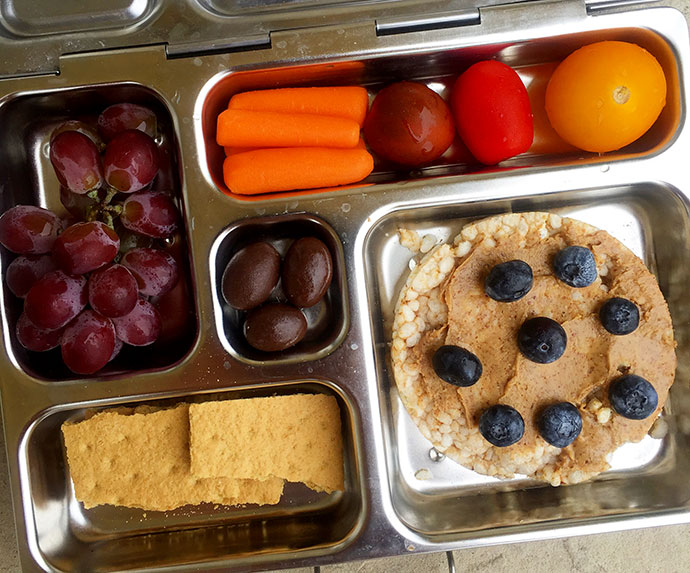 Above – rice cake with almond butter & blueberries, graham crackers, grapes, veggies and dark chocolate covered almonds // Below – graham crackers with almond butter, apples, grapes & berries, rainbow carrots, mixed nuts and a Justin’s dark chocolate peanut butter cup
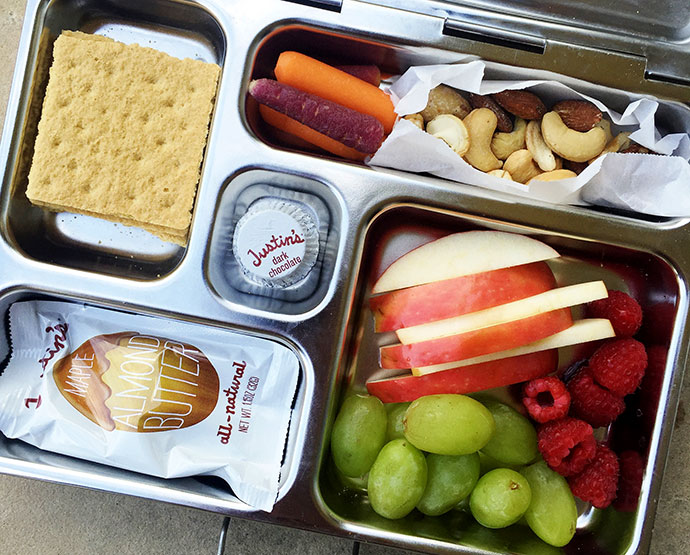
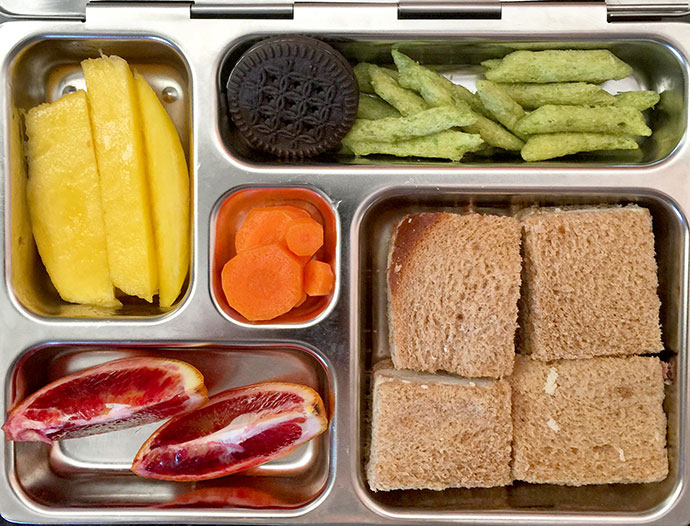 Above – turkey sandwich on whole wheat, blood oranges & mangoes, snappea crisps, carrots and a Newman’s organic cookie sandwich // Below – tuna salad, crackers, snappeas, pineapple & tangerine and dried cranberries
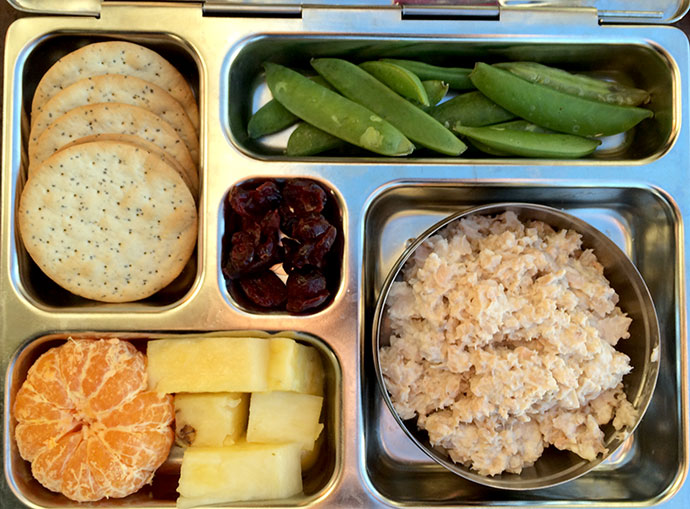
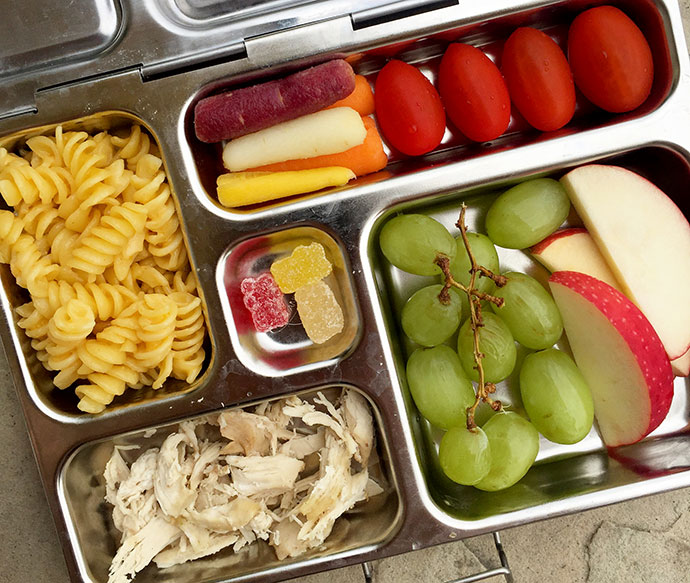 Above – mac & cheese, shredded chicken, grapes & apples, rainbow carrots & tomatoes, dye free gummies // Below – turkey sandwich on sourdough, carrots & tomatoes, Bare Naked apple chips, Roam pork stick and Justin’s pb cup
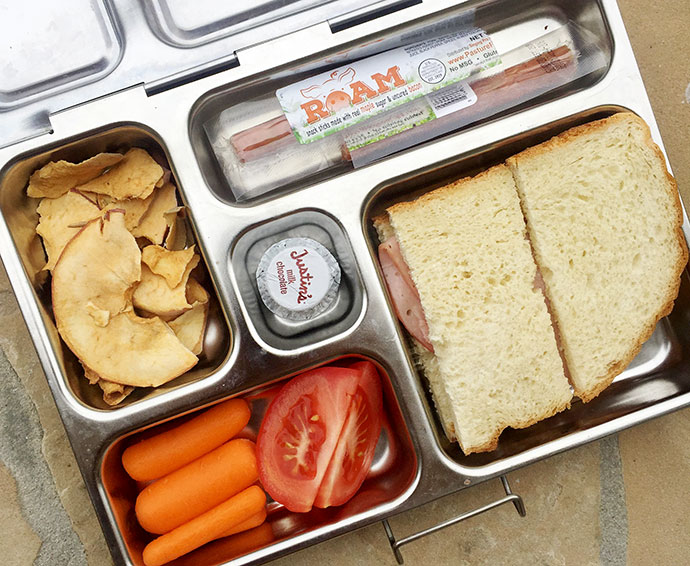
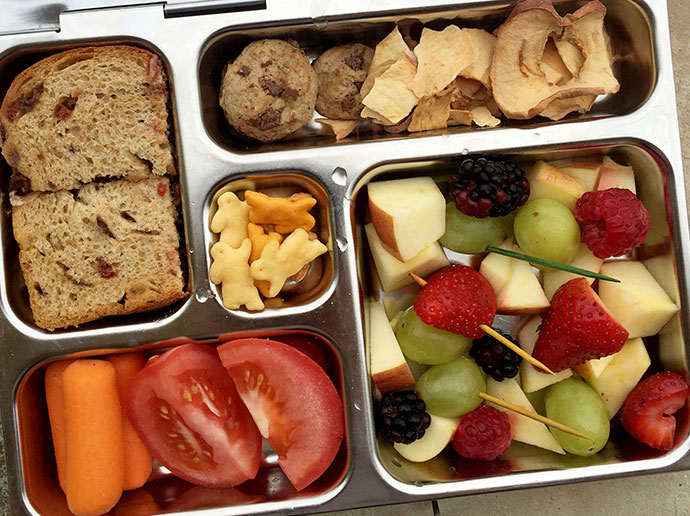 Above – almond butter & honey on whole wheat raisin bread, carrots & tomatoes, cheddar bunnies, Bare Naked apple chips, back to nature chocolate chip cookies and fruit salad // Below – hazelnut spread wrap, fresh broccoli and snappeas, hard boiled egg, pears, apples & berries, chocolate covered almonds
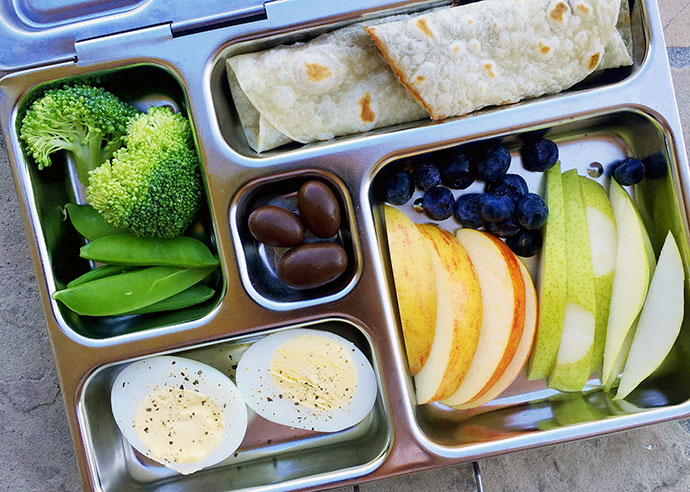
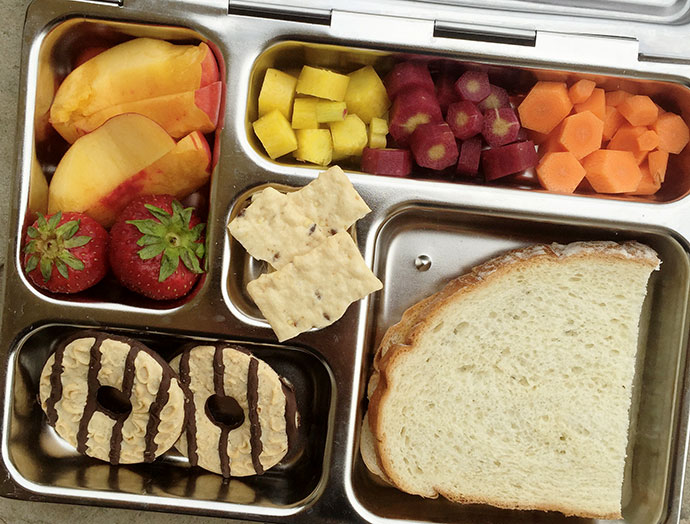 Above – hazelnut spread sandwich on sourdough, back to nature chocolate stripe cookies, peaches & strawberries, rice crackers, rainbow carrots // Below – turkey sandwich on sourdough, babybel cheese, rainbow carrots & snappeas, apple straws, grapes & plums, trail mix
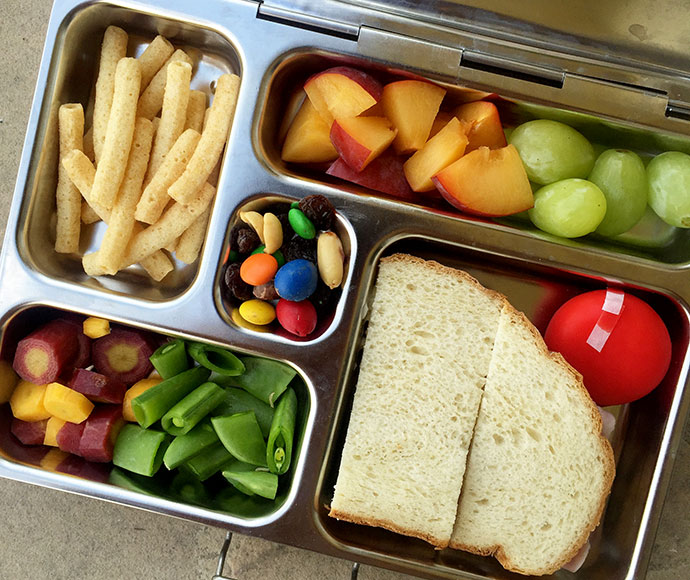
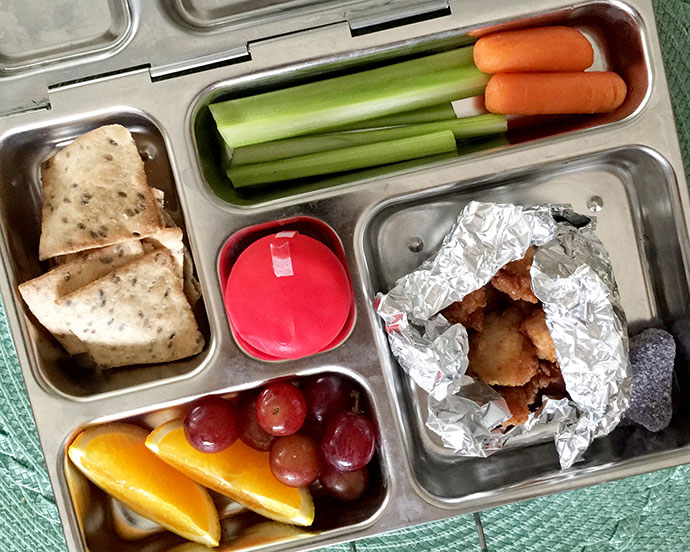 Above – homemade chicken nuggets, grapes & oranges, rice crackers, celery & carrots and babybel cheese // Below – turkey sandwich meat, graham crackers, babybel cheese, dark chocolate chips, fruit salad and snap peas
 Vegetarian Lunch Options:
 Nut-Free Lunch Options:
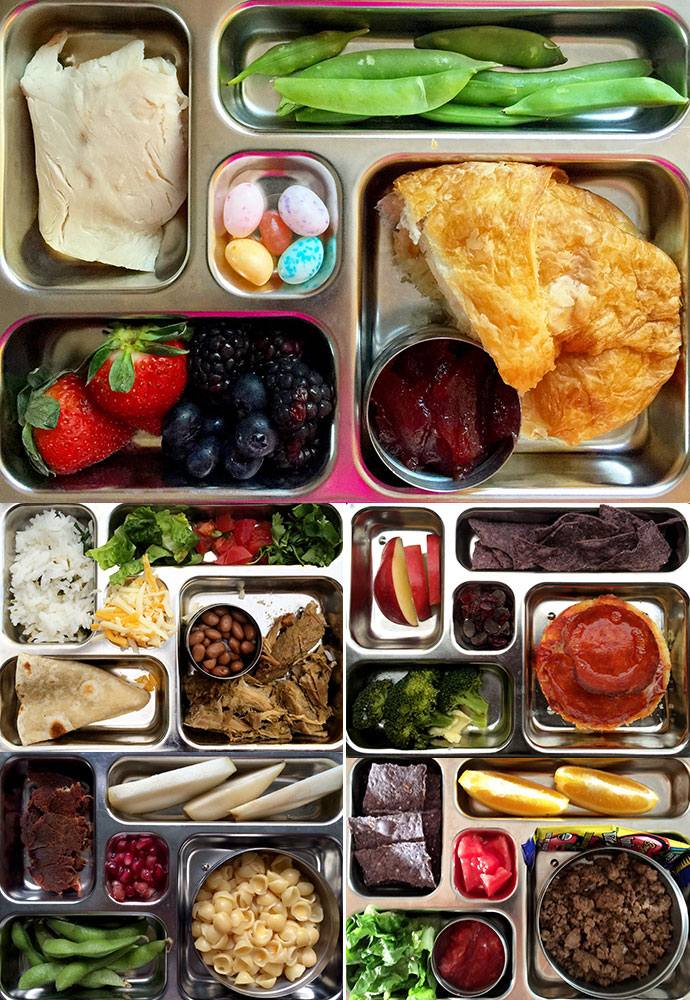 Gluten Free Lunch Options:
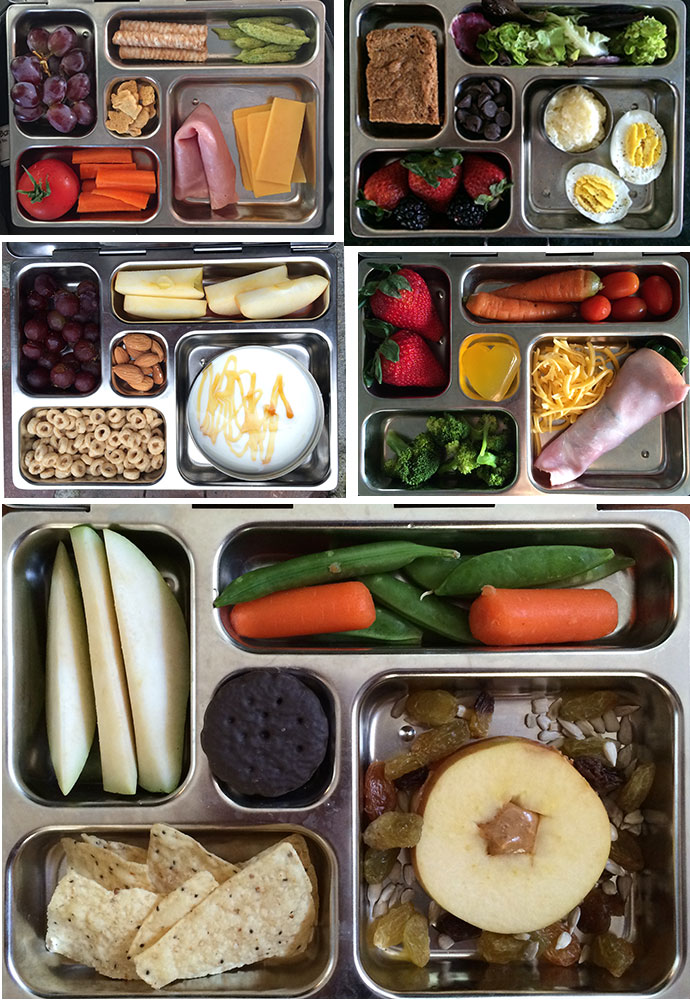 Don’t forget the code to receive 15% off any
 It’s been almost 6 months since I last wrote about the treatment of my Hashimoto’s, and almost a year since my initial diagnosis. Because I’ve been asked lots of questions, and because I’m just pretty darn excited, I wanted to give you all an update on my health and what I’m currently doing to manage my thyroid condition. Note, that I’m managing my Hashi’s symptoms, I’m not curing myself. The good news is, I feel great, and I hope the next couple of posts will help answer questions and maybe even give some of you suffering through this, hope that it can get better. I’m splitting this into 2 posts just to keep them brief, and because there’s been two important components to managing my Hashis, which each deserve their own space; self care & supplements, and diet. Let’s start with the supplements and self-care portion.
 A constant throughout the school year were our daily school lunch posts, most often packed in the
 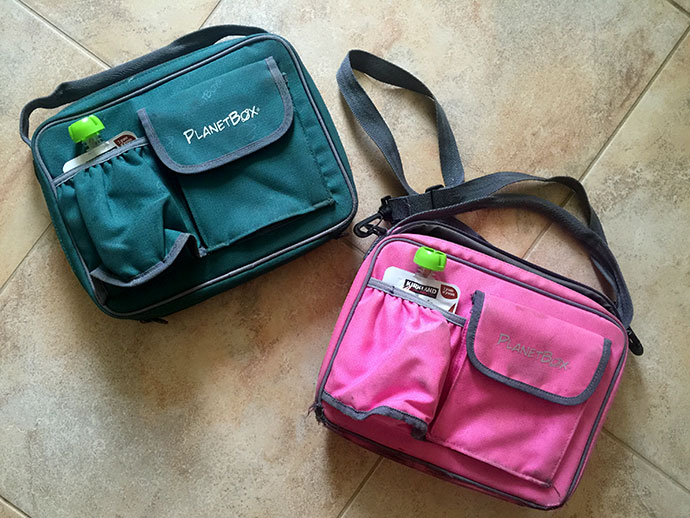 The lunchpail that goes with the Planetbox held up pretty well. Syd carries his in his backpack so it stayed a bit nicer than Taylor’s, who carries hers outside of her pack because it’s so stuffed with books (aww, the life of a 4th grader). I washed Syd’s once throughout the school year, and Taylor’s got a washing about every 2-3 months. To wash, I put in a pillowcase and set it on the delicate cycle, then let it air dry. They held up beautifully in the wash.
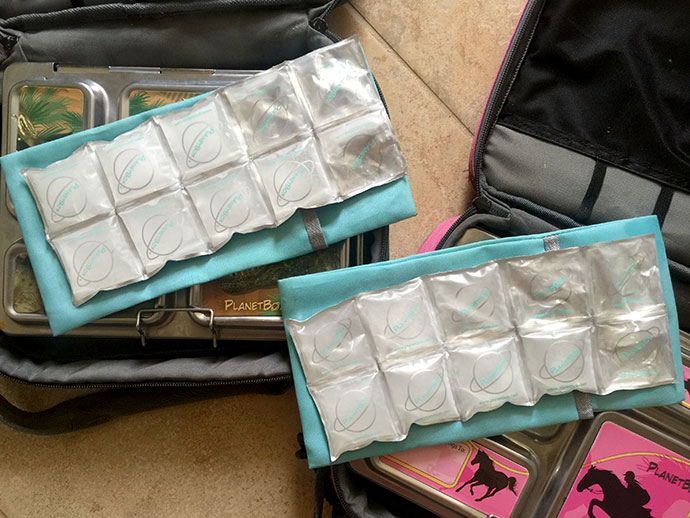 The only Planetbox item that got a bit sad by the end of the school year were the ice packs. Not sure if you can tell here in the photo, but some of the pockets of water sprung leaks so obviously no longer ice up. They still did their job in the cooler temps, but because we go back to school August 5th, when it’s just heating up here in SoCal, I’m definitely going to need to replace these to have any chance of keeping their lunches cool.
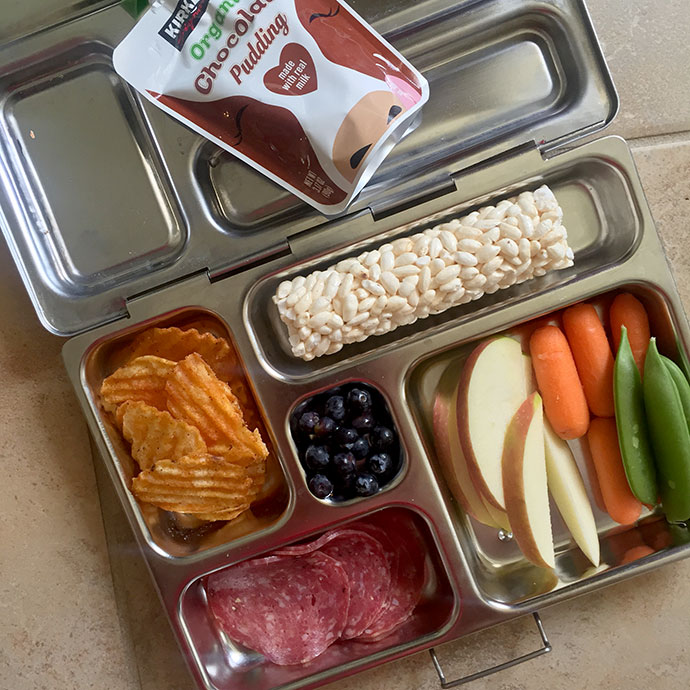 Less Waste
 The question has been raised many times on Instagram, as to whether a
 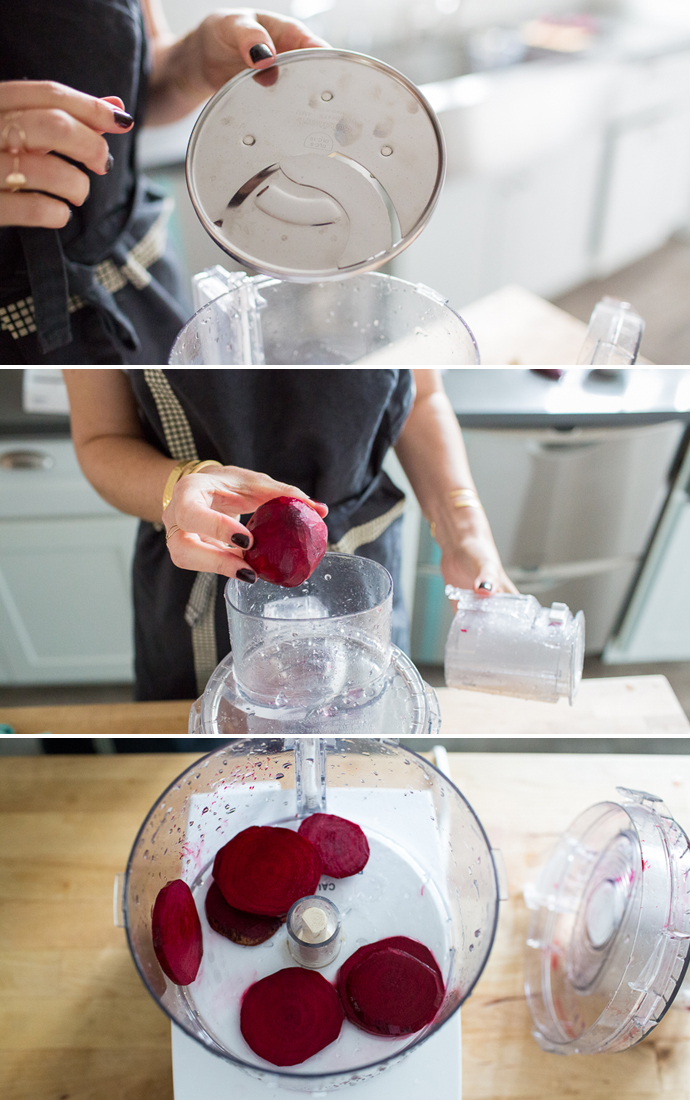 The slicing blade makes quick work of slicing veggies into thin slices, not paper thin like a mandolin, but much thinner and more consistent than you’d be able to slicing on your own.
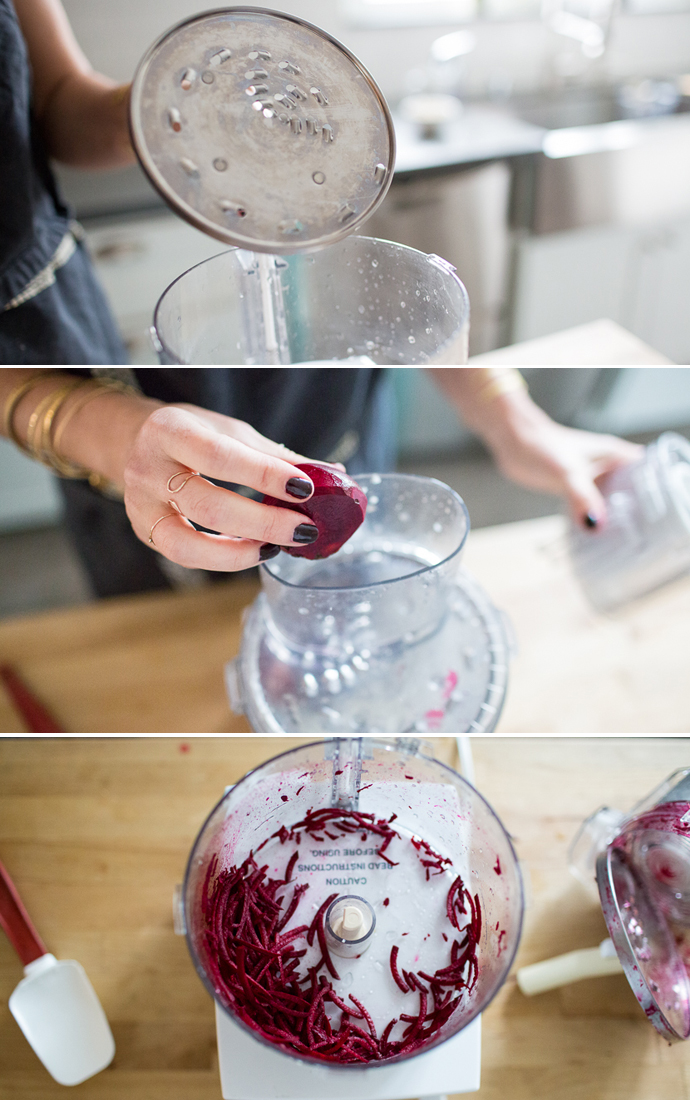 The shredding disc allows you to shred just about any fruit or veggie, and even cheese. I love raw beet shreds for salad toppings by the way.
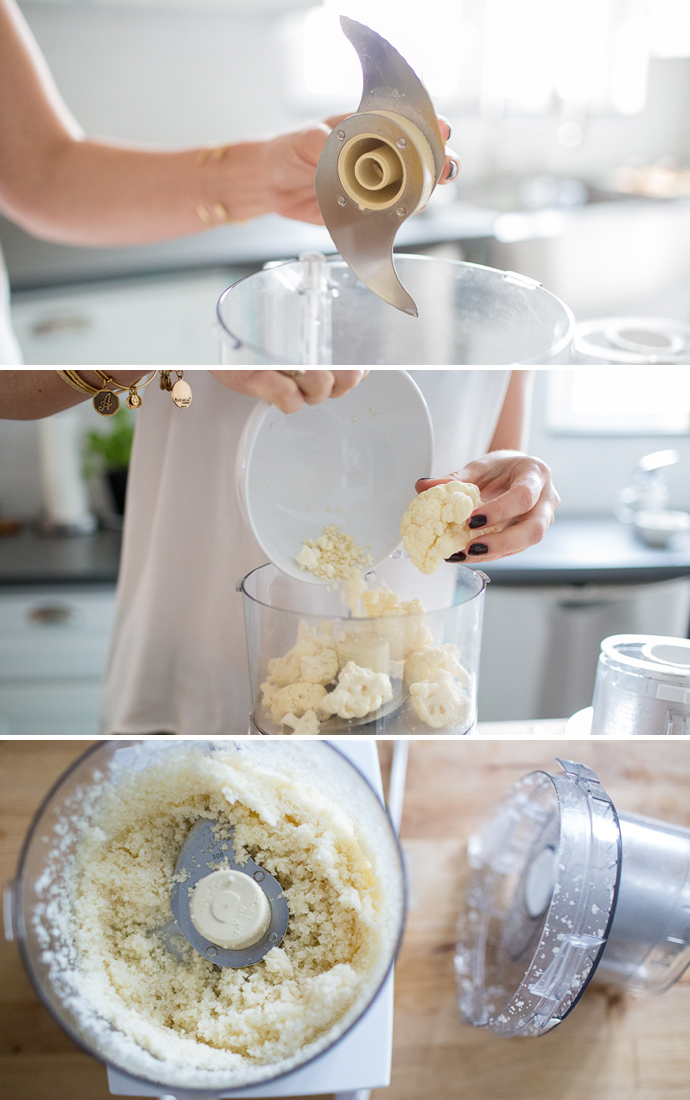 And of course the standard chopping blade is what will quickly chop up any number of foods and make quick purees as well.
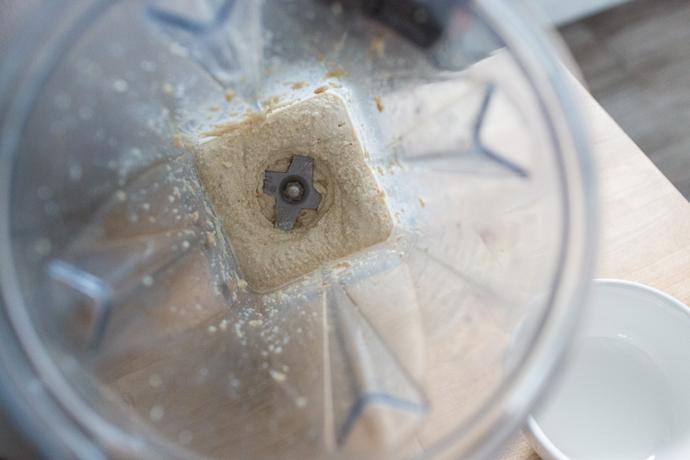
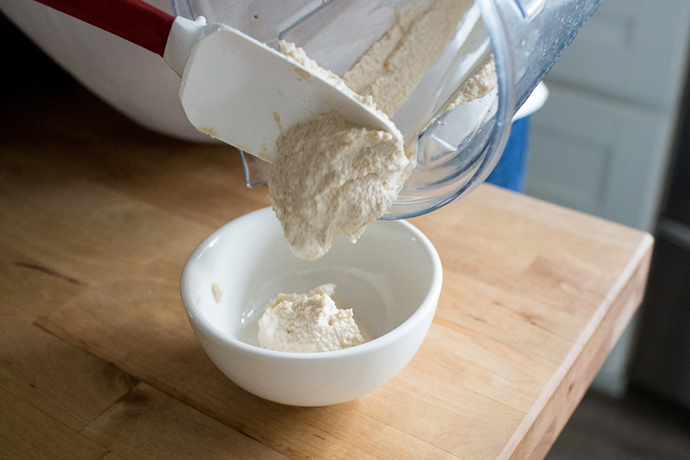
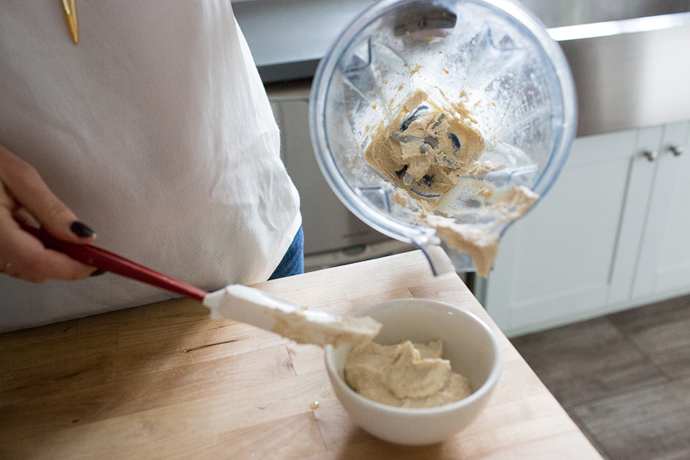

 We have Taylor to thank for this salad. Last week when she made this dinner, she added it to the menu at the last minute and it may have been my favorite part of the whole meal, I loved it so much I practically licked the bowl clean. The original recipe is from
 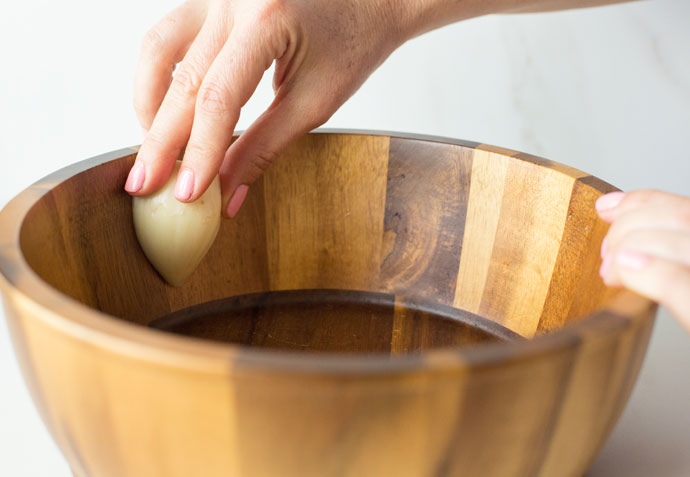 What I love most about this cookbook is the use of simple yet ingenious techniques that children can fully complete, which yield great results. Case in point being the way the dressing comes together; by rubbing the salad bowl in garlic, then adding the olive oil to the bottom along with the pine nuts, and then adding all other ingredients on top. So simple, yet something I had never thought of.
 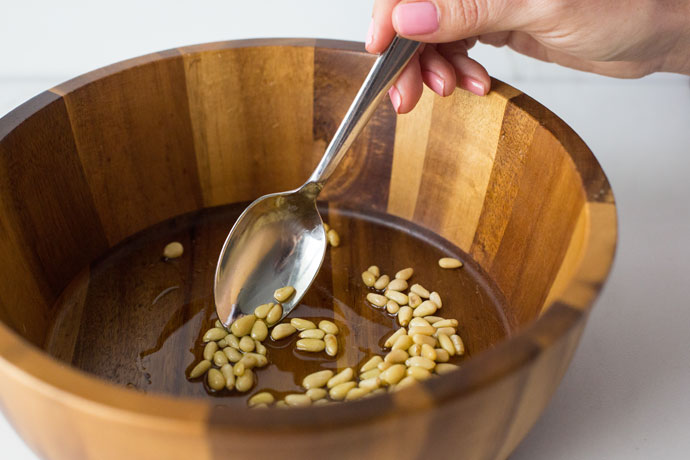 Another great technique they have the kids use is for de-seeding tomatoes. Simple cut in half and scoop out with a teaspoon. I’ve been using that great little tip everyday since learning it; and to think I’ve taken several fancy cooking classes and never once learned to de-seed a tomato that way.
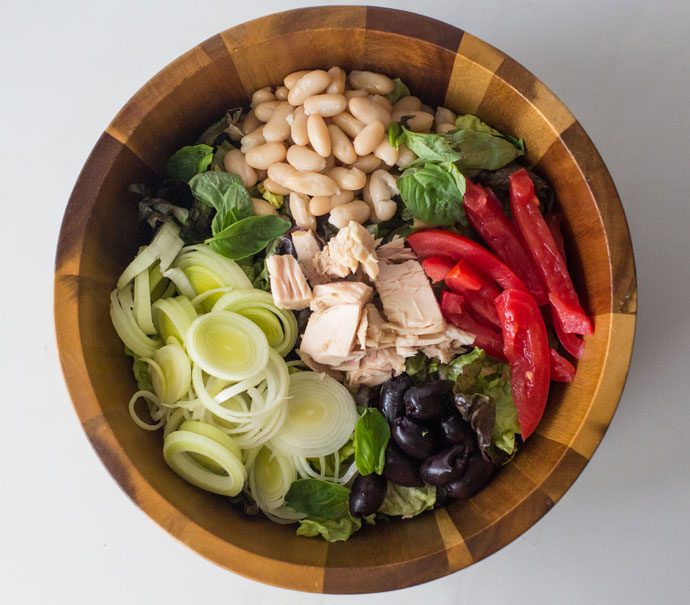 Raw leeks may seem like an odd addition for a child friendly salad, but I can assure you they’re on the super mild side, and are much less pungent than standard onions, and even small green onions. They really add an unexpected hint of sweetness.
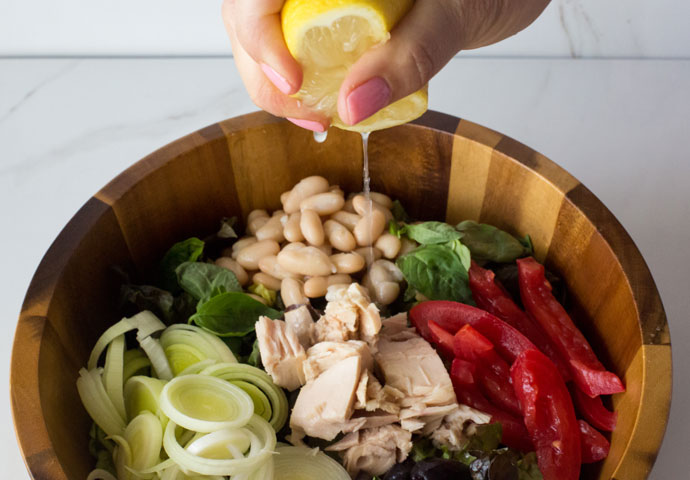 Once all your ingredients are placed in the bowl, you simply squeeze your lemon juice on top, and then toss to combine. Believe it or not, but you definitely get a hint of garlic.
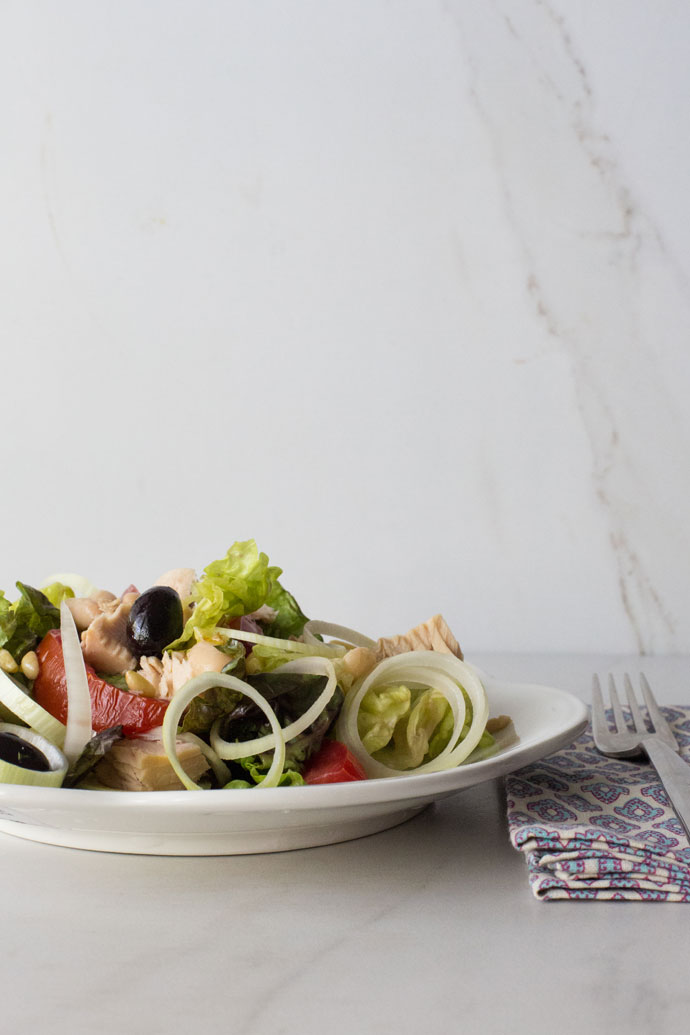 The leeks add the prettiest bit of interest to the plate when tossed and separated all about, almost like teeny tiny onion rings. And the tuna is an easy and affordable way to add in protein, allowing this salad main dish status when eating in its entirety, or serves as a satisfying appetizer when divided into smaller portions.
 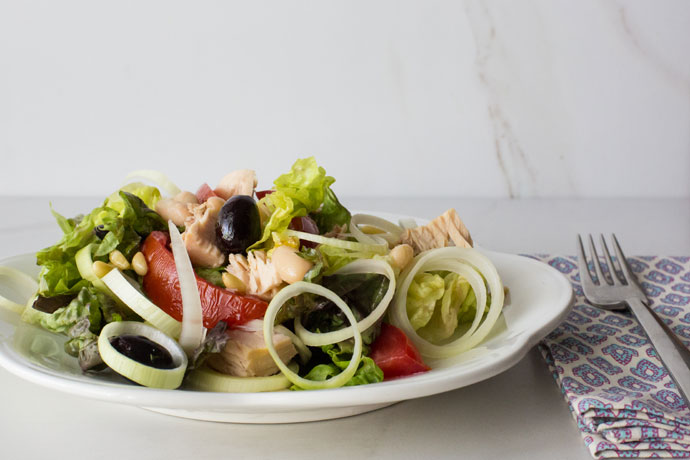 I couldn’t think of a tastier way to welcome the arrival of Spring, and the wonderful bounty we have to look forward to in the coming months. Enjoy, and as always, please let me know if you give this a try. Print out the recipe below.

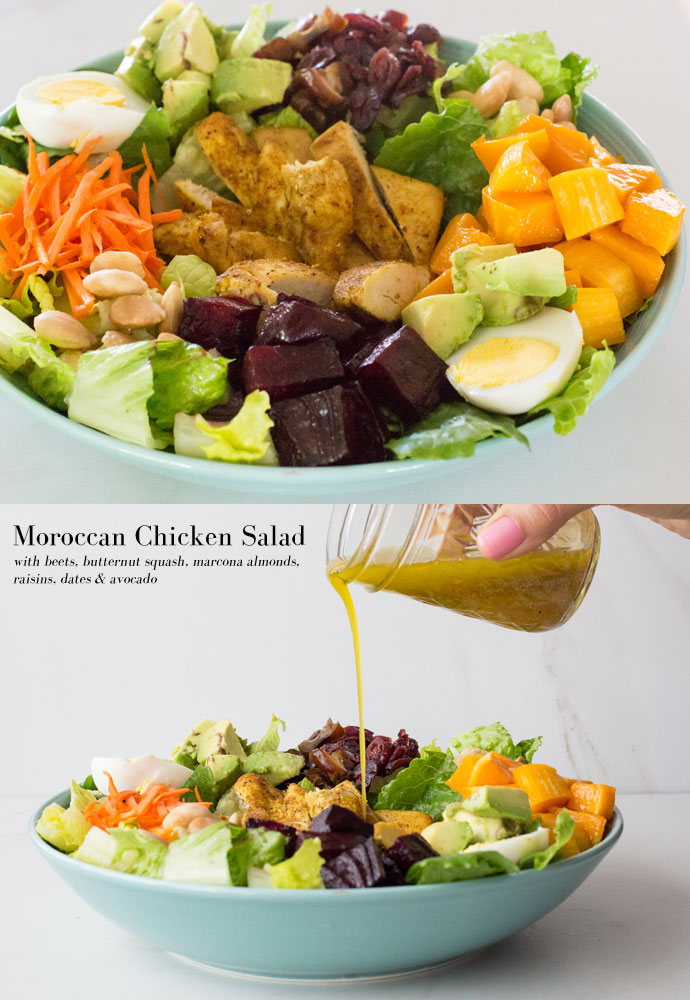 California Pizza Kitchen is hands down, Syd’s favorite place to eat. The kid would be content to eat their mac n cheese every single day for the rest of his life. Or at least until his taste buds evolve a bit. My point being, whenever there’s a special occasion to celebrate and we leave the option up to Syd, we eat at CPK. Their food isn’t anything remarkable, but we all leave feeling full and happy because the kids love the food and we love how close it is to our house, and that the volume in there is always loud enough to mask our noisy kids. Their gluten free menu is decent, and I flip flop between ordering a certified gluten free pizza, and this Moroccan chicken salad. I love this salad so much that I had to recreate it myself at home, and I’m quite pleased to say my version is even better than the one they serve, thanks to a yummy garam masala blend coating the chicken, and a flavor packed dressing.
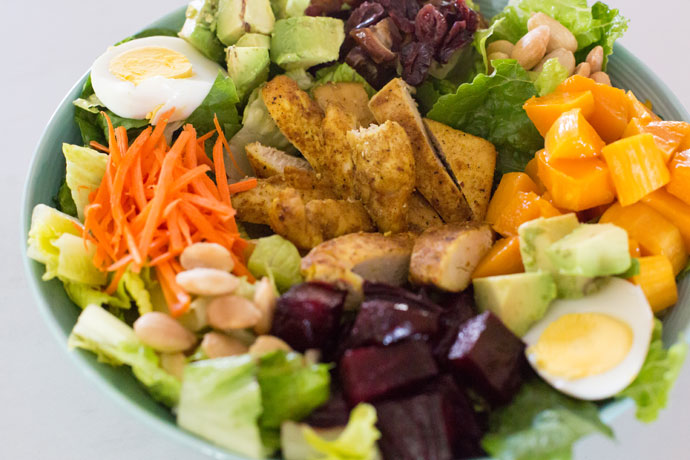 Let’s be completely honest here, anyone else find salads to be a complete pain in the arse to put together? Sort of like sandwiches too, they seem to taste so much better when someone else is making them, but I promise that your return on investment here is plentiful. To make things a bit easier, I roasted the beets and butternut squash as well as the chicken all together on the same big roasting sheet, and while those things were roasting, I prepped the rest of my ingredients.
 You’ll want to roast 1 very large beet, 1 smaller butternut squash, and 2 boneless skinless chicken breasts. This will allow you to make a very large salad that will easily serve two as a main dish. My mom and I ate this for lunch the day I made it to shoot, but if you’re flying solo, go ahead and cut the quantities in half. If you don’t add all the dressing though, there’s no reason you can’t pack away the leftovers and enjoy this 2 days in a row.
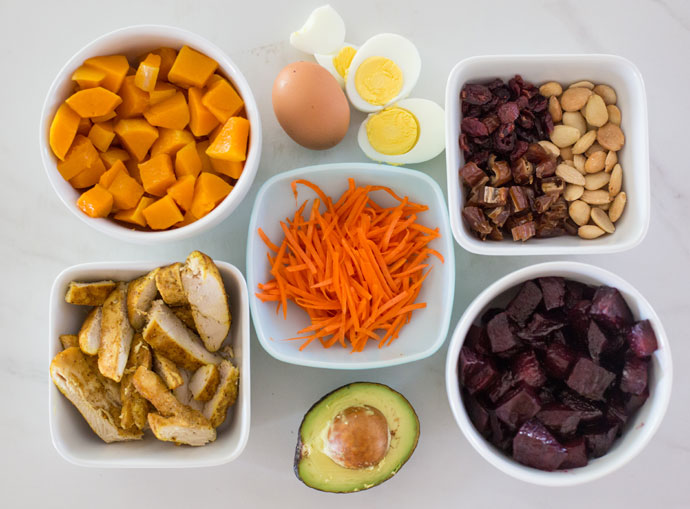 So that your beets don’t color the squash and chicken, keep all three items separated on the sheet pan, which should be no problem if you’re using a large pan. Because you roast the veggies at 400 for a good 30 minutes, but you don’t want to cook the chicken that high for that long for risk of drying it out, I went ahead and cooked the veggies solo at 400 for 20 minutes, then added the chicken breasts and continued cooking for another 10 minutes until the veggies were done. At that point I took out the veggies, lowered the heat to 350 and cooked the chicken for another 10-15 minutes or so. As I type this out, it seems rather complicated but I swear it was easy in the moment. If you don’t want to keep track of pulling things in and out of the oven or adjusting oven temps, say to hell with my method and just cook the veggies and chicken separately. By the way, one of the best parts of this salad is the flavorful chicken, which I achieved by rubbing the breasts in some olive oil, a store bought garam masala blend, and to add more flavor and color, ¼ teaspoon of turmeric. You can find premade garam masala at most grocery stores, or if you have a well-stocked spice rack, you can
 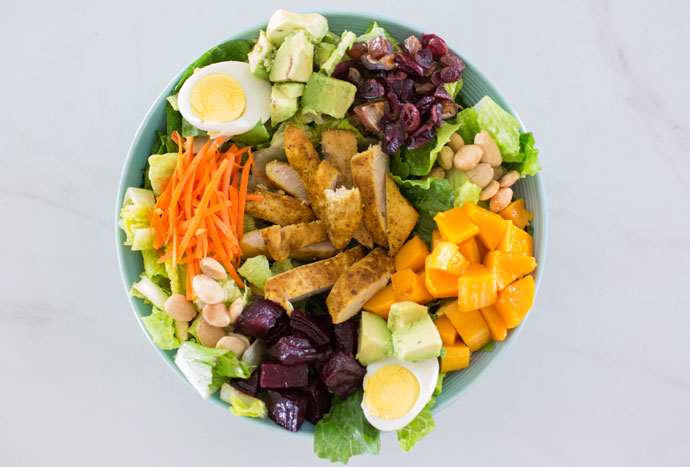 You’ll find that your salad may become quite beet and squash heavy if you add the whole thing, so just go ahead and add about a cup of each and reserve leftovers for another day and another use, you should have no problem making good use of both. If all else fails and you’re feeling lazy the next day after throwing together this monumental salad, just pop them in your mouth one by one and consider that your lunch. However, if you have feta or goat cheese on hand, combine the leftover veggies with a bit of cheese and maybe even some simple spinach leaves and you have a more dignified lunch.
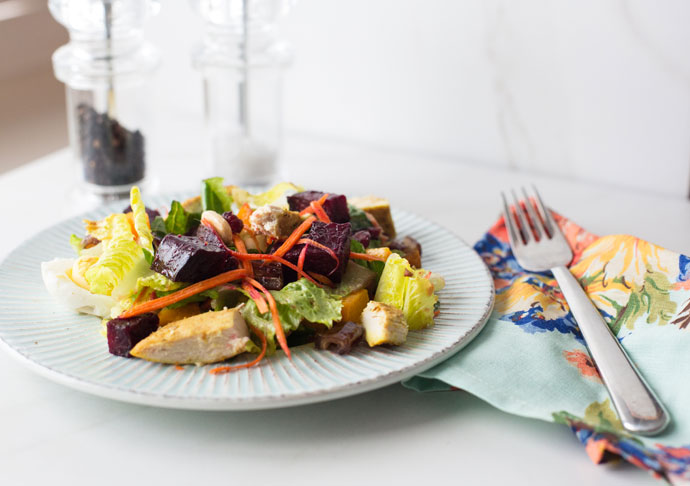 Once you’ve peeled and chopped and sliced and roasted all your ingredients, you’re finally able to put them all together and enjoy the fruits of your labor. I promise this salad is worth the extra effort and it will quickly become a favorite I’m sure. Find the printable recipe below, and of course please let me know if you make this lovely dish and how you liked it.

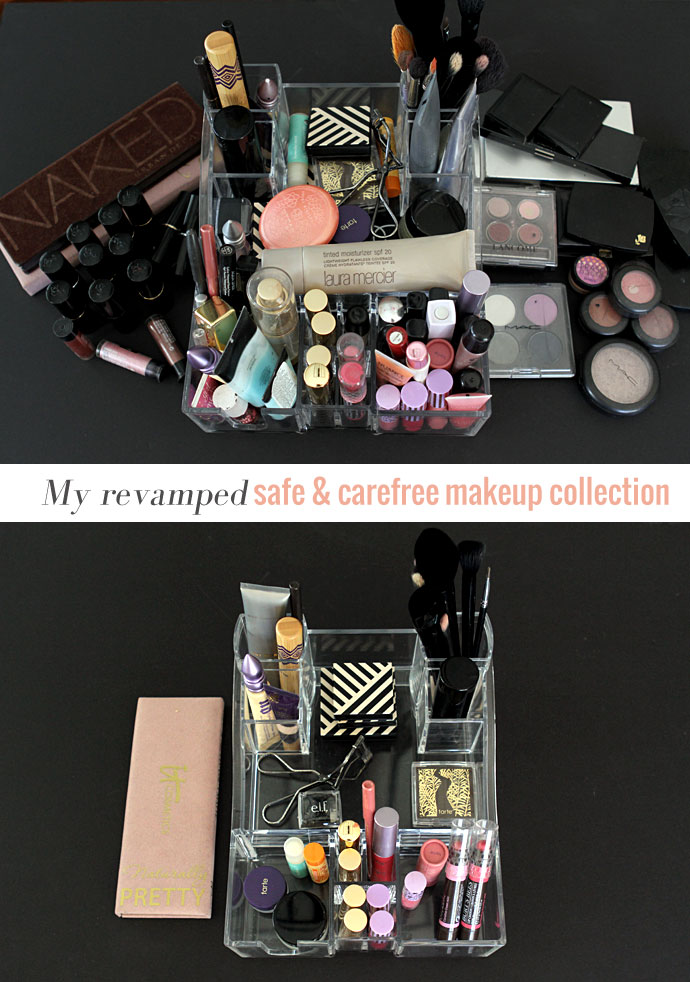
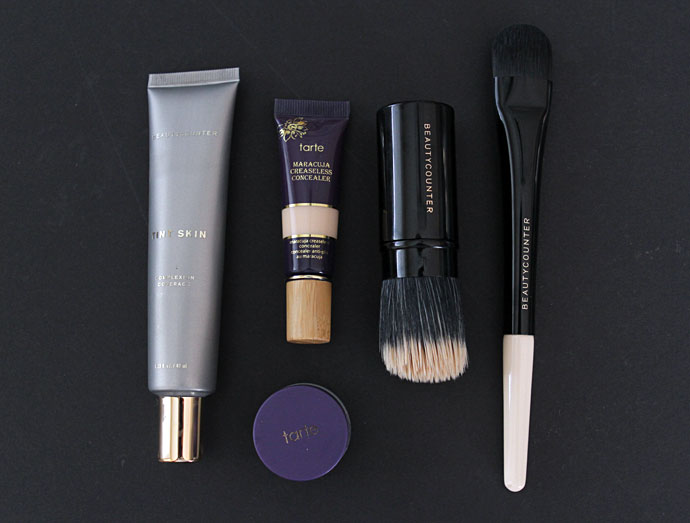 Face:
Face: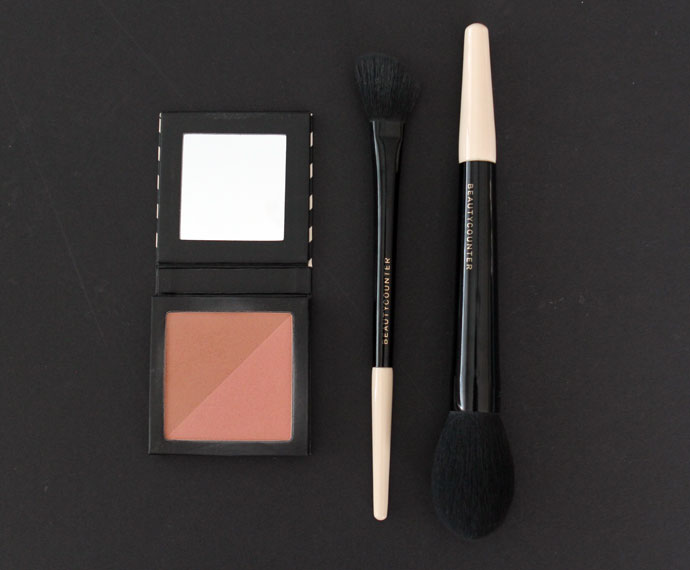 Cheeks:

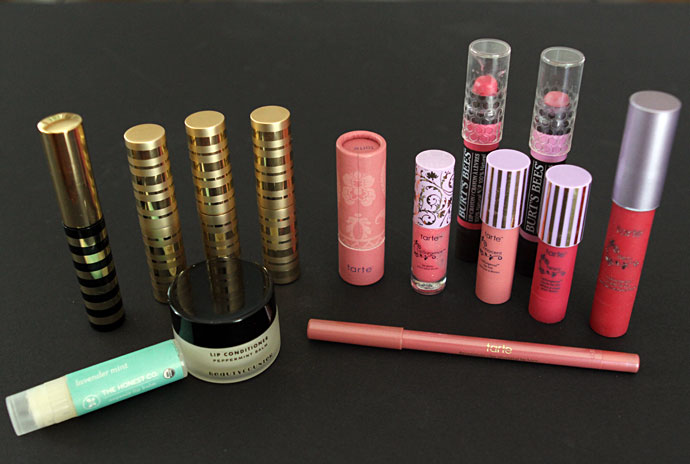
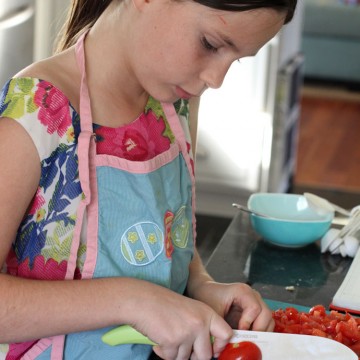
 This past weekend a monumental feat was achieved; one of our children took over meal time and cooked a full 4 course meal for the family, grandparents included. A few days prior, she had rediscovered our copy of
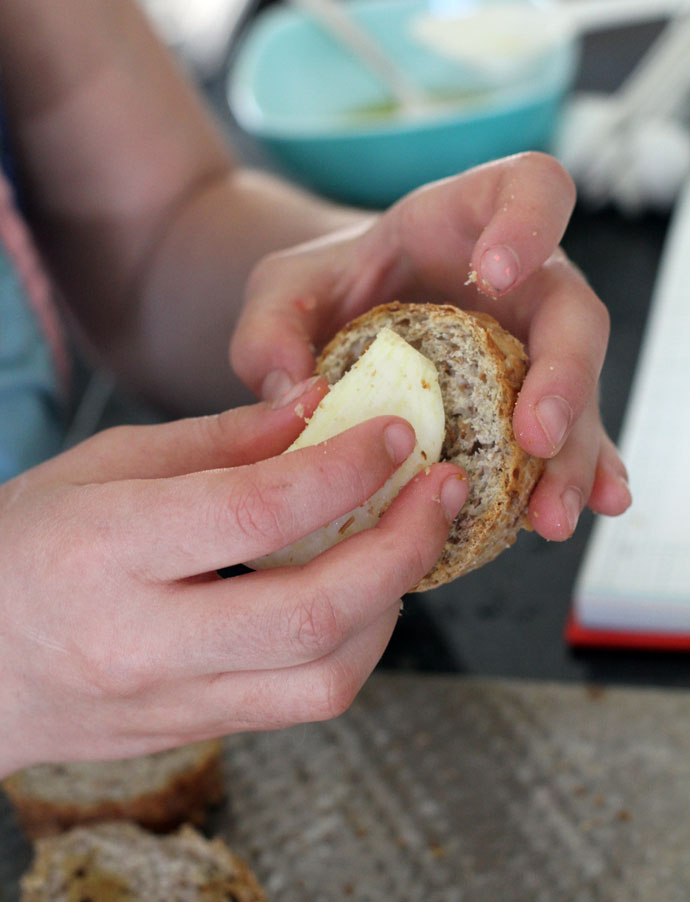
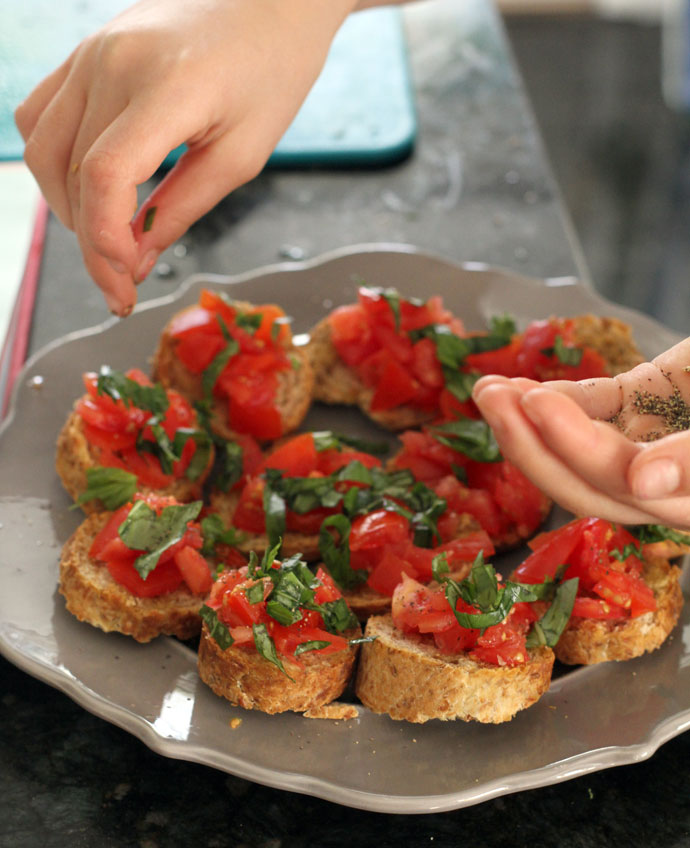

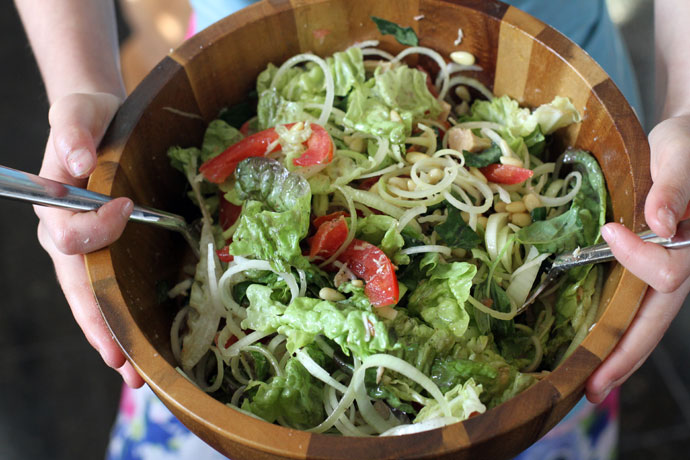

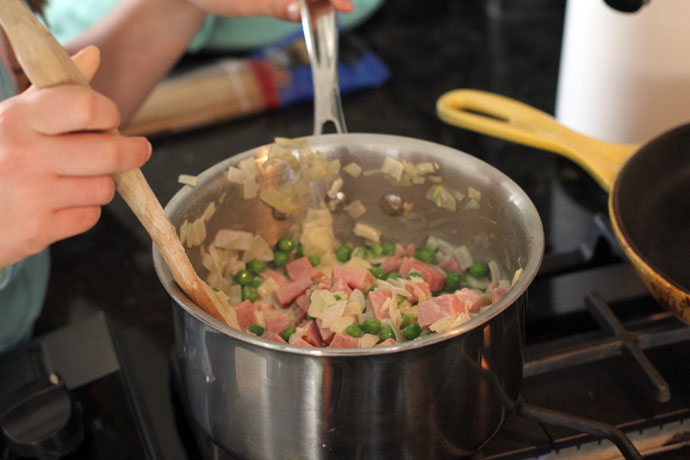
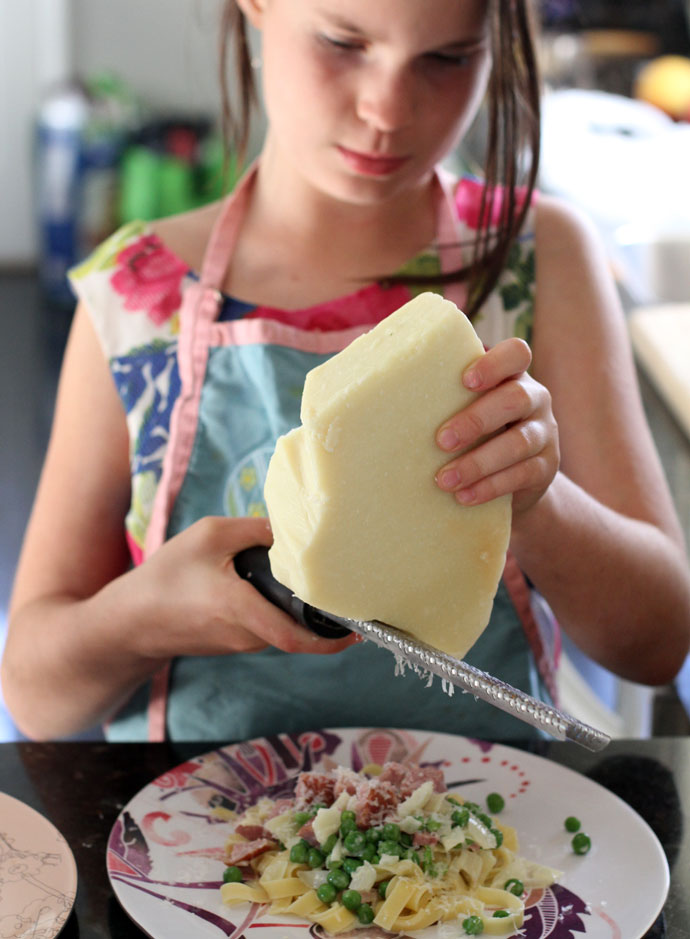


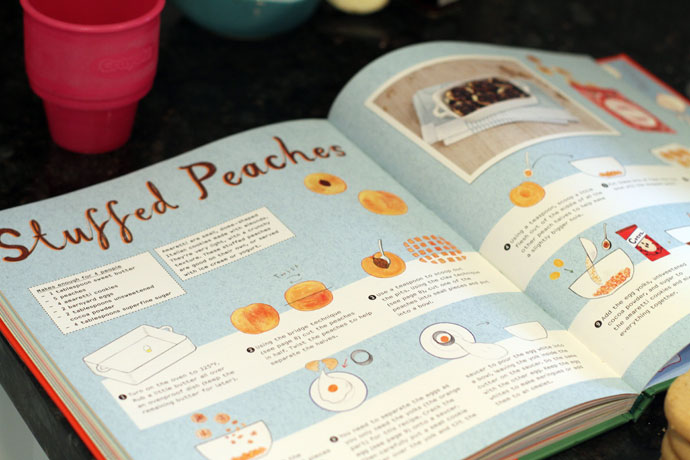
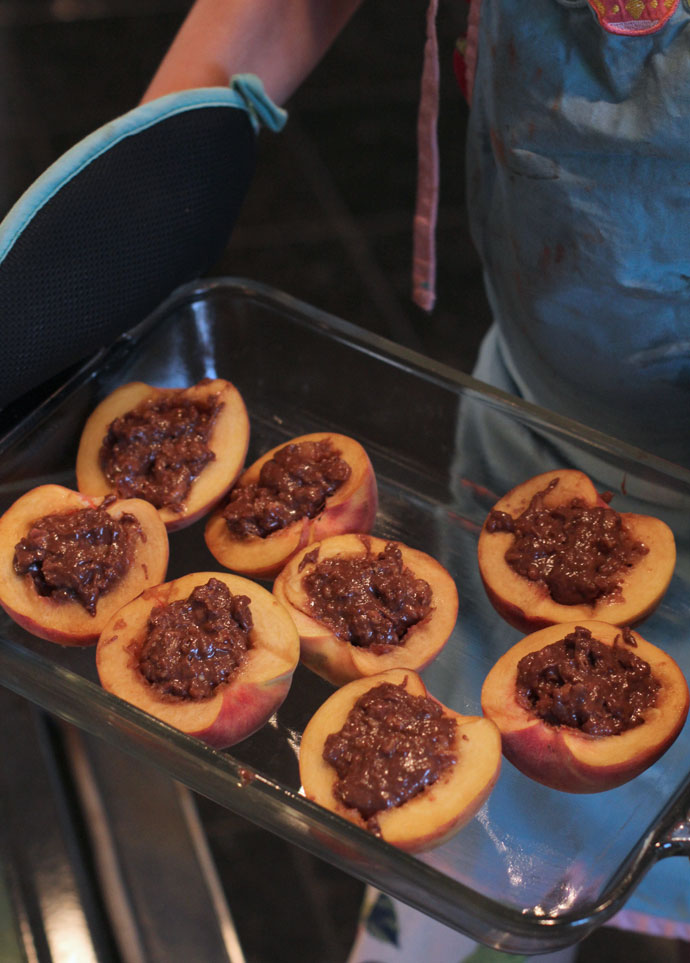

 There’s nothing that can really prepare you for the sleep deprivation that comes with being a new parent. You can prepare yourself as much as possible by reading books and asking around, but until your baby is home and you experience first hand the delirium that comes from lack of sleep, you’ll never understand just how desperate you’ll become to get some sleep. We were lucky with our first two children, who were quick to fall into a great sleep routine as babies, and now as older children fall asleep and stay asleep with limited, to zero hesitation. But the sleep gods did not smile down on us for our third child, and as he left babyhood and entered toddler-hood with continued night wakings, we became willing to try just about anything to get him to sleep, which is how and why we turned to oils. But first, a little back story.


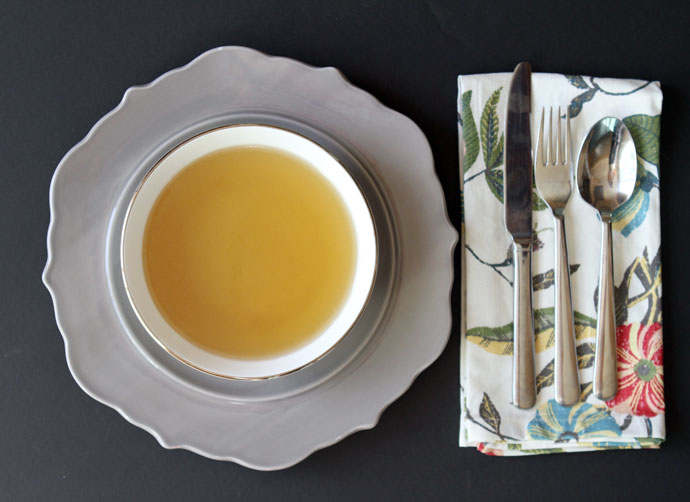 It seems that currently, you can’t gain access to the healthy living club, unless you know how to make your own bone broth, or as our ancestors referred to it, stock. At first when all this talk started forming about “bone broth”, I figured it was some different magic elixir than the one people have been making for centuries, but it seems it’s one in the same. Sure, some recipes suggest you add vinegar to help extract the marrow from the bones, and some insist the broth must cook for days to evoke the medicinal properties. Still, some others insist any stock/broth worth its weight, must be made using beef bones. I won’t get caught up in the many nuances of making broth/stock these days, but as far as I’m concerned, as long as your stock turns out a rich deep color, has a consistency that’s thicker than water, and gels up nice and firm when refrigerated and allowed to sit for a few days, you’ve done a bang up job. Now, to make it taste good so that you can actually make soup out of it, or even drink it straight without having to add tons of salt and seasoning, as I’ve learned, requires a bit more attention to detail. And by the way, there is no secret membership to the healthy living club, and you certainly don’t need to make stock to belong to it. Anyone can join and membership is free, but knowing how to make a few good staples will definitely go a long way towards saving you money and making your healthy food taste really good.
 To get started, you want to gather some veggies you have on hand. Older sad wilty veggies are fine, and making stock out of them is usually a good way to salvage them before they go in the trash. You usually want a few carrots, some celery stalks, at least one whole onion, and whatever fresh herbs you have on hand, although the heartier kinds like bay leaves, rosemary and thyme are best. The key to making really flavorful stock I recently discovered by a fluke, is to roast your chicken pieces first. If you’re taking a whole chicken you’ve already eaten and picked clean, go ahead and season with salt, pepper and any other favorite dried herbs you have on hand. Roast for 10-15 minutes or so in a 375 degree oven. This will enhance the flavor before you cook it. If you don’t have time for this step, fine, but I suggest you make time ha! Doing this has taken my stock from a taste level just above that of grocery store boxed stock, to kick-ass stock that tastes so good you can slurp it up all on its own.
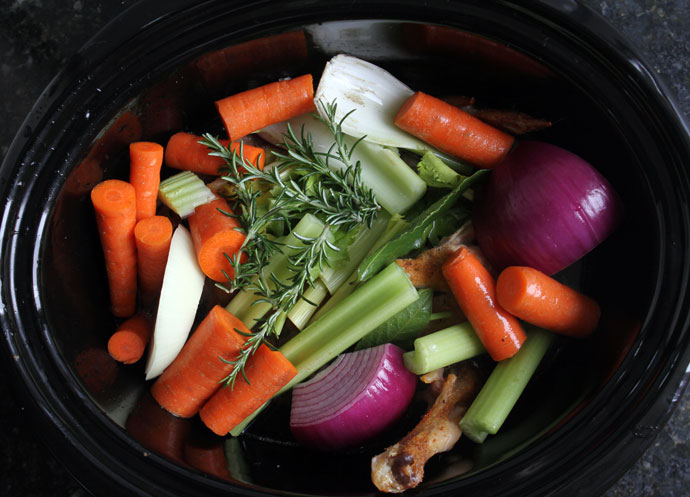
 After you’ve roasted your chicken pieces, which look lovely after being picked clean, add them to your crockpot, and then place your cut up veggies on top. Sprinkle with a good amount of salt and pepper, at least 1 tablespoon salt and ½ tablespoon pepper, and cover with water. Place the lid on top and cook on low for hours and hours. Overnight, for a minimum of 8 hours is ideal, but don’t be shy going for 12 hours too. Turn off your crockpot when the broth is done cooking, and I always like to let it come to room temperature before I start straining it. Don’t be afraid to let it sit out on the counter for a few hours while it does this.
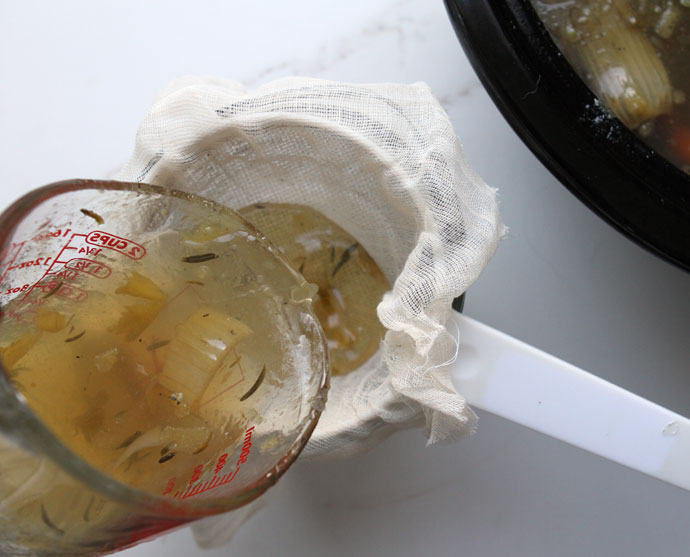
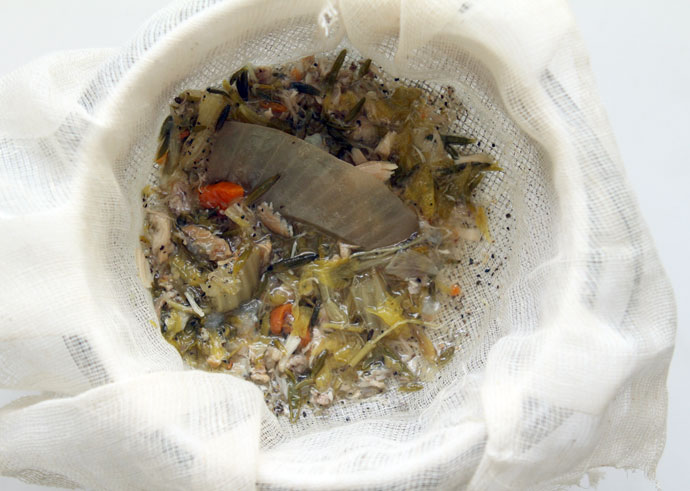 Ideally, you want to have some
  If you want to get really thorough, you can grab another large bowl and strain through again, but if you are using cheesecloth and a strainer, you shouldn’t really have to. You can see how much is really held through with just one pass.
 I hope I’ve helped to demystify the process of making broth/stock. I think I sometimes take for granted that everyone knows how to do these things, so why share the recipe or tips here? But it seems every time I post my stock-making adventures, I always get plenty of questions, so why not share the process? Let me know if you have any questions, and please, go forth and make some kick-ass stock for yourself!
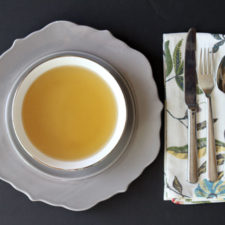

 Going through health challenges for an extended period of time, even seemingly minor ones, is one of the most humbling of things we can go through physically. At least it was for me, and because of the roller coaster ride of health I was on last year, it greatly altered the simple notion I had previously held, that “just eating real food” would work equally well for everyone. After my repeated cases of strep throat last year, and before my official autoimmune diagnosis, I knew something within me was just off, and so I ventured on my first cleanse. I swallowed a lot of my words during that period, because after experiencing just how much better I felt off of certain food groups I previously thought I was immune to, I started to learn that the one size fits all approach to eating wasn’t right for everyone.
 Reintroduction Phase
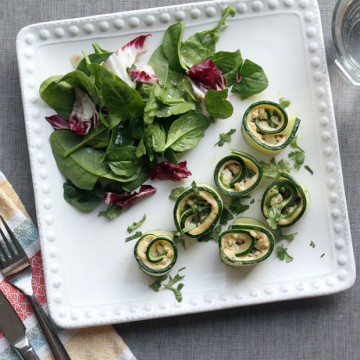

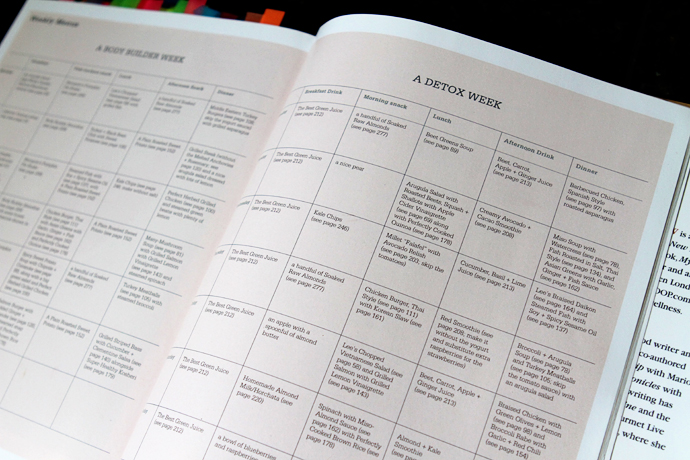