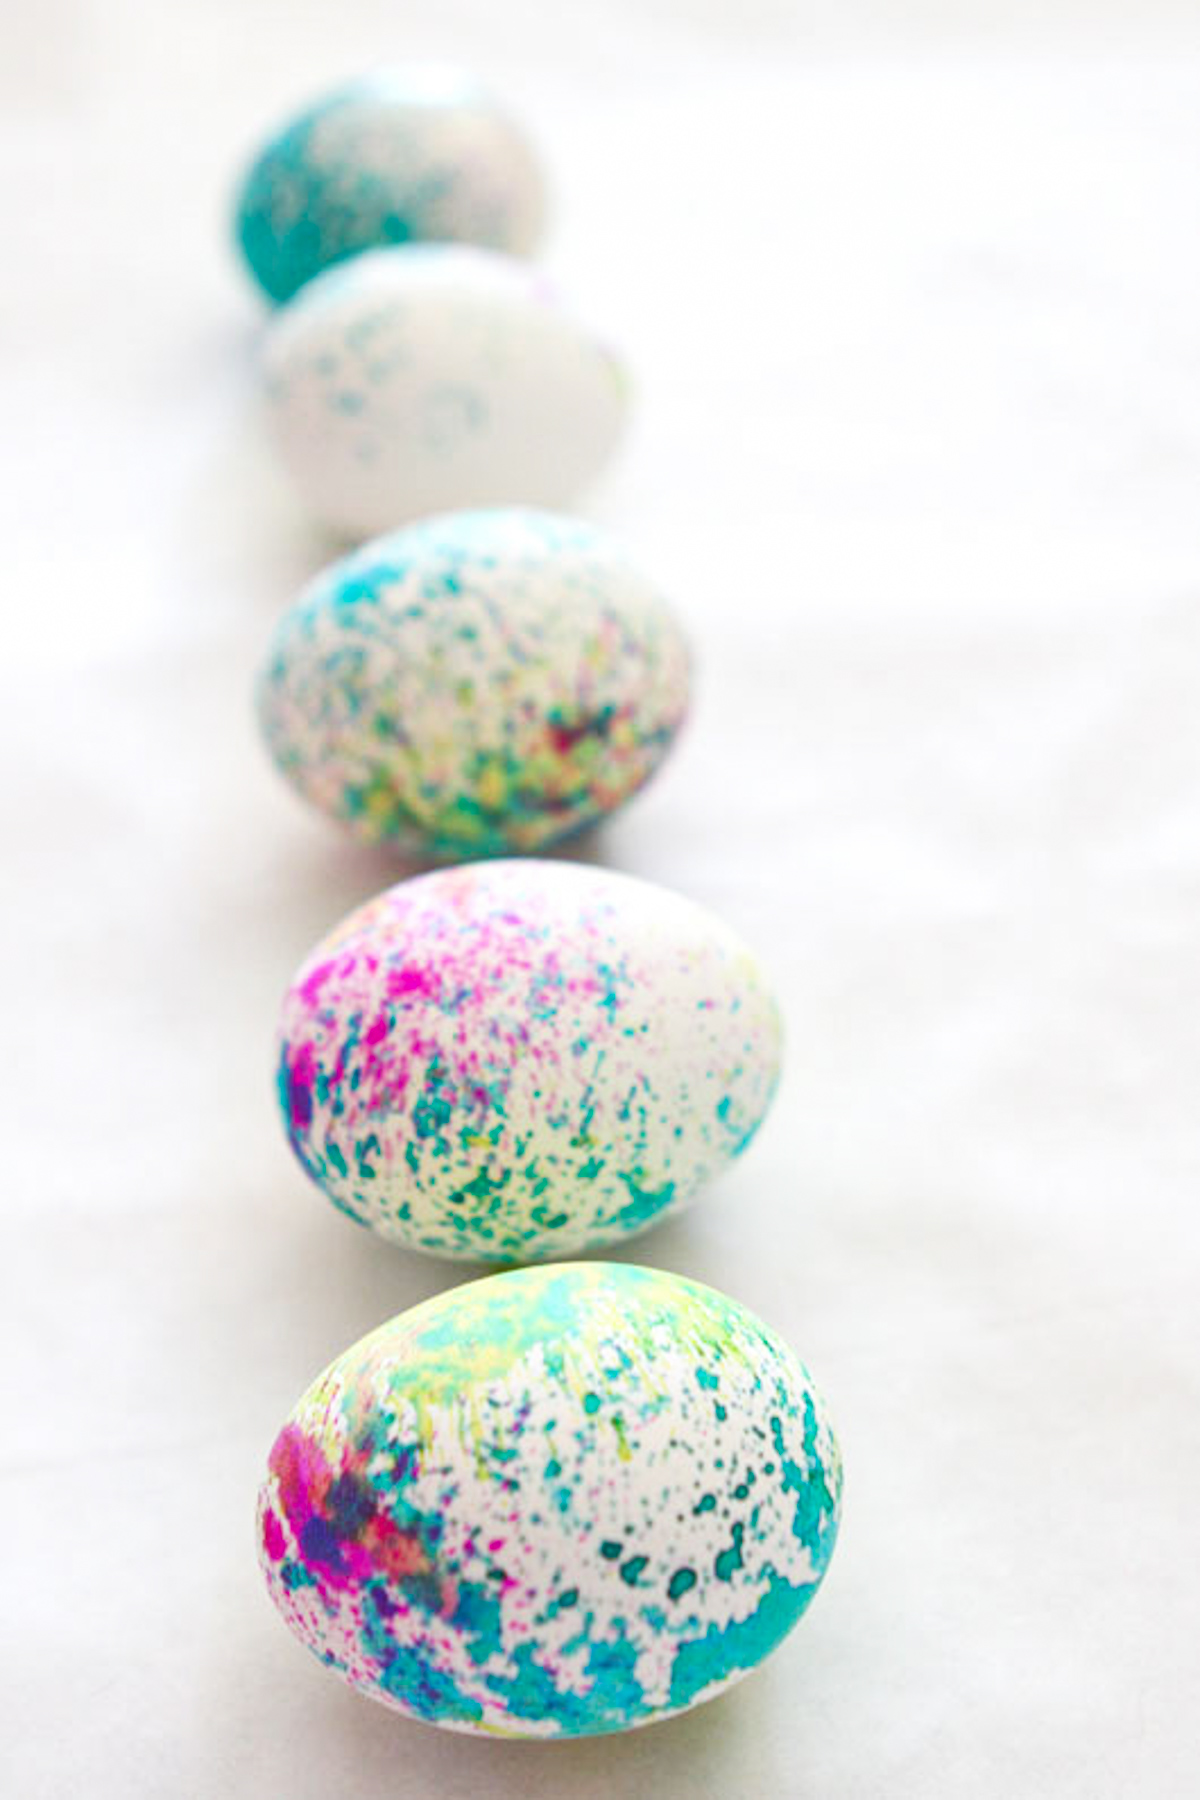
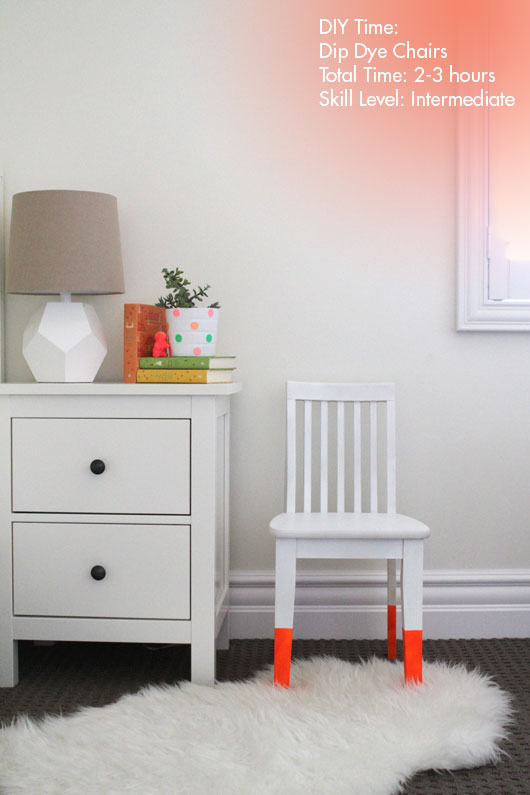
Watercolor Easter eggs are a novel way to update traditional dyed eggs. Using liquid watercolors and spray bottles, you can easily create lovely speckled and marbled effects.
Dying Easter eggs has been an annual tradition for as long as I can remember. We’ve carried the tradition on with our kids, and every year we try our best to always try a new technique.
[feast_advanced_jump_to]Why you’ll love this craft
This unique Easter egg painting idea is a great activity for kids and adults alike. It only requires a couple of craft supplies that are available at any local art supply store, and the results are spectacular. You’ll want to make watercolor Easter eggs all year round, they’re so stunning and fun to make.
Creating special works of art with this activity is also so easy and simple. From start to finish, create dozens of eggs for your holiday celebration in under an hour. But it’s so fun, you’ll be in no great hurry to speed through this craft.
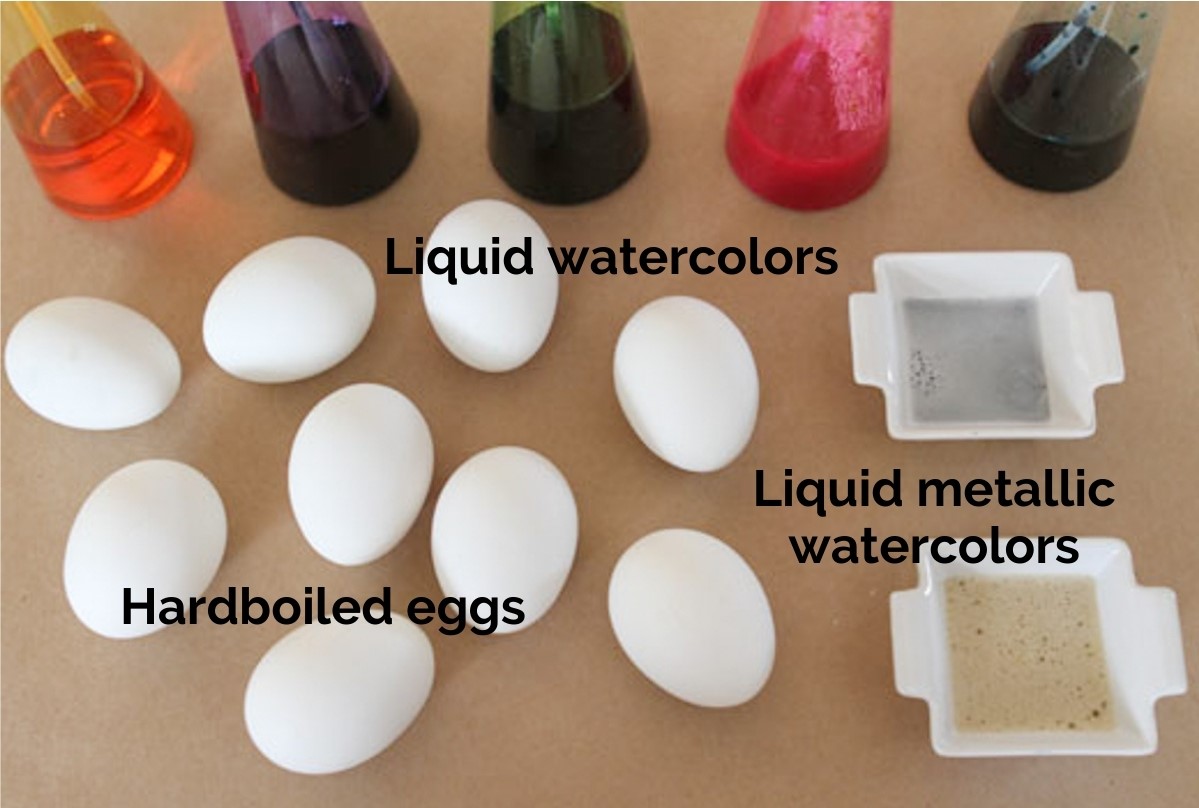
Supplies
- Hardboiled eggs – definitely use white eggs. Paint won’t stick to plastic eggs, so they have to be good old fashioned eggs.
- Liquid watercolors – instead of coming in palette form, liquid watercolors come in concentrated bottles that you mix with water. While you can add the watercolors to a bowl and paint from there, I added them to spray bottles to create the cool speckled effect. Liquid watercolors can be found at any craft supply store.
- Paint brushes and spray bottles for applying your watercolors. I picked up my spray bottles at the Dollar Store and they work perfectly!
Step-by-Step Instructions
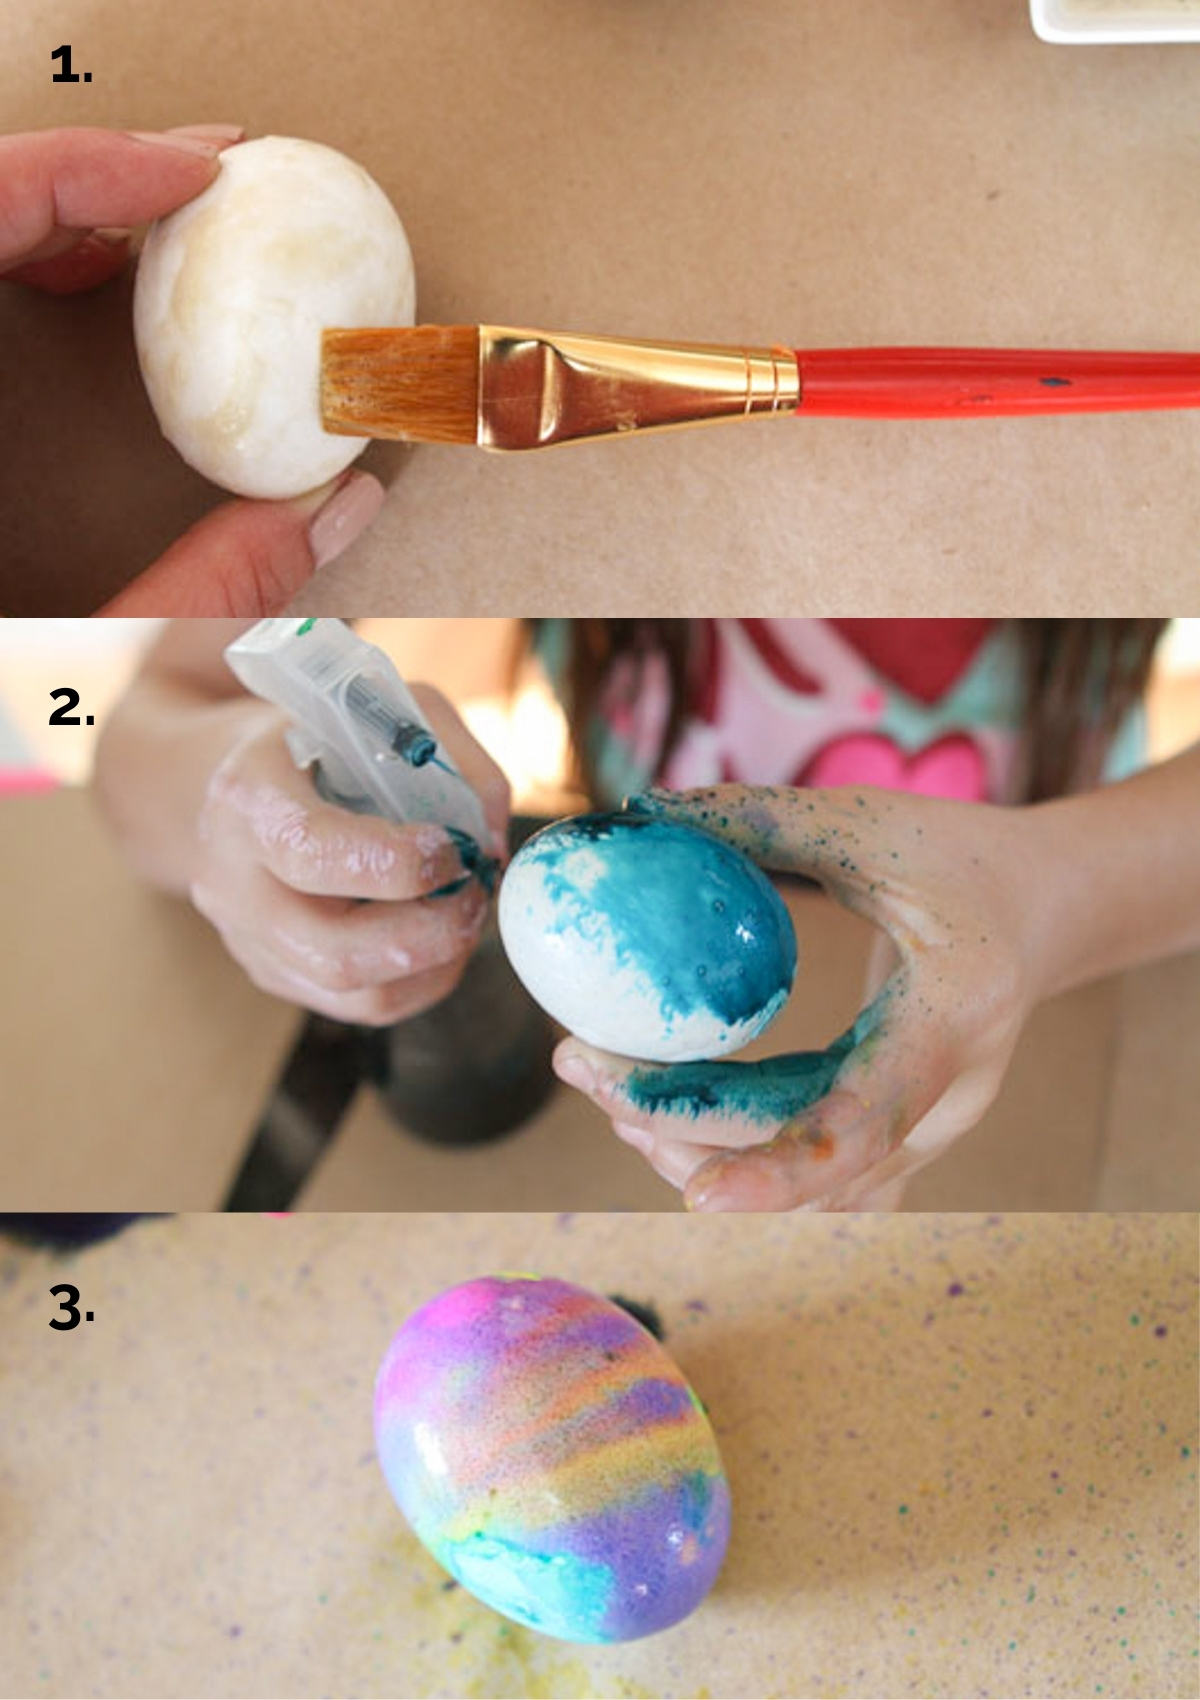
Step 1 – Prepare your liquid watercolors by following package directions and mixing them with water. Add to bowls for painting directly on, or spray bottles to apply with the splatter effect.
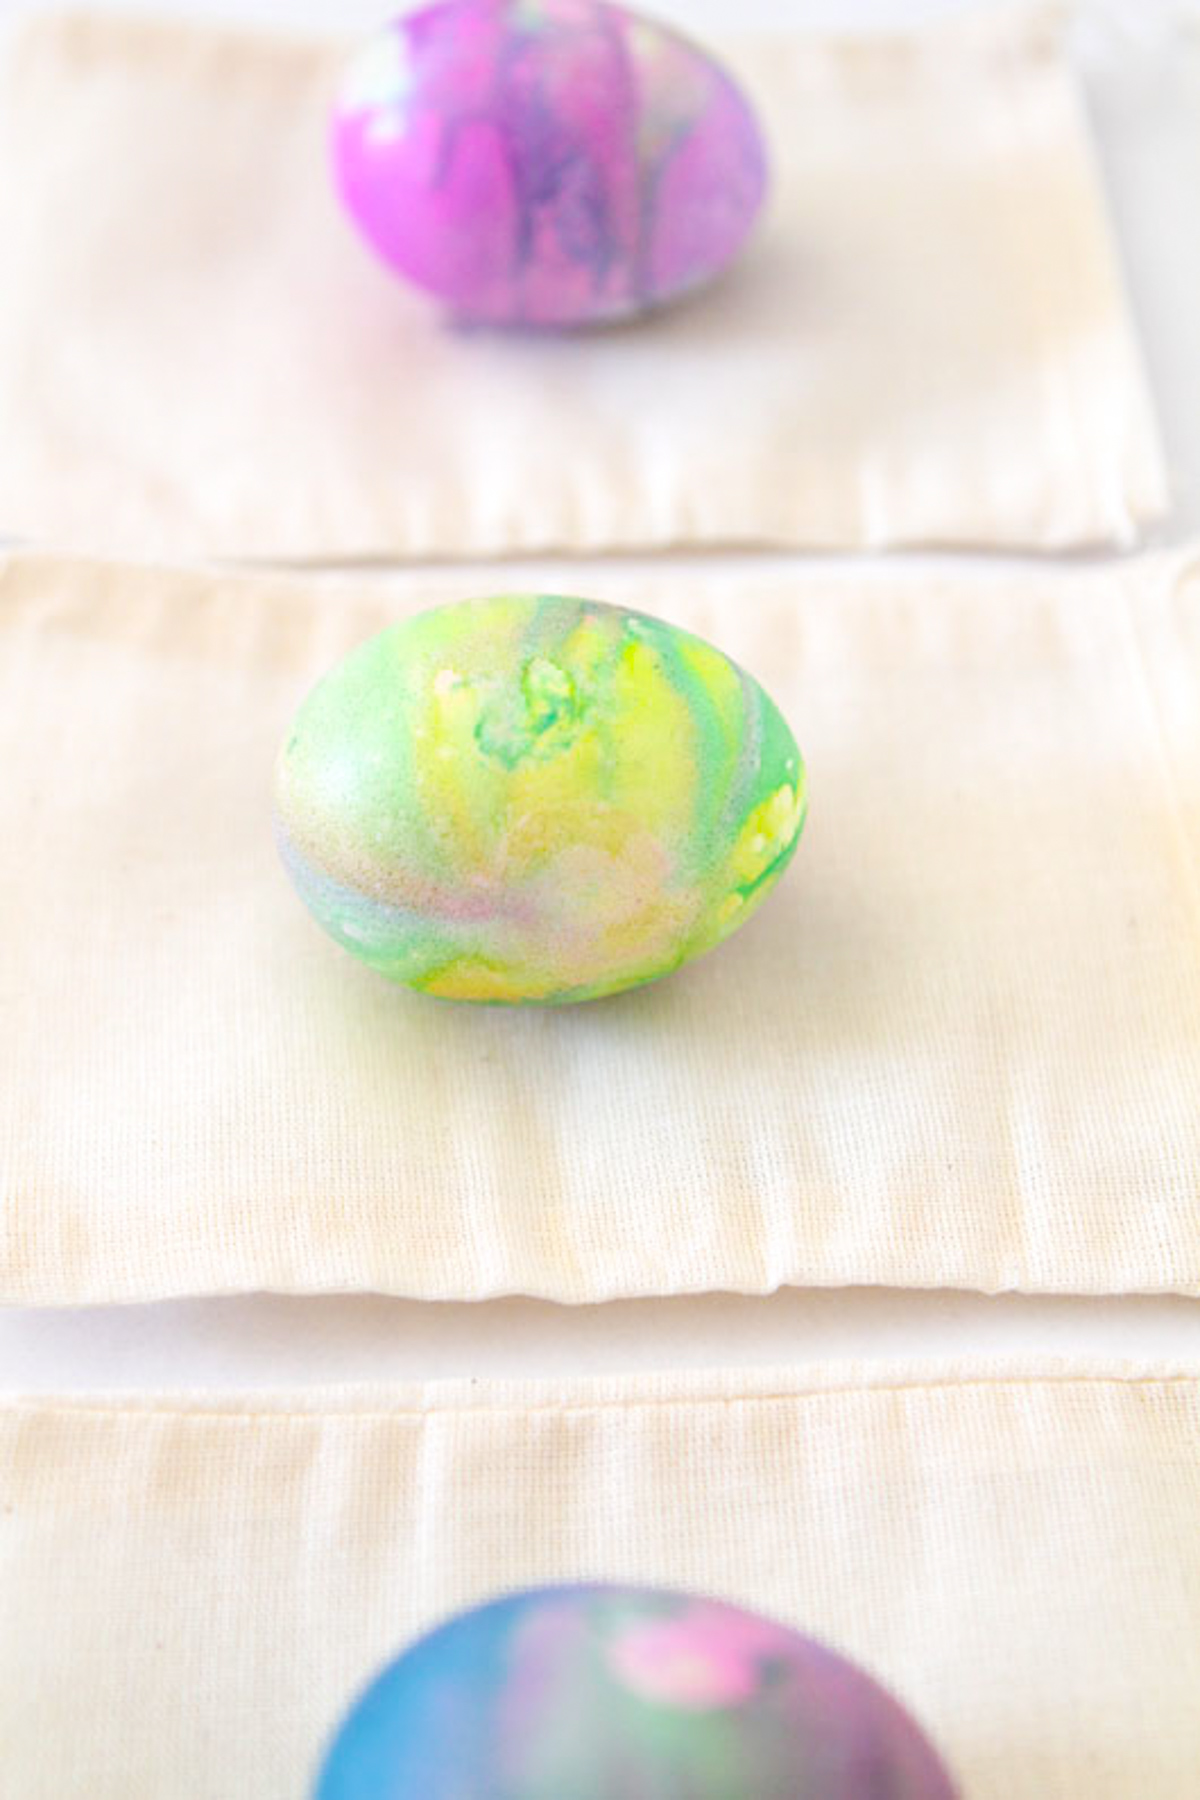
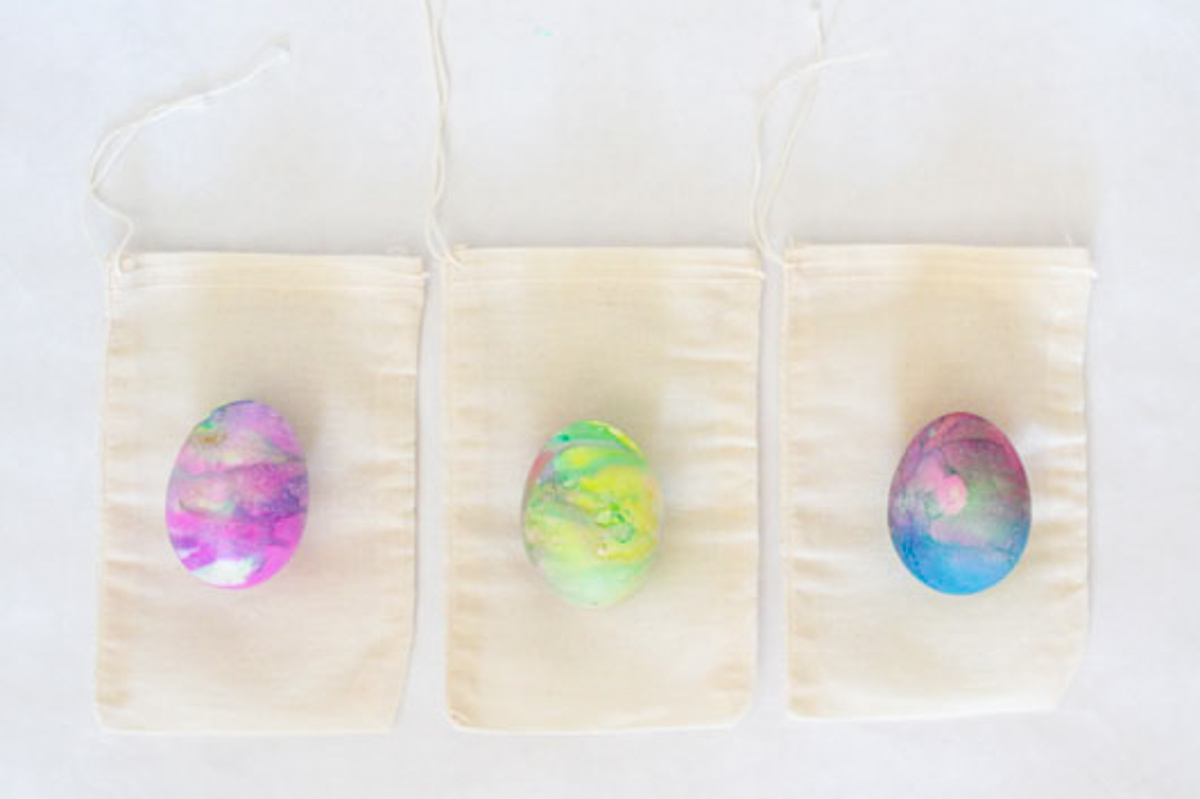
Step 2 – Start painting and spraying! To create a marbled effect, first apply metallic watercolor paint, allow to dry, then generously apply your chosen colors with a brush. Allow them to blend and bleed together.
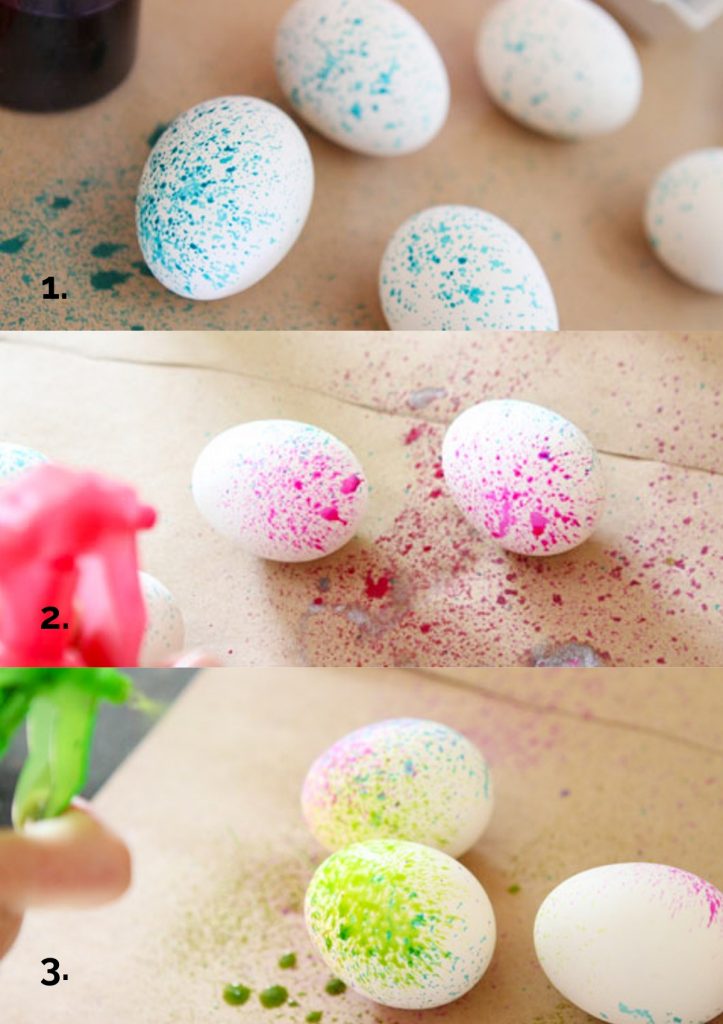
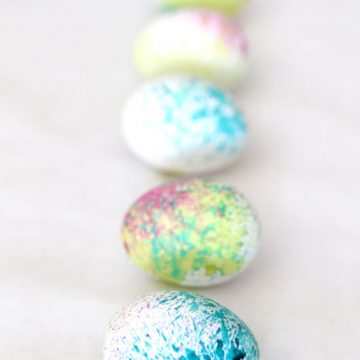
Step 3 – To create the speckled spray effect, begin by spraying a watercolor about 3-4 inches away from the egg. This will create little droplets that don’t completely cover the egg, but give just a minimal sprayed effect. Standing too close when spraying will create much larger droplets that completely cover the egg.
Then add a second or third color to create a rainbow of droplet shades.
Step 4 – Allow the eggs to completely dry for about 30 minutes before handling. Then enjoy!
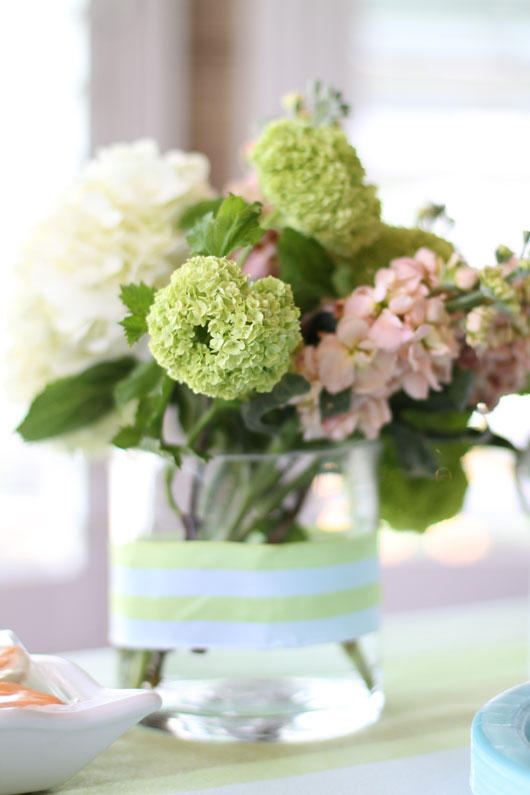
Use these for Easter egg hunts, or gift them in little cotton muslin bags for a pretty and unique Easter gift. They also look lovely displayed on a platter or in a bowl on your holiday table, next to a DIY Orchid Centerpiece or Floral Arrangement.
FAQ’s
Unfortunately, no, you cannot use the standard brick type watercolors. They need to be liquid to apply in such a unique pattern. The liquid watercolors are also much more concentrated, so they create more dramatic effects.
Most craft and art supply stores including Michael’s, Joann’s, and of course Amazon.
Just like any hardboiled egg, make sure to keep refrigerated and they will last for a week. Peel and enjoy!
Yes! The watercolors do not leak through the shell, and the egg will remain completely edible.

Expert Tips
Use bright and vibrant colors for the best contrast and pop.
Experiment with the water to watercolor concentrate ratios that the directions recommend. I have noticed some brands call for a higher water ratio than necessary, which lessens the vibrancy.
While liquid watercolors are much more concentrated than traditional brick paints, you want to keep that vibrancy by not diluting them too much.
While these watercolors wash out of most fabrics, it’s still a good idea to cover up your work surface with some sort of scrap paper or an old cloth. If really young kids are doing the painting, make sure they wear a smock or old clothes you don’t mind getting a bit messy.
Related Easter Posts


Watercolor Easter Eggs
Watercolor Easter Eggs
Ingredients
- 1 dozen white hardboiled eggs
- 4 bottles liquid watercolors use any number of colors you'd like, 4 is a good start
- 4 spray bottles
- 2 bottles metallic watercolors
- 2 paint brushes
- water to dilute the watercolors
Instructions
- Hard boil 1 dozen eggs and let cool
- Mix water and liquid watercolors according to package directions and place desired colors in spray bottles
- Do the same with the metallic watercolors, and place in small dishes
- Paint on metallic colors first if you'd like a shimmery effect
- To create a marbled egg, liberally paint on 2-3 colors separately, allowing the colors to blend together. Allow to dry for 30 minutes before handling.
- For the speckled effect, hold bottles back about 3-4 inches and lightly spray desired colors on each egg, creating a light stream of color. Allow to dry for 30 minutes before handling.

 If you follow me on


