 When Taylor, my first born, was a baby, I fed her so many purees from the squash family that her nose turned orange. It was one of those things that you didn’t really notice much, until one day we were looking at digital photos we had taken of her and we were like “holy smokes, our baby’s nose is as orange as an orange!” Nervous first time parents that we were, we of course rushed her into the pediatrician’s office only to find out that she would be just fine, and to perhaps incorporate a few more greens into her regular diet of sweet potatoes, butternut squash, carrots and acorn squash.
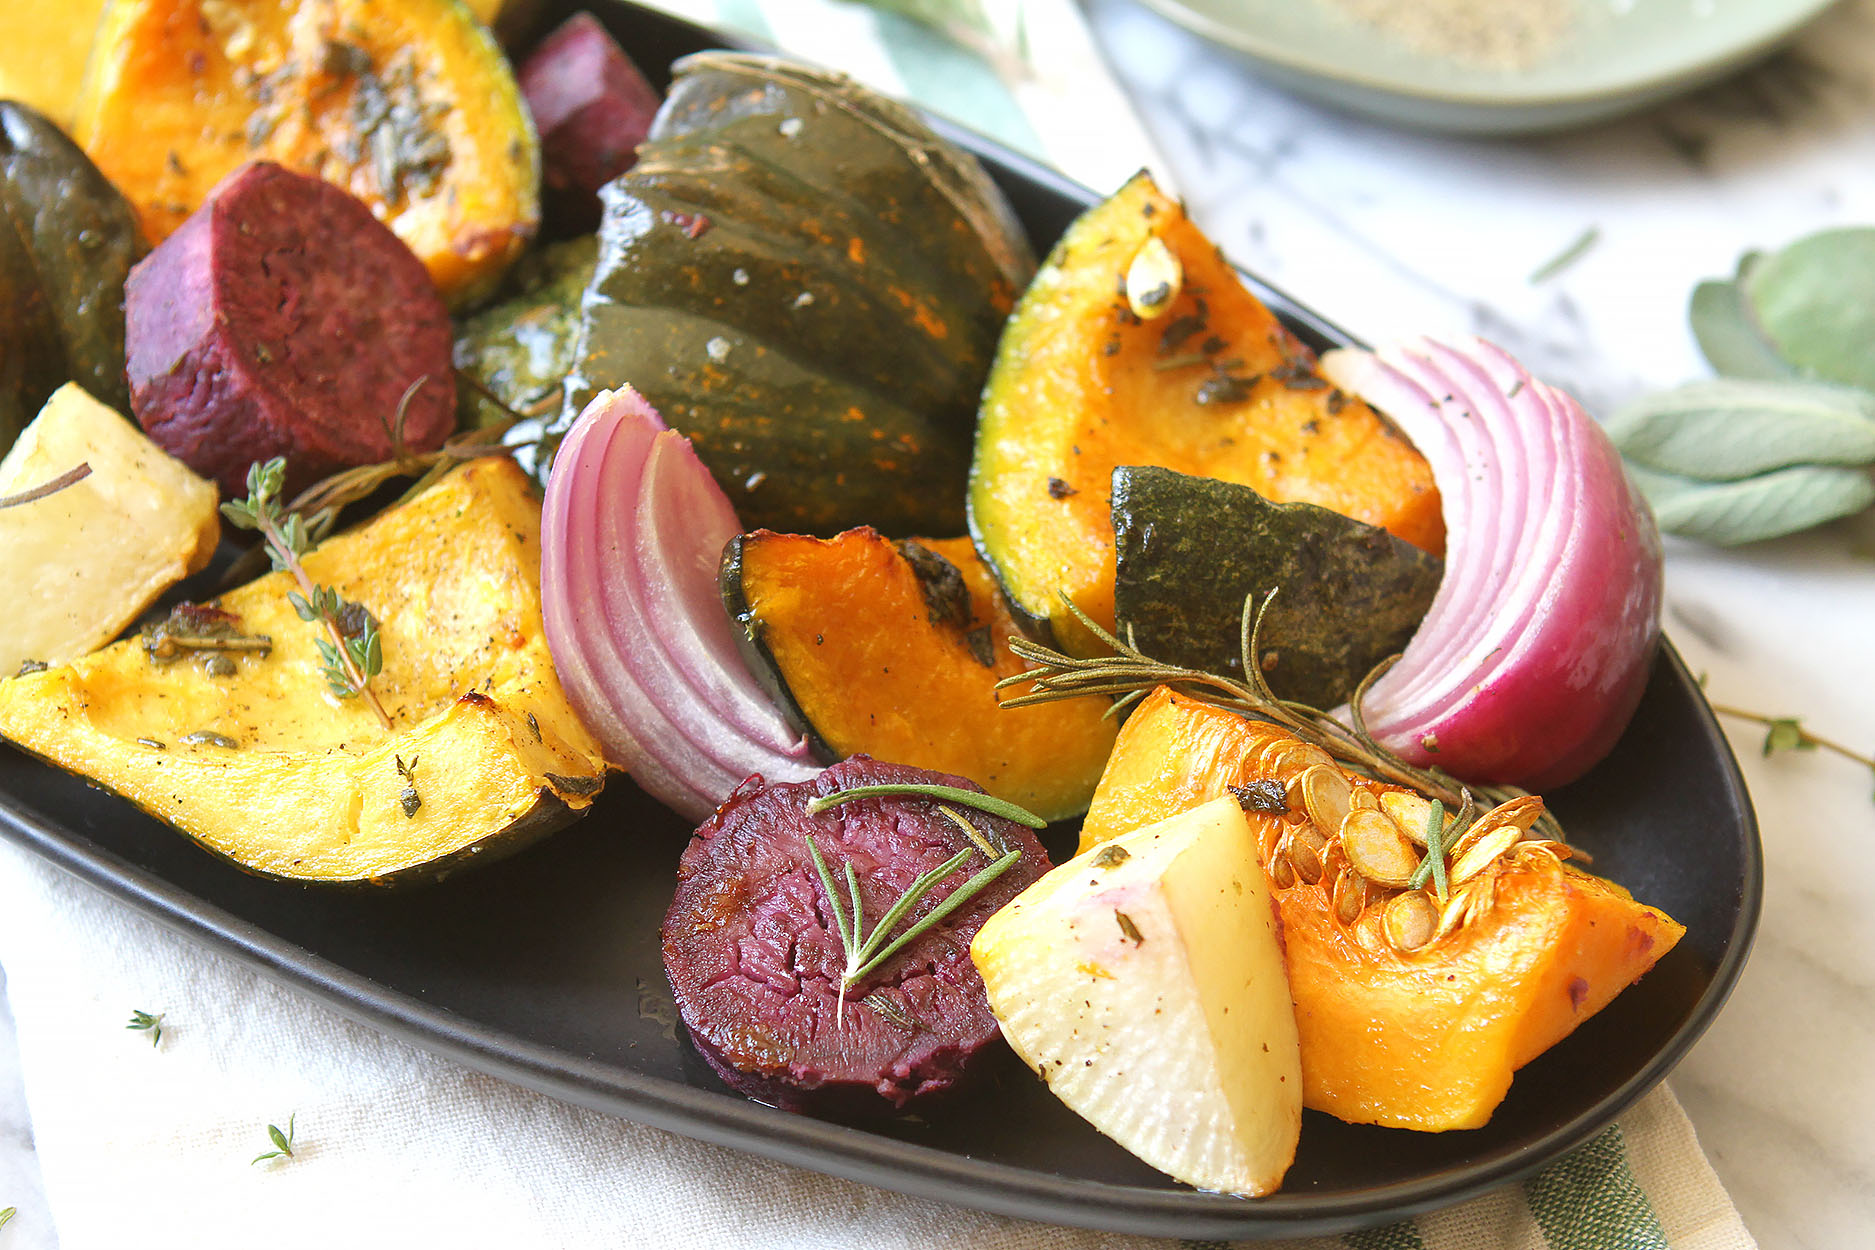 What’s especially funny about this is that after spending the first couple of years of her life as squashes biggest fan, she now despises all varieties & forms of it. She hates the texture, no matter how they’re cooked, and for having a rabid sweet tooth, finds them entirely too sweet. The boys aren’t huge fans either, which means that Art and I have the task each time I make roasted root veggies & squashes, of eating the whole batch by ourselves. Not that hard of a job actually.
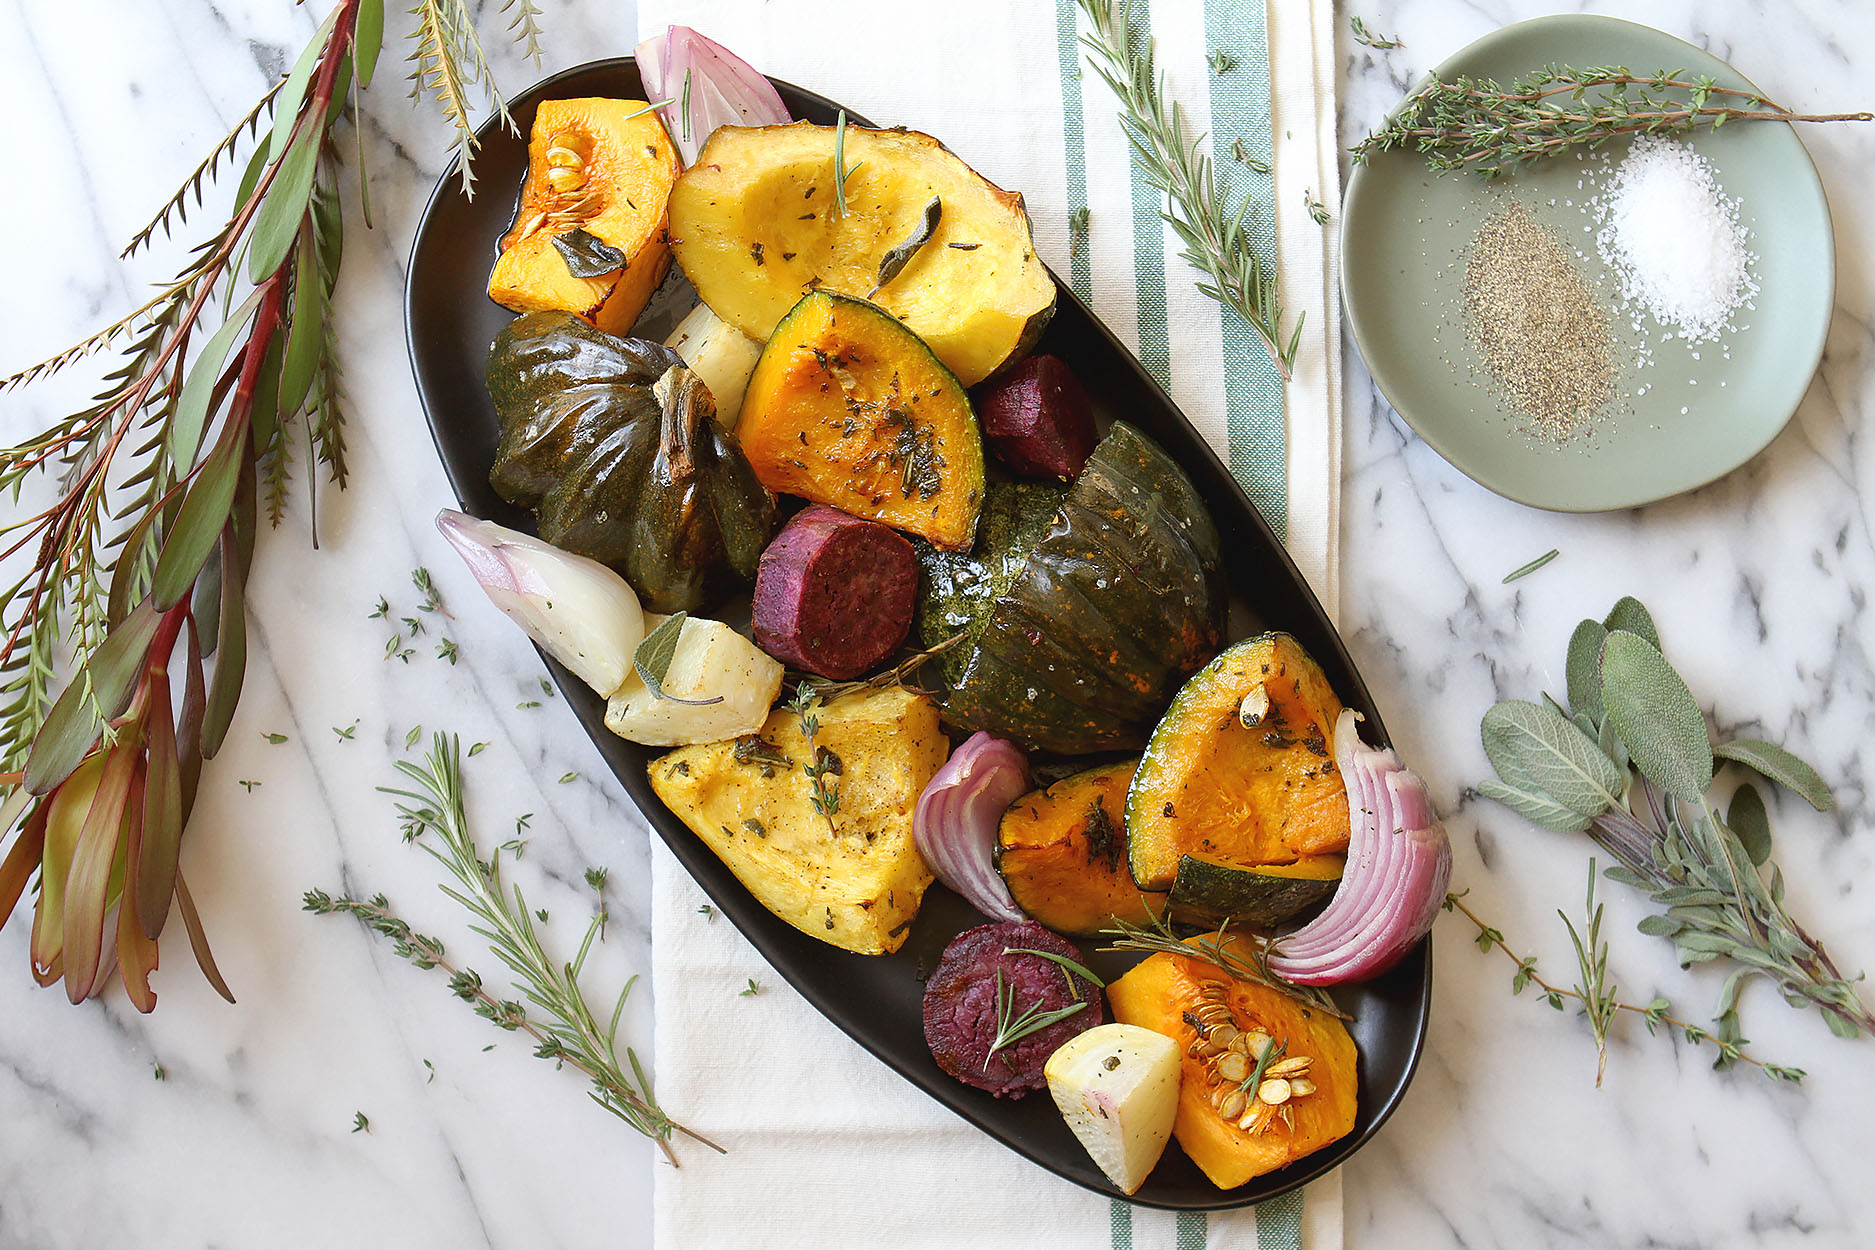
 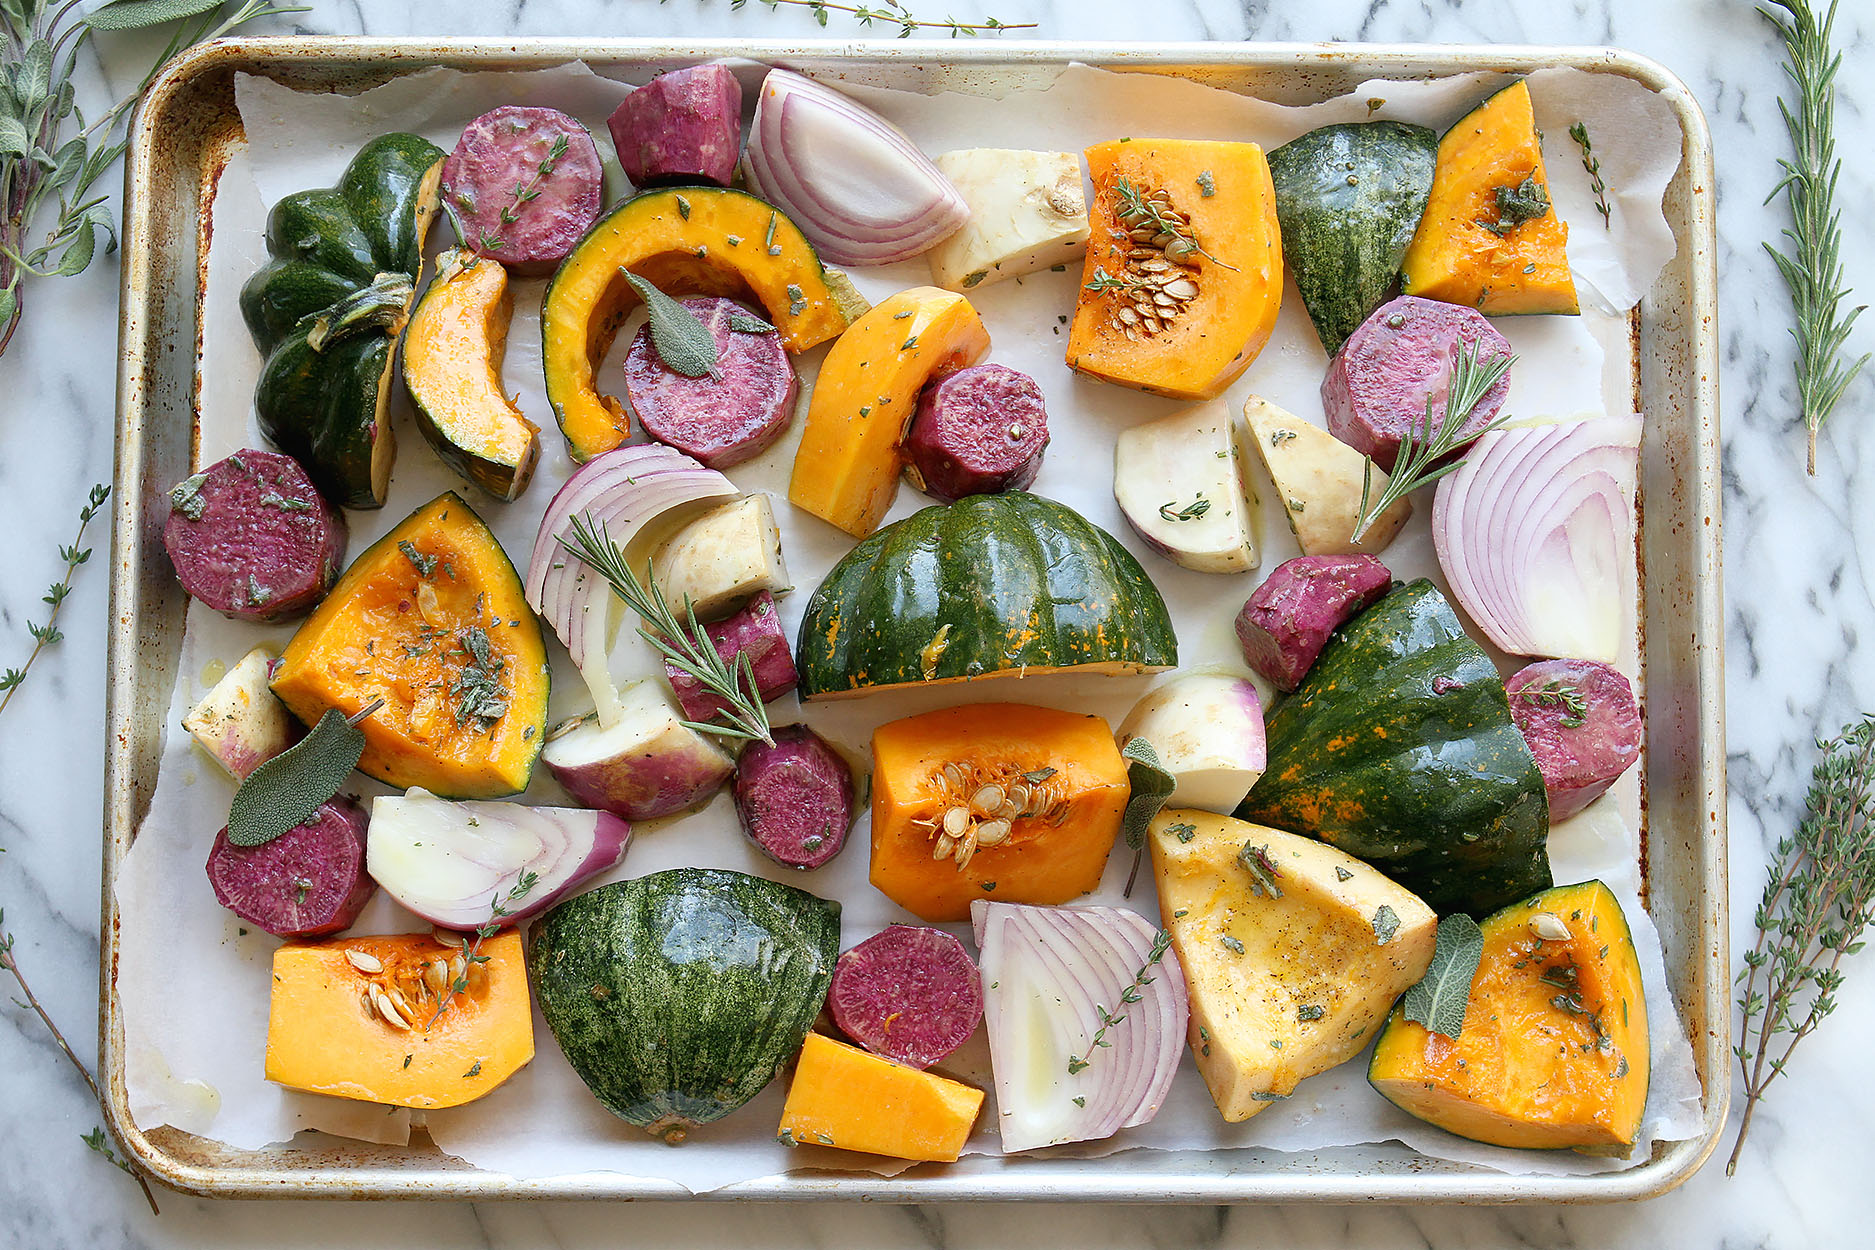 Besides of course eating them as a warm side dish, I use them as a base for protein bowls, mash them up and roll them in meatballs for a perfect balanced snack containing protein, fat and carbs, and I definitely toss them cold into salads. They also make for a beautiful dish to set out at any holiday gatherings. Impressive as well as easy to make and hard to mess up, they serve as the perfect tasty dish to make when you can’t think of anything else to make.
 I don’t typically get too fussy about how I roast them, nor do I really measure out ingredients; generally choosing to just toss them in olive oil, an amount that I only ever eyeball, and throw in a few dashes of salt and pepper and maybe some herbs. Sometimes I roast them low and slow, other times high and fast.
Don’t ask me why I choose different cooking techniques; most likely it depends on if I have the patience to heat up the oven super high or if I’m cooking other items in the oven alongside the veggies. They always come out good, but sometimes, I’ll be honest, it’s hit or miss if they turn out “great.” At times they get too mushy or get kinda dried out and shrively. Of course I still eat them, but I wanted to try and fine tune my technique for Thanksgiving, because no one wants to eat shriveled up turnips on Thanksgiving. So I did some research and discovered the best way to cook them is super high heat for a short time, so the veggies don’t lose all their moisture and shrivel up. This technique worked beautifully and resulted in perfect, beautiful looking veggies. The recipe I’m sharing today has a slightly different twist in that I used a combo of salted butter and olive oil to toss the veggies in, wanting a bit of a richer, more flavorful outcome.
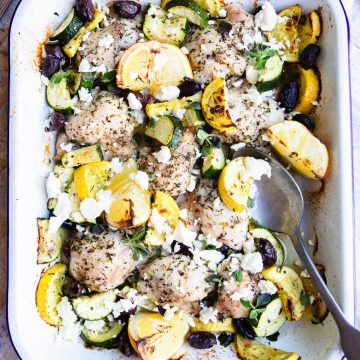
Please note that if you are adding in a softer vegetable like an onion, you will most likely have to take them out early, before the rest of the veggies are done cooking, or else they will get really overcooked. Actually, if you like super soft onions, ignore this advice, but if you like your roasted onions to still have some crunch, take them out after about 15 minutes. 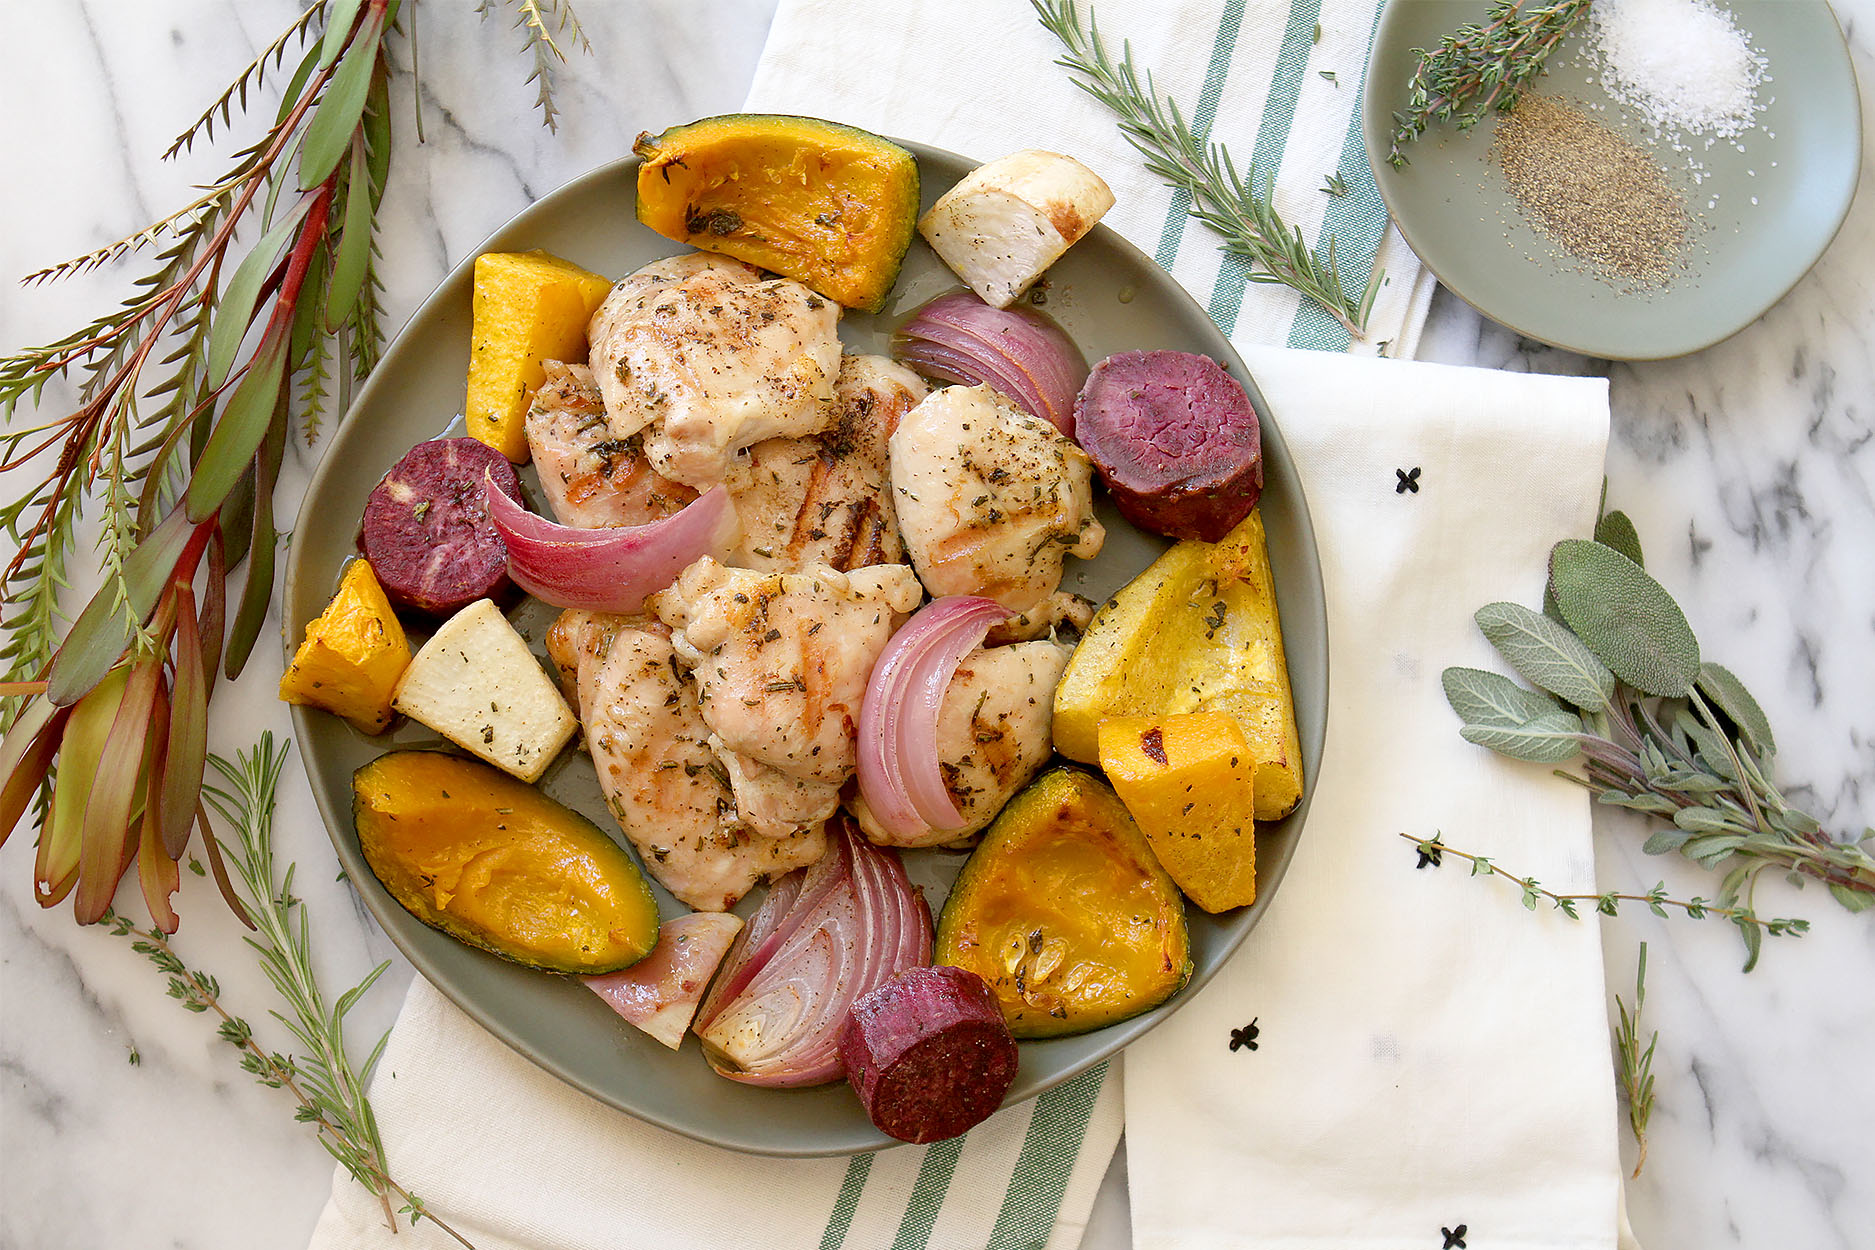 And while you are putting a big beautiful sheet of veggies to roast, make sure to grab some chicken thighs or breasts, and cook up a batch as well, using the same butter/oil/herb blend as you used for the veggies. It’s very easy to make the veggies and chicken on one sheet, just be aware that you’ll want to remove them sooner than your veggies, or, cook them at a lower temp by themselves. I like cooking my thighs at 400 degrees for about 20 minutes (depending on your oven), so if you do a 1 sheet meal, the veggies will definitely take longer cook at this temp, so simply remove them onto a separate plate, and continue cooking the veggies for another 15 minutes or so.
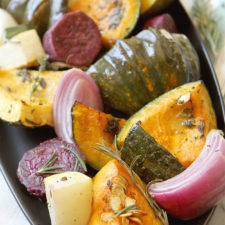
 I thought the seeds in the butternut squash looked especially pretty in the photo, but of course you can just scrape them all out before hand or afterwards too. You may also notice that the veggies are varying in size; some are big chunks of the squash, while other are more like 1 inch cubes. You may notice too that the bigger pieces aren’t as thick as the chunks, so even though they’re larger, volume wise they are about the same. Does that make sense? So in other words, you want all the pieces to be pretty similar not necessarily in size, but in thickness, so they cook evenly.
Find the recipe for these top notch root veggies, squash and chicken thighs below. Enjoy and please let me know if you have any questions.
Herb Buttered Roasted Root Vegetables & Chicken Thighs
Ingredients
- A variety of winter squashes & root veggies such as
- 2 small purple sweet potatoes
- 1 small acorn squash
- 1 small butternut squash
- 1 medium red onion
- 1 small turnip
- 1 small kabocha squash
- 2-3 tablespoon fresh chopped herbs combo such as thyme rosemary & sage
- ½ cup melted butter
- ¼ cup olive oil
- salt & pepper to taste
- 4-6 small boneless skinless chicken thighs
Instructions
- Preheat the oven to 500 degrees
- Cut up and cube squash and root vegetables into similar sizes and place in a large bowl
- Combine melted butter, olive oil and chopped herbs, and pour over vegetables
- Toss to evenly coat all veggies, and then spoon them out onto a large baking sheet, reserving the extra butter & oil mix if you are cooking chicken as well
- Season veggies with salt and pepper
- Toss chicken in remaining butter oil mixture, and place on a separate baking sheet
- Cook the veggies at 500 degrees for 20 minutes, checking on their doneness after about 15 minutes just to make sure they aren't getting over cooked. Depending on the size of your veggies, they may need to cook an additional 5 minutes, and are done when fork tender
- Lower the oven to 400 degrees and cook the chicken thighs for 20 minutes, checking on doneness after 15 minutes. Cook until internal temperature reaches 165 degrees, although most of the time I can tell their doneness by how firm they are to the touch, and if they feel bouncy or not. If firm, they are usually done.


Leave a Comment