
 They say necessity is the mother of invention, and 9 times out of 10, I would say that is definitely how I roll in the kitchen. Mondays are when my parents come over to help out with the kids and spend some time with them, and most of the time, my mom brings over a new dinner recipe to try out. She’s retired and constantly scouring cookbooks, looking for new recipes, and new guinea pigs to try them out on. This week she decided to make a lasagna using some new oven bake noodles she found, and while I of course couldn’t have the gluten-goodness noodles, nor the tomato sauce, I wanted to make myself a dinner that would sorta fit into what the family was eating. I immediately thought of a zucchini lasagna, but then I decided to get all fancy, hence these zucchini rolls were born.
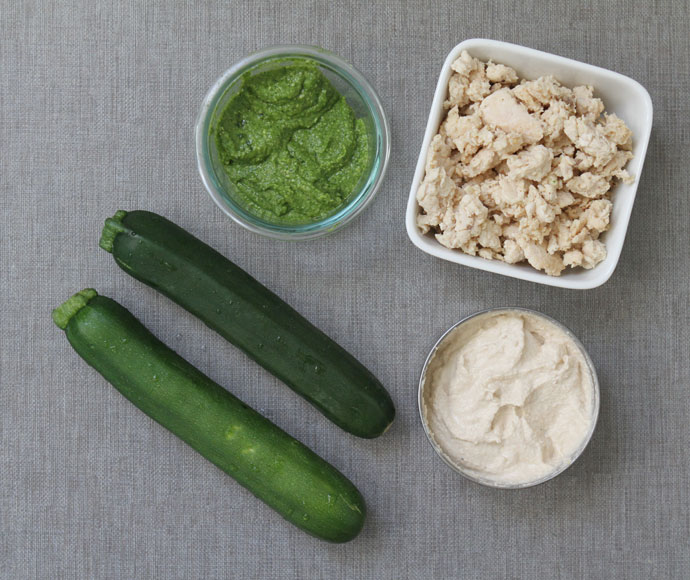 I’ve seen zucchini rolls floating all around Pinterest, so I know the concept is nothing new, but I had a hard time finding a recipe that would work for the cleanse; all either used ground beef, the vast majority used tomato sauce, which is a nightshade and a no-no on the cleanse. I already had the cashew cream made so I knew I could use that as a base to replace the usual ricotta/parmesan mix, but now I just needed something to give the rolls a bite, to replace the tomato sauce. Pesto popped into my head, and a meal was born.
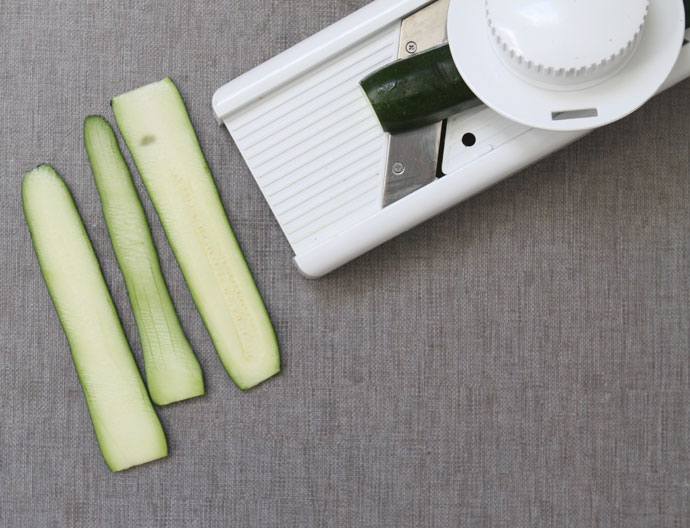 You’re going to want to start by slicing or putting your zucchini through a mandolin. Go for ¼″ thick slices if you can.
 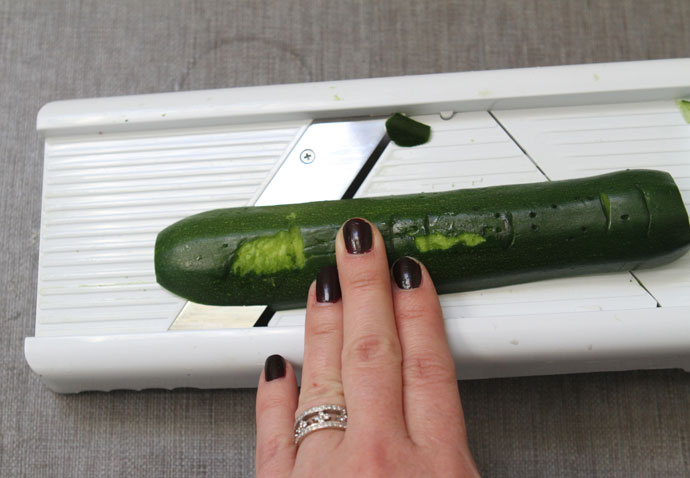 If using a mandolin like mine pictured here, I found a good trick was to start by passing the zucchini through the mandolin, very carefully guiding it with your hand. Once the zucchini had reached the part of the mandolin where it could sit in it, then add the cutting guard and continue to pass it through. I learned to do this after clumsily trying to pass the extra long zucchinis through with the blade guard on, and quite a few of my slices snapped in half.
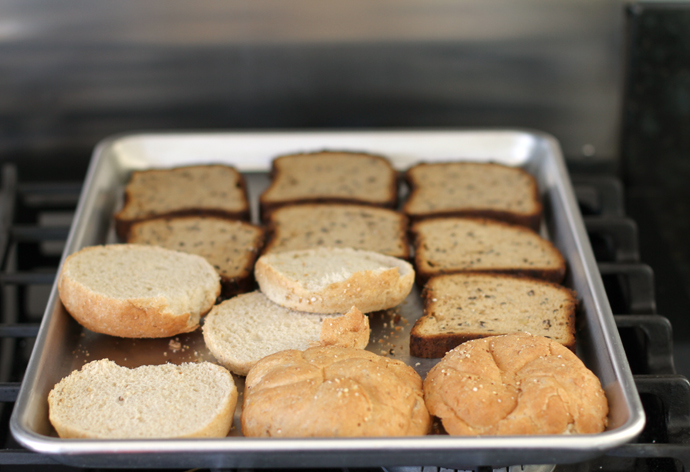
 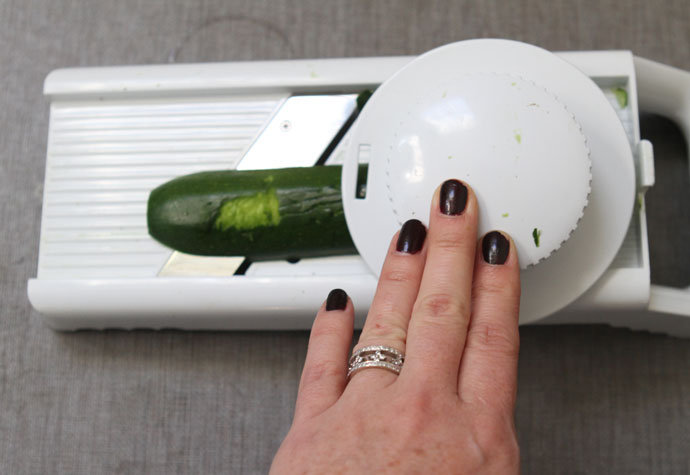 Once you have your slices all ready, lay them out on a baking sheet and lightly brush them with a coating of olive oil. This will give them some extra flavor and help them get a bit softer. Bake in a 375 degree oven for about 7-10 minutes, just till they’re pliable enough to work with.
 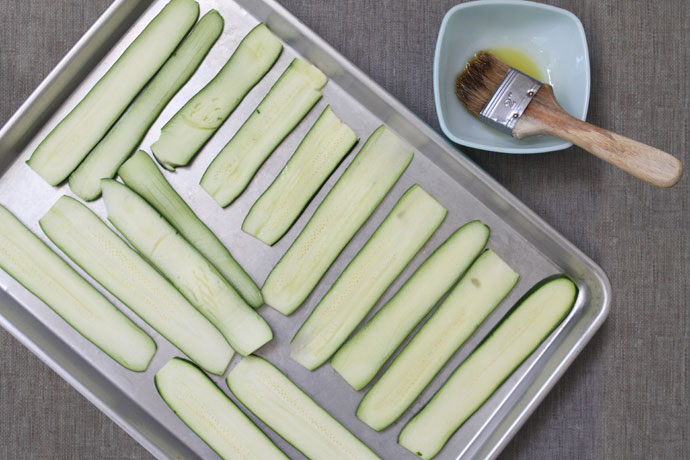 Now you’re just going to start smearing on your ingredients beginning with your cashew cream, then pesto, and then your pre-cooked ground chicken or turkey.
  If you have trouble finding a pesto sauce that doesn’t have dairy in it, you can seriously whip up your own in minutes. Think outside the conventional pesto box of basil + pine nuts, and go for any other type of soft leafy green and a mild tasting nut. For this batch, I used a salad mix I had on hand which was arugula + baby spinach, and cashews, and it may just be the best pesto I’ve ever made. Your ratios are simple, 2 cups of greens + ½ cup olive oil + large handful of nuts, about ½ cup + salt to taste. Blend up in a blender or food processor and done! Add in more oil if need be, but these ratios are usually pretty full-proof.
 You don’t want to overstuff these or they will be more difficult to roll up, so be stingy, and just plan to have about 5-6 rolls to satisfy you.
 You can roll them up and then place them in a small baking dish, but I found that just tucking them in together nice and tight, on the baking sheet I was already using, worked just fine and meant one less dish to wash. Once all rolled up, bake in the 375 oven for 10 minutes, then broil for another 1-2 minutes to set them up nice and firm. You’ll find that once they are baked, they stay together fairly well, and aren’t so delicate. I cut mine in two, but my husband popped each one in his mouth whole, like a sushi roll.
 Now at this point, I’d like to offer two other suggestions for assembling these. If you want to cut your time in half, then you could simply layer these ingredients flat in a baking pan, like a traditional lasagna. Like I said, that was my original plan, I just decided to do something different since I had my mom there and she was helping manage the kids. But if you’re crunched for time, go for this method.
Another idea I had, which would work great if you don’t have a mandolin, is to slice your zucchini in thin rounds, and layer them flat like a lasagna, or layer them in cupcake baking tins, and have individual little lasagnas. If you have ramekins, you could do the round coins in those as well, then no fussing with trying to pop them out of the baking cup. Just some ideas. These are hard to mess up, so feel free to experiment.  You can get the recipe for the cashew cream in this post, but stay tuned, as I’m going to be posting this recipe separately for ease of use, in the next few days. I’ll update the link once I do. The printable recipe for everything else can be found below though. Enjoy, and please let me know if you give these a try. My kids aren’t keen on zucchini, but my husband and I love these, and are worth the effort to make them for a special treat for us. In case you’re wondering, the second night I made these (yes, I ate this 2 nights in a row), I went ahead and served the kids the ground chicken separately, and served broccoli because none of them like zucchini, and rice on the side. So it was a separate meal, but fairly manageable to throw together for them. I don’t do this often, but sometimes there’s no please everyone and I won’t be deterred from trying new things or enjoying the things I love, just to please everyone. Does that make sense?

Pesto & Chicken Zucchini Roll-Ups
Ingredients
- 1 pound cooked ground chicken or turkey reserving leftovers for another meal
- 1 batch of cashew cream see recipe link for ingredients & directions
- 1 container dairy free store bought pesto or if making your own, note ingredients below
- 2 cups soft greens including basil arugula or baby spinach
- ½ cup olive oil
- ½ cup mild nuts like cashews or pine nuts
- 3-4 medium size zucchinis
- ⅛ cup olive oil for brushing zucchini
Instructions
- Preheat the oven to 375 degrees.
- Begin by cooking your ground turkey or chicken, by simply sauteing on the stove top, and set aside.
- Slice or mandolin your zucchinis, placing them on a baking sheet.
- Brush zucchinis with a light coat of olive oil, then place in the oven and bake for 7-10 minutes.
- Add your filling ingredients to the zucchini slices, starting with the cashew cream, then the pesto, then sprinkle the chicken or turkey on top. Gently roll up each zucchini and place topping side up, nestling each roll into each other, to help them stay together.
- Bake at 375 for 10 minutes, then broil for ½ minutes to help them set.
- Serve with a side salad.


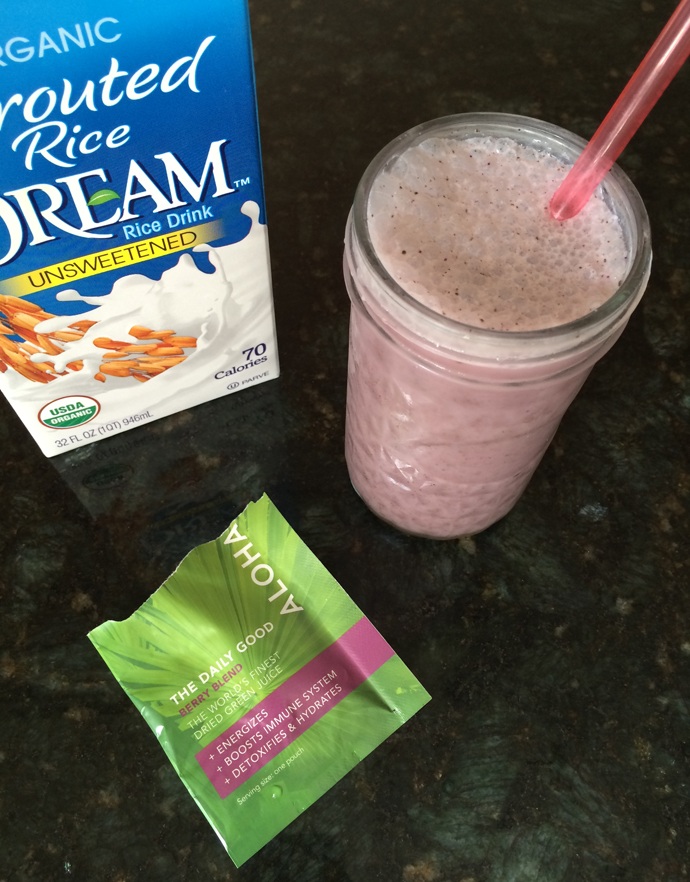
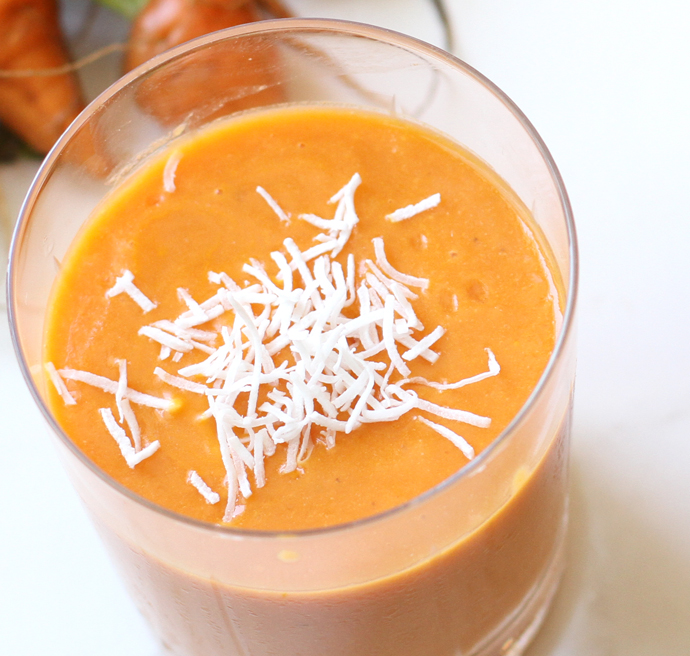
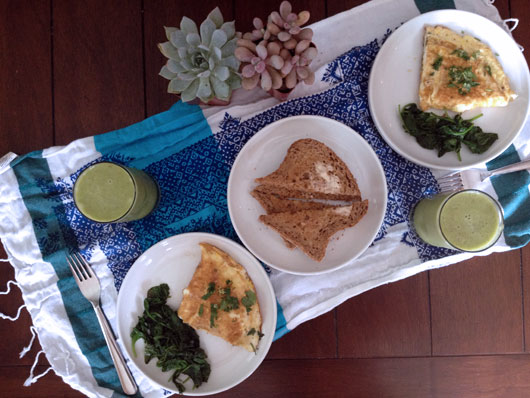
 This smoothie came about last week when I realized I hadn’t followed my own
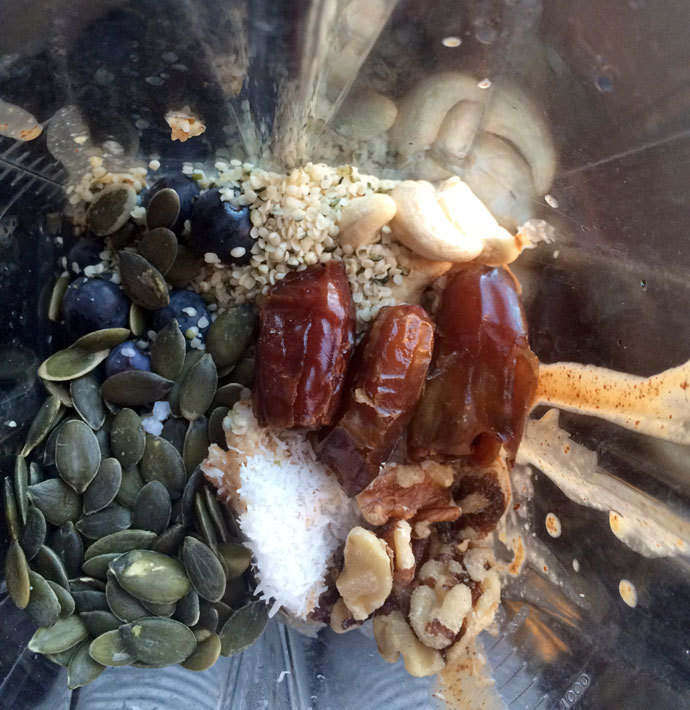
  I added in hemp seeds, a powerful complete protein that would ensure I got a much needed extra dose of the stuff. Hemp seeds are one of the widely hailed “superfoods” and while I won’t make wild and powerful claims of its healing properties, I do know that in a smoothie, the taste is well-hidden, but topped on salads and oatmeal, it adds a nice and subtle mild crunch. I also subbed spinach for kale because I notice that kale in my smoothies, but not in my juices, has a tendency to give me an upset stomach.

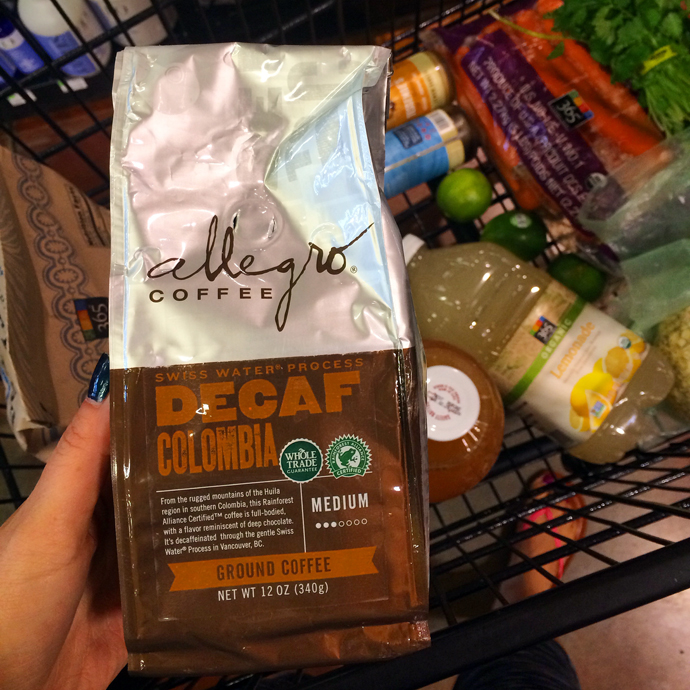
 The babysitter has been here since 8 am, and I’ve been sitting in front of my computer screen for at least an hour, trying to type up my article for Babble, and go through emails. I feel almost completely worthless though, in terms of getting anything accomplished which requires actual brainpower. I slept for over 8 hours, but I still woke up groggy and with a headache. The sugar withdrawal is killer today, as I feel like I’m dealing with an intense bout of seasickness. I honestly didn’t think the first few days would be so hard this time, seeing as how I’ve already given up caffeine, so it would be one less withdrawal to deal with, but it seems I’m not getting away scot-free this time. After a month of parties, baking and lots of eating out, there was obviously more sugar in my system than I thought.


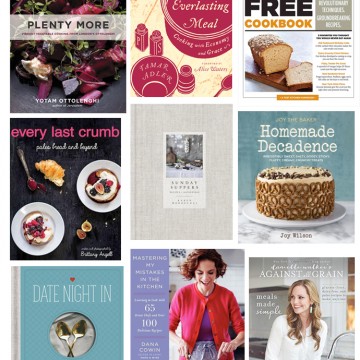
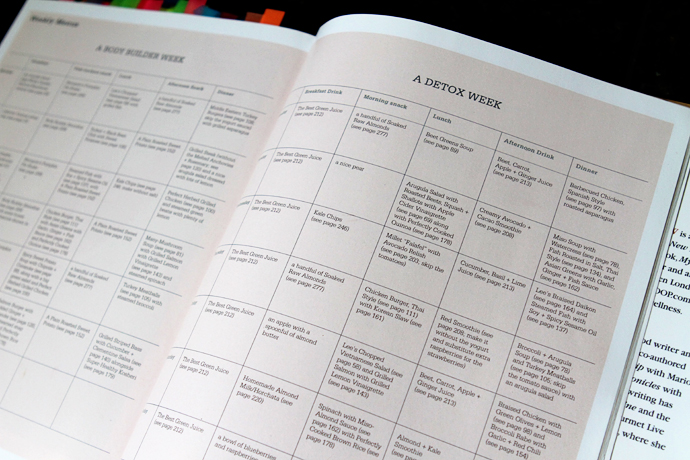
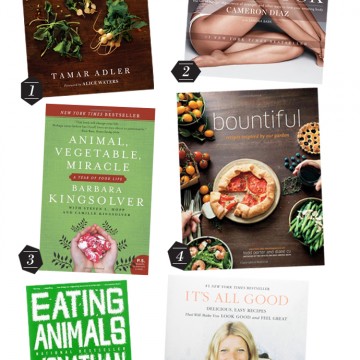
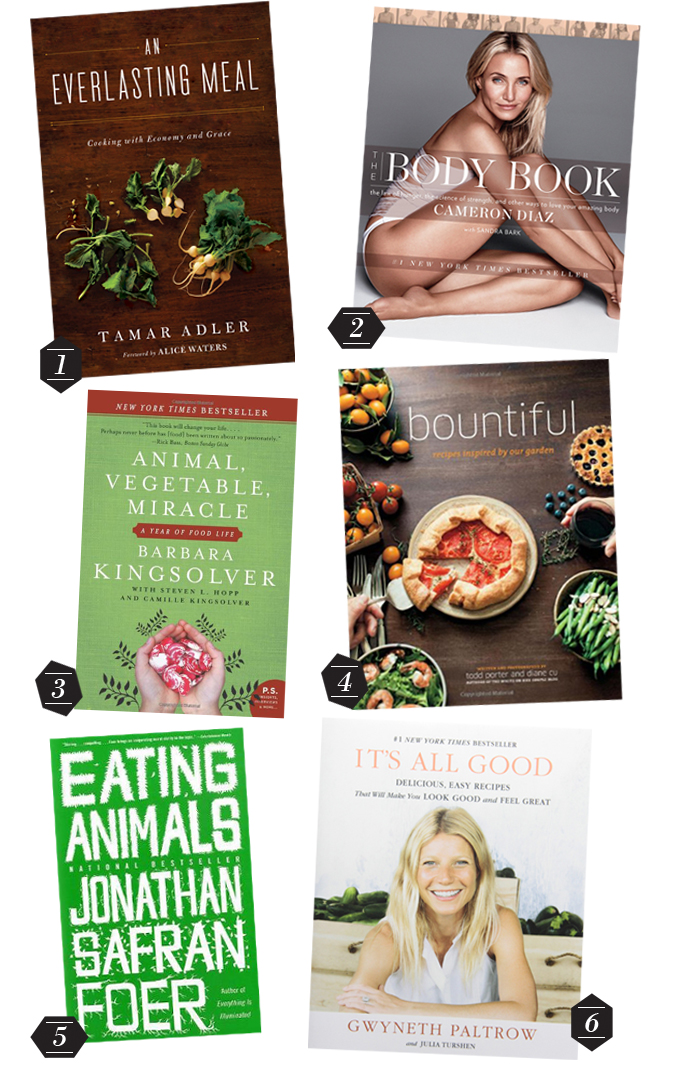
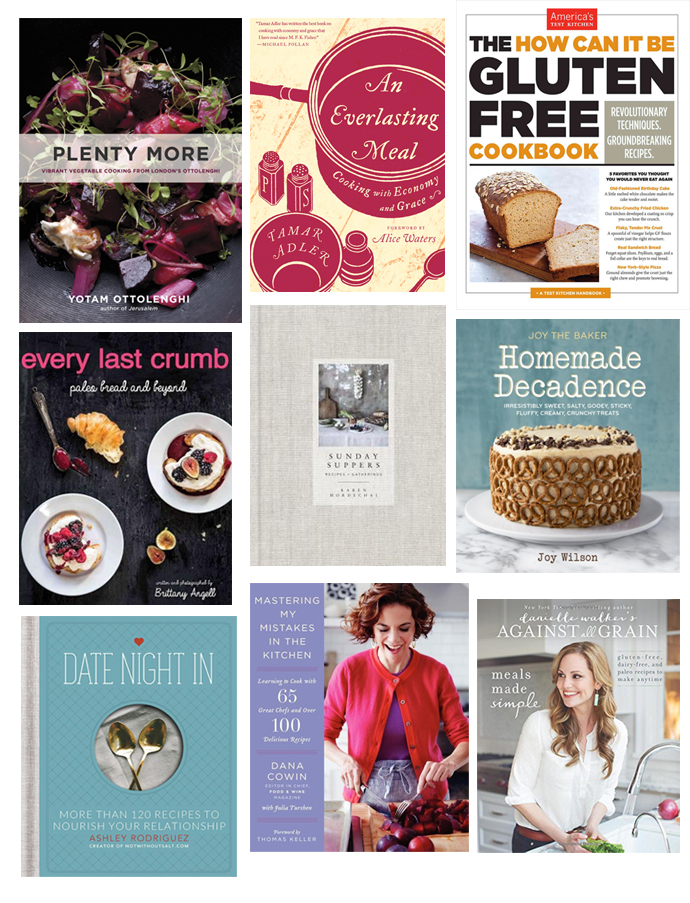 In my imaginary dream kitchen, I have a bookshelf just to hold my cookbooks. Like many people, I love collecting cookbooks, and I won’t stop, can’t stop. Cookbooks keep me excited about cooking, and they’re there for me when I’m feeling in a cooking slump, quickly offering mew new-found inspiration and gusto to pick up my spatula and dirty more dishes. Last night over a quick dinner with my guy, I rattled off a wish list of several easy-to-find items, including several cookbooks. These are books that I’d love to receive and gift, and since there’s always a Barnes & Noble open late, or Amazon 2 day shipping to save your life, there’s still plenty of time to order up before the big day next week.


 The women in my family have been dying our hair at home for as long as I can remember. A visit to my Grandma’s house involves as many memories of her feeding me homemade enchiladas as it does watching her walk around with a plastic shower cap on her head, waiting for the coloring process. The women in my family go gray early, like in their early thirties, and so a lifelong of coloring treatments at a salon when you start that early, adds up. Therefore most of the women, including my grandma, aunties, mother and my own sister, have long dyed their own hair. All this to say, I grew up around the idea, and started dying my own hair when I was 16, so I’ve never been intimidated by the process, having watched it hundreds of times. My stylist has been dying my hair for the past couple of years, but it’s cost prohibitive to maintain the lovely color more than about 3 times a year, so for many months of the year I walk around with a sad looking, faded color.
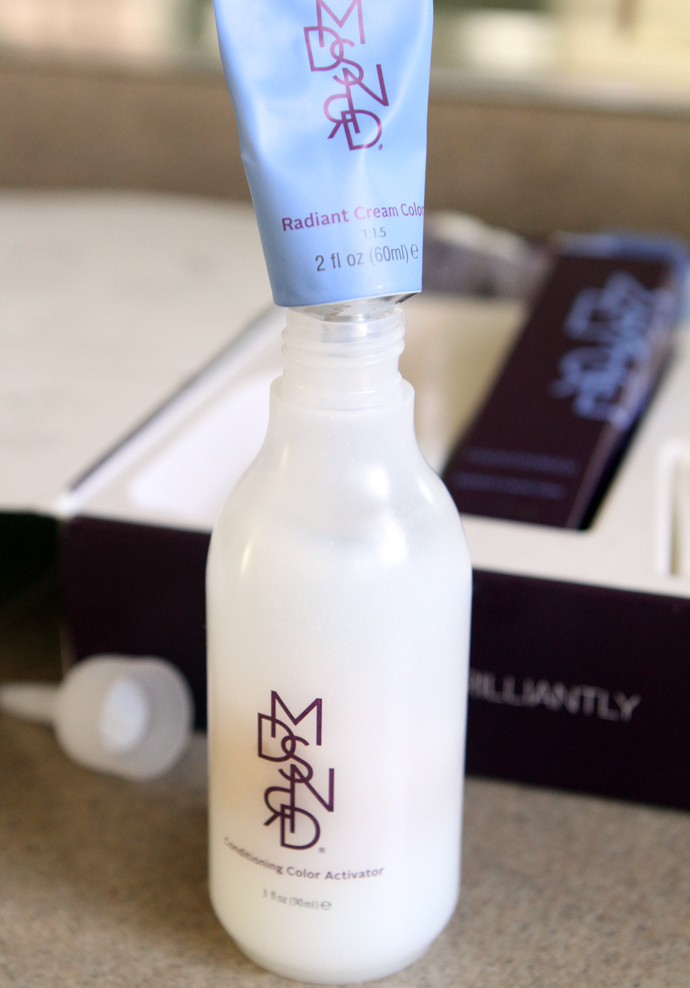 Enter Madison Reed. Before we get started on the tips for dying your hair at home, I wanted to point out some of the biggest (and important) benefits of Madison Reed, so you don’t miss them.
 The concept of Madison Reed is to not only bring you safer hair color, but to also dumb down the process to make it fail-proof. No tiny pamphlets to unfold and pour over the directions; all you need to know about how to dye your hair is written and illustrated out in a 5 step process, right in the packaging. You seriously can’t do this process wrong. Everything you need including the supplies, are all included in your package; gloves, barrier cream to put around your forehead and ears, a cleansing wipe for touch-ups, a cap, and even a generous sized bottle of shampoo and conditioner, good for multiple washes.
 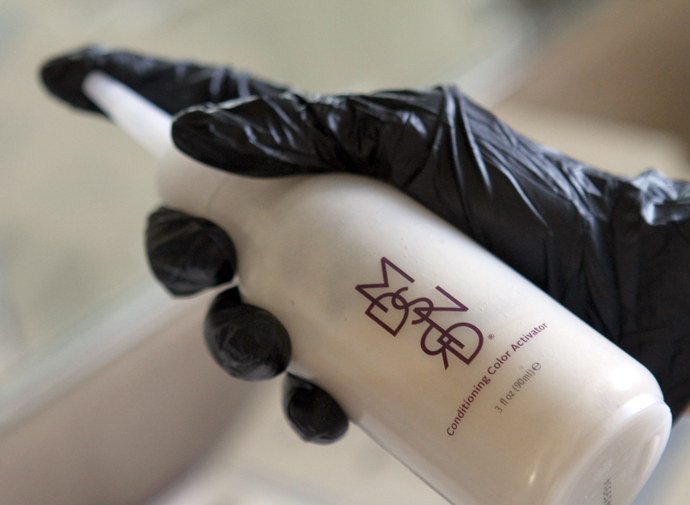 Some tips to help you feel comfortable with the process, since I’m assuming many of you have never colored your hair at home before.
  If this isn’t the first time you’ve dyed your hair and you have grow-out at the roots, you’ll want to apply your color to the fresh new hair at the roots, and leave that in for an extra twenty minutes. If this is your first time dying your hair, then you can just apply the color all over. But assuming you’re not a color virgin, this is the process I use. First, divide your hair into sections, as instructed, and you’re ready to begin coloring. After having watched the women and my family and my own colorist hundreds of time, I’ve found the easiest way to apply the strips of color on your roots is to use the tip of the applicator, as a comb, to create small parts along the hair line as you go, then apply the strip. Dab the strips of color with your fingertips to make sure it absorbs into your roots, and then flip that strip of hair over, and proceed onto the next section of hair, working in many multiple rows.
  Getting the back of your hair is admittedly the trickiest part since you can’t see divide your hair into rows as neatly, but the good news is the underside of your hair will hardly ever get seen, so even if you don’t do a “perfect” job, you should be okay. Once all your roots are covered with the dye, do little touch ups around the front of your hair line, and dab in the color. Now you let your color sit on your roots for 20 minutes.
 Once your roots have sat with color for 20 minutes, you want to apply the rest of the color throughout the hair. I used about half the bottle for my roots, which need the color the most, and the other half for the remainder of my hair. Once your hair is all saturated with color, simply comb it through as best you can with a large toothed comb, and then cover your hair with the cap. Let it sit on your hair for 15 minutes, but with the root and all-over hair color process, don’t stress about getting the timing exactly right. I used to be freaked out that if I left the color on my hair for an extra 3 minutes it would all fall out, but I have never had that problem. The barrier cream worked really well at removing the color inevitably left along my hair line, but the cleansing wipe was the back-up to removing any stubborn stains. You can see the difference between the photo above and below.
  I should also mention at this point that it is extremely helpful to wear a button down shirt when dying your own hair, because then you can easily take it off when it’s time to get in the shower and rinse your hair color off; no fussing with trying to get it over your colored hair. Also, it goes without saying that you should either use an old shirt you don’t care about, or cover your shoulders with an old bath towel to protect your shirt. When it’s time to wash out the color, you can try to do it in a sink but I’ve always found it much easier to just hop in the shower and hose off haha. The color running down your shower does not stain, but I do recommend using an older towel to wrap your hair in, as there is sometimes residual dye that comes off your wet hair the first 2-3 washings; I notice this even when I get my hair dyed at the salon, just par for the course.
 And not only did the color come out amazing, the texture of my hair feels just like it does when my colorist does it in his salon; silky, shiny and moisturized almost like there’s a coating on it. That shine and texture you get from a proper salon coloring, is one of the biggest reasons why I color my hair.
 I seriously couldn’t be happier with the way my hair came out, and I think my colorist is going to be bummed that I’ll be seeing him even less now. But since I can’t yet cut my own hair, he’ll still get plenty of my money.
 I consider myself fairly proficient in the kitchen, and have been for several years now. Even though my focus on healthier eating has really only been in the last year+, doesn’t mean I haven’t been cooking all this time; it was just a different way of cooking. At any rate, since I thought I knew my way around the kitchen all these years, I was pretty surprised when I found out I had been using my knife the wrong way all these years, and I had been using the wrong knives for the majority of my cooking. A couple of months back already, geez I meant to write about this a lot earlier, I finally decided to take a knife skills class, because even though I didn’t think I was doing things wrong, I figured I could do things better. What I learned in that short 2 hour class though, blew my mind and my skills and proficiency in the kitchen have vastly improved in the last couple of months because of it.
 You begin by grabbing the very edge of the blade closest to the handle with your thumb and forefinger, and then wrap your remaining three fingers around the handle. From the other side, it should look like this.
 This positioning will give you the best control of the knife while chopping, leaving you less prone to injury, and more prone to chopping shit up correctly! By the way, I also learned that I had been using the wrong knife this whole time. I have 2 big chef knives that I always found too heavy, so rarely used them, preferring the smaller blade knives used only for odd tasks like filleting fish. Turns out the reason these large blade knives always felt cumbersome was because I was holding them wrong. Doh! I’ve switched to only using my big chef’s knife too. A larger blade also gives you more reach and leverage when you’re chopping.
 When chopping, you want to use a rocking motion, trying to keep the tip of your blade on your cutting board at all times, and gently lifting the knife up and rocking it down with a rolling type motion. Here’s a
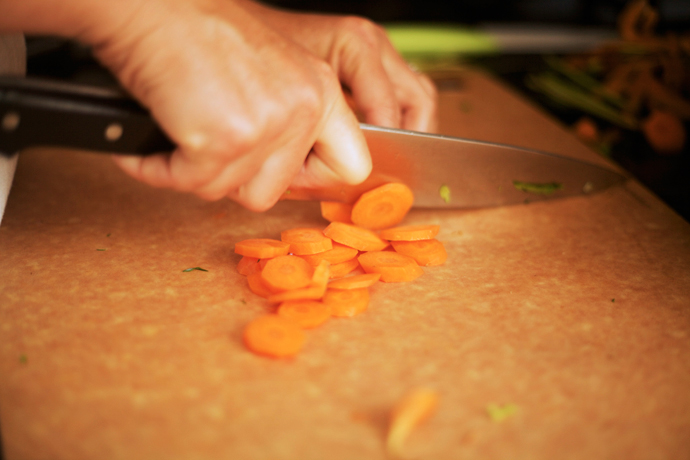 Besides spending time going over basic knife holding and chopping skills, we spent a good portion of the class just practicing. There were about 10 of us in the class, and she put out several types of knives for us to try out, and had a wide array of produce to practice our chopping and dicing skills on. She shared a few ingenious tips too, including how to cut a carrot. When she was demonstrating her carrot slicing, I asked her why she was chopping them at a diagonal. Assuming it was for show, she actually revealed that it was so they wouldn’t roll off the cutting board. Anyone who has been chopping round carrot pieces for years can confirm that many round pieces roll right off the board and on to the floor. The diagonal cut stops that. This tip alone was worth the cost of the $40 class!
 Another great tip for chopping tomatoes. Instead of slicing skin first, pierce the tomato with the tip of the knife to easily slice it in half. Then rest the tomato, skin side down, and slice the flesh first. Because the skin is so delicate, even a super sharp knife at times has trouble slicing through it first. By slicing the heartier flesh first, you get some force going and are able to easily cut through the skin.
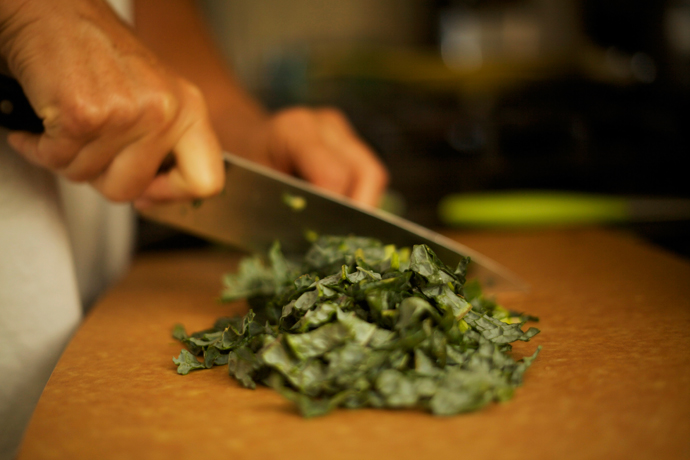
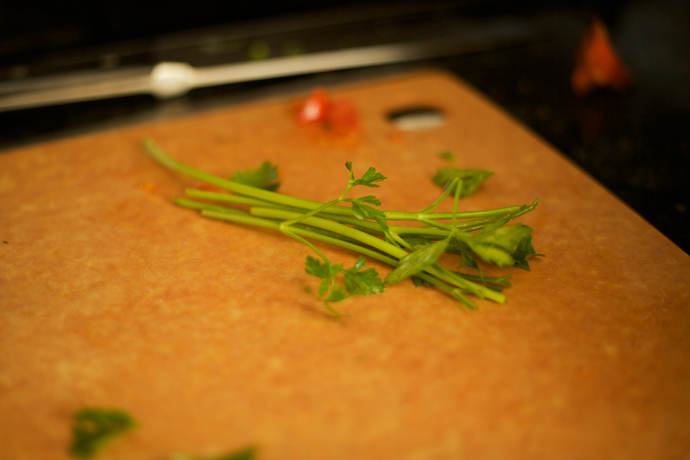 For years I’ve been painstakingly pulling leaves off of parsley and cilantro stems, and it turns out that was totally unnecessary. Just grab a few stems, roll them together, and start chopping leaves and stems together, while holding onto the ends of the stems. When you have chopped down to where it’s mostly stems and few leaves, stop and toss the rest. Continue mincing so that the leaves and stems get chopped finely all together, and no one’s the wiser.
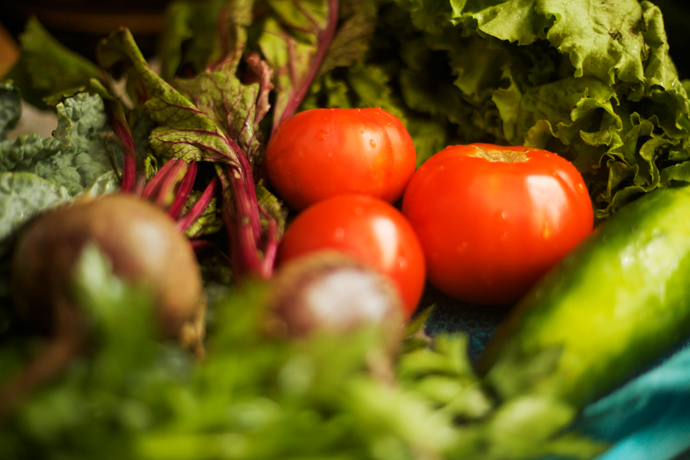 In addition to practicing and prepping an actual meal while we were there, I also finally learned the proper technique on how to dice an onion, and here’s
 If I had a nickel for every time someone asked me what the heck I was eating on my detox, I’d have at least $1. I did get asked a lot, because when you roll out the list of things you *can’t* eat, it seems like the list of what you *can* eat would be teeny tiny. But in reality, if you’re cooking at home, your possibilities are abundant. Eating out is another story, as I’ve already told you all about. But at home, for the most part I felt free to cook, or modify, foods I was craving.
 Curry is one of those things I go in and out of craving. I won’t think about it for months, and then I get a craving and I have to have curry right this very second! The other day, my friend Candace sparked my craving when I ran into her at Sprouts and she told me what she was making for dinner. From then on out, it was curry for lunch and dinner, for about 4 days straight.
  Of course my family doesn’t love curry as much as I do, or really not at all, so this was the perfect dish for me to make myself during the detox, since it would ensure I had lunch and dinner covered on the nights I made something that wasn’t detox-friendly. This recipe lasted myself for 4-5 meals, and would easily serve a family for one night or a couple of 2 days, especially serving it on top of rice or noodles.
 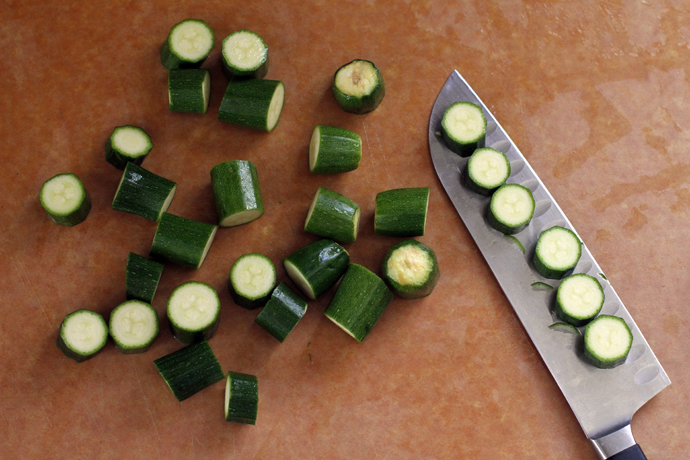 The types of vegetables you use are all up to you, but standard curry usually involves carrots, a squash of some sort, potatoes and a green. Potatoes, since they are a nightshade, were off limits for me during the cleanse, but normally I would’ve added those in a heart beat. The mixture of baby zucchini, baby bok choy, carrots and onions was wonderful though, so adjust as you wish and include or leave out according to your tastes and preferences.
  If you want to make your curry vegan, use these 2 simple ingredients which are widely available just about anywhere. Full fat coconut milk will give the best richness and flavor, and the Thai Kitchen red curry paste is as clean as they come, and sure is convenient. I read reviews that the paste didn’t have a strong enough curry flavor for some, so if you like strong flavor, consider adding in some curry powder as well, but this was plenty tasty for me.
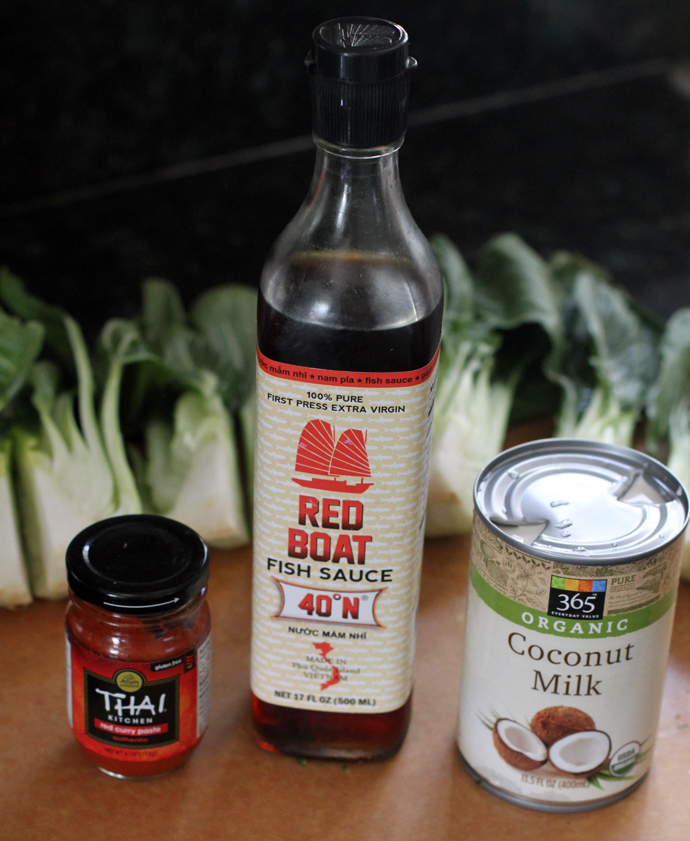 To take the flavor up a notch though, if you’re not concerned about this dish being vegan, adding in a good tablespoon full of
  You want to saute your carrots and onions first, before adding your more delicate veggies like squash and bok choy. If you’re using potatoes, add these in here as well.
  Once you’ve cooked the heartier veggies, add in your softer veggies and let cook for about 10 minutes, perhaps even covering the pan to trap in some heat and steam.
 While you’re cooking your veggies, you are warming your coconut milk and curry paste in a small saucepan over medium-low heat. You can skip this step and just add in your coconut milk straight to the pan of veggies, then stir in your curry paste, but your coconut milk may look a little curdled. Still tastes as good, just doesn’t look as pretty. If you’re going for speed and less dishes, just do it this way, but if you want it to be purty, definitely heat separately.
  Let the curry mixture and veggies simmer together for a few minutes, just to mainly let the flavors coat and meld into the veggies, and then you’re ready to serve. I really love this over brown rice, or the
 Last week my editor checked in and offered a post suggestion; “5 Funny Things You Think About When On a Detox.” I at first agreed to write the suggested post, thinking I could weave a funny little tale about life on a detox, and be done with it. But the more I sat on it, I wrote her back and told her no. Because I wasn’t going insane on this detox, wasn’t starving, wasn’t craving everything in sight, wasn’t a raving lunatic bitch. I actually felt pretty dang good in fact. So instead of that funny post about surviving a detox without killing someone, I wrote about detox myths and today, I’d like to share a little a bit about how I not only survived the cleanse, but thrived.
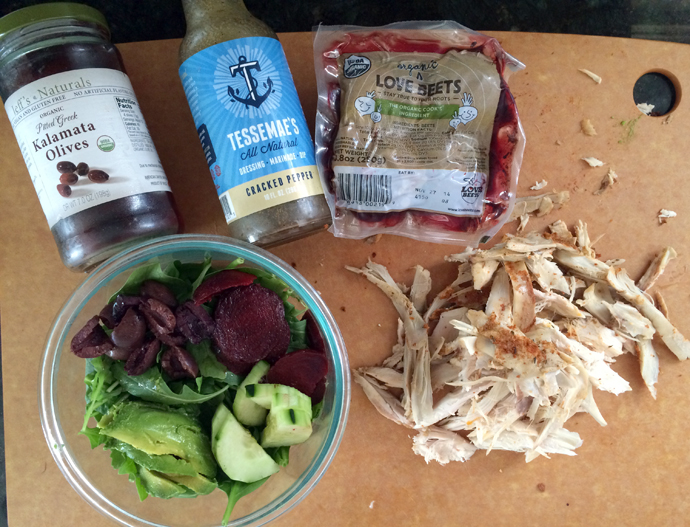

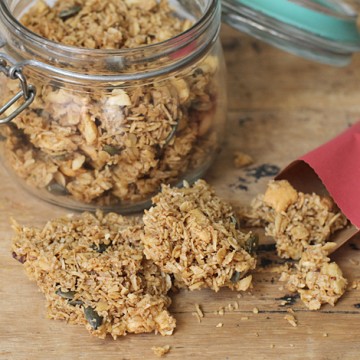
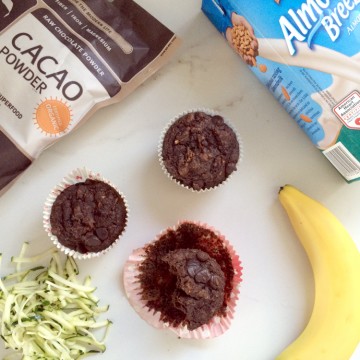
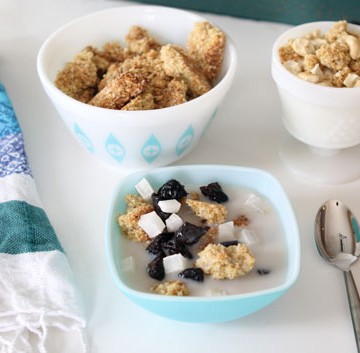
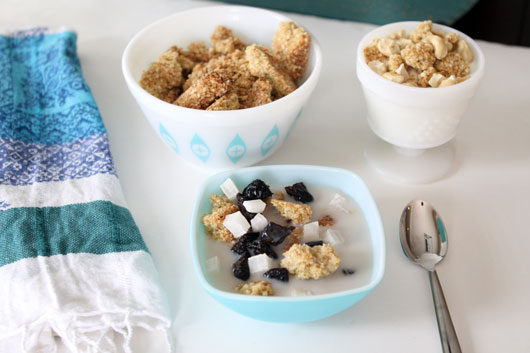
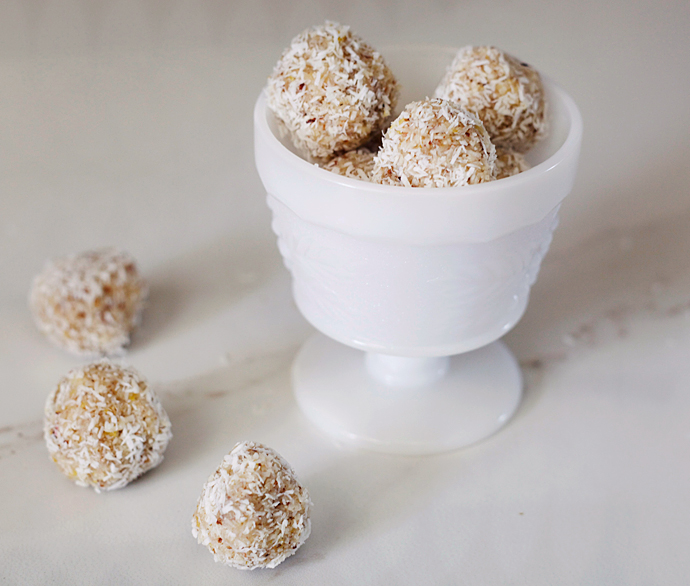 These little power balls, made with a bevy of awesome ingredients, are floating all over the internet and Instagram. After many of us stashed protein bars in our cars and purses for so long, we’re looking for an alternative that provides the same benefits of protein bars – filling, yummy and convenient – but without all the questionable ingredients. Lindsey shared her
 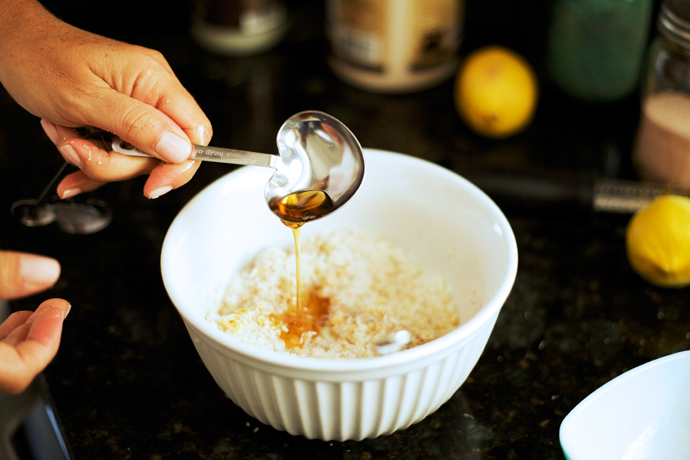 I had to tweak with the recipe just a bit, but for the most part, these came together fairly quickly. Once you have a good understanding of what ingredients you need to make these little delights stick together; usually shredded coconut and some sort of nut flour or oats, you can then tinker with ingredients and come up with a variety of versions. These are light and refreshing, but satisfy a sweet craving just as well as a cupcake, and they’re a nutritious little snack to have in the morning with some tea or in the afternoon when you need a pick-me-up.
 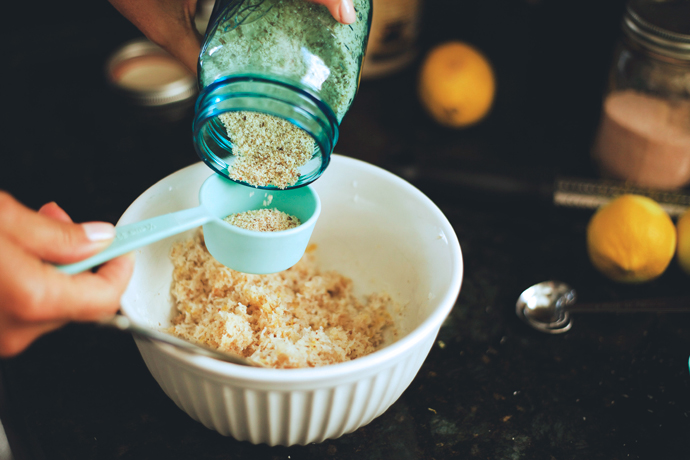 For these, you can use almond flour or hazelnut meal, but almond flour is much cheaper. Most health food markets, even Sprouts, sells almond meal/flour in the bulk bins, but you can make your own by just pulsing raw almonds in a blender or food processor until very fine. I suggest you start with the zest of 2 lemons, taste, and then add more zest if you want it tangier. I find that lemons range quite a bit in levels of tartness, and people’s preference differ as well. I personally love the extra tang, so if you’re like me, be bold and just start with 3 lemons.
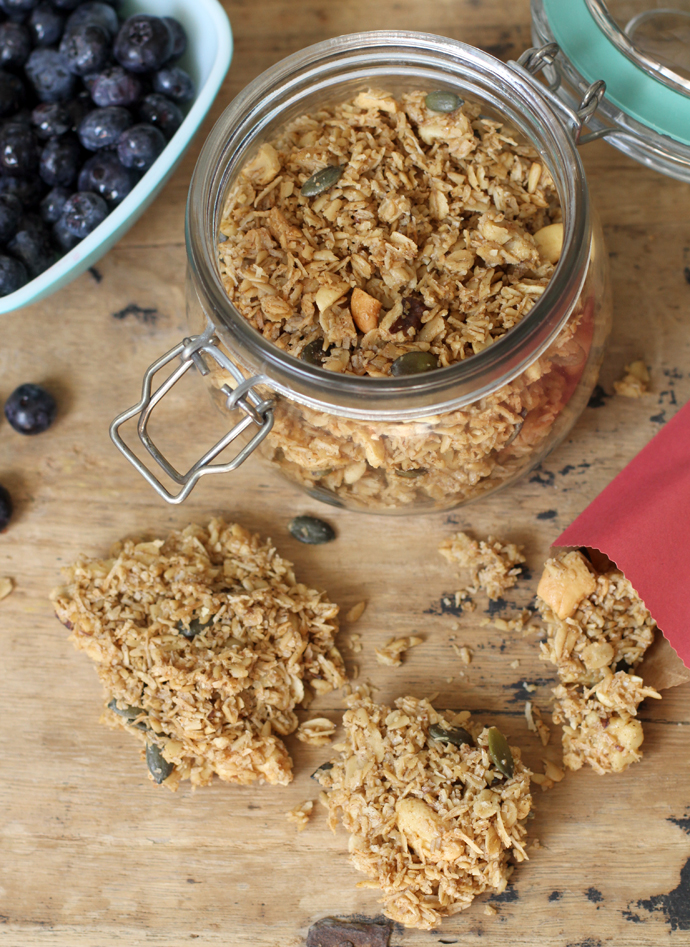
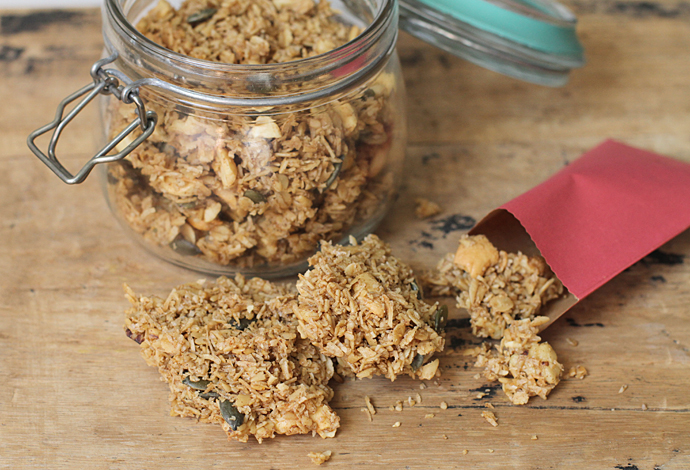
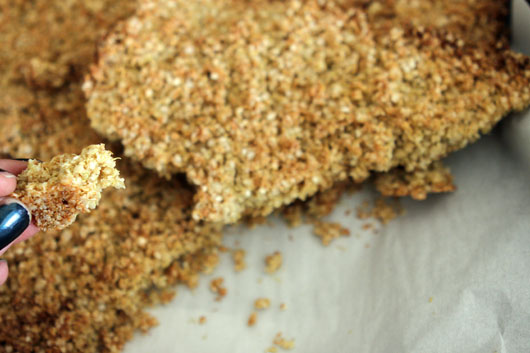
 You’re looking for a consistency that stays together easily when you smash it together with a fork. If it seems too gooey, simply add a bit more coconut or almond flour. Your hands will still get messy either way, so don’t be afraid to roll away, and maybe keep a dish towel on hand for the occasional hand wipe.
 Depending on how much you love coconut, you can roll these babies around in some more shreds, or not. My favorite brand of coconut is
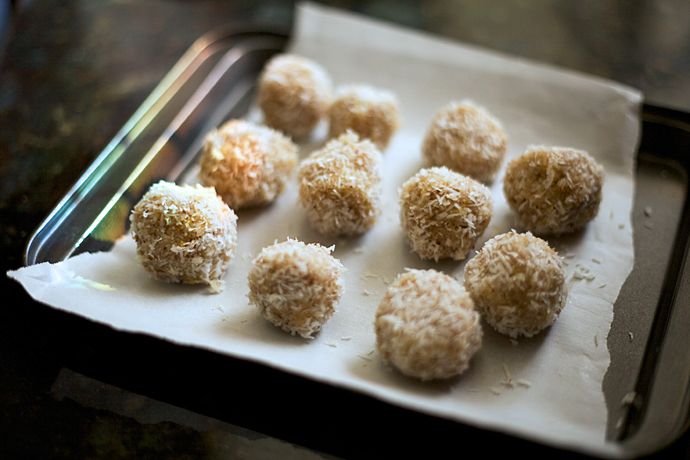

 I can’t help but think of one of our favorite, supremely stupidly funny movies,


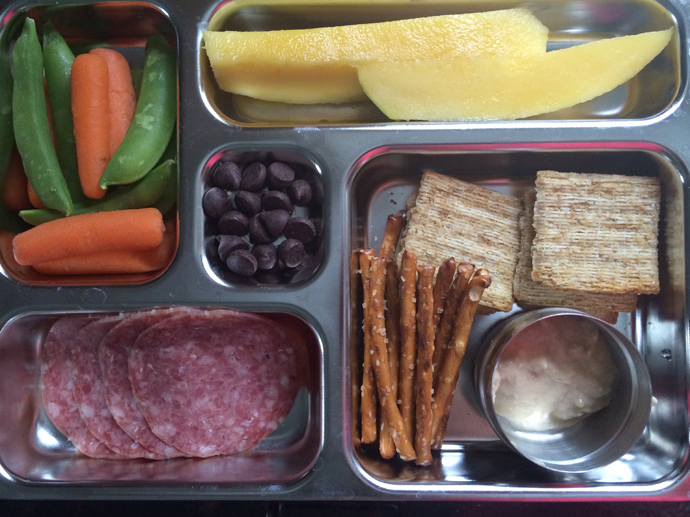
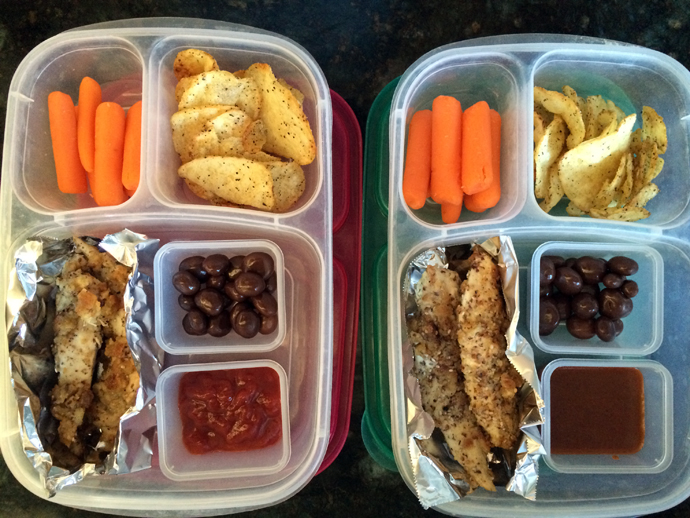
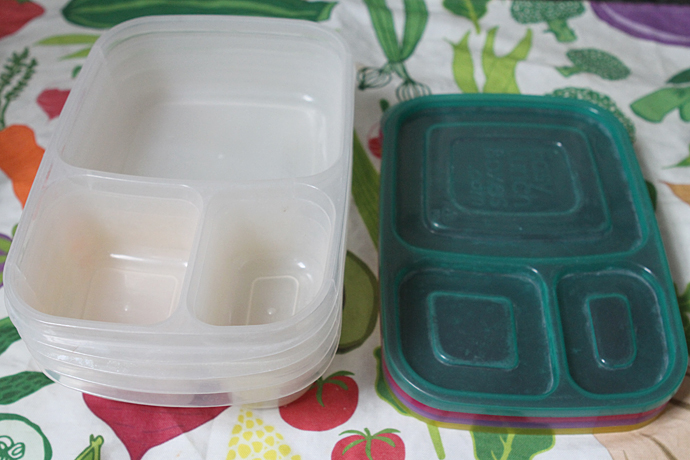
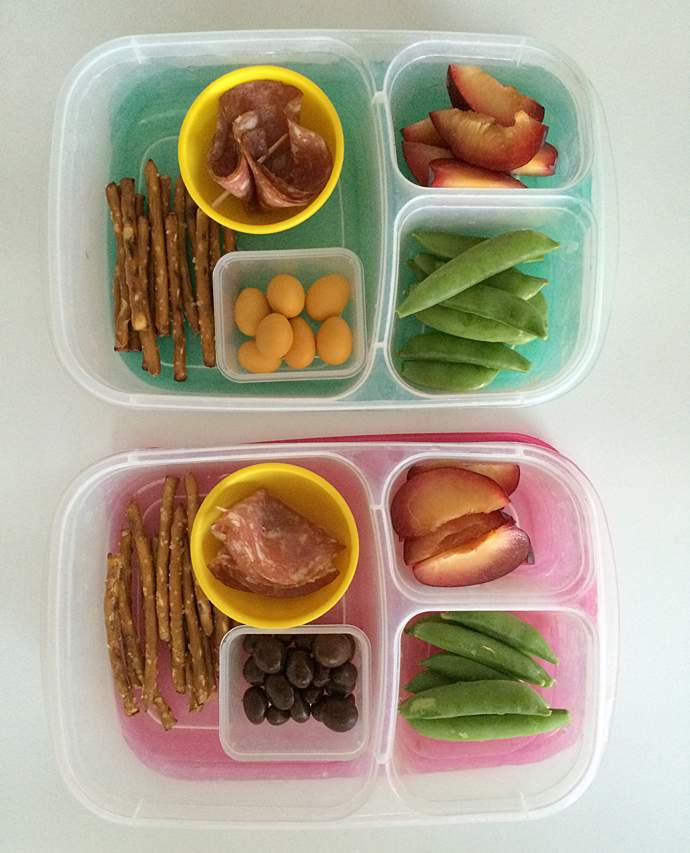
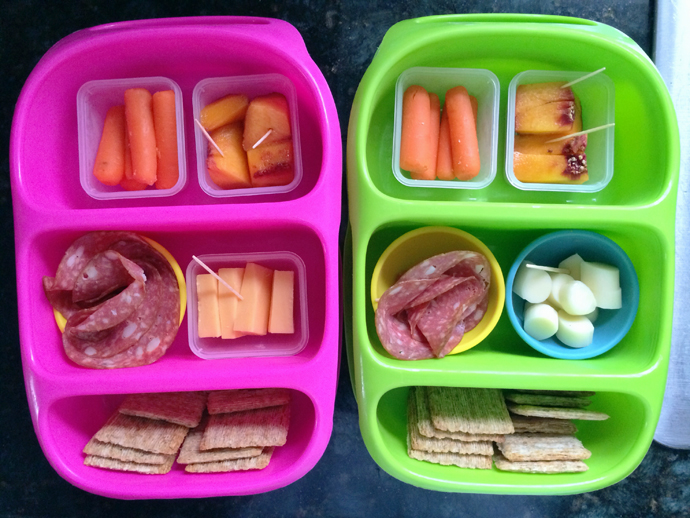
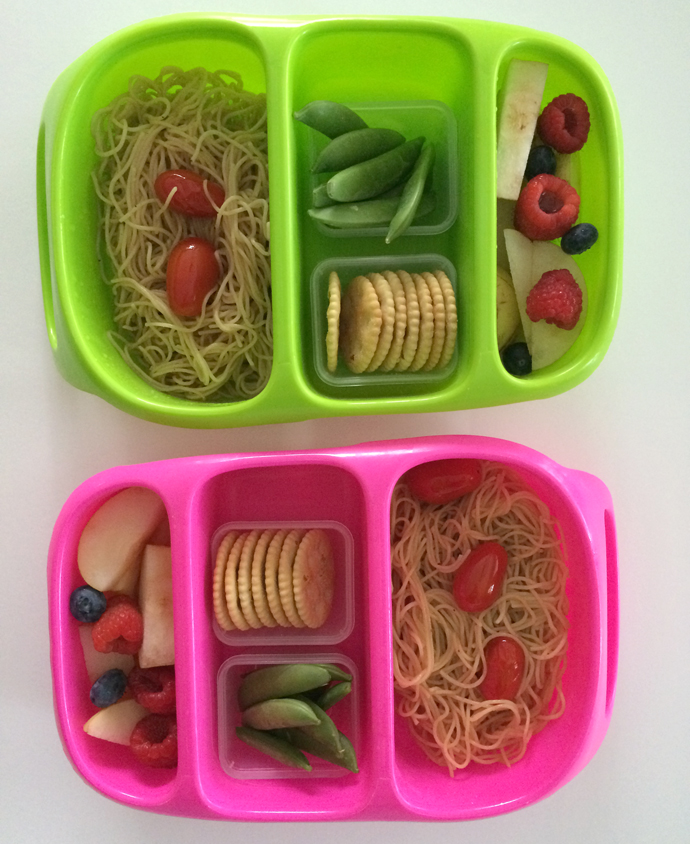
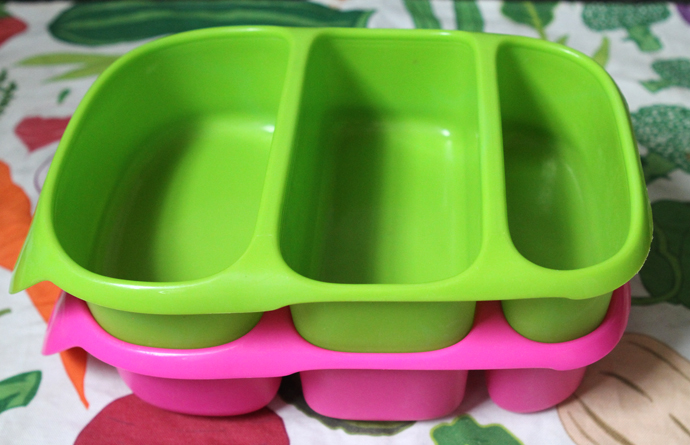
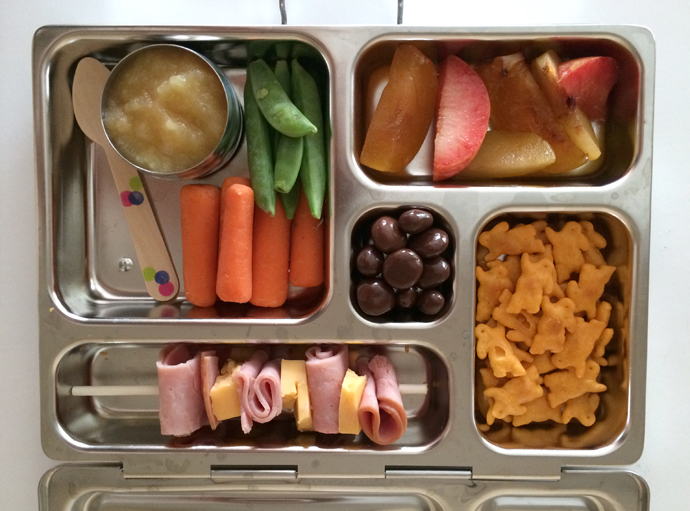 I’m convinced that finding the “perfect” lunchbox for kid’s school lunches is the same as finding the perfect stroller; perfect doesn’t exist so you just try to find the best one out there. I embarrassingly spent a lot of time this summer reviewing several different lunchbox systems before I took the plunge and invested in a


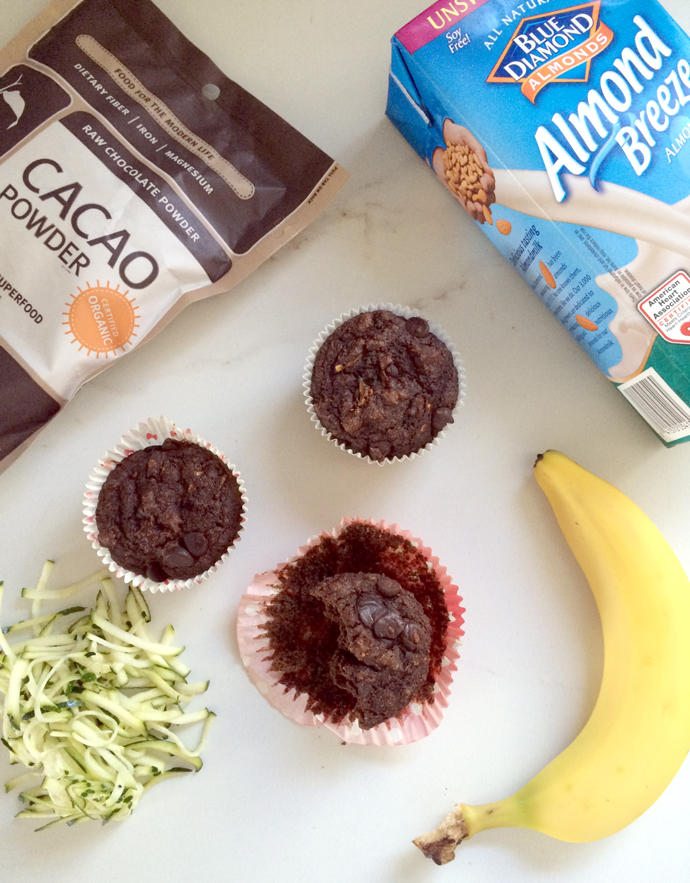 Summer usually finds many home gardeners people with an over-abundance of zucchinis, and if you’re a mindful shopper, you’ll notice that they’re almost giving them away at any local grocery store. Summer makes zucchinis grow like weeds, and even those with hardly a green thumb in their body can get a few to grow with minimal effort. We didn’t plant zucchinis this year, because we hardly had time to plant a few rows of lettuce before we were overrun by a pack of screaming kids, and had to call it a day. But we have been receiving our steady supply of yellow and green squash from our CSA produce boxes, and I’m always trying to come up with new ways for us to go through them. Confession, my kids hate squash of any type, so it’s often hard for Art and I alone to go through the amount we seem to find on our hands these days.
 This post was sponsored by the nice folks at Almond Breeze, but all opinions are my own! Thanks for supporting the companies who allow me to support this site.
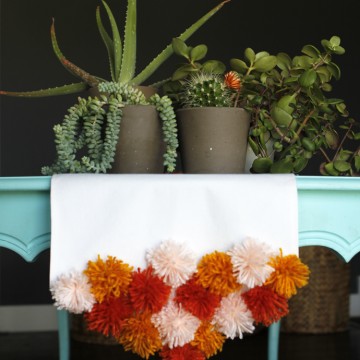
 For parties and entertaining I sometimes feel like the most under-utilized table accent is the table runner. Don’t get me wrong, there are definitely more important things to worry about: like making thoughtful meals and spending quality time with guests. But if you find yourself wanting to make a party statement without a ton of hassle consider the table runner your new best friend. Table runners anchor a table setting…they give it structure without stealing the show! That’s why I came up with a fun and simple way to accessorize my table runner without too much fuss!

 Our neighbor’s ran into us this morning and asked if we had hosted a wedding on Saturday night. They heard the band, saw the twinkling lights and had passed by while the catering van was packing up, so they assumed the big hoopla had been a wedding. I had to laugh because it very much felt like I had hosted a wedding, with all the details and time leading up to the big event, and the sad let-down most brides feel the morning after. All that planning, all that fun, to have it flash by in a blink. It was a special night for a very special person, and I’m so happy I went all out for Art’s 40th.
  We don’t travel much, or as often as we’d like, so instead of spending on a big trip for his 40th, we did the next best thing and celebrated with our closest friends and ate, drank and danced until we were tired and full.


 I decided pretty early on that I wanted to hire a caterer because I wanted to eat well and enjoy the night. I’ve never hired a caterer and very rarely order premade food from restaurants, choosing to do most everything myself to save money and control the menu. Each time I do, I’m glad I put in the effort, but I also wish I had some energy and time to spare so I could actually enjoy the party and our guests. From the beginning I knew we wanted
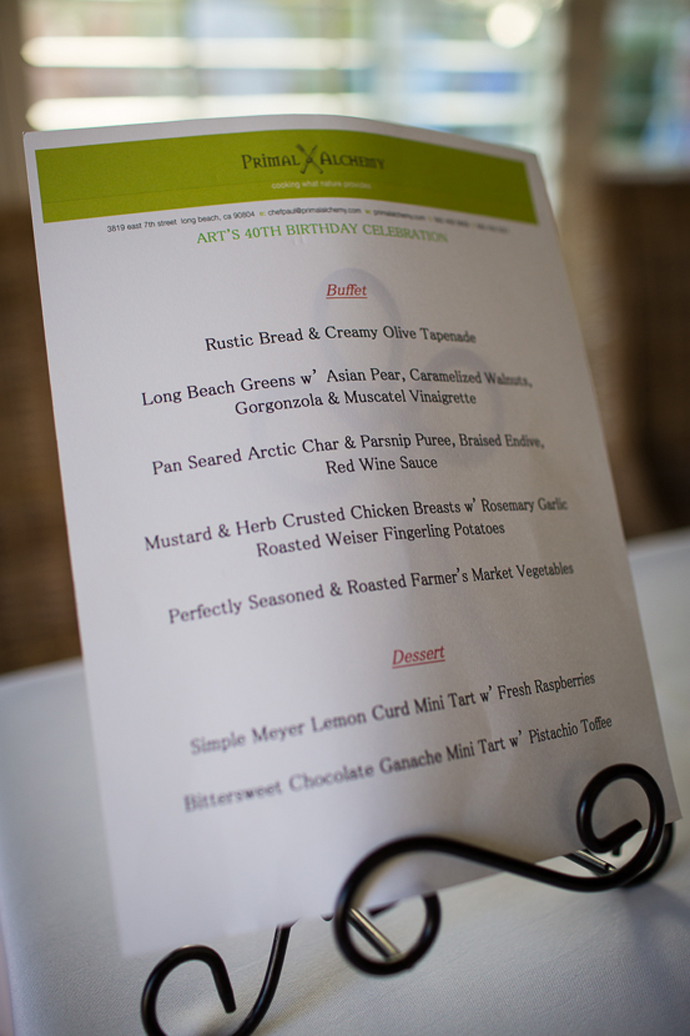


 There weren’t any pictures captured of the actual food when it was complete, because my dear friend Mary, who snapped all these lovely photos, was too busy enjoying her dinner. I think that fact speaks more to the quality and flavor of the food, than it does to her skills as a photographer haha! Ever the perfectionist, only food that good could throw Mary off her game for a moment. I’m so happy and thankful that she captured the most important moments shared with friends and my guy, though.
 The caterer made the most amazing stone fruit agua fresca, and set up the wine & beer bar area for us. Once the tray passed appetizers were through, they also set up a full bar, complete with the makings for Roberta’s Cookbook’s American Nightmare, found on the
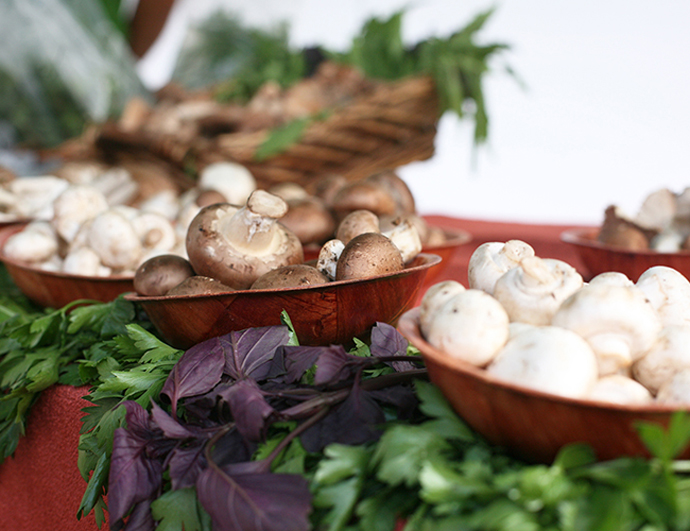
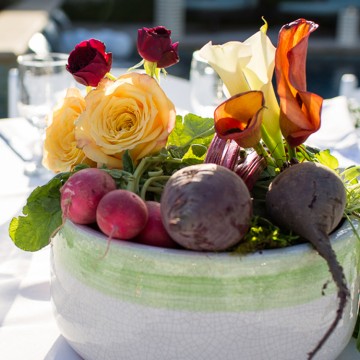
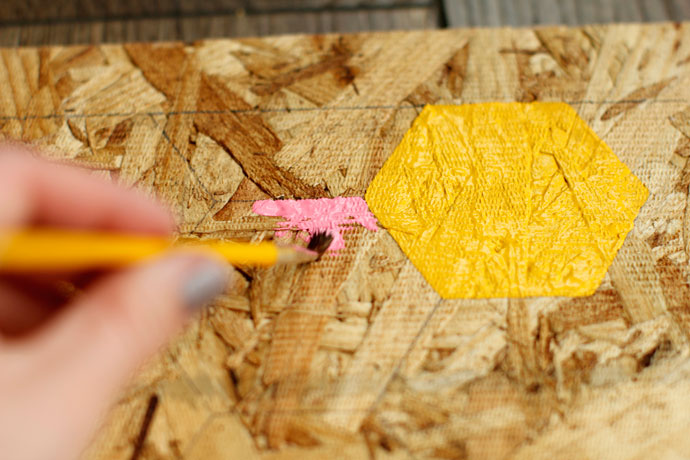
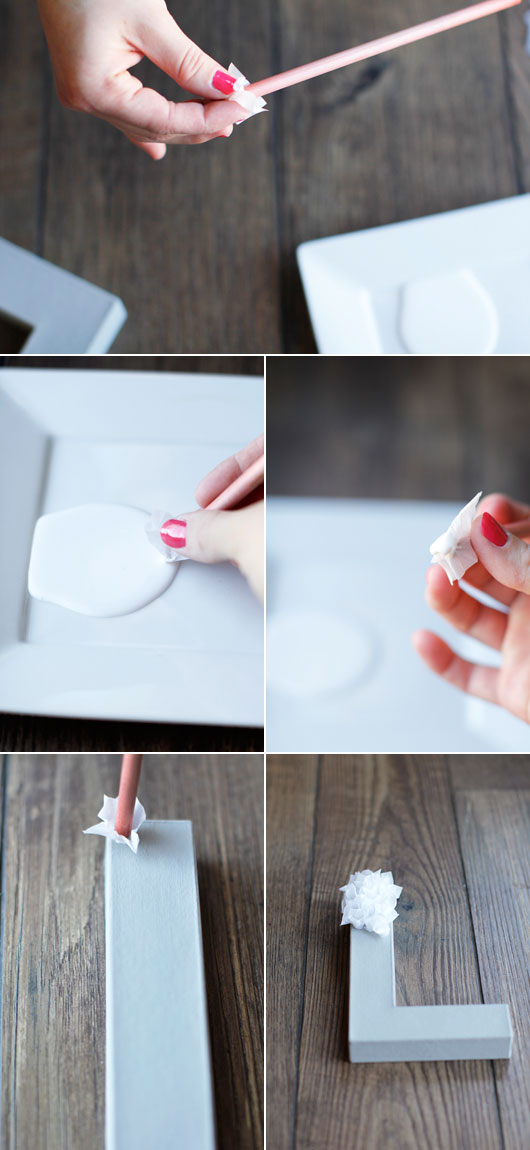
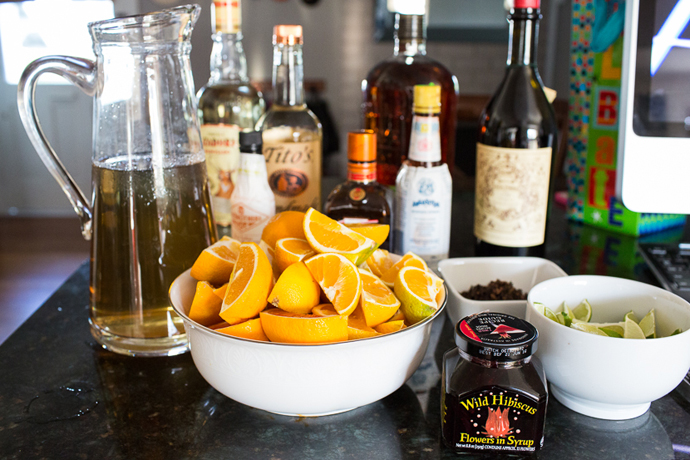 The table settings were a very last minute idea. I originally had the idea to create full and colorful centerpieces using paper honeycomb balls, but when the company I usually order from was shut down for a few days, I had to switch plans. At the very last minute, as I was wracking my brain for ideas, I started thinking of what I wanted to represent, things we love, and in particular, things that would relate to the dinner. I instantly knew I had to incorporate fresh fruit and veggies somehow, so I did some searching around, and used
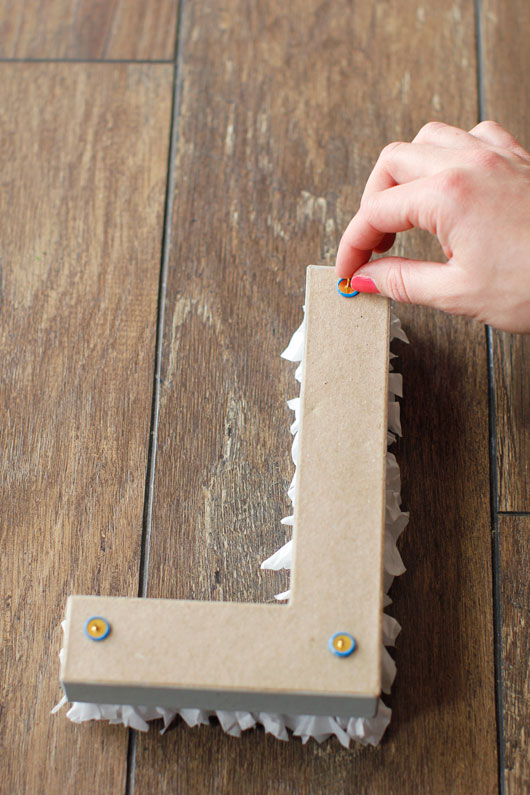
  I couldn’t be happier with how they came out, and even though it took some last minute running around to find appropriate vessels, they fit with the party theme perfectly.
 I found the containers at Home Goods, and purchased some moss from Michael’s. Heather of
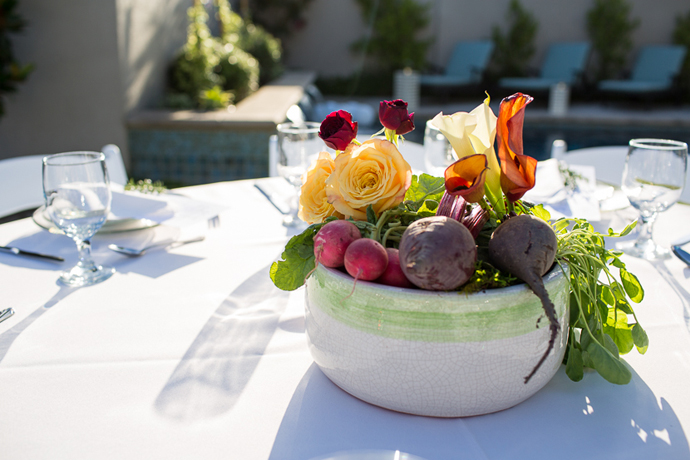

 To add some color and whimsy to the backyard, I purchased white and aqua paper lanterns in bulk from Amazon, and hung them from our cafe lights. I also placed huge metal and reclaimed wood lanterns around the pool area, porch to welcome guests, and on the drink table. I found them on clearance at Target and I can’t wait to use them throughout the summer. They really added a special feel. I also put some friends to work at the last minute.


 Besides having a caterer, I also really wanted to hire a favorite local band who has performed at a few friend’s parties. The Joneses were on point as usual and provided fabulous entertainment long enough, and loud enough, for our next door neighbor to call and ask us to keep it down.
 In between dancing and eating, some fierce ping pong matches occured. While I don’t always love having the garage open up to our backyard because it’s not always so clean, I do love it on night’s like these, when friends are over and we can all gather around the pool, fire pit and ping pong table, let the kids shoot some hoops or play dodge ball, and everyone can have fun and stay safe and sound.
 During sunset we ate dinner and enjoyed our company, and then as night fell we lit some candles, sang happy birthday and the fun really began.
 Things started to also blur a little around here too because of the dancing and wine, and I remember being flung and twirled around, and then the next thing I knew we were both in the pool.


 I do know that I didn’t do much to stop the toss in the pool, in fact I may have really encouraged it. But I didn’t think I would get tossed in alongside the birthday boy. Luckily my dress survived, and we made sure to take Art’s phone off him before he was thrown in. Greg was a good sport and somehow landed in the pool too. He spent the rest of the night in a pair of Art’s swim trunks and an old t-shirt. Thanks for taking one for the team Greg.

 Such a memorable night that we won’t soon forget. It was so much fun, and we were so happy many of our closest friends and family members could be there to celebrate Art on this milestone of a birthday. Happy 40th Art! I love you, and I hope you had as good of a time as I did!

 My husband turned 40 years old this past Saturday. The mental game tied in with the aging process is a strange thing, considering we are literally getting older by the second, but there’s something about hitting the milestones, like 30 and 40, which seem to punch you in the gut a little more and send you in a tailspin of self-analyzation and reflection. The momentous countdown to 40 got him on a quest for a 30 day transformation. He was being silly of course in saying he was going to completely change his life and body in just 30 days, after quite frankly, neglecting to follow through consistent workouts for years, but for him it was more of way to kick start the road to transformation. I have to say I’ve been quite impressed with the small changes he’s made over the last 30 days, which have had a huge impact, including getting to bed and the office earlier.
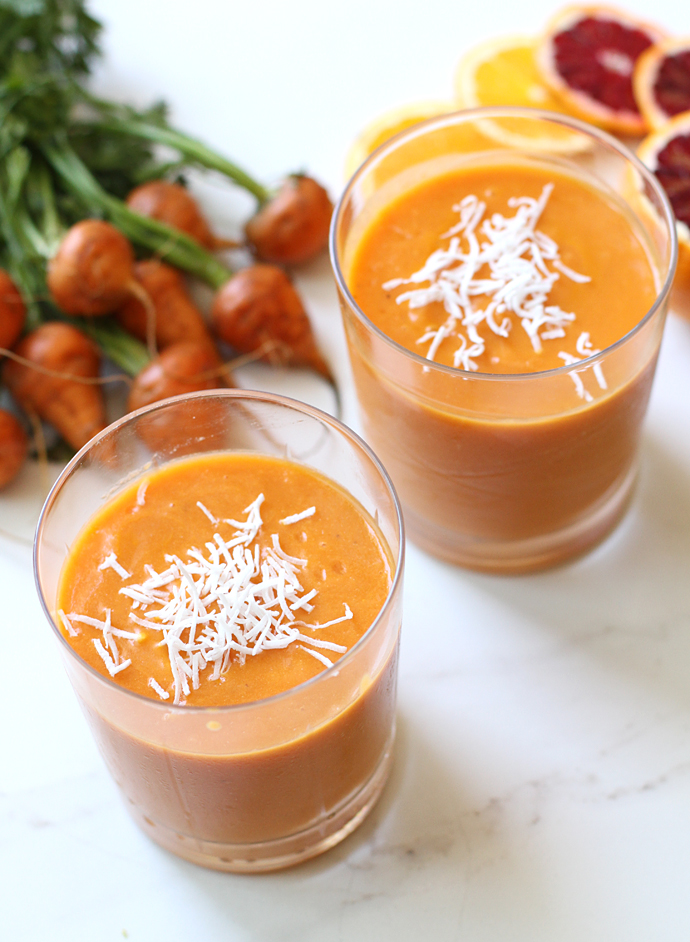
 In continuing my partnership with Almond Breeze, I posted some other great recipes last month including:


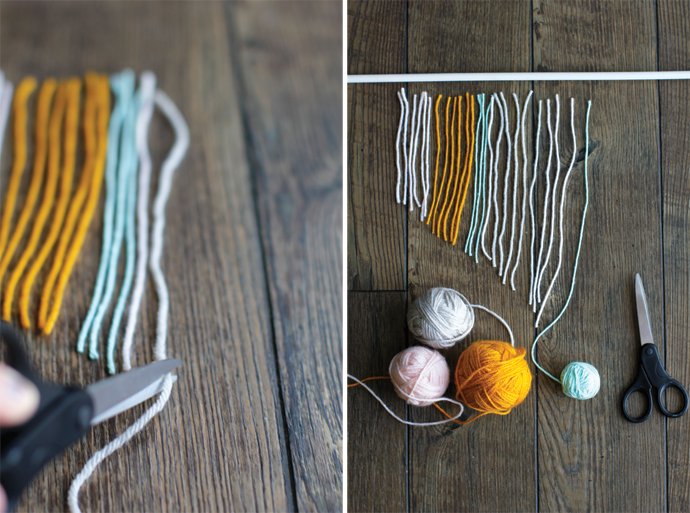
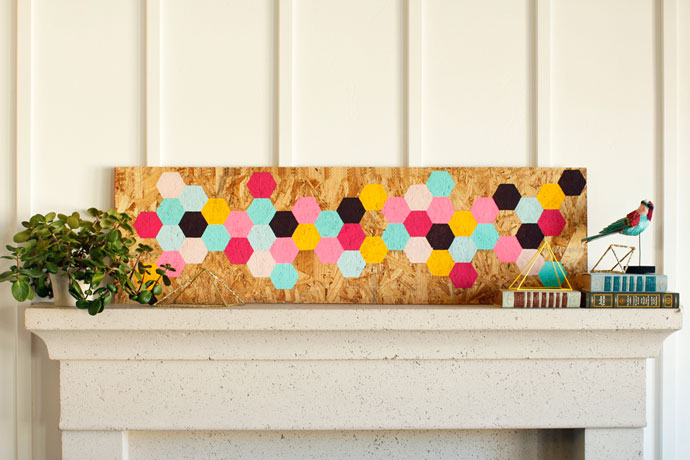
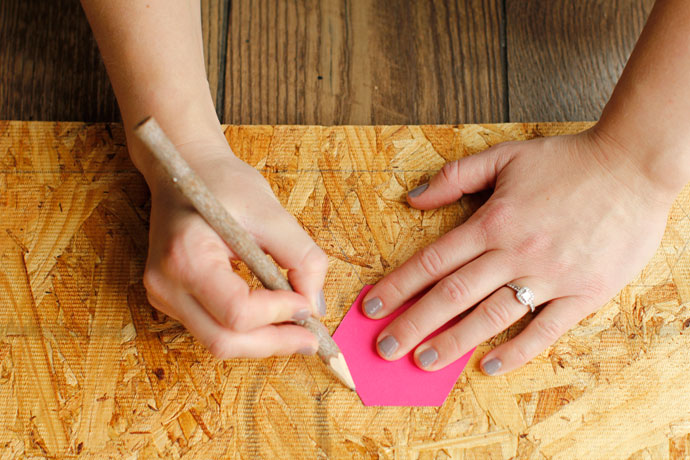
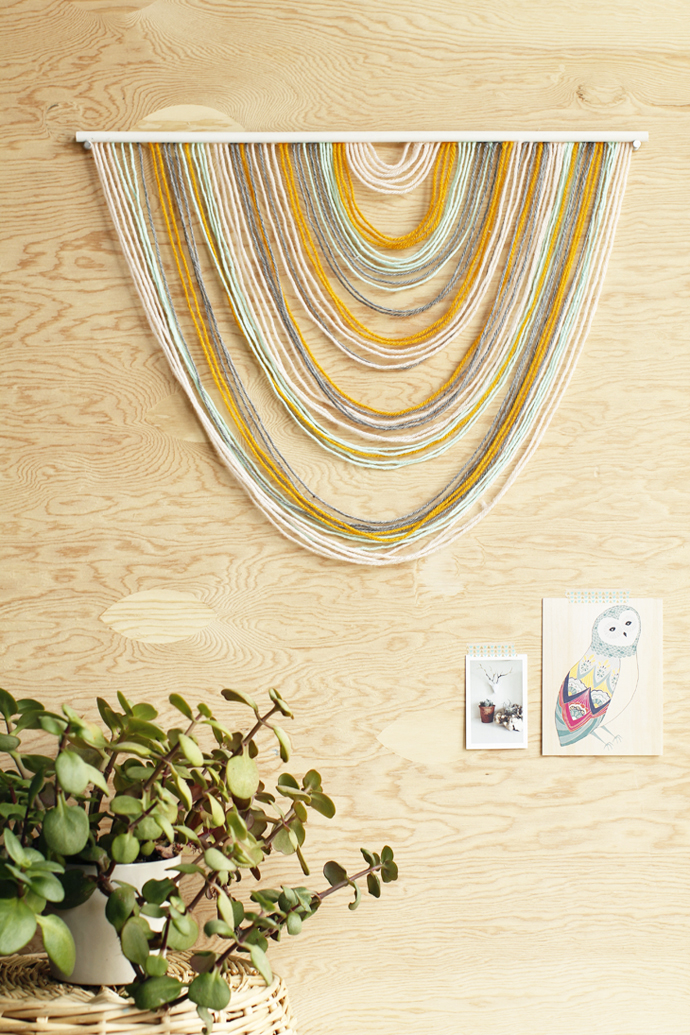 Wall tapestries are totally the new hot thing, didn’t ya know? It’s true I am jumping on the wall tapestry bandwagon and not looking back. In my summer lineup I plan to take a tapestry class and learn from a pro.


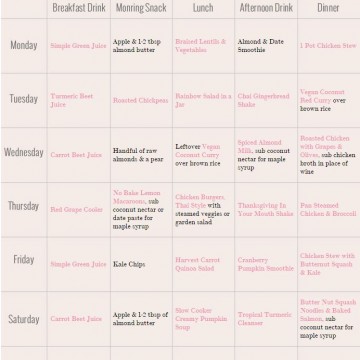
 I both love and despise food prepping. When done right, it can be a life saver, but when done wrong, it can be a waste of time and money. I’ve had my overzealous times, spending literally all day in the kitchen to prep tons of meals only to watch some of it go to waste. I stand back and admire my accomplishment, shown by mounds of food, and then think, “Well crap, now we’ve gotta eat all that.” And then I’ve had days like yesterday, where by the looks of it I didn’t make much headway, but know the few things prepared will be completely worthwhile, saving me time and money. As we enter week 2 of the
 With this in mind, I much prefer to prep different foods that I know will save me time in the kitchen when I need it the most, and will be there for me when I’m hungry and impatient, when I would most likely reach for the tortilla chips. I also like to prep foods that will get me eating more fruits and vegetables each and every day, and I’m sure many of you have the same goal, especially since most of us including our children,
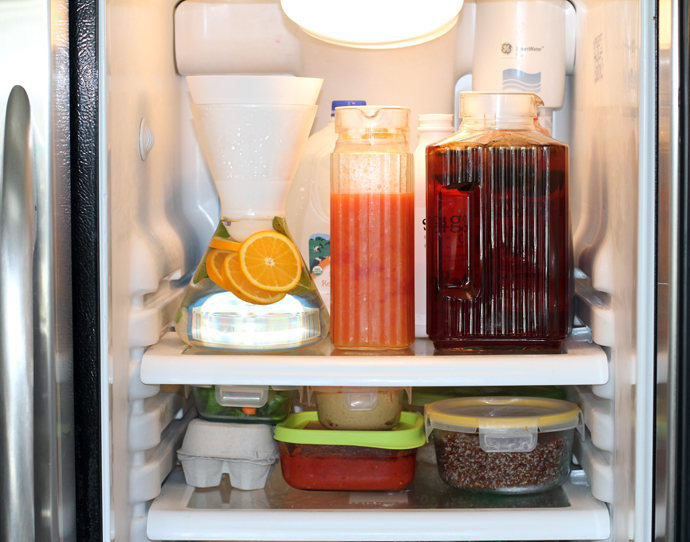

 MAKE FOODS THAT MAKE MY LIFE EASIER
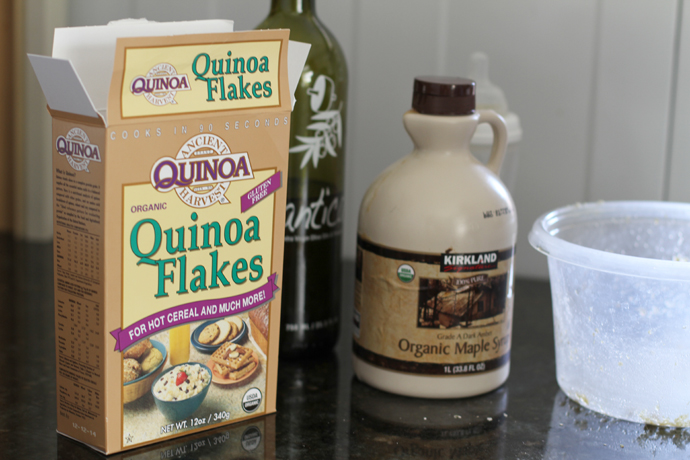


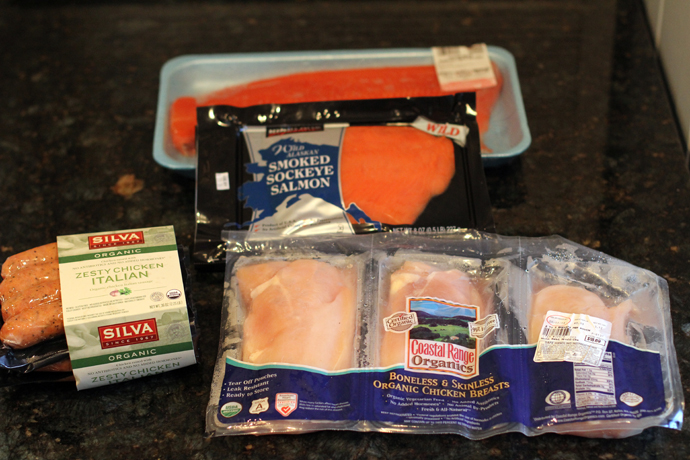
 While we’ve been progressively cutting down on our meat consumption over the last year, sticking with vegetarian meals for at least 3-4 nights a week, the concept of Meatless Mondays is still relatively new to my parents, especially my dad. Mondays happen to be the day they come over and help watch the kids while I run errands and do some work. It’s been that way for years now, and it’s a consistent routine we all look forward to each week, most especially my parents I think. They stay on for dinner each week, and my mom and I usually gather in the kitchen around 5 o’clock and cook a meal together, while my dad tries to manage watching over 3 kids. It sounds quite serene I’m sure, but my mom and I are often passing off Hayden back and forth since papa doesn’t have quite the same soothing touch of either of us, while we take turns telling my dad not to get the older two kids so riled up. In other words, its chaos, but for some reason we seem to enjoy it and keep coming back for more and more.
 The vegetable mix made for a wonderful addition to scrambled eggs the next morning, and I even had a tiny bit left to add to a halved avocado, sitting atop a bed of lettuce for lunch. If you’re skipping dairy, feel free to do as I did and just use the mix for tacos, but if you can handle some cheese, you won’t regret eating this as a quesadilla (I know, because I stole a bite or two off Art’s plate when he wasn’t looking.)
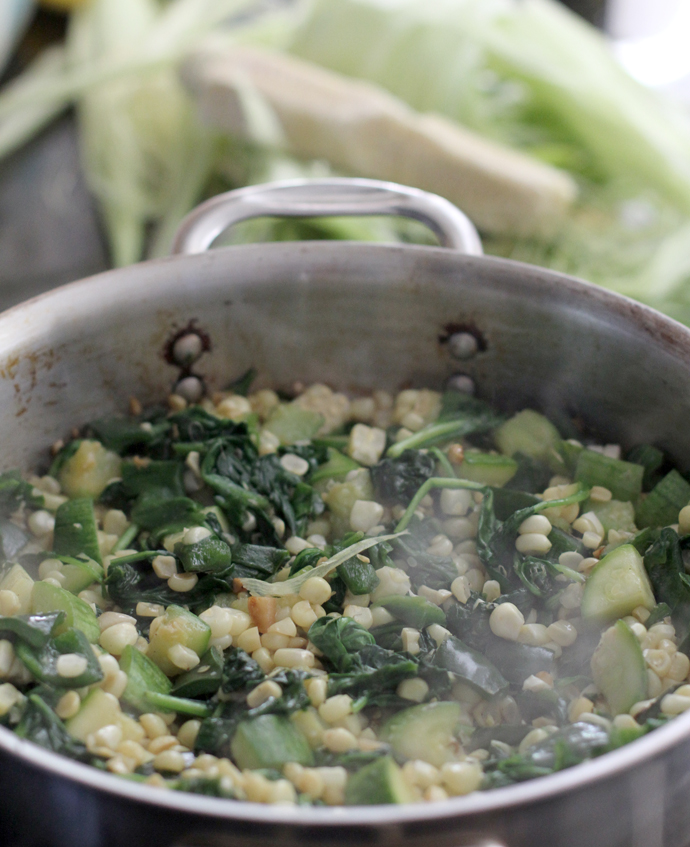


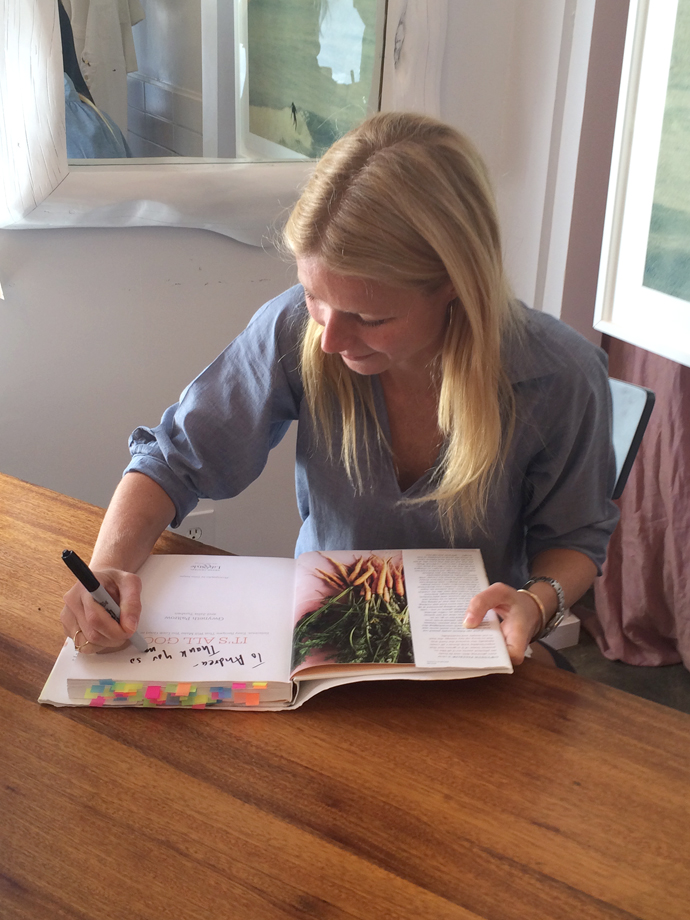
 I realize it’s been weeks since I’ve written a proper post over here. I’ve been in a post-spring break haze, fumbling around, still trying to get back into the swing of things. It’s getting warmer, the sun is out longer, and I’ve been doing yoga every day, so in other words, there have been so many other things luring me away from the screen. It’s definitely not a bad thing I suppose. I have so much to tell you all, and share with you about what life has looked like around here lately, but I thought I’d start back with a bang, and tell you all about the day I met Gwyneth Paltrow.
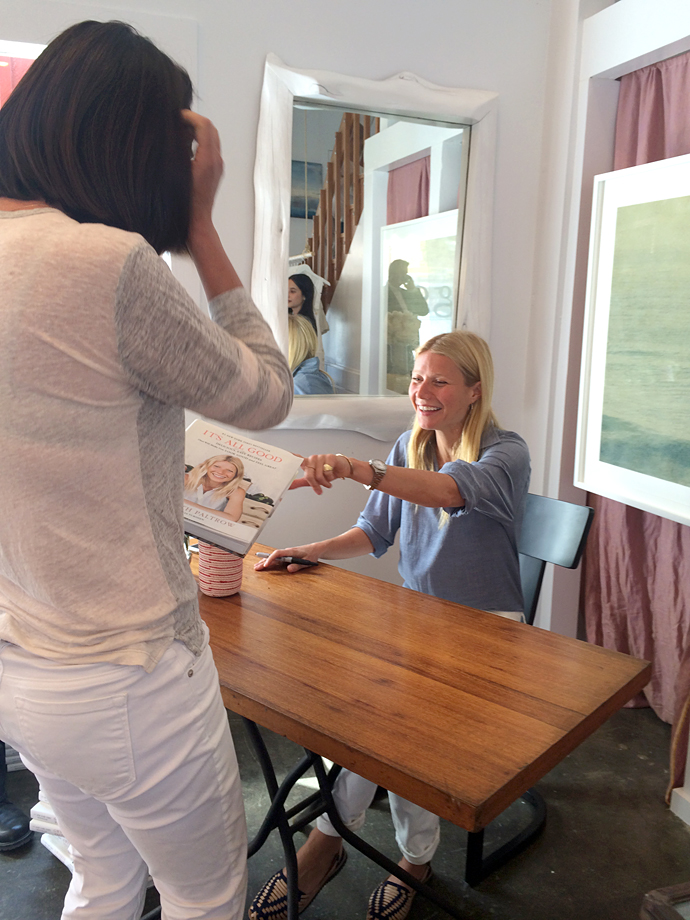


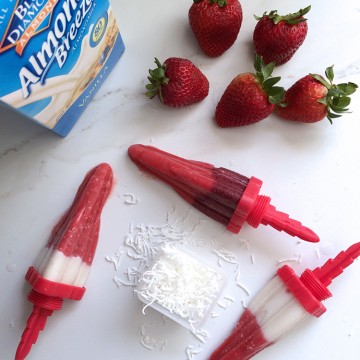
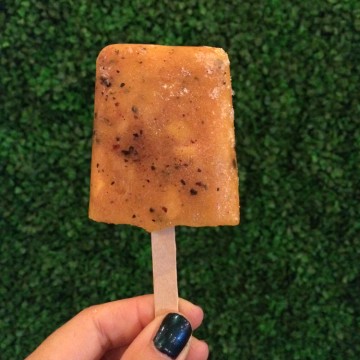
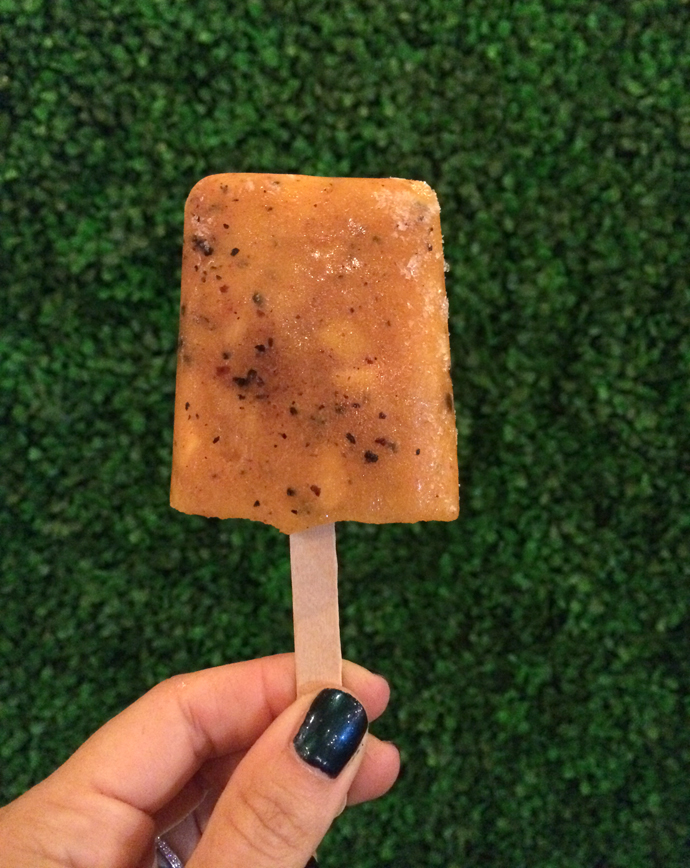
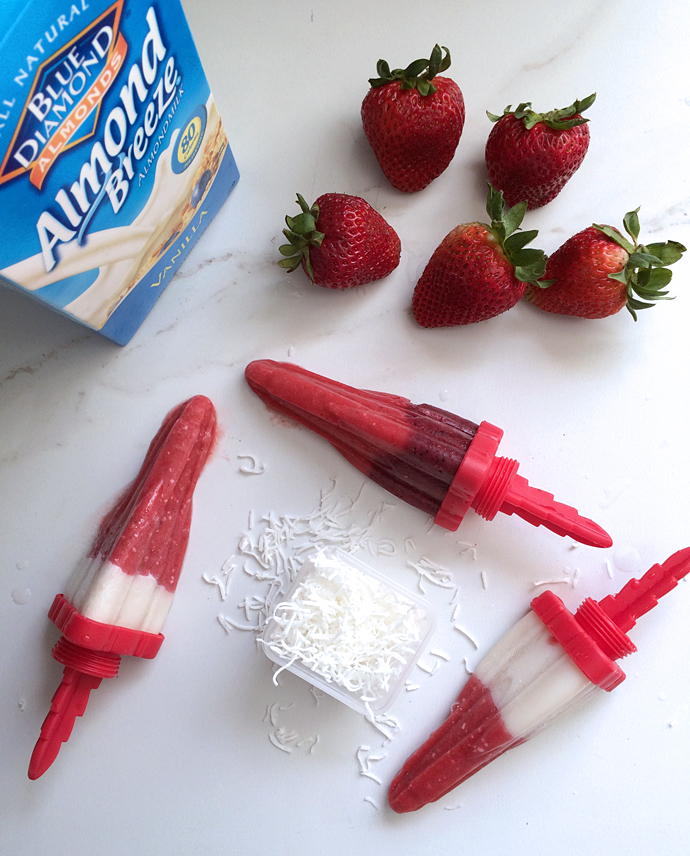 Because these were a last minute throw together treat, I did a little winging it in the ingredients department. I started off with just a plain strawberry mix, using fresh strawberries I had on hand, but then quickly realized there wasn’t enough mixture to even fill up 3 popsicles. So then I dug through the freezer and a bag of frozen berries and blended those up. We were getting there, as we now had enough mix to fill up about 6 popsicle molds. Since we have a 9 piece set of molds, I mentally felt like I just had to fill them all up, so I then just added plain almond milk to top off some of the molds, hence the reason why we have a few different variations. It made for fun when choosing their flavor of choice though, so it all worked out.
 In the photo of Hayden above you can see how dusty our pool got from the crazy wild winds. We were feeling a bit caged in, stuck inside the house and classrooms (kids didn’t even take recess that day it was so hot), so we ventured outside under the shade of our Chinese Elm and enjoyed our pops. All 9 are all gone and the kids are asking me to make them again. They loved the coconut flavor addition, and I think next time I’ll try to be a bit more prepared and have some blueberries on hand to make red, white and blue pops. Or maybe some mango and banana for a more tropical flavor combo. To get the layered look, just freeze the first layer for about 20 minutes, enough for it to slightly set, but not freeze so much you can’t get the stick in, and then add the other flavor layer. Set a time and go about your business. Seems like a pain but really it wasn’t. Also, the molds are from Cuisipro if anyone is interested.
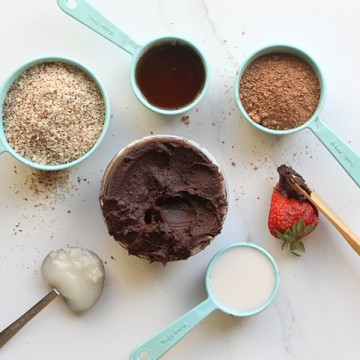
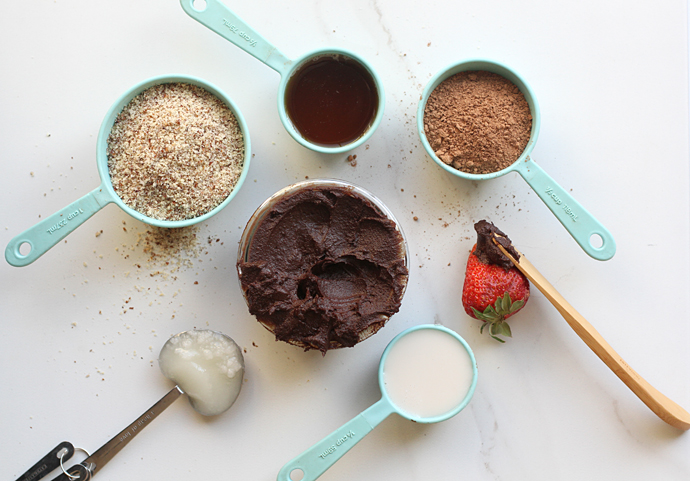 Sometime a couple years back, I decided to try Nutella, and we quickly grew more than a little hooked. Since it was “hazelnut” spread, I naively figured that since it was nut based, it was a delicious, too good to be true healthy treat. I never even bothered looking at the

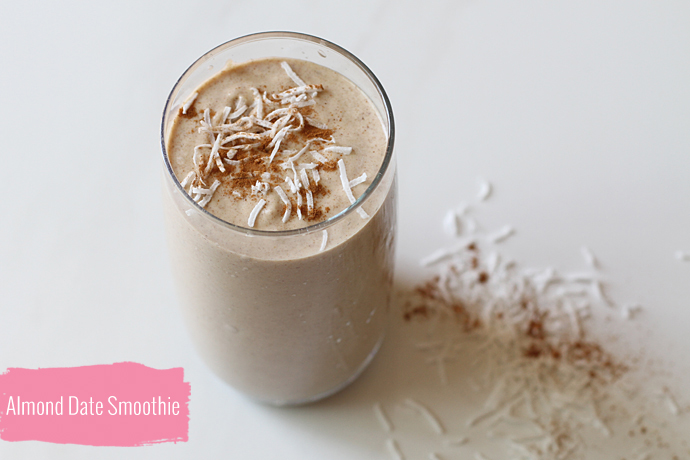 Some days, you just can’t look at another leafy green vegetable based smoothie or juice. Some days you miss the old you, who’d stroll through McDonald’s on a Tuesday afternoon and order a McFlurry and fries on the side, to dip in my McFlurry. Sigh.
 This smoothie is filling, and would make a really good breakfast on the go, or when you need a comforting mid-morning snack. The day I ordered it, I was in need of some comforting, it was just one of those days, and this did the trick.
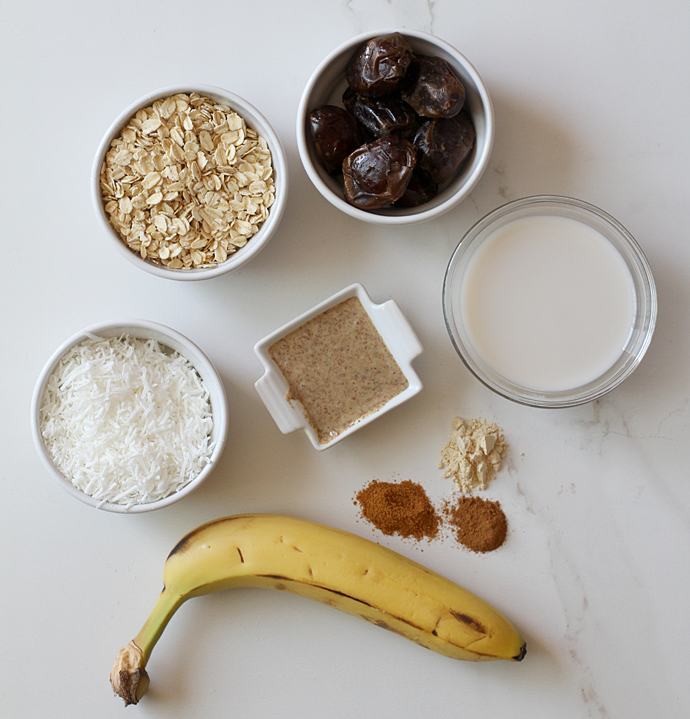 You’ve probably noticed that I added maca powder to this smoothie. Is it entirely necessary to get the same taste? Definitely not, but if you’d like to see if you can reap some of the reported benefits of maca, you can certainly give it a try. A note on the ingredients:
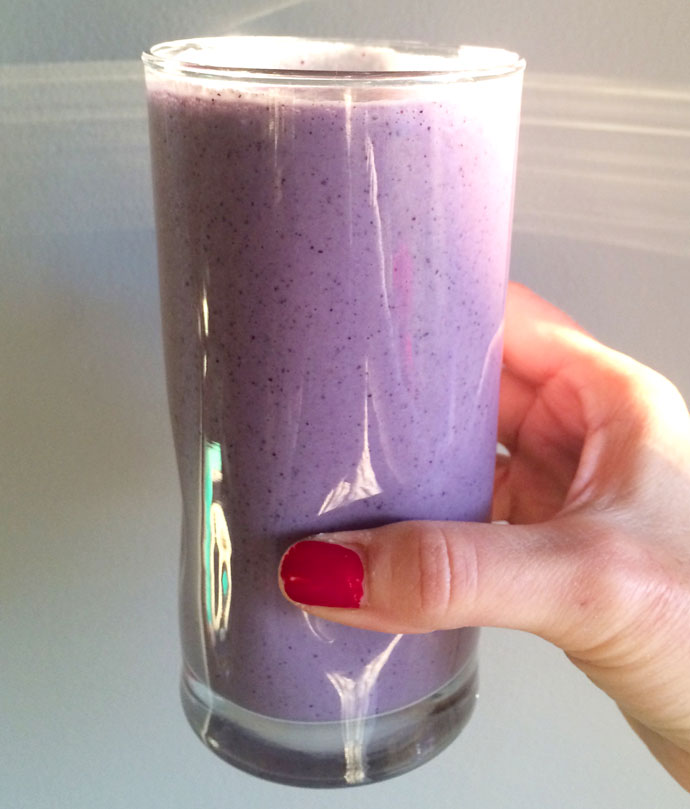
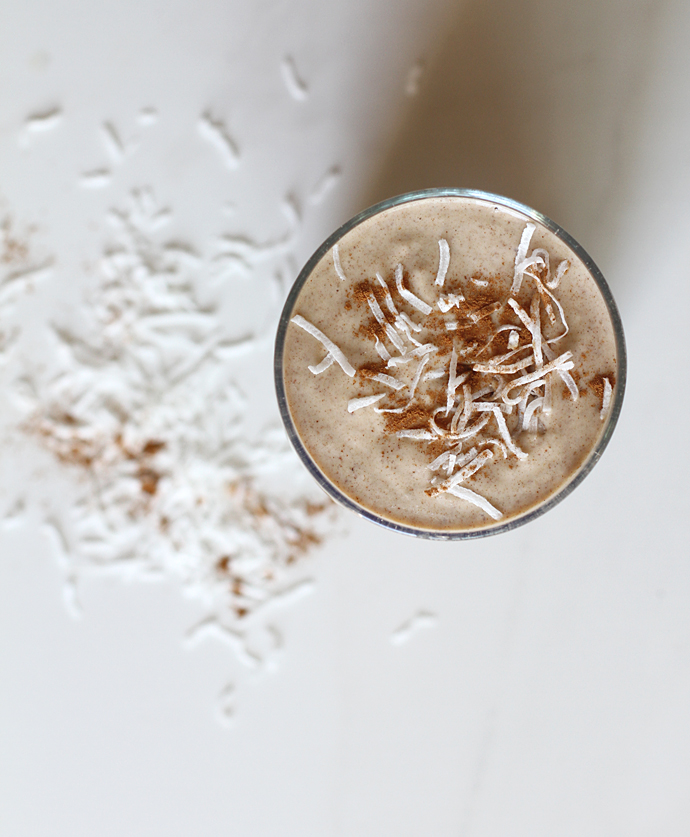 If this smoothie sounds like it’s something you’d like to make out with, or at least take on a date, see the recipe below, and please let me know if you give it a try. Happy Wednesday friends!
 This post was sponsored by Almond Breeze Almond Milk, although all opinions expressed are my own. I’d like to thank Almond Breeze for their support, so I can develop some wonderful recipes for you all over the next several months. If you would like to see the other recipes I created in the month of March, using Almond Breeze Almond Milk, you can visit my Instagram where I provide the recipes within each post.


 Last week when Martha went a bit crazy and warned everyone to be wary of bloggers, and our lack of experience, I had to chuckle, after at first fuming. She made mention that many of our recipes and such weren’t all that good, and hadn’t been tested, and even said many were copycats of recipes skilled editors and chefs had created. Raise your hand if you’ve ever followed a recipe, published by a well-known cookbook author, and had the recipe either fail, or just not come out right? We all make mistakes, there are always things that could go wrong in the kitchen, even for the most skilled of chefs, and so for many of us, it’s a constant learning and experimentation process.
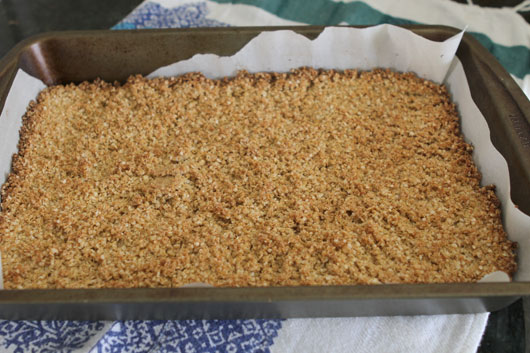
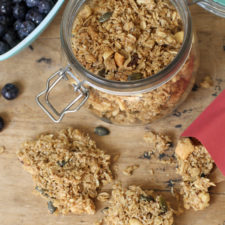
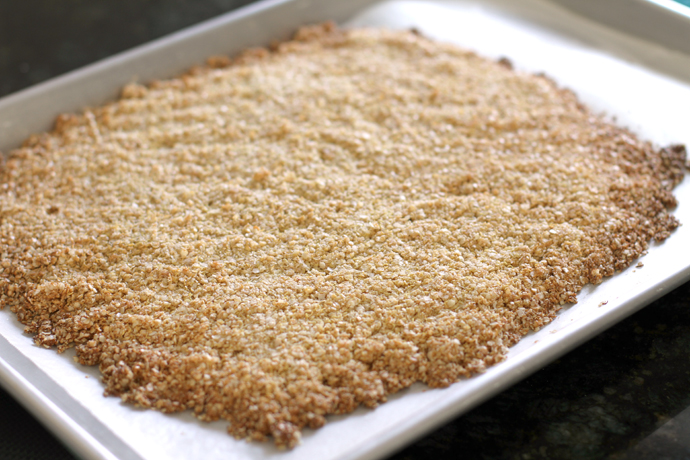
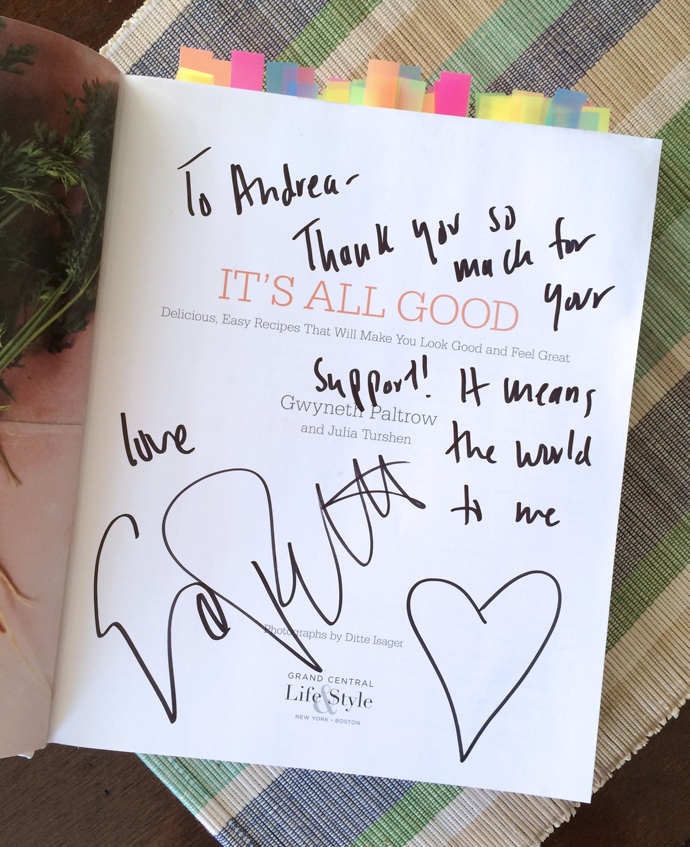
 Baked Quinoa Granola from Gwyneth’s It’s All Good
 To see the entire 31 Days Series,
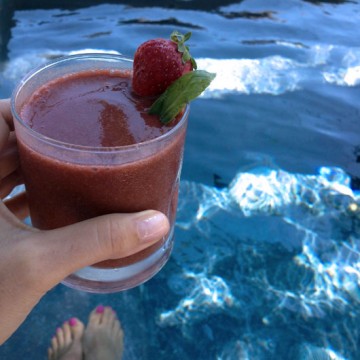
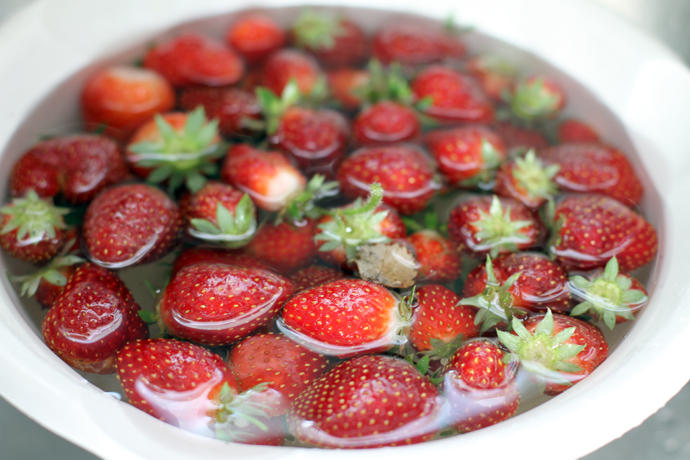
 1 cup frozen strawberries + 1 cup fresh strawberries – the combination of the two helps to make the drink cold and fresh tasting
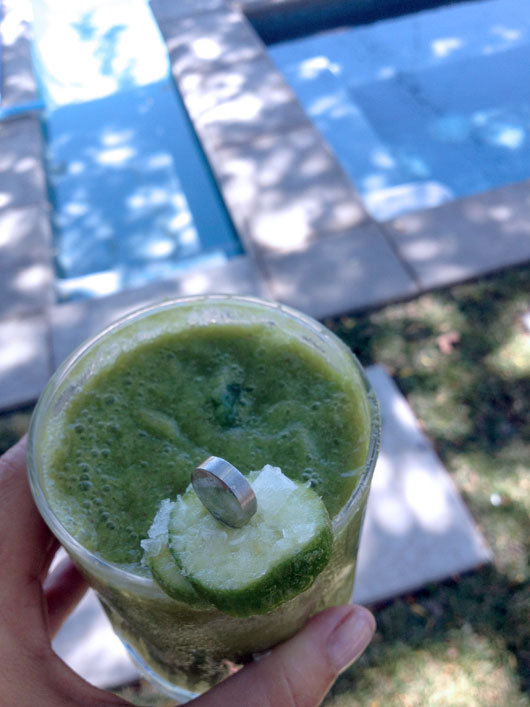


 Believe it or not, Taylor came up with the idea to build a swing out of a skateboard deck. While I believe my daughter is a creative genius, I do have to wonder if she saw this somewhere, and unknowingly tucked it away in her subconscious mind a long time ago, because the idea was just too brilliant.
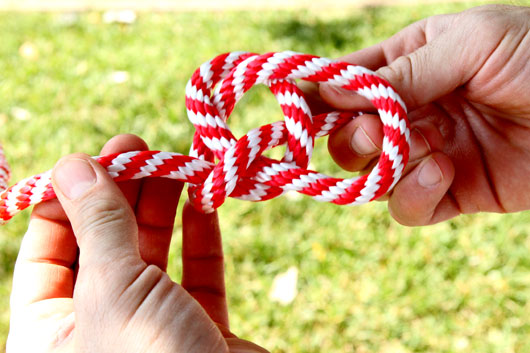 Start by tying a
 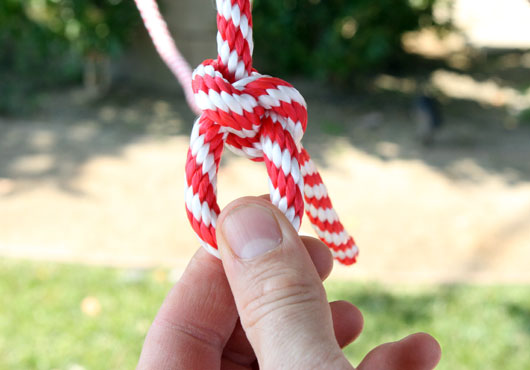 Take the loose end and feed it through the loop and then tighten/pull the rope so it creates a noose around the branch. The bowline knot allows for a super tight and secure knot, but expands when there’s no pressure from the weight of the swing, allowing for the tree branch to grow properly.
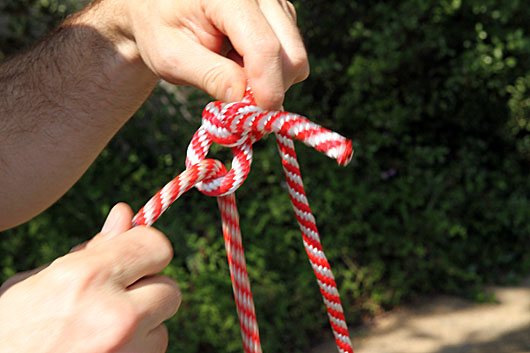

 Then cut the rope to the desired length. We wanted the ability to take down the swing and store it during the winter so we added this extra step, but it’s not necessary. We tied another bowline to a steel ring so that we could hook and unhook the swing to it.
  Repeat this process on your second rope so you now have to ropes hanging down from your tree. Then go ahead and drill your holes into your deck (we used a ⅜″ bit), and feed 2 pieces of rope through your deck.
 It’s important to note that we fed the rope through horizontally so they run along the long side of the deck as opposed to vertically running along the short side. This provides additional support of the deck.
 Then take your two pieces of rope on either side and tie together in at least 3 half hitch knots, pulling extra hard to ensure a tight and secure knot.
  The last step is, using the rope from either side of the deck swing, tie another bowline to your carabiners and then attach to the rings. You can now unhook your carabiners and take down the swing if you’re having a party or during the winter. One last thing you should do is burn the edges of your ropes to prevent fraying. Simply take a match or lighter to the ends and singe till they melt together, should just take a few seconds.
  Now you’re ready to have fun and be safe!
 We couldn’t install a swing for the big kids and leave out little Hayden, so we got a baby swing up for him too and he’s in heaven.

 It’s only been a couple of mornings since we installed the swing, but so far they’ve ran outside each day and got on their swing. They ate breakfast by their swing and then their popsicles later in the afternoon. It’s awesome to see them so excited about it. Syd, the night we installed it, said “I can’t believe we actually have our own swing in the backyard now.” It feels good to see them getting so much joy out of such a simple experience.
 And because our tree is so high up, the swing gets a really deep, high arc to it so you really lose your stomach on it, in the most awesome of ways. It doesn’t get going super fast, but what it lacks in speed it more than makes up for in the drop and the free-fall.
 Let me know if you have any questions and I’ll do my best to answer them. This was such a fun, easy and quick DIY project that I’m so glad we completed. Just when I thought it wasn’t possible, the backyard went and got even cooler.
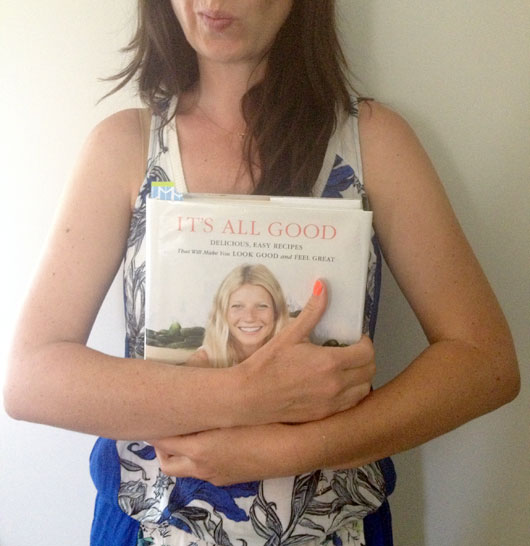

 I don’t even like royal icing cookies, yet I keep making them. I’m so weird. “Hey kids, let’s spend 2 hours making cookies that I’m not going to even eat!” “Hooray”, say the kids! They are way too sweet for my liking; as you may recall I much prefer a sweet & savory cookie like a flaky shortbread for instance. But really, I just can’t help it, they are so darned pretty and let’s be honest, impressive. Especially these patriotic pinwheel ones, claiming to be “easy” on the cover of this month’s Martha Stewart Living. I have to say, she didn’t lie, they are in fact easy. And oh the kids love them! Instant sugar high no doubt.
 You start by outlining the cookie
  Then you just start flooding it in, using your tip to push the icing around a bit to help fill it in
  Add some sprinkles if you like, and enjoy. Royal icing takes about 10-15 minute to set, so you have to work a bit quickly, but you still have plenty of time to get the job done at a nice steady pace.
 To achieve the pinwheel effect like Martha’s cookies, simply place a dot of royal icing in the center of your cookie, and then 3 concentric circles surrounding it.
  Your icing needs to stay wet so immediately place your toothpick in the center of the dot and drag a STRAIGHT line from the center all the way out to the outer edge.
  Your icing needs to stay wet so immediately place your toothpick in the center of the dot and drag a STRAIGHT line from the center all the way out to the outer edge.
  The straight line is the part that was left out in the magazine. I was imagining I had to draw wiggly lines to get the curved effect, but nope, a straight line is all you need.
 Drag your toothpick from the center all the way out
 Easy right?
  To get the other side of the wavy pinwheel effect, you start at the outer edge and then drag your toothpick towards the center like so:
 So you’re first dragging from the center out, and then from the out into the center
  And you just repeat drag out, drag in, all the way around the cookie
  And you end up with a pretty spectacular looking cookie! For the red and blue combo, you start with a blue dot and then alternate red and blue circles. Taylor’s cookie below has a wavy effect if you can tell. For that effect, as I was dragging out and in, I slightly curved the line to the right.
 So even though I may not enjoy these cookies very much, everyone else seems to love them so I’ll keep making them. 🙂 I’m thinking these would be so pretty in hot pinks and oranges for a girl’s birthday party don’t you think?
 Happy 4th Of July!!
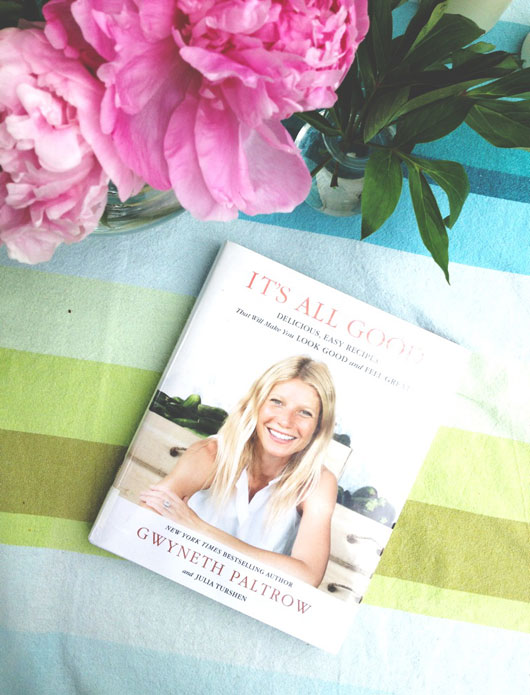
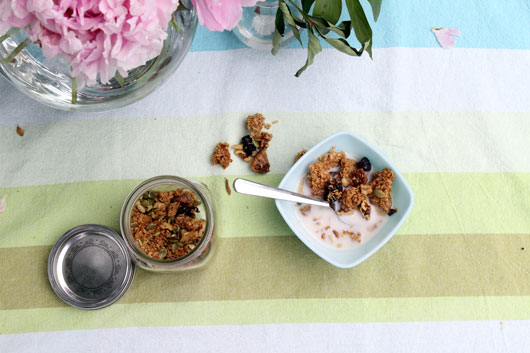 enjoying my breakfast in the garden, aka my backyard
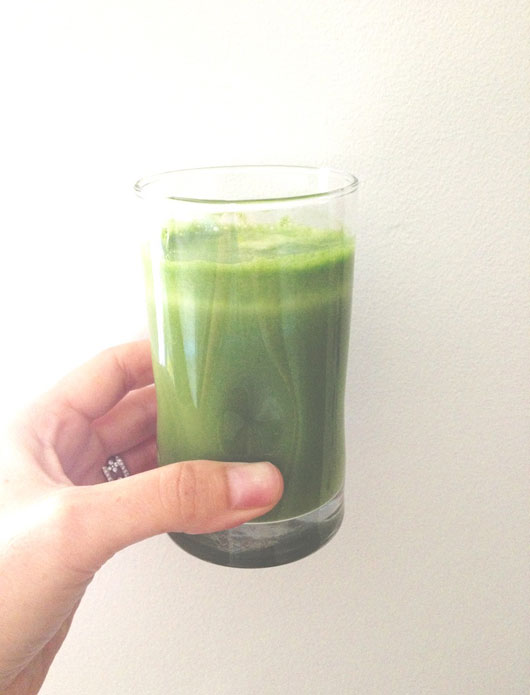


 Hi there friends. It’s Friday and I’m running around, trying to get ready for Memorial Day weekend, but I wanted to pop in and say hi. How are you? Have any fun plans for the weekend? Well in case you’re looking for a craft or are hosting a BBQ this weekend, I thought I’d share a project from the archives of my other blog, that still is as relevant and pretty back then as it is today. The actual tutorial itself is fairly simple and you might have seen it already around the web, but if not, you can see how I made the exact same luminaries for Halloween, by following


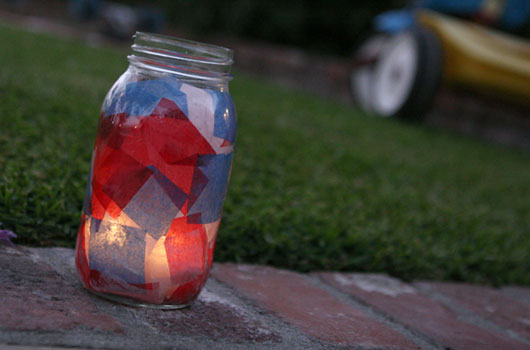
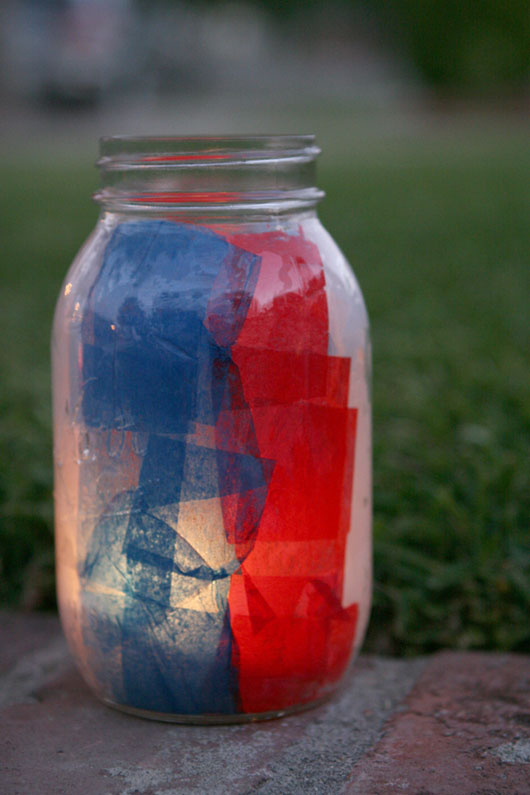

 My little guy is growing despite his best efforts to refuse all solid foods lately. He’s now comfortably fitting into 12 month clothes and has quickly outgrown the
  As fun as it is to make your own stencils, I have to say it’s twice as fun to create these onesies when you have half the work. To make them all you need are your set of stencils, some sponge brushes and acrylic paint or fabric paint, whichever you prefer. You’ll also want to make sure you place a rag or piece of thick cardboard between the 2 layers of fabric so the paint doesn’t bleed through.
 Start by taping the stencil in place, and then with a gentle pouncing motion, apply the paint in up/down strokes.
 You don’t want to attempt to brush it on side to side because it will pull at and stretch out the knit too much. Up and down, applying a generous amount of paint is the way to go.
 To get the gradated colors of the raindrop I just mixed some of the aqua paint with white and didn’t worry about being too precise with color match, so that it kind of came out in a swirly blend of light and dark shades of aqua.
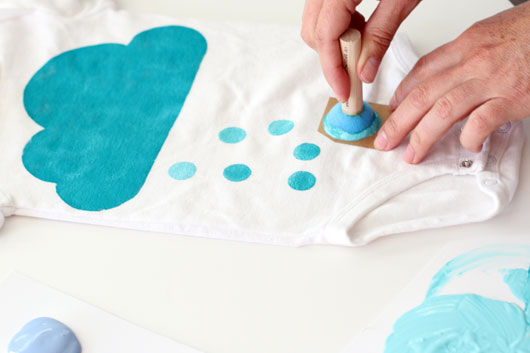 To get the graphic Morse code looking pattern, I cut out a grouping of 3 shapes and then just applied the paint and alternated the stencil right side up and upside down.
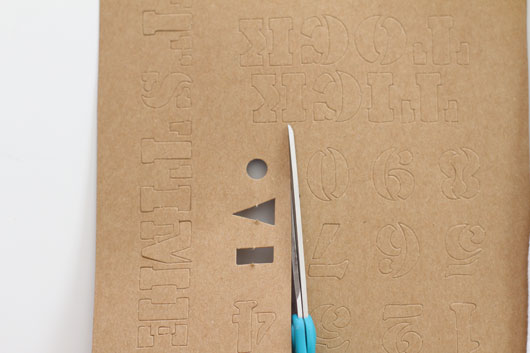
 Allow the paint to dry for at least 2 hours and then remove your rag or card stock. You can prewash it but not necessary. These hold up in the wash fine for me and we end up getting lots of use out of them. They never come out perfect, but that’s part of the charm I suppose.

 Let me know if you have any questions, and if you have a set of the Handmade Charlotte stencils, I’d love to know which one you have and how you like it, so I can get another set. The catalog of stencil sets can be viewed here, and I’d love to get the patterns or party set.