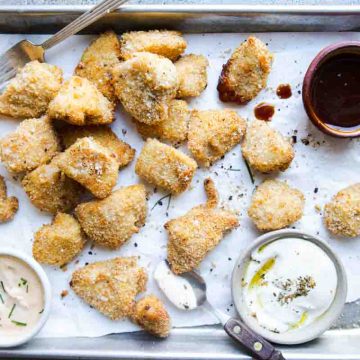
Crispy oven baked chicken cutlets are the perfect weeknight, kid-friendly meal because they’re ready in under 30 minutes. They’re also crispy, juicy, and you only need 5 ingredients to make them! They are a great healthier alternative to fried chicken, and don’t scrimp on flavor!
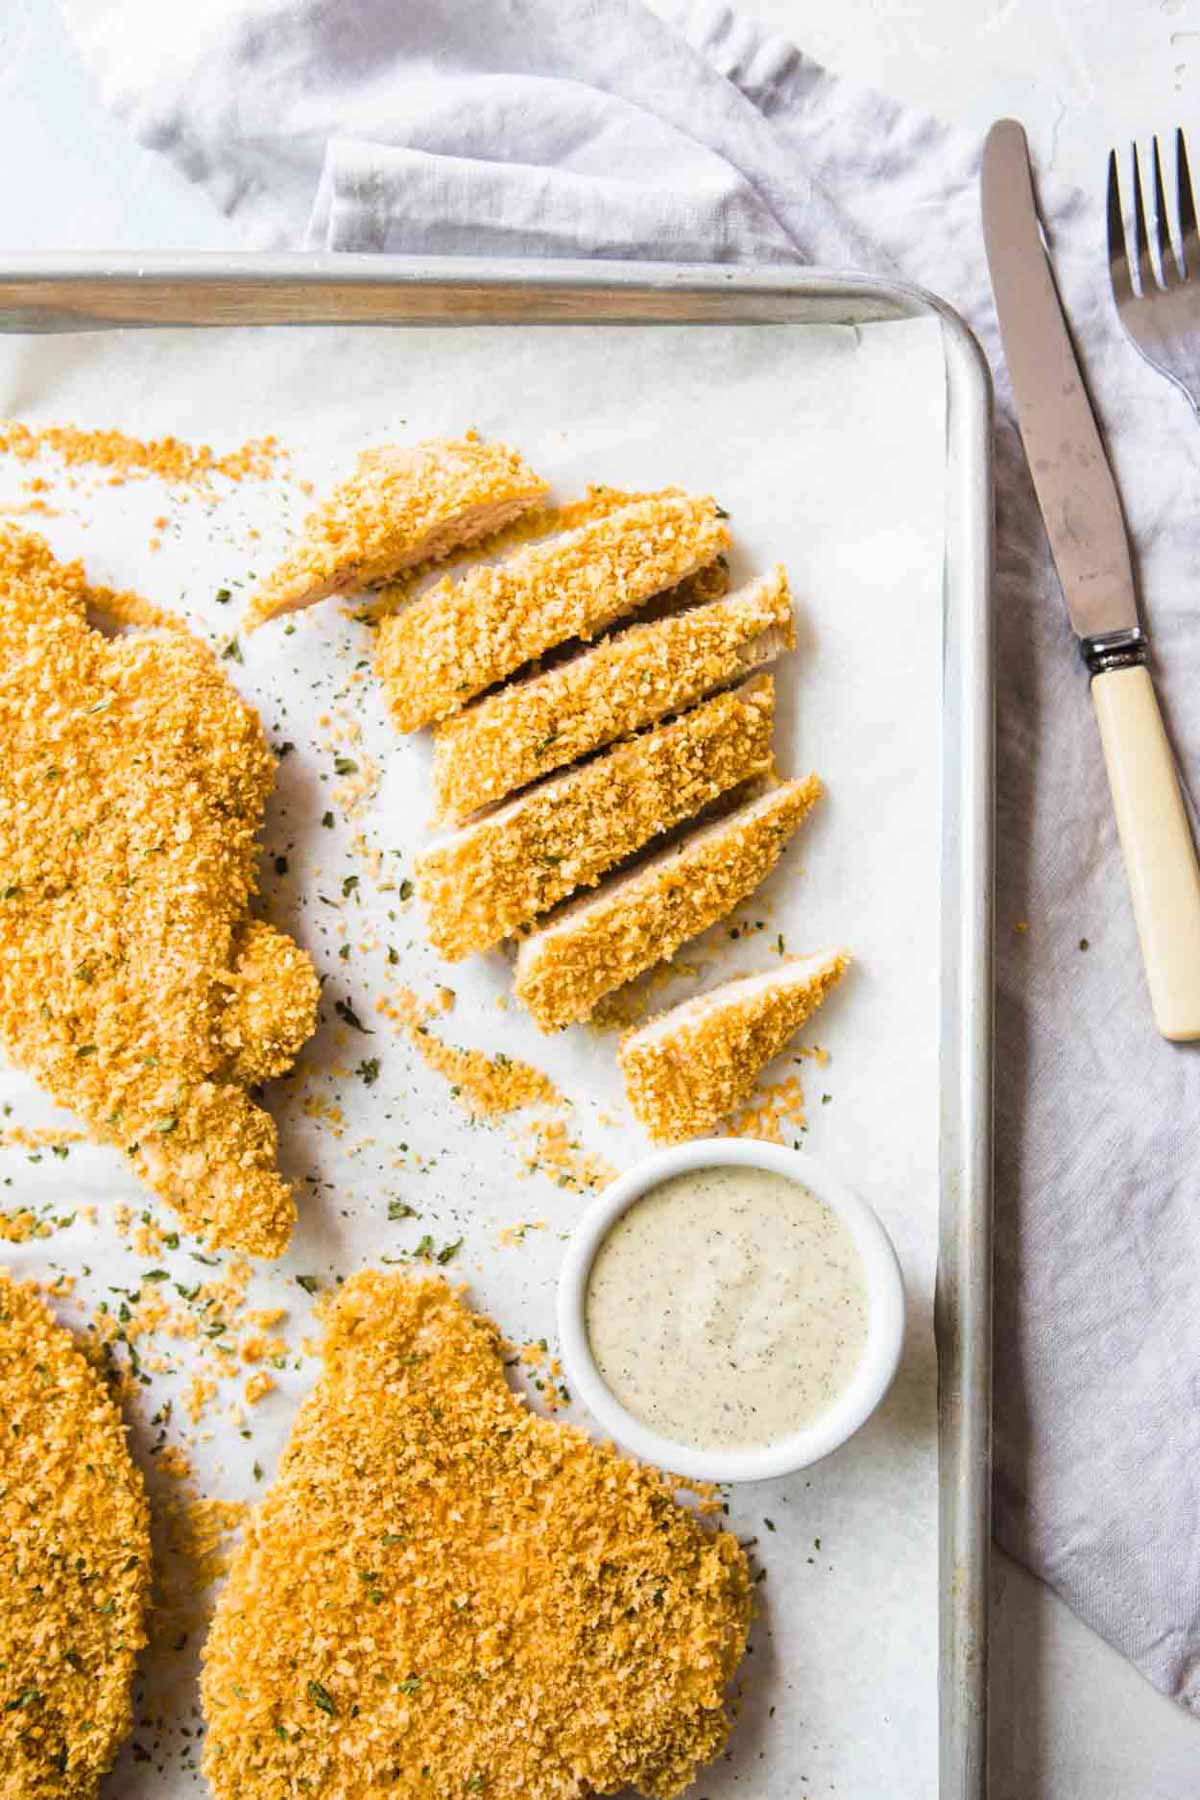
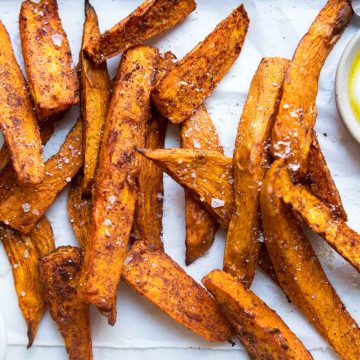
These oven-baked chicken cutlets are an easy meal with great flavor, and will become a go-to chicken dish! Also, if you have an air fryer, check out how to make crispy breaded chicken cutlets in the air fryer! They go perfect with my air fryer sweet potato wedges.
Jump to:
- Why You’ll Love These Oven Baked Chicken Cutlets
- What are chicken cutlets?
- Ingredients for Baked Chicken Cutlets
- How to Bake Chicken Cutlets
- Tips and Tricks for baking Chicken Cutlets
- Storing and Reheating Baked Breaded Chicken Cutlets
- FAQs for making Breaded Chicken Cutlets in Oven
- What to serve with oven baked chicken cutlets
- Baked Chicken Cutlets
- other delicious chicken dishes
Why You’ll Love These Oven Baked Chicken Cutlets
- Ready In Less Than 30 Minutes – This delicious recipe requires very little prep and clean up, and help you get a tasty and healthy dinner on the table every single time!
- Crispy yet tender and loaded with flavor. – I have a great little trick that will help you get both flavorful, juicy chicken breasts, that also come out crispy!
- Super versatile main dish – Just about anything tastes great with these crispy chicken cutlets; a side salad, a yummy veggie dish like these brussels sprouts, or with creamy cheesy mashed potatoes.
- No Oil Is Needed– Because of the breadcrumb coating it locks in all the juices and flavor so you don’t need much oil. So not only is this quick to make it’s healthy too!
What are chicken cutlets?
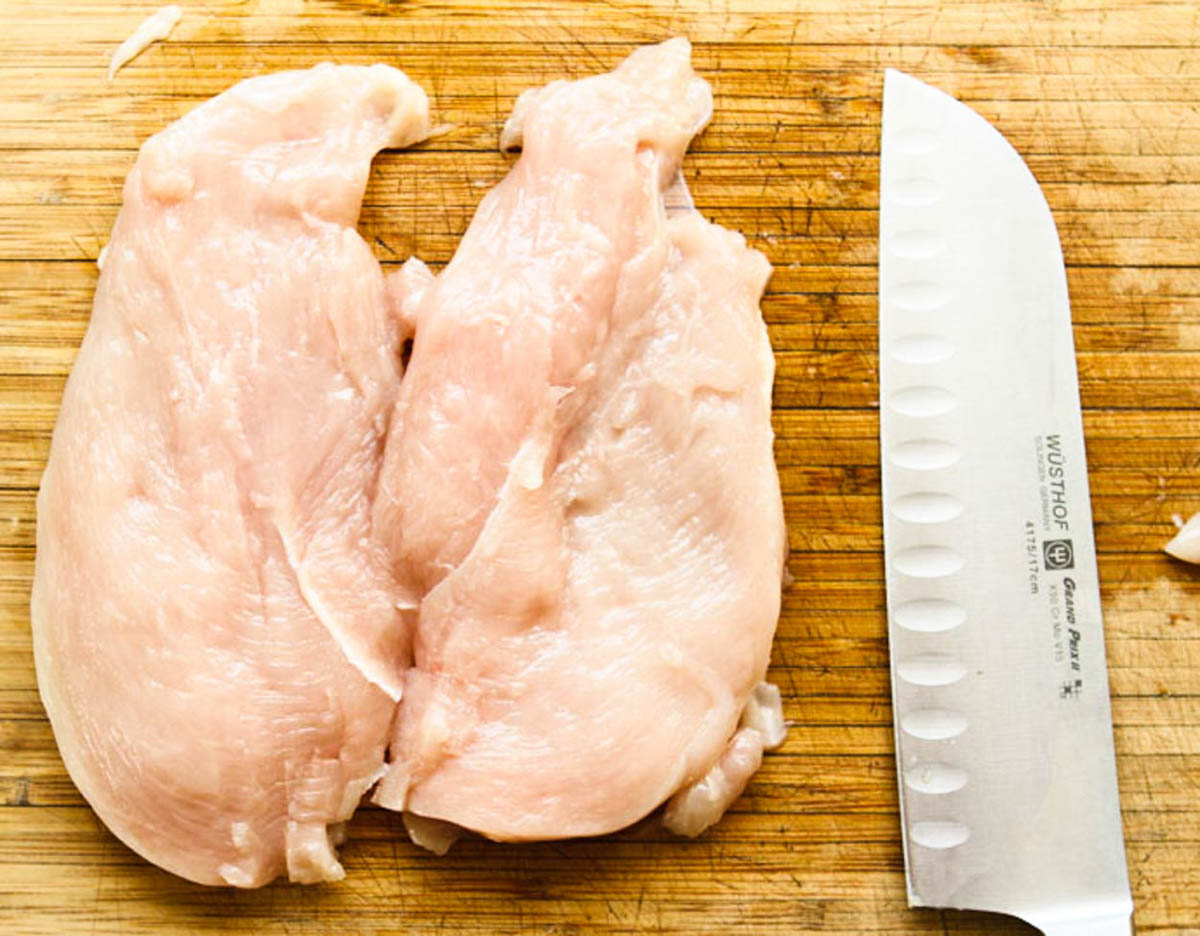
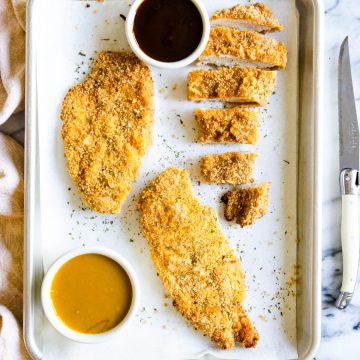
Chicken cutlets are just thinner, flatter pieces of chicken breast. One breast is cut in half horizontally to create two cutlets. They are then often pounded even thinner to make for quick and even cooking. You can purchase cutlets at the grocery store, or make your own following the simple steps shown above.
Ingredients for Baked Chicken Cutlets
- Chicken – I prefer buying boneless skinless chicken breasts, and making my own cutlets, which I’ll show you how to do below. Breasts are usually a bit cheaper than buying cutlets since you do the work at home. Cooking cutlets versus breasts is quicker and typically yields juicier results,
- Panko breadcrumbs – These are breadcrumbs made with bread that has the crusts cut off. I find them to be a bit lighter and crisp up well, but feel free to use regular breadcrumbs or your favorite gluten-free breadcrumbs.
- Flour – For a crispier texture, flour is a must to help get a nice brown coating and it also helps keep the chicken coating from sticking to the pan/baking sheet. I used all-purpose flour but you can use your favorite gluten-free flour.
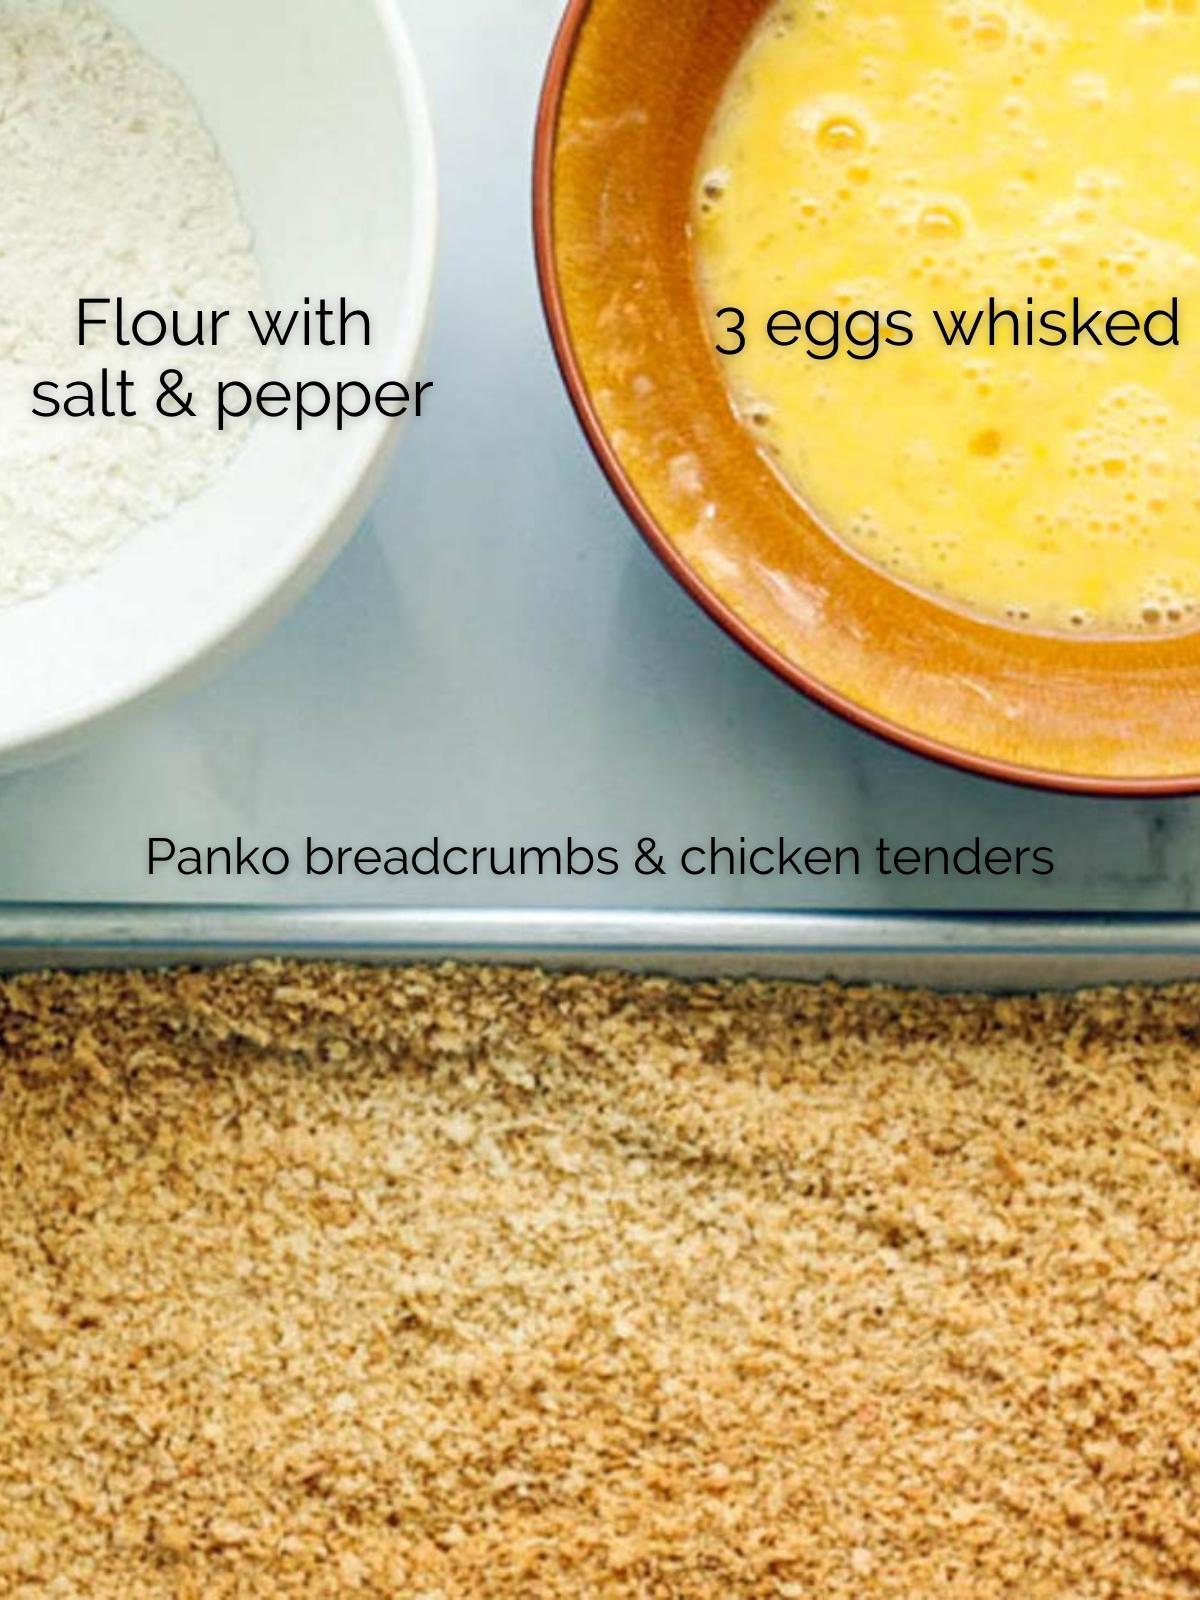
- Eggs – Three eggs is needed! And after the chicken gets a flour coat, it gets dunked in the egg to give the breadcrumbs something to stick to.
- Salt and black pepper – Don’t forget to season! You can also add even more flavor by including parmesan cheese and garlic powder, like I use in my air fryer chicken bites.
How to Bake Chicken Cutlets
1. Pat your chicken breasts dry, and cut them into cutlets by inserting a sharp knife into the center of the breast, and slicing in half, creating two thin-sliced chicken breasts, or chicken breast cutlets.
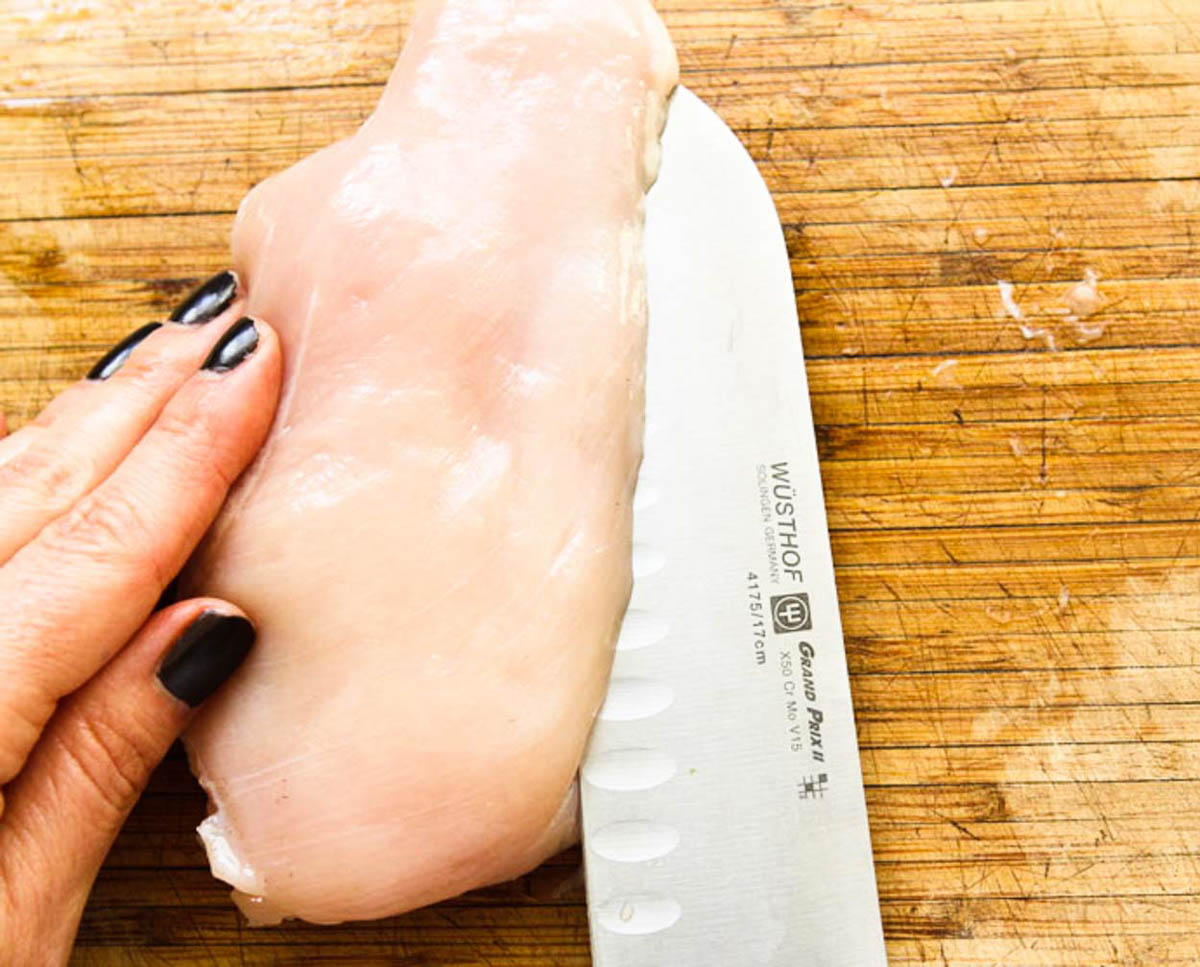
Pro-tip: slice off the little tender piece of meat found on most breasts, and either reserve that for another use, or to make a really small version of these breaded cutlets. They will cook more quickly though because they are small, so pull them out earlier!
2. Tenderize chicken by wrapping in a sheet of plastic wrap or placing in a Ziploc bag, and gently tenderizing with a meat mallet. You want them thin and even, but not see-through. Once tenderized, season with salt and pepper (if you have brined the whole chicken breasts first, no need to add more salt).
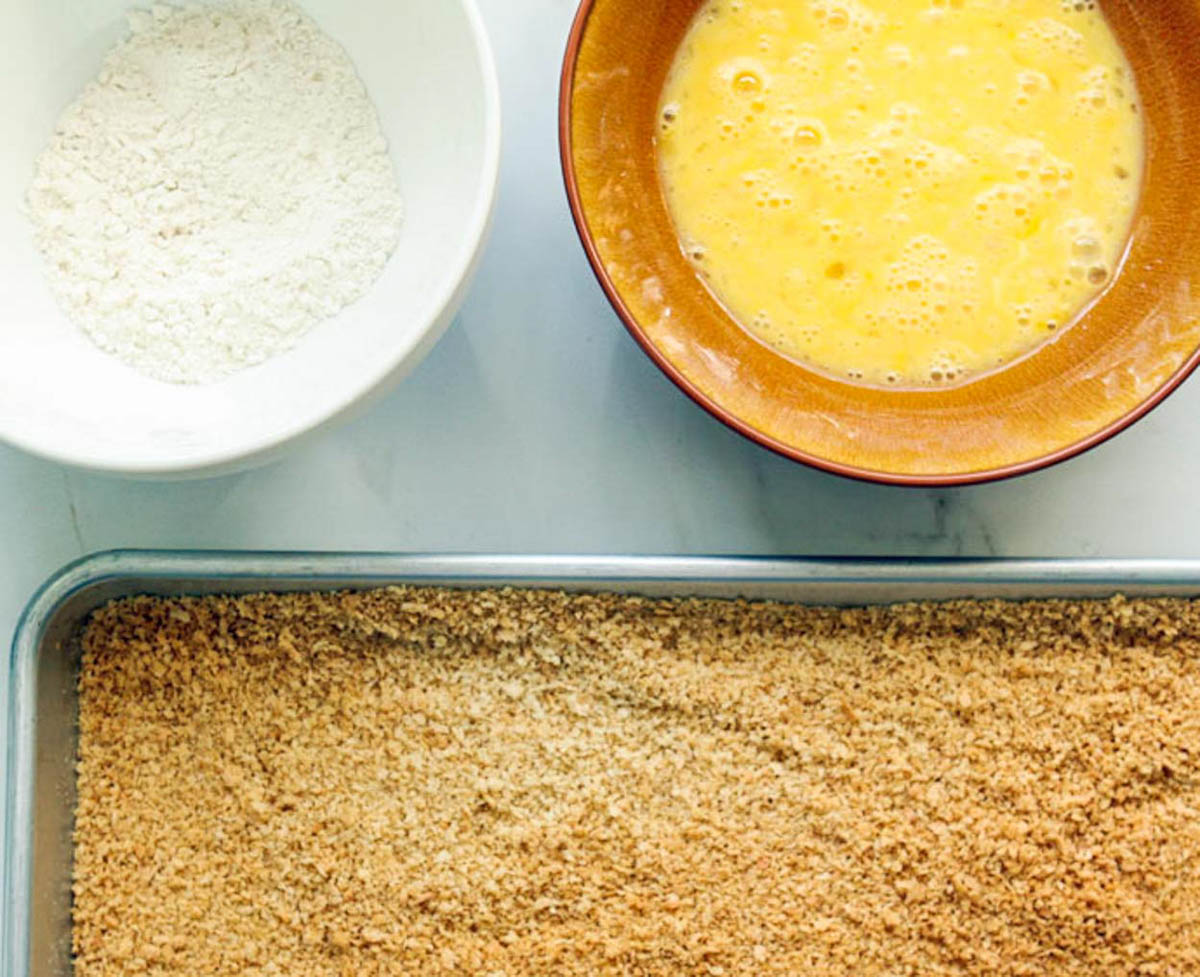
3. Now, set up a little breading station. Whisk eggs in one shallow bowl, then place flour, salt and pepper in a separate bowl. In third shallow bowl, place breadcrumbs (along with optional parmesan cheese and garlic powder).
4. Dip chicken pieces one at a time into the flour, then dip in beaten egg wash, then bread crumb mixture. Make sure the cutlets get an all-over even coating of the panko mixture.
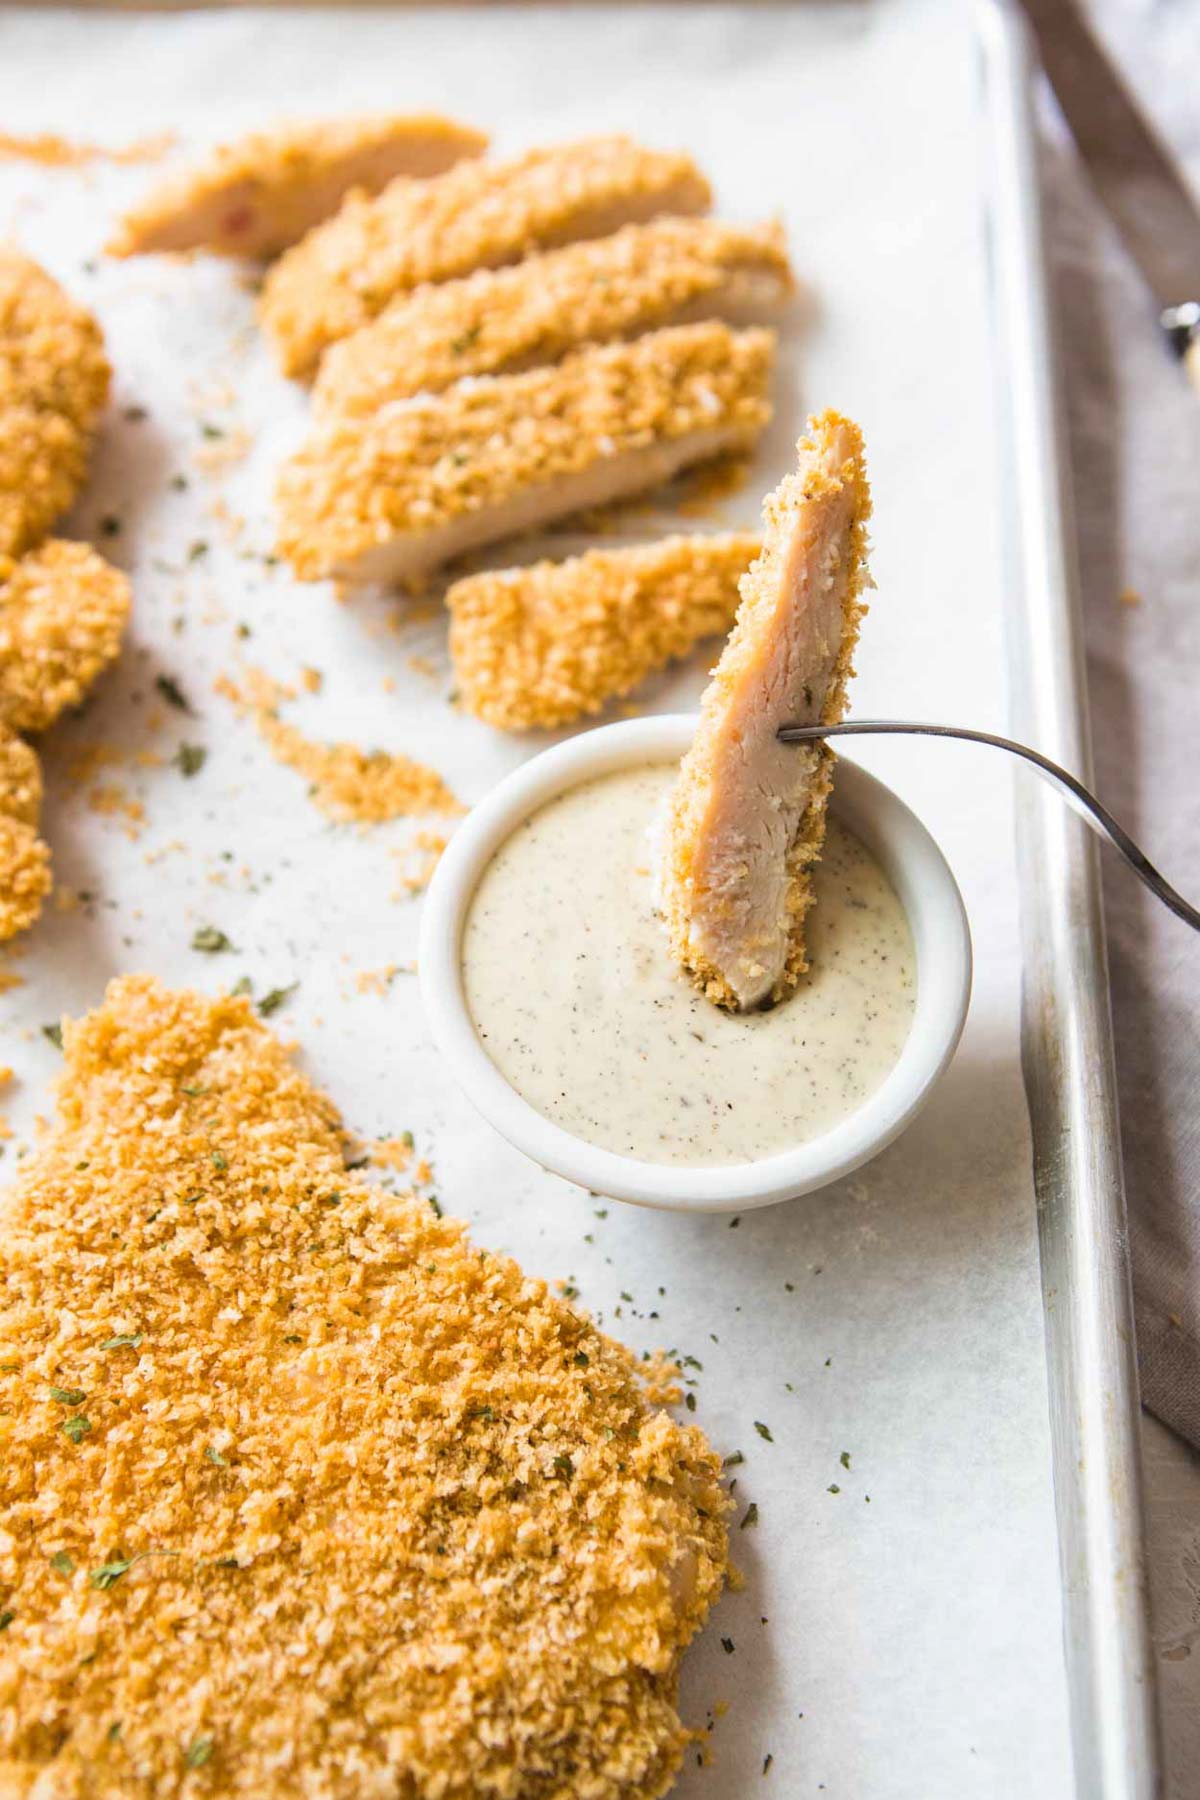
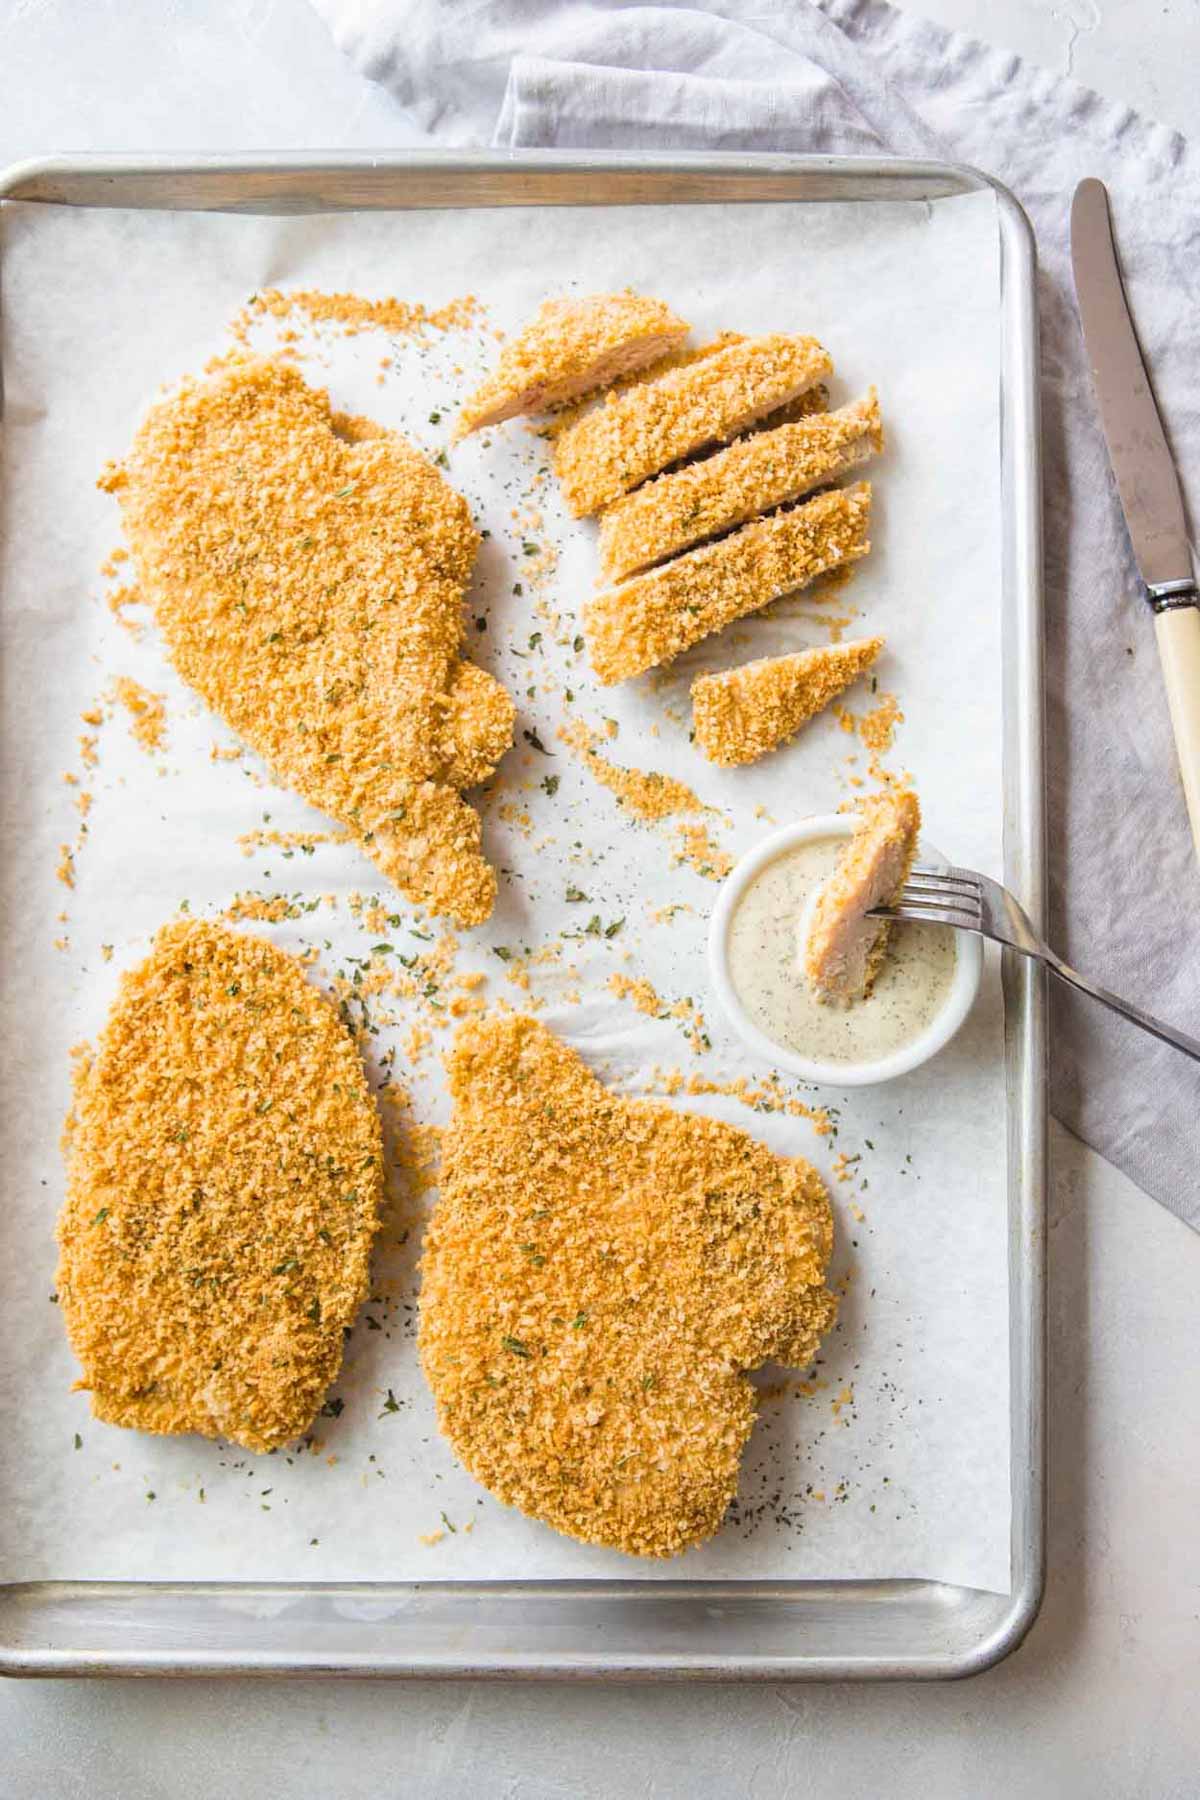
5. Place a wire baking rack (like a cooling rack) atop a rimmed baking sheet and bake in a 375 oven for 10-15 minutes, until the internal temperature of the chicken reaches 160 degrees f. If you do not have a wire rack, just place on the baking sheet lined with parchment paper. Make sure to flip half way through baking. Serve immediately.
Tips and Tricks for baking Chicken Cutlets
These crispy baked chicken cutlets are delicious all on their own, but let me share 2 easy tricks to enhance the flavor and achieve a beautiful golden crunchy crust.

- Bake your panko bread crumbs first. Preheat your oven to 375. Season your bread crumbs with a generous amount of salt and pepper, and then spread out in a single layer onto a large sheet pan. Bake in the oven for about 7-10 minutes, until golden brown but not dark brown. Place in a shallow bowl or plate when done baking and reserve baking sheet for cooking the chicken. This step is optional, but can easily be done while you are prepping the chicken breasts.
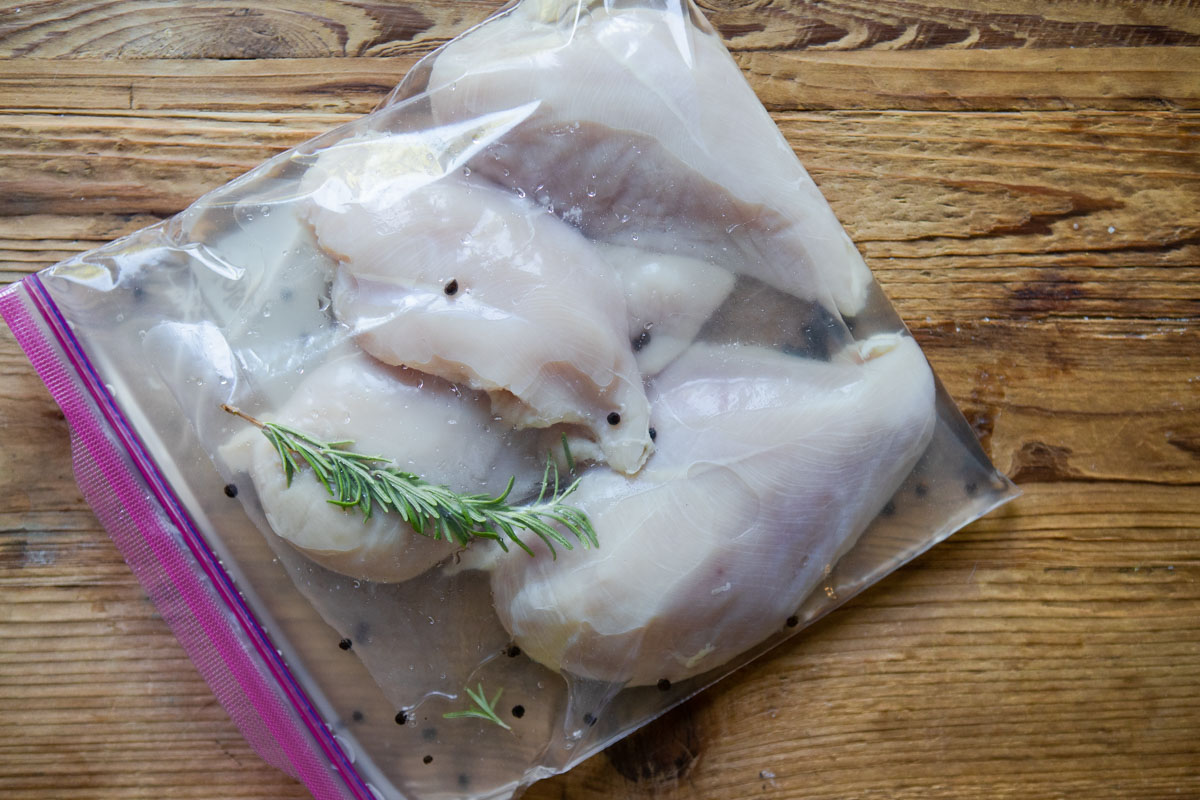
- Brine the chicken all day or overnight. Again, this step is completely optional, but brining the chicken can be done the night before or the morning of. It’s a simple process but makes a big impact in flavor and juiciness. No worries though if you don’t have time!
Storing and Reheating Baked Breaded Chicken Cutlets
These honestly taste heavenly straight out of the oven, but I have definitely had to reheat them a few times and the trick to making them taste as good the second time around is the broiler.
To get them nice and crispy again after being stored in an airtight container in the fridge, simply place the cutlets on a foil lined baking sheet and heat in the oven with the broiler set on low. You’ll have to watch them carefully though and cook for about 5 minutes.
Nervous about using the broiler? If you tend to be forgetful about things cooking in broiler mode though (I’ve had a few whoopsie moments myself), just reheat them in a 350 degree oven for about 10-12 minutes. Of course the microwave works fine, you will just lose some of the crispy texture.
FAQs for making Breaded Chicken Cutlets in Oven
Thinner cutlets bake so much quicker than a large chicken breast, allowing you to get dinner on the table even faster. Plus, I find they are much more tender than using a whole breast.
Simply coat your chicken in a flour substitute like arrowroot powder or rice flour, and substitute almond meal, not almond flour, for the panko breadcrumbs, as almond meal has a crispier texture and finish.
Baking on the wire rack allows for more air to flow through to both sides of the chicken, and also makes it easier to flip halfway through. But it is not necessary.
For this recipe, you definitely want to cook the cutlets uncovered. Covering chicken when baking will trap in steam and moisture, resulting in soggy breaded chicken. For best results, including a crispy breadcrumb coating, bake uncovered.
There could be multiple reasons your breaded cutlets don’t come out crispy, but the most common reasons would be overcrowding of the pan. This is why we recommend baking on a wire rack set over a baking sheet, to allow for optimal air flow and heat distribution. Pre-baking the breadcrumbs as suggested is also another way to ensure better, crispier results.
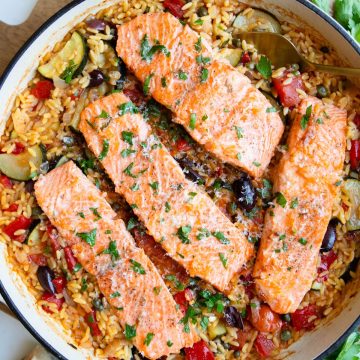
What to serve with oven baked chicken cutlets
- Air Fryer Sweet Potato Fries
- Old Fashioned Macaroni Salad
- Lemon Orzo Salad
- Balsamic Glazed Brussel Sprouts
Tried this recipe? Please leave a comment and/or rating, letting me know how you enjoyed it! Connect with me on Instagram and Pinterest, and never miss a post by signing up for my weekly newsletter!

Baked Chicken Cutlets
Ingredients
- 2-3 chicken breasts depending on size, cut into 4-6 chicken cutlets
- 3 cups plain Panko bread crumbs
- 3 large eggs
- ⅓ cup flour or flour alternative of your choice arrowroot powder works well too
- salt & pepper for seasoning
- 3 tablespoon parmesan cheese optional
- 1 teaspoon garlic powder optional
Instructions
- Preheat your oven to 375.
To bake breadcrumbs first (optional)
- Season your bread crumbs with a generous amount of salt and pepper, and the spread out in a single layer onto a large baking sheet. Bake in the oven for about 7-10 minutes, until golden brown but not dark brown. Place in a shallow bowl or plate when done baking.3 cups plain Panko bread crumbs
Prepare the chicken cutlets
- While your breadcrumbs are baking, pat your chicken breasts dry, and cut them into cutlets by inserting a sharp knife into the center of the breast, and slicing in half, creating two thin breasts, or cutlets. You will want to slice off the little tender piece of meat found on most breasts, and either reserve that for another use, or to make a really small version of these breaded cutlets.2-3 chicken breasts
- Once cutlets are ready to go, either wrap in plastic wrap or place in a Ziploc bag, and tenderize them till soft and thin, but not see-through.
- Season the cutlets with a bit more salt and pepper.salt & pepper for seasoning
Bread the chicken cutlets
- Whisk your eggs in one shallow bowl, place flour in a separate shallow bowl, then breadcrumbs into a 3rd shallow bowl. If adding parmesan cheese and garlic powder, add to the breadcrumbs at this time.3 large eggs, 3 tbsp parmesan cheese, 1 tsp garlic powder, ⅓ cup flour or flour alternative of your choice
- Dip your cutlets one at a time in the flour or flour substitute, and then in the egg wash. Then dip in the browned bread crumbs. Make sure the cutlets get an all-over even coating of the crumbs.
- Place cutlets on a wire rack set over a baking sheet (or a parchment lined baking sheet) and bake in a 375 oven for 10-15 minutes, flipping half way through cooking, until internal temperature reaches 160 degrees. Serve immediately.
hevan says
This is so easy to make food in oven. I really enjoy this chicken cutlets recipe. I really enjoy it. Thank you for sharing such an amazing recipe.
Millie says
The baked chicken cutlets are favourite of everyone in my house. Such an amazing and valuable post for household women who wants anything quick with main dish. Thank you for sharing these ideas and love post. Really enjoy this reading.
Rachael Kogen says
Love this ! Thank you Andrea.
KC says
I’m finally learning how to cook at (age 40!) and this recipe was easy to follow and turned out delicious! My boyfriend and I loved it. The baked breadcrumbs beforehand really seemed to add to the overall taste. Thanks for the recipe!