• Skip to primary navigation
  • Skip to main content
  • Skip to primary sidebar

Howe We Live logo

  • Home
  • About
  • Recipes
    • By Category
      • Appetizers
      • Breads & Muffins
      • Breakfast& Brunch
      • Christmas
      • Desserts
      • Drinks
      • Main Courses
      • Side Dishes
      • Soups/Salads
    • By Cooking Method
      • Air Fryer
      • Instant Pot
      • One Pan
      • Sheet Pan
      • Slow Cooker
    • By Ingredient
      • Beef
      • Pasta
      • Pork
      • Poultry
      • Seafood
      • Vegetarian
  • Resources
    • Kitchen Hacks & Tips
    • Lifestyle
  • Contact
  • Subscribe
  • Nav Social Menu

    • Bloglovin
    • Facebook
    • Instagram
    • Pinterest
    • RSS
    • Twitter
menu icon
go to homepage
subscribe
search icon
Homepage link
  • Home
  • About
  • Recipe Index
  • All Recipes
  • Resources
  • Shop My Favorites
  • Contact
  • Subscribe
    • Facebook
    • Instagram
    • Pinterest
    • RSS
    • Twitter
  • ×
    Home » Lifestyle

    DIY Tissue Paper Wall Letters

    Published: Feb 25, 2014 · Modified: Nov 8, 2016 by Andrea Howe · This post may contain affiliate links.

    253 shares

    tissue-paper-letters1

    Alix is back again to share this awesome spin on cardboard craft letters. I love the texture the tissue paper adds to each letter, and of course I love the simplicity of the project overall.  Read on to get the full step-by-step tutorial.  Thanks Alix, for creating another amazing project for my readers!

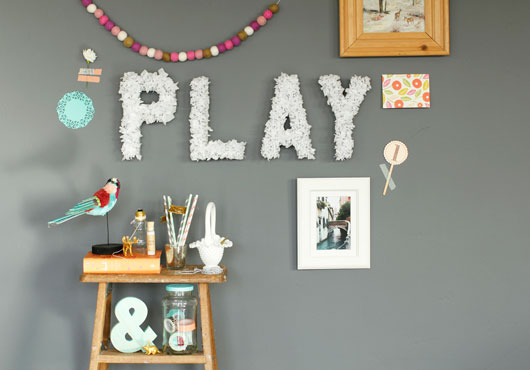
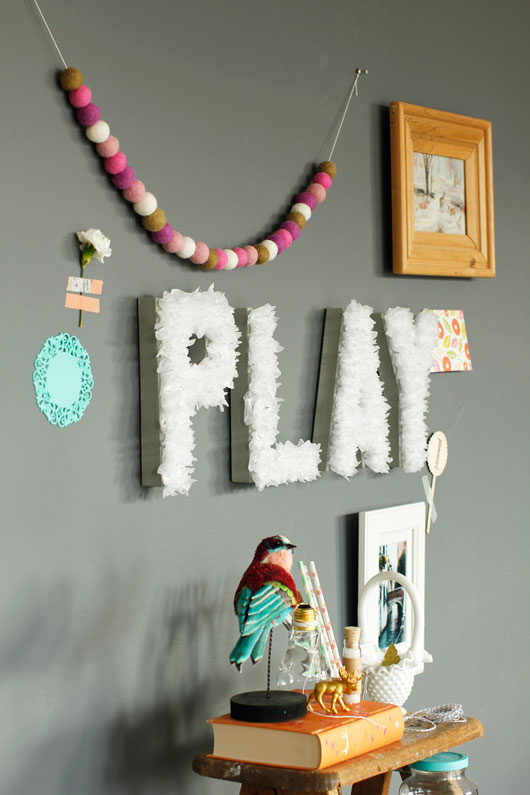
    I’m always looking for simple and quick ways to add details to my home. Sometimes I feel like finding the perfect couch overshadows the importance of adding meaningful wall decoration. This isn’t life-altering stuff here, but we could all use a few more lovely things in life, don’t you think? Two weeks ago I purchased some cardboard letters that spell out the word “PLAY”. My intention is to hang them in my future daughter’s room, but only heaven knows when that day will come. I couldn’t just let them sit in a sad pile in my office (I have a crafting addiction that must be fed)! So I decided to come up with a craft that would satisfy my crafting “problem” and make those lonely letters happy. It is also cute enough to hang in a little girl’s nursery someday!
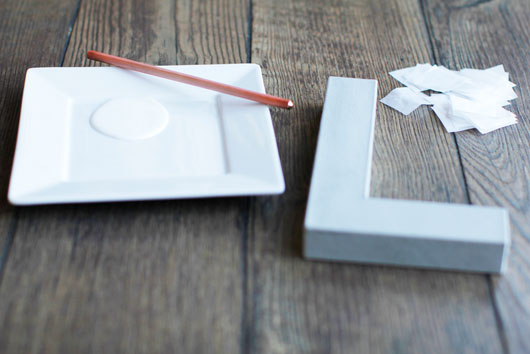
    tissue-paper-letters3

    Supplies:
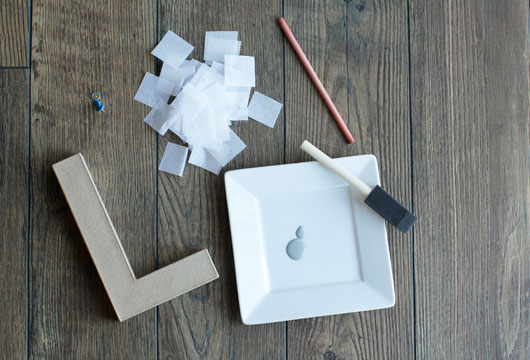
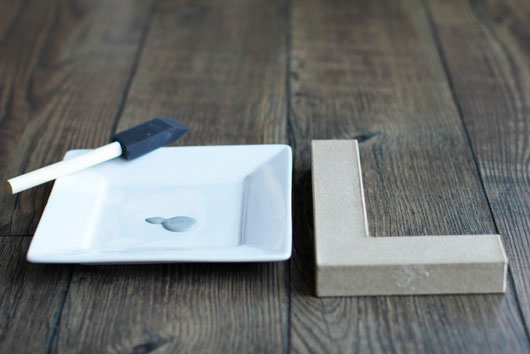
    – Cardboard letters. You can buy these at your local craft store.
    – Craft paint if you want the sides of your letters to be a different color than the cardboard.
    – Paintbrush or paint sponge.
    – Several pieces of tissue paper cut into 2-inch by 2-inch squares.
    – A pencil or pen to form the tissue paper around.
    – White craft glue. I used simple Elmer’s glue and it worked like a dream.
    – Thumb tacks–you will need about 3 per letter.
    – Hot glue gun and glue.

    letters-supply

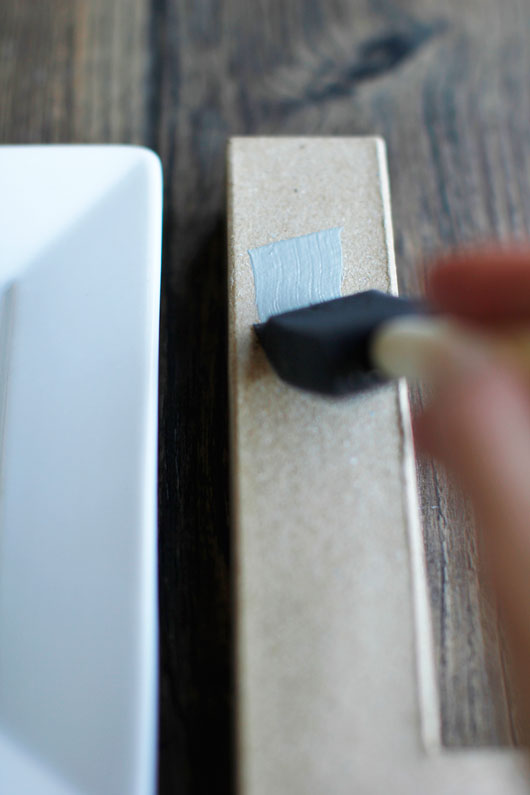
    Step 1 is easy and optional (just the way I like it!). If you wish your letters to be a certain color that will be visible on the sides, paint them. I chose a light gray I felt would go well with my wall color and home decor. Let’s be honest though, light gray pretty much goes with everything so I was playing it safe. Let the paint dry for 15 minutes and then move right on to step 2.

    letters-Step1_1

    letters-step1 2

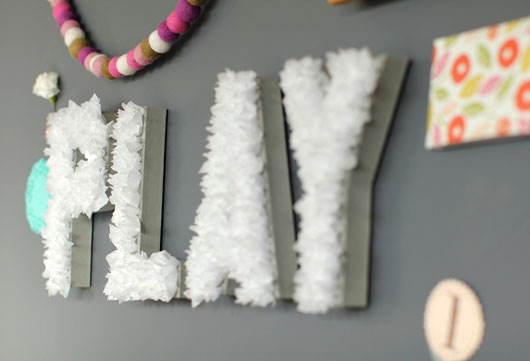
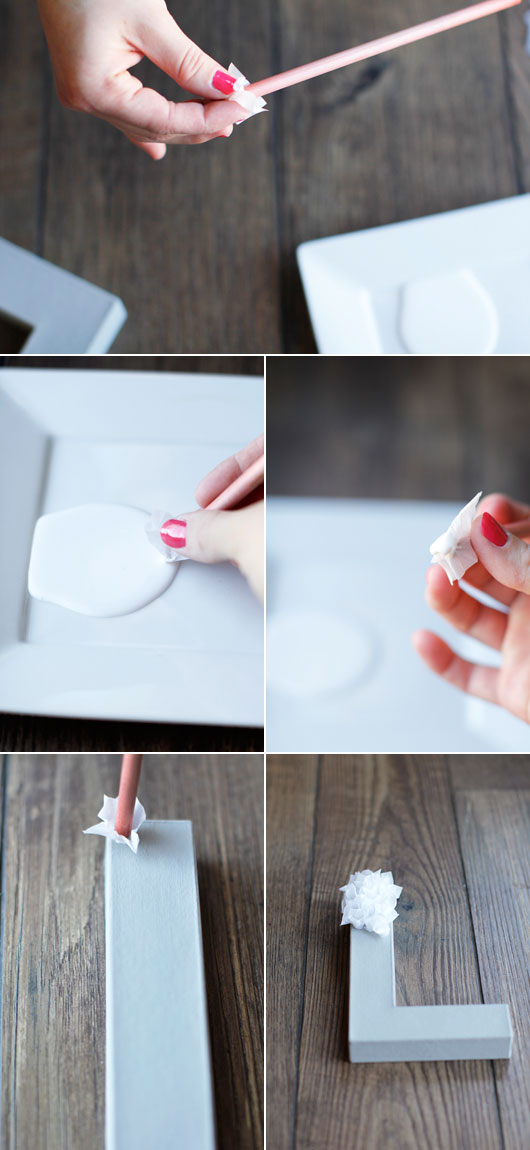
    For step 2 you will transform the cardboard letters into whimsical tissue paper letters. To begin, take one tissue paper square and place the center of the square on the eraser end of your pencil. Now form the tissues paper square around the end of the pencil and hold it tight. Next, dip the tissue paper lightly into the glue and press it firmly onto the face of the letter. Repeat this step until the entire face of the letter is covered in tissue paper dots.
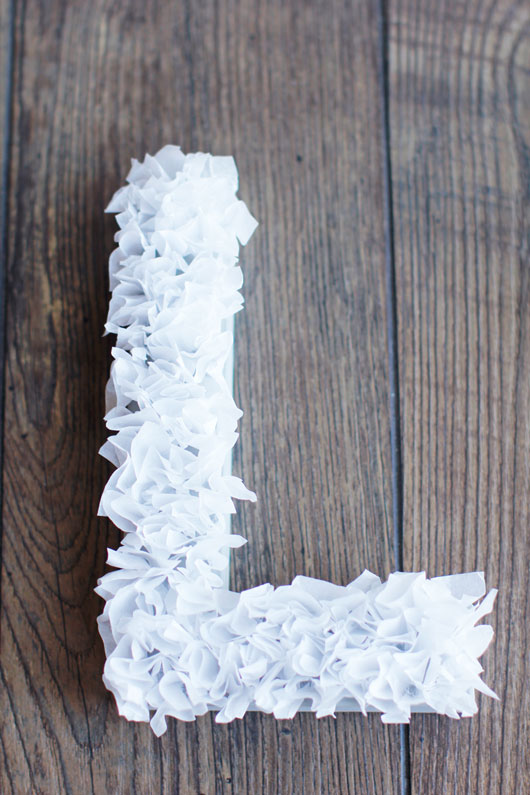
    letters-step-2

    step-by-step

    The final look.

    Step2_7

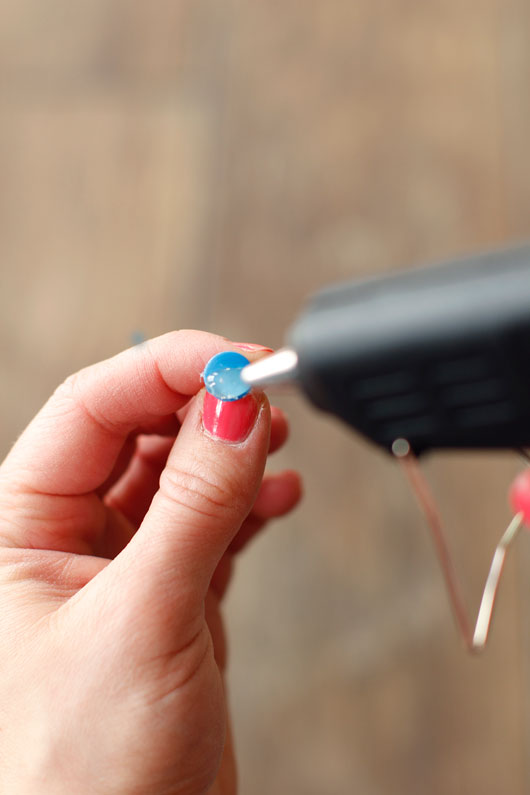
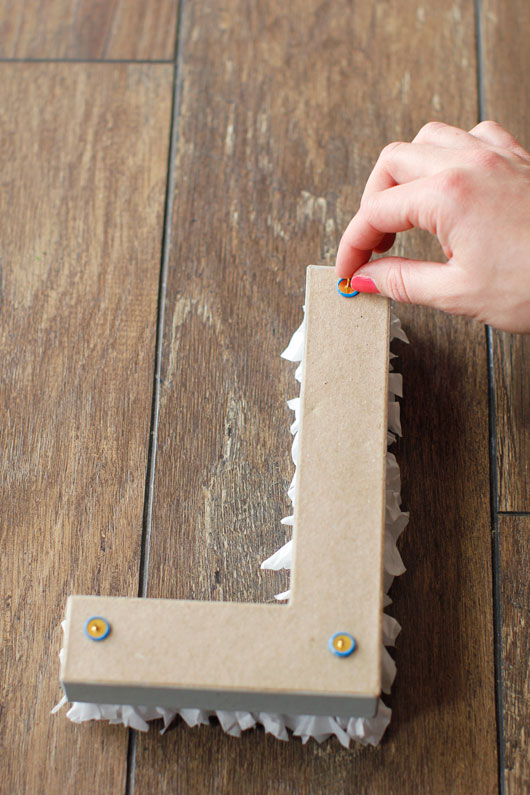
    Now step 3 is my secret step. One thing about cardboard letters that I love (there are so many things to love about them) is that they are light and easy to hang. But here is my little trick…the easiest way to hang them is with thumbtacks! First, place a dab of hot glue on the face side of your thumbtack. Then glue the tack onto the back of your letter. I usually attach 3 to 4 thumbtacks to the back of each letter. When you go to hang your letters all you have to do is make sure they are level and firmly push them into the wall.

    Step3_2

    Step3_3

    There you have it! Mission wall display accomplished!

    tissue-paper-letters2

    tissue-paper-letters4

    Thanks so much Alix!  I love the project and I know you all will too. Make sure to visit Alix at her own space, A Ruffled Life, where she shares lots of other great projects and sweet snippets of life.

    More Lifestyle

    • Costco Grocery List (my fave healthy foods at Costco)
    • Lovely Touches of Christmas In Our Home
    • gift guide featuring hostess gifts
      Hostess Gifts That Aren’t Wine, and Other Gift Guides
    • Gifts for the Impossible Man to Shop For

    About Andrea Howe

    Andrea Howe is a Certified Nutrition Coach (CNC PN-L1) and the founder of Howe We Live. As a seasoned home cook of over 20 years, developing and photographing recipes is her passion. Andrea has spent over 10 years in the health & nutrition industry, writing for various publications including Babble and Disney. Her work has appeared in Real Simple, Taste of Home, Yahoo, Buzzfeed and ABC News.

    Reader Interactions

    Comments

    1. Cute Librarian says

      March 14, 2014 at 6:38 am

      This is so wonderful and I can’t wait to try it!

      Reply
    2. mandie says

      February 26, 2014 at 7:40 am

      I love this!! I’ve been trying to decide on a way to display my baby’s name in her nursery, and I think this is it! Affordable, not difficult, and lovely.

      Reply
    3. Jeanine says

      February 25, 2014 at 7:12 pm

      An absolute dream come true secret you shared!! Thank you ever so much for this inspirational post–Magnifique finished product.

      Reply
    4. Jessica Rose says

      February 25, 2014 at 9:15 am

      Really cool idea…and so simple..

      http://vodkandarose.blogspot.co.uk

      Reply

    Leave a Comment Cancel reply

    Your email address will not be published. Required fields are marked *

    Recipe Rating


    Primary Sidebar

    Caucasian women sitting on a kitchen counter smiling, holding a glass of white wine

    Welcome to Howe We Live. I’m Andrea, a Certified Nutrition Coach and a passionate home cook and mother of 3. I’ve been writing about the health & nutrition industry for over a decade, and my number one goal is to make eating well as uncomplicated as possible. Let me help you throw together a great meal at home that is both delicious, and healthy-ish. Read More

    Latest Posts

    • Cajun honey butter salmon on a black serving platter garnished with parsley and honey.
      Slow Roasted Cajun Honey Butter Salmon
    • Baking dish with colorful, veggie filled egg bites laying on parchment paper.
      Egg White Bites Recipe with Spinach & Red Pepper
    • Costco Grocery List (my fave healthy foods at Costco)
    • Lemon Orzo Salad
    • Southern Macaroni Salad
    • Large bowl of fluffy orzo pasta with garnish of parsley pieces on top.
      Instant Pot Orzo

    Top Posts

    • picture of 2 glasses filled with coconut pineapple margarita
      Coconut Pineapple Margarita Recipe
    • Beef Sirloin Tip Steak With Garlic Butter Potatoes
    • brown rice and turkey meatballs in a cast iron skillet
      Skillet Turkey Meatballs & Rice
    • A piece of chicken cutlet cooked in air fryer dipped in ranch dressing
      Chicken Cutlets In the Air Fryer

    As Featured In:

    Footer

    ↑ back to top

    About

    • Privacy Policy
    • Accessibility Policy
    • About

    Newsletter & Contact

    • Sign Up! for emails and updates
    • Contact

    Notable Links

    • Recipes by Category
    • Shop Clean Beauty

    As an Amazon Associate I earn from qualifying purchases.

    Copyright © 2023 · Howe We Live · Privacy Policy