• Skip to primary navigation
  • Skip to main content
  • Skip to primary sidebar

Howe We Live logo

  • Home
  • About
  • Recipes
    • By Category
      • Appetizers
      • Breads & Muffins
      • Breakfast/Brunch
      • Christmas
      • Desserts
      • Drinks
      • Main Courses
      • Sides
      • Soups/Salads
    • By Cooking Method
      • Air Fryer
      • Instant Pot
      • Meal Prep
      • One Pan
      • Sheet Pan
      • Slow Cooker
    • By Ingredient
      • Beef
      • Eggs
      • Pasta
      • Pork
      • Poultry
      • Seafood
      • Vegetarian
  • Resources
    • Book Recommendations
    • Cookbook Recommendations
    • Balanced Eating As a Family
    • Kitchen Hacks & Tips
    • Lifestyle
  • Contact
  • Subscribe
  • Nav Social Menu

    • Bloglovin
    • Facebook
    • Instagram
    • Pinterest
    • RSS
    • Twitter
menu icon
go to homepage
subscribe
search icon
Homepage link
  • Home
  • About
  • Recipe Index
  • All Recipes
  • Resources
  • Shop My Favorites
  • Contact
  • Subscribe
    • Facebook
    • Instagram
    • Pinterest
    • RSS
    • Twitter
  • ×

    Home » Lifestyle » DIY Ombre Seed Bead Necklace

    DIY Ombre Seed Bead Necklace

    Published: Mar 13, 2012 · Modified: Feb 19, 2020 by Andrea Howe · This post may contain affiliate links.

    9.6K shares
    Ombre Seed Bead Necklace Pinterest Image

    blue ombre multi-strand seed bead necklace with gold clasp howewelive.com

    Andrea wearing a white shirt and a blue ombre multi-strand seed bead necklace

    Design Mom asked me to create a spring version of a classic DIY of mine, the seed bead necklace.  I ended up creating this pretty coral and gold version for her site, but I also created a fun ombre layered necklace for me and I wanted to share it with you all!  I’ve said before and I’ll say it again, working with seed beads is simple, but tedious.  Expect this project to take you about 3 hours, but the level of ease is quite high.  A novice should be able to recreate this beautiful interpretation of a fun trend out there.

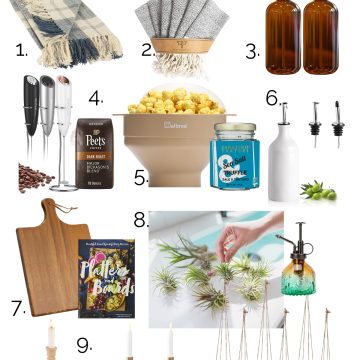
    Your Supplies: Various colors of seed beads in light to dark shades, stringing wire (looks just like fishing wire), crimp beads, 4 jump rings in varying sizes (2 larger for your ends, one tiny one to attach your chain to and 1 medium size ring to leave on the end of your chain to lengthen – Michaels has a pack of various sized jump rings that contain all the sizes you need), 1 lobster claw closure, a small bit of chain, and scissors, wire cutters and needle nosed pliers.

    Begin by cutting a length of line about 20 inches long.

    cutting the necklace string with gold scissors

    Next, add one crimp bead, then a jump ring

    necklace wire with a gold crimp bead and a jump ring

    Then loop your string over the jump ring and through the crimp bead and pinch shut with your needle nosed pliers.  This will keep the beads in place when you start stringing.

    The necklace string looped thru the jump ring and back thru the crimp bead

    closing the crimp bead with a pair of needle nose pliers

    Then begin stringing.  You can start with your lighter shade of bead like I did or reverse it and go from dark to light.  A trick for quicker stringing is to lighten dampen your finger tip with a wet sponge/cloth and then dip your finger into your bowl of beads to grab a few at a time.  This limits how many times you have to dip into get beads a bit.

    threading the first beads on the necklace string

    As you complete each string, make sure to repeat the crimp bead process as above so that you add a jump ring and crimp bead to one end.  This secures your other end and leaves you a jump ring on both ends to add your strings to.  Here are some in progress shots.  To create the layered ombre effect it is important that as you add your strings of beads, you also add a bit of length to each line.  I added about 1 inch to each line so that at the end, my necklace varied from 20 inches to about 25 inches long when hung on my neck.

    two strings of light blue beads with two gold jump rings

    6 strands of seed beads strung together into an blue ombre necklace

    different shades of blue seed beads on a necklace

    dark blue seed beads being thread onto the necklace wire

    Once your stringing is complete, you’ll want to add your chain.   I added a 3 inch piece of chain to the end of my necklace to make it a bit adjustable.

    ombre blue seed bead necklace with a gold chain and clasp to the side

    With your needle nosed pliers and the smallest jump ring, attach your chain to one end of your necklace.

    Attaching a gold chain to the jump ring

    Trim your chain with your wire cutters

    cutting the gold chain to length with wire cutters

    Add the medium sized jump ring to the end of the piece of chain, and then using your needle nosed pliers attach the lobster claw to the other end.

    gold chain attached to the seed bead necklace with a small jump ring on the end

    >adding the necklace clasp to the jump ring with needle nose pliers

    And you’re complete!

    completed ombre multi-strand seed bead necklace

    A pretty spring necklace reflecting ombre, one of the biggest ongoing trends.  The color options are endless and you because the necklace is adjustable, you can wear it short or long depending on the look you’re pairing it with.  I hope you enjoyed this DIY and let me know if you have any questions!

    Andrea wearing a white shirt and the completed ombre blue multi-strand seed bead necklace

    DIY Floral Arrangements »

    About Andrea Howe

    Andrea Howe is the recipe developer and photographer of Howe We Live. She is also a seasoned home cook of over 20 years, for her family of 5. Andrea has spent over 10 years in the food industry, writing for various publications including Babble and Disney. Her work has appeared in Real Simple, Taste of Home, Yahoo, Buzzfeed and ABC News.

    Reader Interactions

    Comments

    1. lorraine thompson says

      September 21, 2022 at 2:07 pm

      beautiful neckless and it looks like fun to do lorraine [email protected] mail .com i hope i can get free patterns great work

      Reply
    2. thejewelcreation says

      December 04, 2018 at 11:22 pm

      Wow ! The colors are so pretty ! Great work

      Reply
    3. lolli says

      May 10, 2015 at 4:09 pm

      How could I make this more droopy and fluidly ?

      Reply
    4. Joni says

      May 10, 2015 at 3:37 pm

      I made this for my mom for Mother’s Day and it turned out great! The only problem is that the Clamp beads And jump wire can be felt and scratchy on the back of the neck. Advice on how to smooth the ends?

      Reply
    5. Debra says

      April 06, 2015 at 12:22 pm

      I love multi-strand seed bead necklaces…the way you finish this one is brilliant!! Thanks for sharing!!!

      Reply
    6. sarah says

      April 02, 2015 at 8:41 am

      Do you buy your seed beads in bulk? If so, where do you recommend buying them?

      Reply
    7. Custom Creations by Christie says

      April 02, 2015 at 6:52 am

      Absolutely Beautiful! I’ve been bead-weaving for years; thought stringing was too simplistic, but you’ve shown how classy, classic, and stunning stringing can turn out. Thank you for opening my eyes!

      Reply
    8. Eartha says

      February 20, 2015 at 7:39 am

      l es un caballero, neimaer y me dio el poder del di. With a small amount of practice, however,
      you can get that things get even more simple to do.
      an su ministerio o el lugar en el que guardaban sus objetos
      personales cotidianos”, explica Amalia Est.

      Reply
    9. Wendi says

      January 18, 2015 at 6:27 pm

      Hola amigos , su gran párrafo en el tema de la educación clases particulares y
      plenamente explicado , sigue así todo el tiempo.

      Reply
    10. acne cures says

      October 16, 2014 at 9:21 pm

      great issues altogether, you simply won a logo new reader.

      What might you recommend about your put up tuat you made some days ago?
      Any sure?

      Reply
    11. Kimberly says

      September 29, 2014 at 8:00 am

      This is very creative and beautiful!

      Reply
    « Older Comments

    Leave a Reply Cancel reply

    Your email address will not be published. Required fields are marked *

    Recipe Rating


    Primary Sidebar

    woman with brown hair and orange shirt smiling

    Welcome to Howe We Live. I’m Andrea, a passionate home cook and mother of 3. I’ve been cooking and writing about healthy eating for almost a decade, and my number one goal here is to help you develop the tools needed to throw together a great meal at home that is both delicious, and healthy-ish. All eaters are welcome here! Read More

    Latest Posts

    • Nourishing Fiesta Salad Recipe
    • Easy Creamy Protein Hummus
    • Creamy Spicy Ranch Dressing
    • Homemade Air Fryer Taquitos
    • High Protein Italian Sub Salad
    • Easy Homemade Air Fryer Croutons

    Top Posts

    • Coconut Pineapple Margarita Recipe
    • Beef Sirloin Tip Steak With Garlic Butter Potatoes
    • Skillet Turkey Meatballs & Rice
    • Chicken Cutlets In the Air Fryer

    As Featured In:

    Footer

    ↑ back to top

    About

    • Privacy Policy
    • Accessibility Policy
    • About

    Newsletter & Contact

    • Sign Up! for emails and updates
    • Contact

    Notable Links

    • Recipes by Category
    • Shop Clean Beauty

    As an Amazon Associate I earn from qualifying purchases.

    Copyright © 2023 · Howe We Live · Privacy Policy