
This DIY project went through a few transformations before I finally settled on this particular design, and I have to say I love the way it came out. My original intent was for it to just be a plain clustered necklace that was much shorter in length, lying closer to my collarbone. But the more I worked with it, the more it just felt a little too mature. I tried braiding it, and while it looked cool, it also looked too young, almost bordering on tweenish. Finally this morning, it came to me to attach it to an existing old necklace I had on hand that was missing its pendant, and leave it as a simple long draped necklace. So while this necklace really only took about 4-6 hours to make, it took over 4 weeks for me to finally settle on a design I loved.
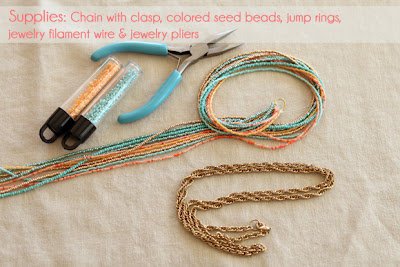
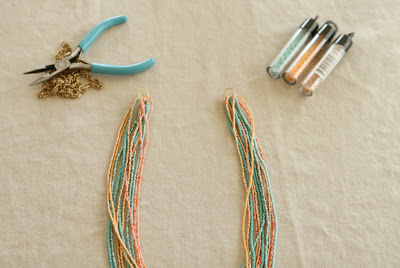
For this project you’ll need the following, as well as a steady hand and just a bit of patience. Stringing seed beads is tedious, yet strangely very therapeutic work. I string a little at a time, usually in front of the TV at night and stop when my fingers get tired.
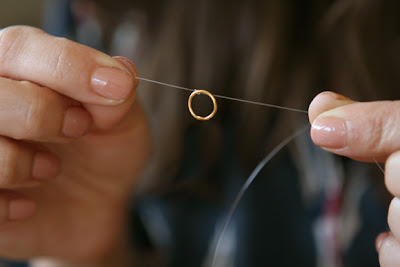
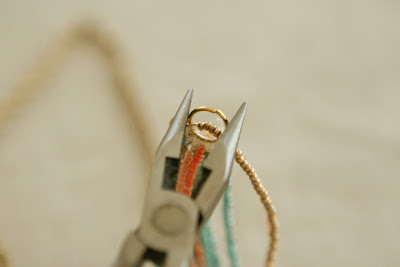
Start by double knotting the filament wire around the jump ring like so{*Please see updated post on how to properly tie off strung seed beads using crimp beads}
And then you just start threading your beads. There are tools that work like channels that help you string your beads more quickly, but I just do it the old-fashioned way.
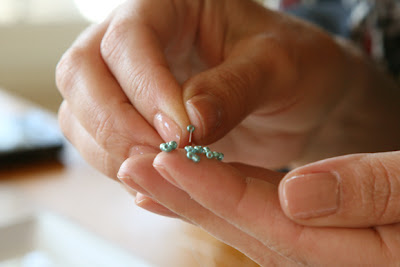
A little trick I have is to pour out some beads on a flat surface, and then lightly moisten my finger tip with my tongue so the beads can easily stick to my finger, and then pick them up one by one, maneuvering the filament wire to easily pick up each bead. Sounds weird and kinda gross, but it’s an effective technique.
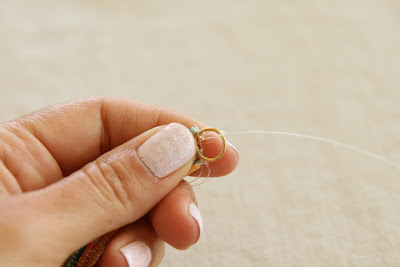
Once you complete a row of beads, double knot the end so they don’t slip off, and make another row.
My necklace has 12 rows of seed beads, but you can add as little or as much as you’d like.
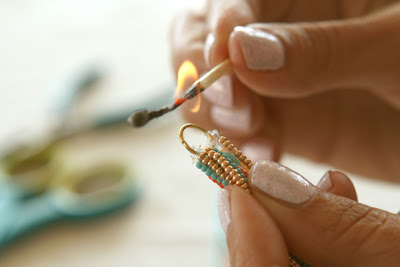
Once you’ve completed your rows, a little trick I have is to very carefully burn the edges of the filament wire so the messy little stragglers sort of melt into each other, giving it a cleaner finished look, as well as better securing the ends so they don’t come untied, which has happened to me before. It’s heartbreaking when a row of beads comes falling to the ground.
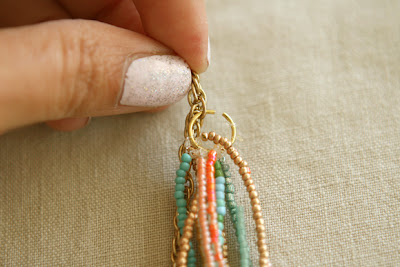
Attach the completed rows of beads to another jump ring at the other end, and singe those ends as well.
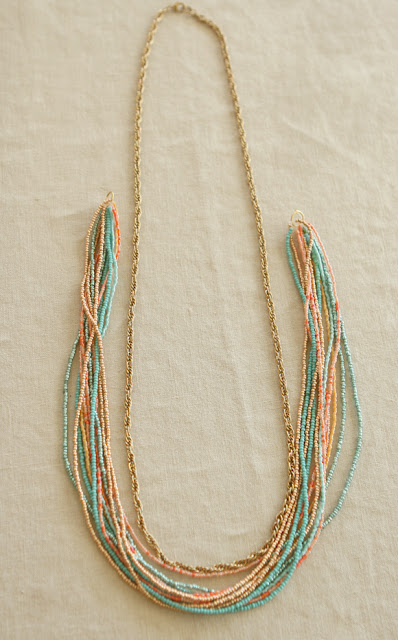
Line your row of beads up to your chain necklace and figure out where you want to attach the beads. The chain was already the perfect length, so I went ahead and figured I’d attach the beads 6″ down from the opening on each side.
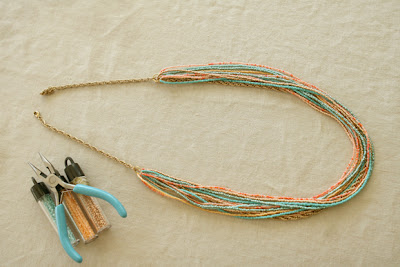

I love the way the chain adds a bit of texture and dimension to the beads. Originally I was going to cut the chain and attach just the upper half of the chain to the beads, but attaching the beads directly on to the chain adds depth and eliminates another step!
A note about the ends. They don’t look perfect I will admit. There are tiny bits of the filament wire sticking out, but since it’s clear no one really notices at all. If you’re really wanting a perfectly finished look, you could add some decorative little covers to each end, and are available at any jewelry supply store. But really, no one will ever really notice if you don’t.


The total length of the necklace is 32″ and has 12 rows of seed beads that are approximately 20″ each. The total time it took me to complete the project was roughly 4-5 hours, and the total cost was less than $10. I used 5 different colors of beads, some of which I already had on hand and some I purchased. Any beginning crafter could easily complete this DIY in a weekend with just a bit of patience 🙂 Also, a note about the chain. If you don’t have one already on hand, you can of course buy chain at a craft store, but the least expensive solution is to pick one up at Forever 21 in their $1.50 section. This is where I got my chain from; it originally had a cute fishie attached, but fell off after a few weeks. What do you expect for $1.50 I guess? Anyhow, the chain is still in perfect condition though, so I’m glad I saved it and found a way to repurpose it!
I hope you enjoyed this one, and please let me know if you try it! To see a couple of recent jewelry DIY’s, you can see my friendship bracelet tutorial here and my threaded rhinestone bangle tutorial here.


Elizabeth Belcher says
yes I enjoy stringing seed beads
thejewelcreation says
THIS I S LOVELY and color selection is just amazing! Thank you for the inspiration 🙂
Mose says
I was recommended this website by means of my cousin. I’m not positive whether or not
this put up is written via him as nobody else understand
such distinctive approximately my problem. You are incredible!
Thanks!
Finance Portal says
Thanks for finally writing about >DIY Seed Bead Necklace – For the Love of…
For the Love of <Liked it!
radiant skin trial says
I used to be recommended this blog through my cousin. I’m now not sure whether this submit is written by way of him as no one else understand such certain about my difficulty.
You are incredible! Thank you!
test says
Yes! Finally something about bbc vera.
farmville 2 cheats farm bucks says
For most recent information you have to visit web and on the web I
found this website as a best web page for most recent updates.