 It seems that currently, you can’t gain access to the healthy living club, unless you know how to make your own bone broth, or as our ancestors referred to it, stock. At first when all this talk started forming about “bone broth”, I figured it was some different magic elixir than the one people have been making for centuries, but it seems it’s one in the same. Sure, some recipes suggest you add vinegar to help extract the marrow from the bones, and some insist the broth must cook for days to evoke the medicinal properties. Still, some others insist any stock/broth worth its weight, must be made using beef bones. I won’t get caught up in the many nuances of making broth/stock these days, but as far as I’m concerned, as long as your stock turns out a rich deep color, has a consistency that’s thicker than water, and gels up nice and firm when refrigerated and allowed to sit for a few days, you’ve done a bang up job. Now, to make it taste good so that you can actually make soup out of it, or even drink it straight without having to add tons of salt and seasoning, as I’ve learned, requires a bit more attention to detail. And by the way, there is no secret membership to the healthy living club, and you certainly don’t need to make stock to belong to it. Anyone can join and membership is free, but knowing how to make a few good staples will definitely go a long way towards saving you money and making your healthy food taste really good.
 To get started, you want to gather some veggies you have on hand. Older sad wilty veggies are fine, and making stock out of them is usually a good way to salvage them before they go in the trash. You usually want a few carrots, some celery stalks, at least one whole onion, and whatever fresh herbs you have on hand, although the heartier kinds like bay leaves, rosemary and thyme are best. The key to making really flavorful stock I recently discovered by a fluke, is to roast your chicken pieces first. If you’re taking a whole chicken you’ve already eaten and picked clean, go ahead and season with salt, pepper and any other favorite dried herbs you have on hand. Roast for 10-15 minutes or so in a 375 degree oven. This will enhance the flavor before you cook it. If you don’t have time for this step, fine, but I suggest you make time ha! Doing this has taken my stock from a taste level just above that of grocery store boxed stock, to kick-ass stock that tastes so good you can slurp it up all on its own.
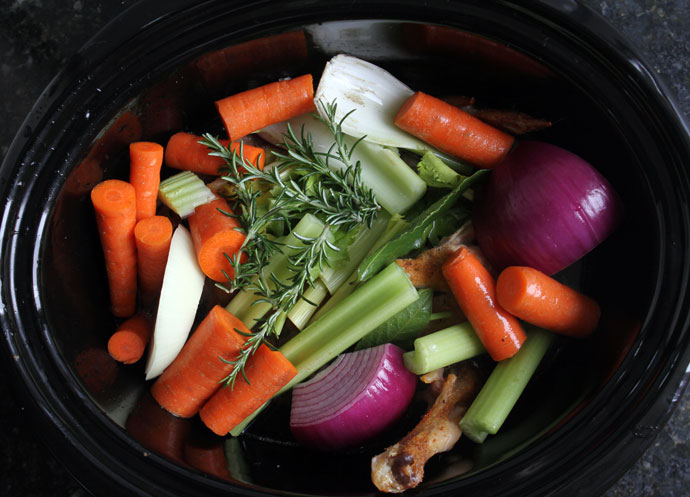
 After you’ve roasted your chicken pieces, which look lovely after being picked clean, add them to your crockpot, and then place your cut up veggies on top. Sprinkle with a good amount of salt and pepper, at least 1 tablespoon salt and ½ tablespoon pepper, and cover with water. Place the lid on top and cook on low for hours and hours. Overnight, for a minimum of 8 hours is ideal, but don’t be shy going for 12 hours too. Turn off your crockpot when the broth is done cooking, and I always like to let it come to room temperature before I start straining it. Don’t be afraid to let it sit out on the counter for a few hours while it does this.
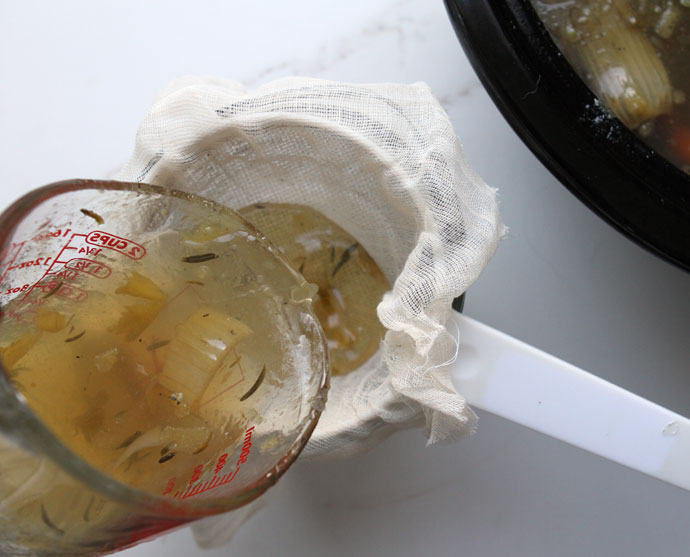
 Ideally, you want to have some Cheese Cloth
![]() on hand, as this will make quicker work of the straining process. Assuming you have cheesecloth on hand, grab a sheet of it, a fine mesh strainer
on hand, as this will make quicker work of the straining process. Assuming you have cheesecloth on hand, grab a sheet of it, a fine mesh strainer![]() , a big bowl and a super large 4 cup measuring cup
, a big bowl and a super large 4 cup measuring cup![]() . You can make your job a bit easier by scooping out the largest pieces of veggies and bones from the broth, setting aside in the trash or wherever you want to dispose them. I like to scoop out huge ladles full of stock along with all the bits and pieces, and feed it right through the strainer into the large measuring cup. Work in batches, transferring the measuring cup full of stock to your large bowl as you go. Keep scooping and straining till all your liquid has been worked through.
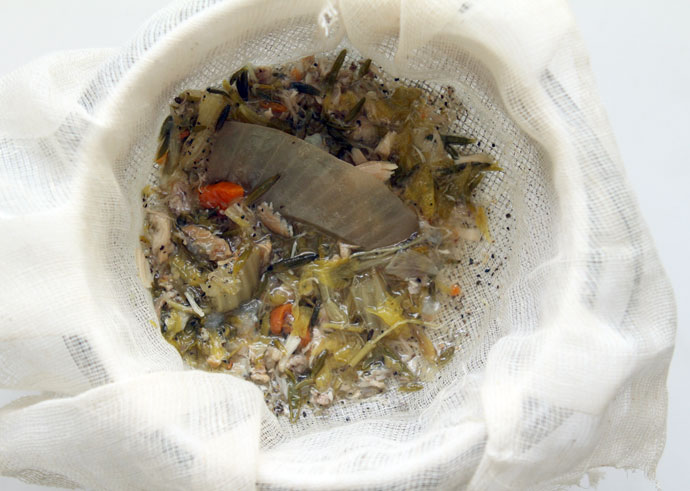
. You can make your job a bit easier by scooping out the largest pieces of veggies and bones from the broth, setting aside in the trash or wherever you want to dispose them. I like to scoop out huge ladles full of stock along with all the bits and pieces, and feed it right through the strainer into the large measuring cup. Work in batches, transferring the measuring cup full of stock to your large bowl as you go. Keep scooping and straining till all your liquid has been worked through. 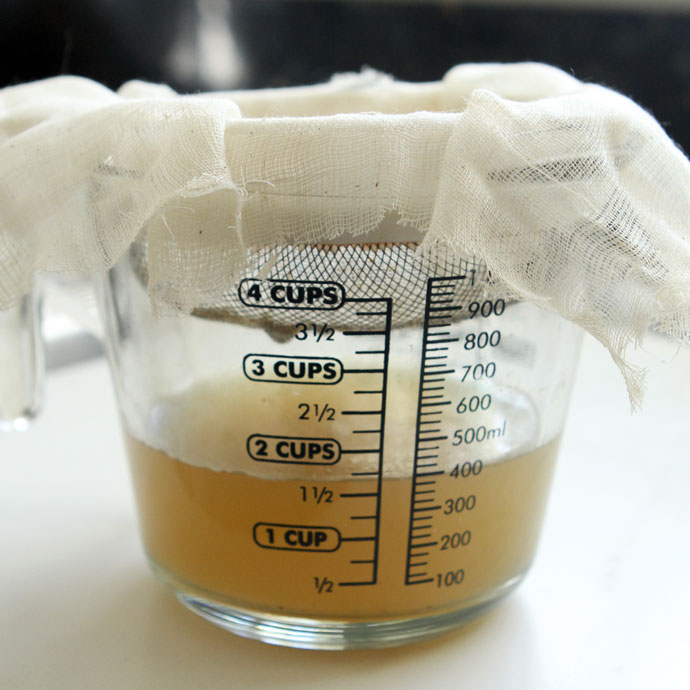 If you want to get really thorough, you can grab another large bowl and strain through again, but if you are using cheesecloth and a strainer, you shouldn’t really have to. You can see how much is really held through with just one pass.
Out of a typical batch of stock, I usually get anywhere from 10-12 cups of broth. I like to store it in 3 cup increments, but store according to your own needs. You can freeze in glass mason jars, leaving a bit of room on top for expansion, or store in quart size freezer Ziploc bags. It can be stored in your fridge for a couple of weeks, and in the freezer for about 6 months, but it shouldn’t even last you that long.
I use stock to cook my grains in, making a killer white rice by sauteing up some diced onion and then swapping out water for stock, and cooking as usual. Makes really nice and flavorful rice this way. Also does a great job elevating the rather bland taste of quinoa. Really to add more flavor to a number of dishes, you can swap out stock where the recipe calls for cooking in water. Of course you can use it to make a wide range of soups, including a simple vegetable soup, by simply boiling hearty vegetables in the stock, including broccoli, carrots, cabbage and mushrooms.
Now, does stock have magical healing properties beyond helping to ease the symptoms and duration of the common cold? Well that’s up for debate, and is one that has recently been challenged. Hence, I won’t extol the virtues of bone broth/stock beyond the simple fact that it enhances the flavor of food, and is quite comforting. Making it yourself is also a great exercise in thriftiness and resourcefulness. Sure, store-bought broth isn’t all that expensive, but if you already have chicken bones lying around, why not use them and your cost is therefore zero dollars? 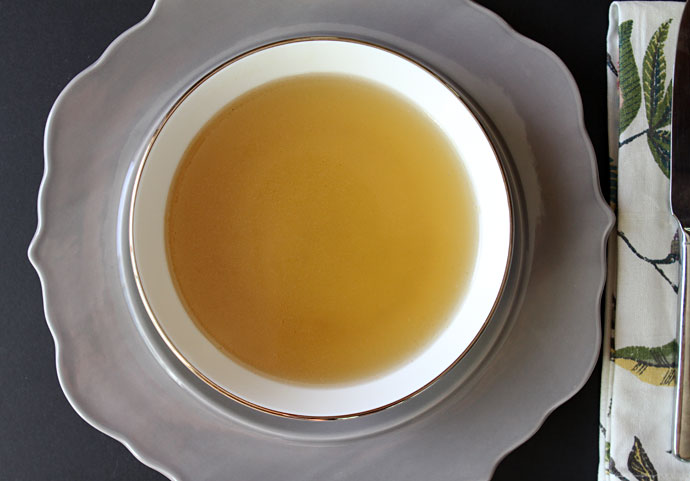 I hope I’ve helped to demystify the process of making broth/stock. I think I sometimes take for granted that everyone knows how to do these things, so why share the recipe or tips here? But it seems every time I post my stock-making adventures, I always get plenty of questions, so why not share the process? Let me know if you have any questions, and please, go forth and make some kick-ass stock for yourself!
*Edited to add answers to a couple of questions I’ve already received on Instagram – I use bones from at least one whole chicken, or if I’ve made chicken pieces, I save enough until I have at least 6 good size bone remnants. If you don’t make bone-in chicken that often, go ahead and save them in a freezer bag as you go, and add to the bag. When you have enough bones, toss them in a crockpot and get cooking. You can do the same freezer trick with vegetable scraps too, to make veggie stock!
Kick-Ass Chicken Bone Broth, aka Stock
Ingredients
- Various chicken bone-in chicken pieces
- 1 onion cubed
- 3-4 carrots cubed
- 2-3 celery stalks cubed
- Hearty fresh herbs including bay leaf rosemary or thyme
- Salt and pepper
Instructions
- Begin by seasoning your chicken pieces with salt and pepper, and roasting them on a baking sheet for 10-15 minutes until browned, in a 375 degree oven.
- Remove chicken pieces from baking sheet and place in slow cooker.
- Add in vegetables and fresh herbs, sprinkle with salt and pepper, cover with water.
- Place lid on slow cooker and cook on low for a minimum of 8 hours.
- Allow to come to room temperature, then strain broth through a cheesecloth lined fine mesh sieve.
- Store in the freezer for up to 6 months and in the fridge for 1-2 weeks.


Heidi says
I keep a container with veggie scraps like carrot tops, onion skins, broccoli/asparagus stems, herb stems, celery etc. in my freezer and when it gets full then I make stock. Then, when I have bones, I just make a batch of broth! I feel so Tamar Adler “Everlasting Meal” when I do it!
Jenifer says
Fyi- unless the chicken broth has a nice later of fat preserving it and you haven’t opened the jar I wouldn’t let it sit in the fridge longer than 4-5 days! Just advice from the trade:)!