I’m taking the next few days off to be with my family and enjoy summer, so I thought I would leave you with one of my favorite tutorials that I pulled over from my old blog. I recreated a cookie that was on the cover of Martha Stewart magazine, skeptical I would be able to achieve similar results. I in fact did achieve great results and my faith in the Martha Stewart enterprise was restored, or strengthened, depending on how you look at it. I still love how they came out and think they’re just as timely today as they were two years ago. And oh my, look at how my children have grown! I hope you enjoy this little tutorial, and please let me know if you have any questions!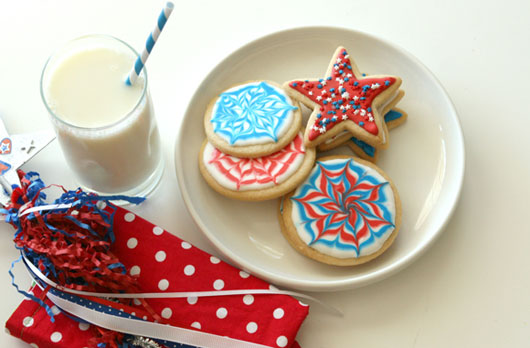 I don’t even like royal icing cookies, yet I keep making them. I’m so weird. “Hey kids, let’s spend 2 hours making cookies that I’m not going to even eat!” “Hooray”, say the kids! They are way too sweet for my liking; as you may recall I much prefer a sweet & savory cookie like a flaky shortbread for instance. But really, I just can’t help it, they are so darned pretty and let’s be honest, impressive. Especially these patriotic pinwheel ones, claiming to be “easy” on the cover of this month’s Martha Stewart Living. I have to say, she didn’t lie, they are in fact easy. And oh the kids love them! Instant sugar high no doubt.
I posted a video tutorial on how to use royal icing back in February if you’d like to check it out. I was told it was a tad too long, but at any rate, I share some tricks I learned along the way to help you achieve a “perfect” consistency for royal icing. Once you’ve achieved the perfect consistency, a little practice at a steady hand and consistent pressure is just about all you need to achieve these pretty cookies. 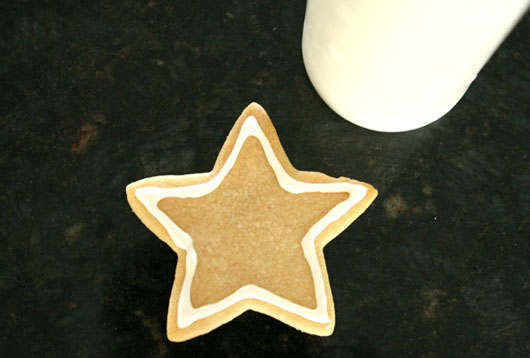 You start by outlining the cookie
 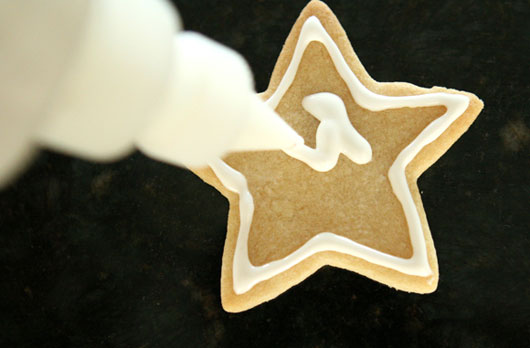 Then you just start flooding it in, using your tip to push the icing around a bit to help fill it in
  Add some sprinkles if you like, and enjoy. Royal icing takes about 10-15 minute to set, so you have to work a bit quickly, but you still have plenty of time to get the job done at a nice steady pace.
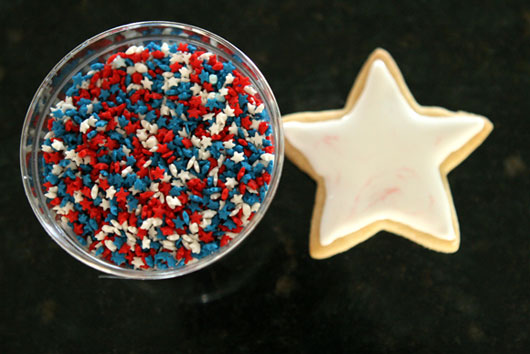 To achieve the pinwheel effect like Martha’s cookies, simply place a dot of royal icing in the center of your cookie, and then 3 concentric circles surrounding it.
 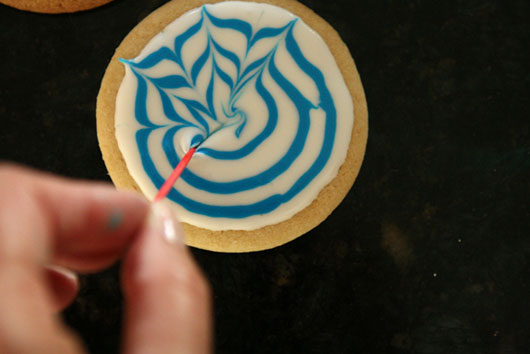 Your icing needs to stay wet so immediately place your toothpick in the center of the dot and drag a STRAIGHT line from the center all the way out to the outer edge.
 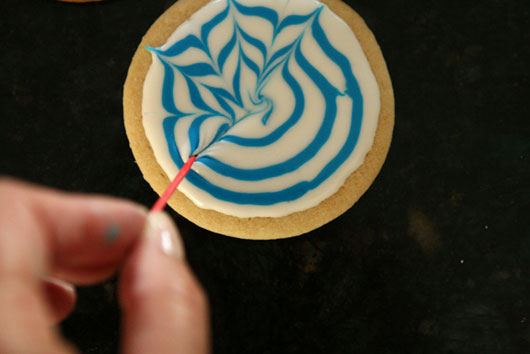 Your icing needs to stay wet so immediately place your toothpick in the center of the dot and drag a STRAIGHT line from the center all the way out to the outer edge.
 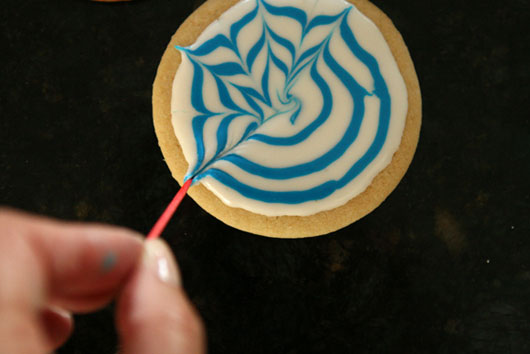 The straight line is the part that was left out in the magazine. I was imagining I had to draw wiggly lines to get the curved effect, but nope, a straight line is all you need.
Here’s what a cookie looks like in the beginning of the process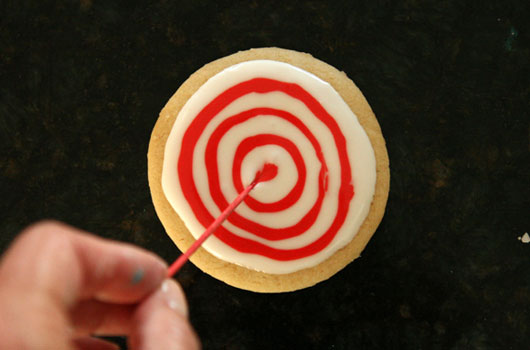 Drag your toothpick from the center all the way out
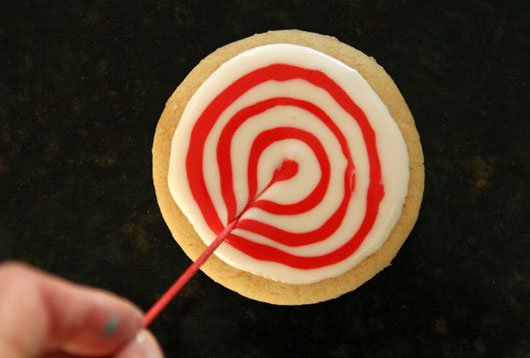 Easy right?
 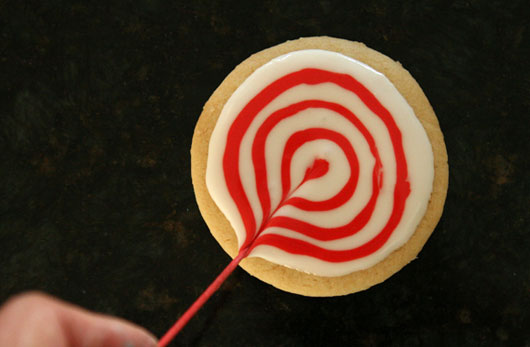 To get the other side of the wavy pinwheel effect, you start at the outer edge and then drag your toothpick towards the center like so:
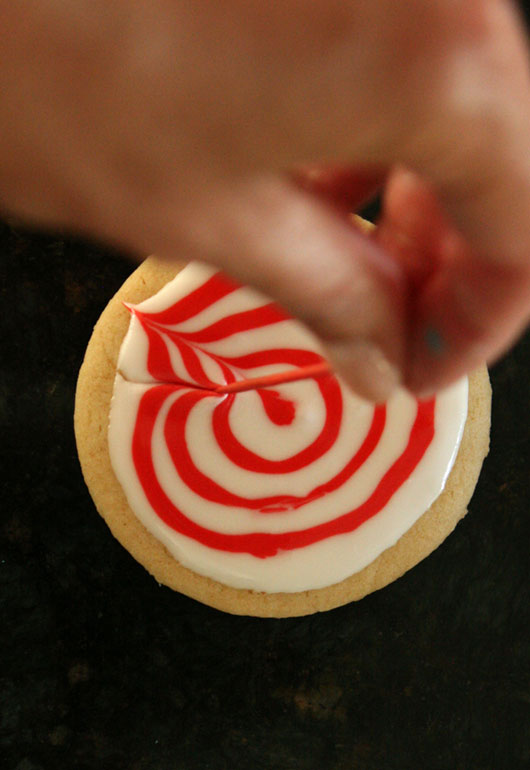 So you’re first dragging from the center out, and then from the out into the center
 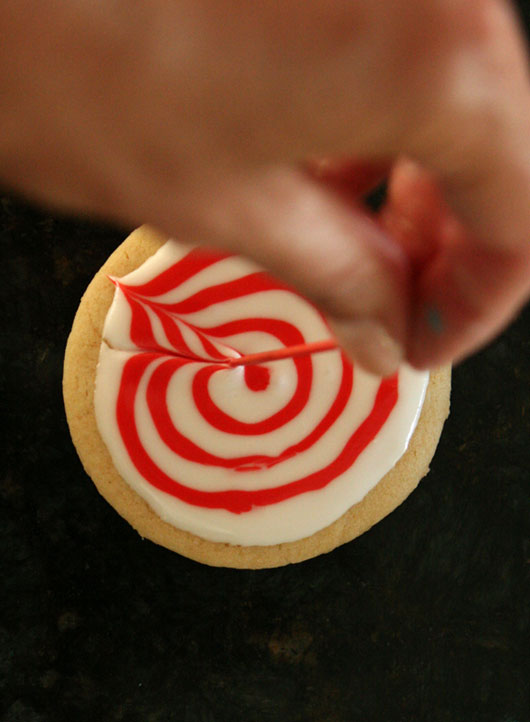 And you just repeat drag out, drag in, all the way around the cookie
 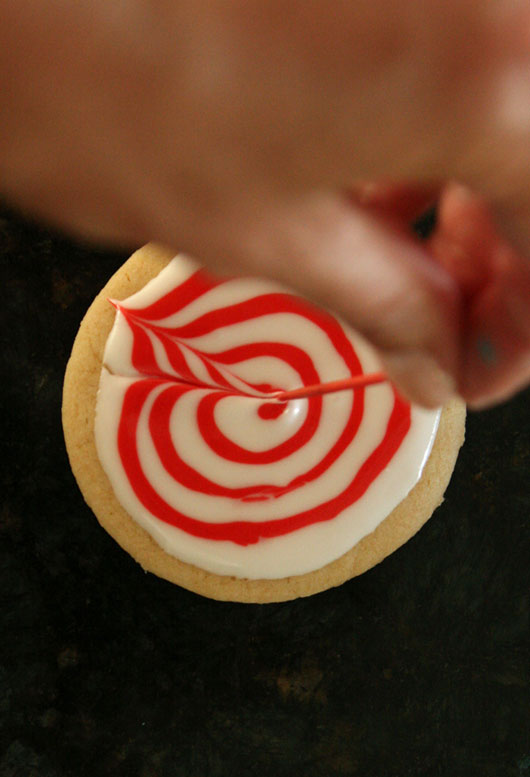 And you end up with a pretty spectacular looking cookie! For the red and blue combo, you start with a blue dot and then alternate red and blue circles. Taylor’s cookie below has a wavy effect if you can tell. For that effect, as I was dragging out and in, I slightly curved the line to the right.
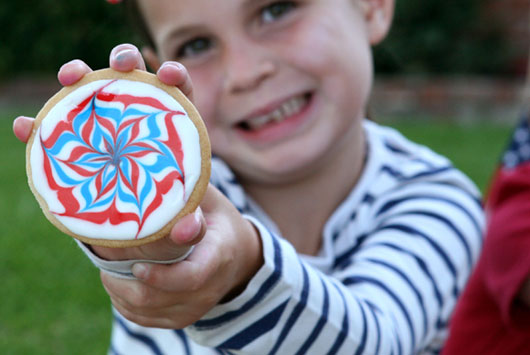
 So even though I may not enjoy these cookies very much, everyone else seems to love them so I’ll keep making them. 🙂 I’m thinking these would be so pretty in hot pinks and oranges for a girl’s birthday party don’t you think?
 Happy 4th Of July!!

Ralph says
Can youu tell us more about this? I’d care to find out
some additional information.
Kristin says
Wow! They turned out amazing!
Kim says
So pretty! And easy! I might just make these for our 4th of July party. 🙂